How to Make a Pincushion (that sharpens your pins!)
As an Amazon Associate I earn from qualifying purchases
This is the first in a series of tutorials showing you how to make various items to help you with all your sewing so keep coming back to the blog for some more ideas. The set includes how to make a needlebook and how to make some pattern weights. You could make a co-ordinated set!

This page contains affiliate links meaning I earn a commission if you use those links at no cost to you. I only recommend brands I use and trust.
This full tutorial is available as a downloadable PDF for a small charge so that you can avoid the ads and easily print it off if you want to. Simply click here for more details.
If you prefer to watch a craft tutorial then scroll down to the bottom of the written instructions and watch my video tutorial
You will need:
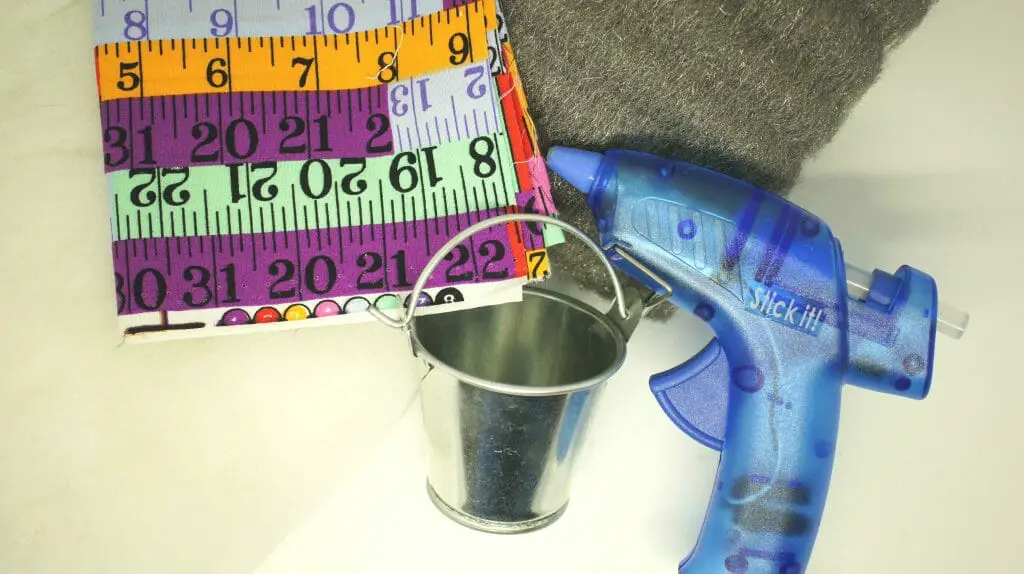
Fabric (like this from Amazon)
Teacup / jam jar lid /toy truck / etc
Basic sewing supplies


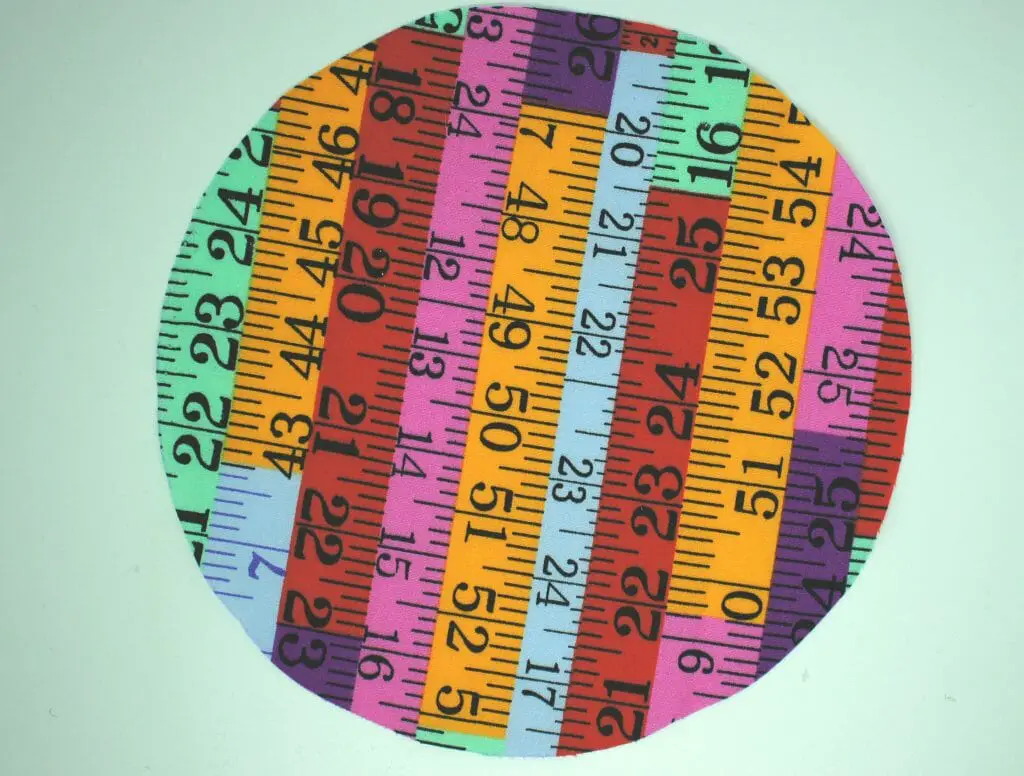
Cut out fabric
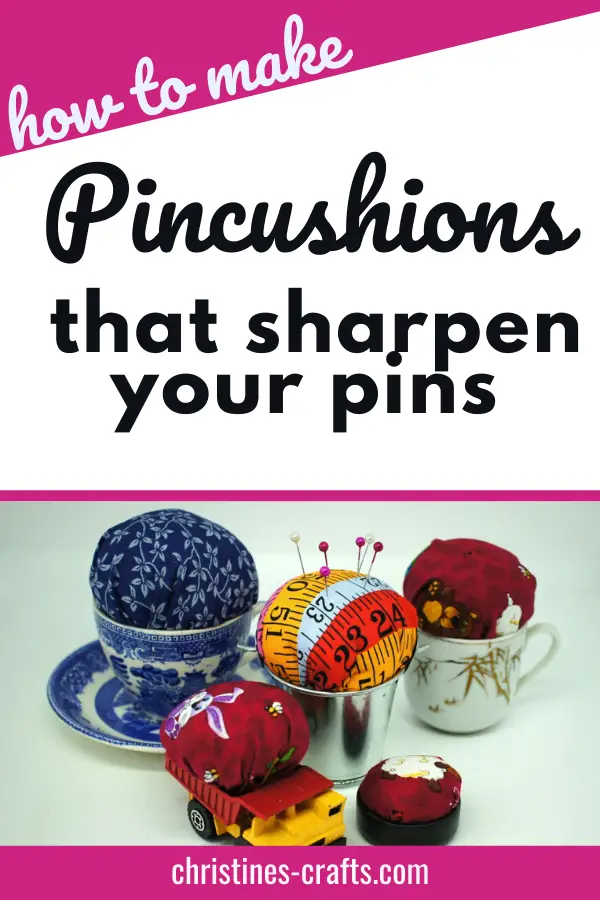
Once you have chosen your item to form the basis of your pincushion (in my case a little bucket) you need to cut out a circle of fabric. I suggest that you use a circle approximately twice the diameter (distance across the circle) of the object you are going to use. I used a side plate for mine!
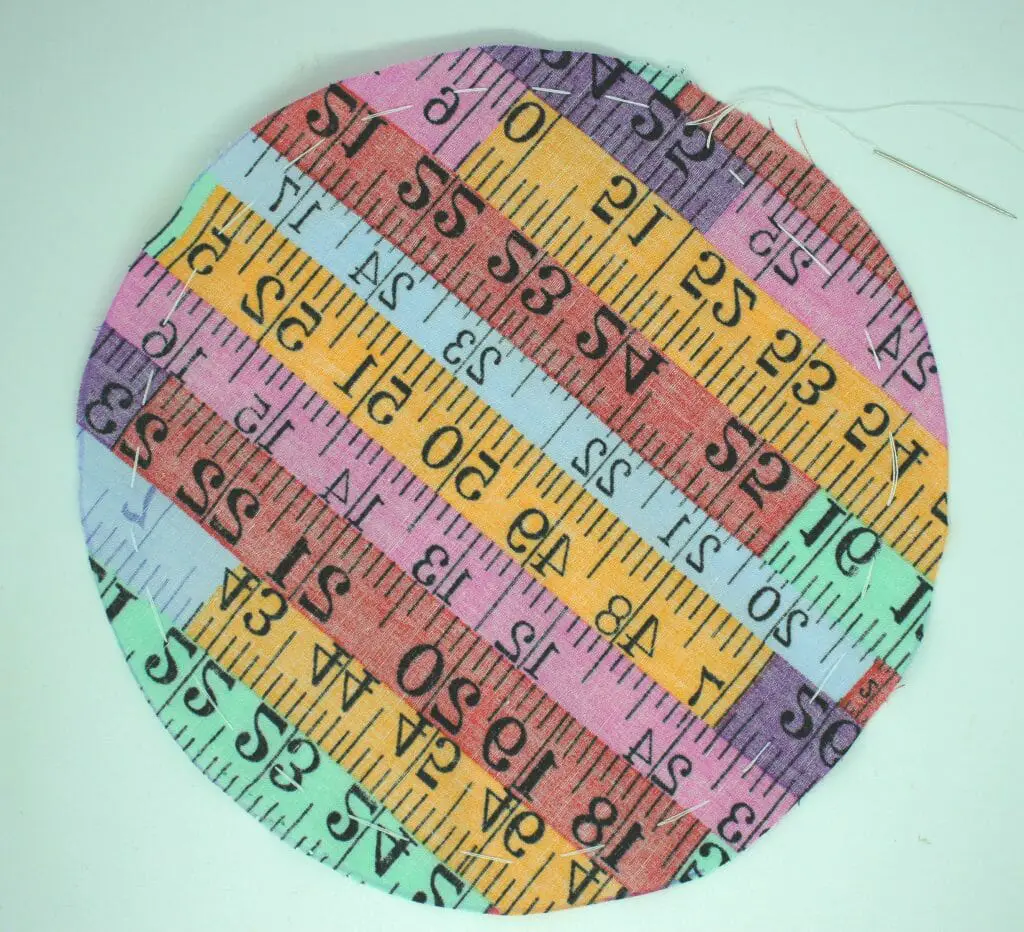
Sew a running thread
Run a running thread around the outside of the circle. I did a simple running stitch (tacking stitch) 0.5cm (1/4″) from the outer edge. Make sure that you leave a thread long enough to pull and that will not get pulled through the fabric. Once you have gone all the way around leave a long thread for pulling. I used a double thread to prevent it snapping.
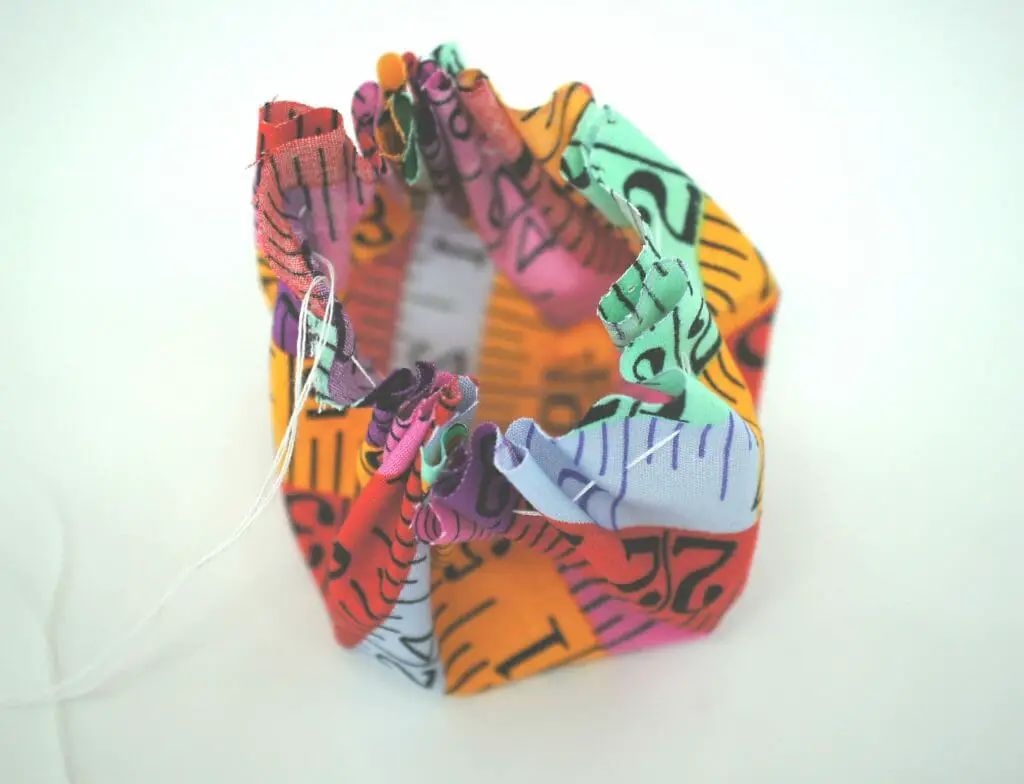
Stuff pincushion and fasten closed
Draw up the thread a little way to start to form your cushion.
Now cut an amount of wire wool if you are using it, that will fit comfortably in your ‘cushion’ and leave space for wadding around it. Then, cut a piece of wadding and wrap it around the wire wool.
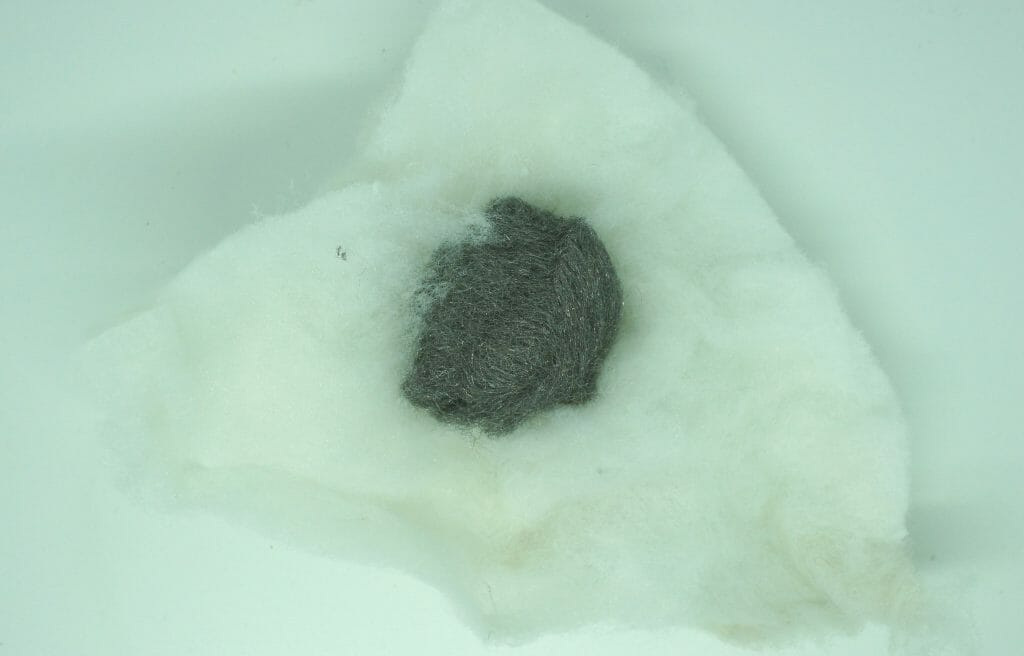
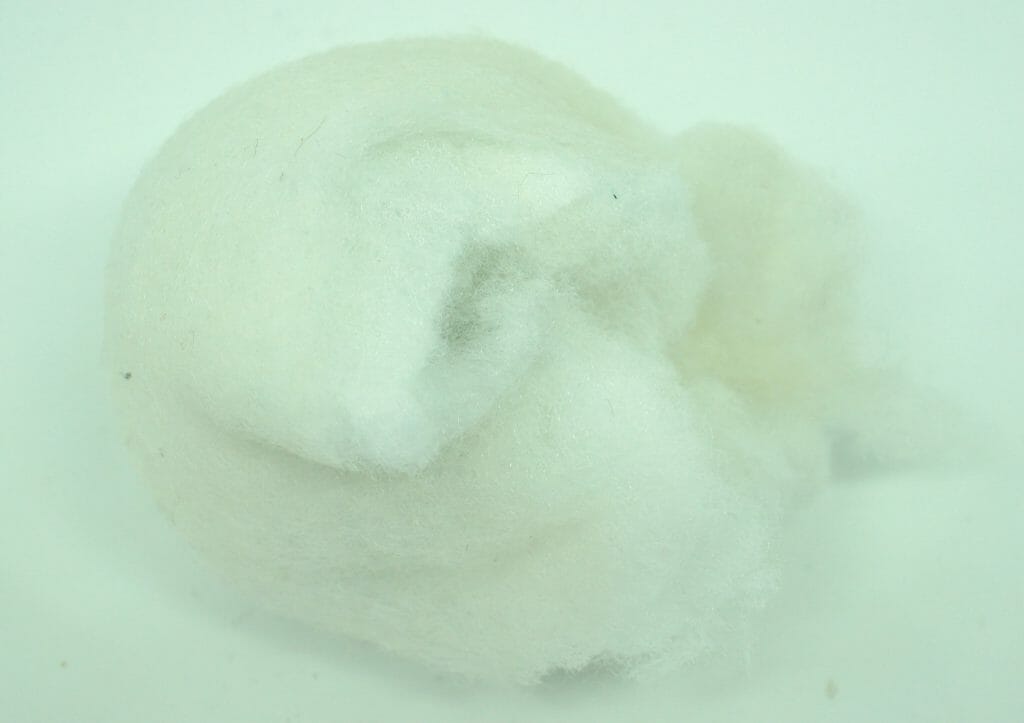
If you are using wadding only then you simply need to fill your ‘cushion’.
Once you are happy that your cushion is full and firm draw up the thread fully and fasten it off

Attach pincushion to container
Now apply glue using your hot (or cool) melt glue gun to the inside of your chosen base near to the top. You can apply more glue inside if you wish. Then place the cushion inside the base and firm it onto the glue.
You have now completed your pincushion. How quick was that?
Video Instructions for Pincushion
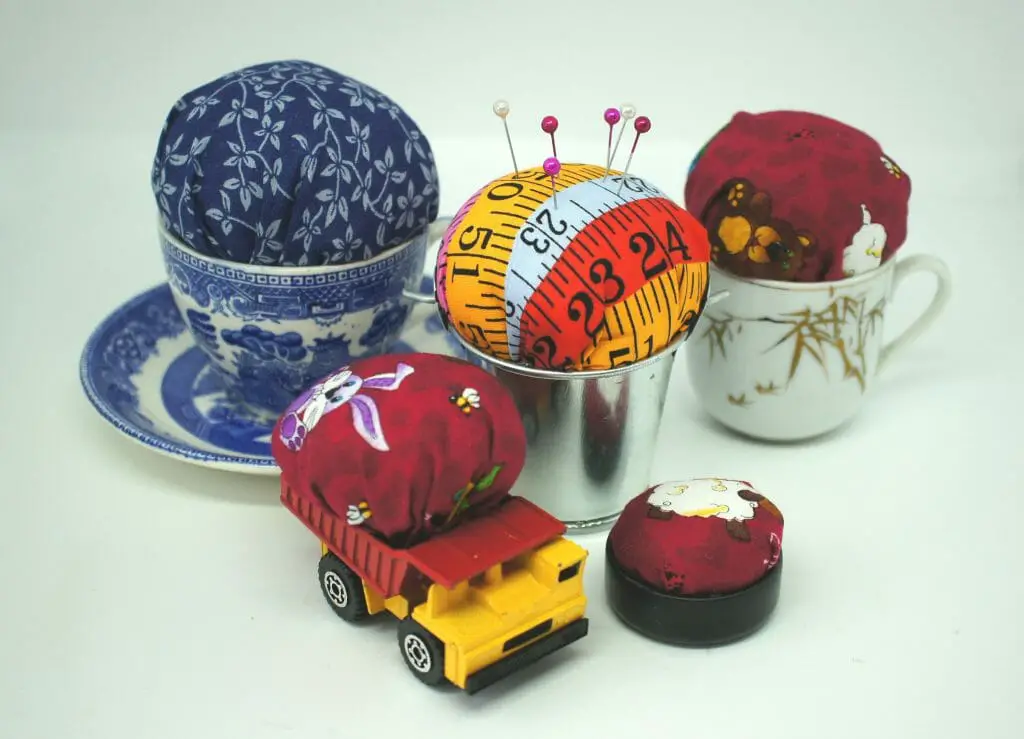
These are the pincushions that I made at the same time as the one above. You only need a small piece of fabric so they are great for using up scraps of fabric and you can get really inventive with what you use for the base. You could make these for charity sales or as gifts. My favourite is the teacup. It is glued onto the saucer so that I can rest other supplies on there eg, thread, thimble, scissors.
Please let me know via the comments section below what you think of these and if you have made any in unusual containers. I will be developing this into a series of sewing item tutorials so keep looking out for their arrival in the coming weeks.
If you would like this tutorial as a downloadable PDF for a small charge so that you can avoid the ads and easily print it off simply click here for more details.
If you enjoy sewing then take a look at a few of my other tutorials:
No sew Victorian Style Pin Cushion
How to make a fabric corner bookmark
Make your own lavender ‘teabag’ sachets
Remember to pin this article for later when you are ready to make your new pincushions.