Turn old Jeans into Adorable Denim Pocket Angel Decorations
As an Amazon Associate I earn from qualifying purchases
Old jeans are a great source of denim fabric for crafting. These gorgeous denim pocket angels are a prime example. They are so cute and a great way to reuse your old jeans and avoid them going into landfill.
Great for hanging at Christmas or simply to gift to people you care about. You do not need to do any sewing so anyone can make these.
Let’s get started
This page contains affiliate links meaning I earn a little commission if you use those links at no cost to you. I only recommend brands I use and trust.
You will need:
- Old Denim Pocket (to be honest any patch pocket works)
- Ribbon, string or twine
- Embellishments (optional)
- 1″ bead for head
- Embroidery thread (or yarn) for hair
- Glue (I used hot melt glue and multi-purpose glue)
- Wire (you could probably use a large paperclip)
- Small Beads



Video Tutorial for a Denim Pocket Angel
This video is also available on my YouTube channel.
Prepare Your Pocket to form an Angel
The first step is to remove the pocket from your jeans carefully. I used a seam ripper but you can use a pointed pair of scissors instead. You want the whole back pocket but without the trousers.
Then decide if you are embellishing the pocket. If you are , now is the time to do it. Some ideas are:
- drawing on it using fabric markers
- gluing on lace
- gluing on pieces of scrap fabric
- whatever you fancy
Of course, if you want to sew you can embroider onto the pocket; perhaps initials or flowers or a cute message.
Now take your chosen ribbon or twine and place it on the desk. Fold your pocket several times in a concertina style making sure that the two edges fold to the back of the pocket. Tie your ribbon around the folds approximately one third of the way down the pocket.
Now, check that it looks how you want and that the head fits nicely onto the top section. Adjust if you need to. NOTE: If you prefer you can sew the pocket concertinas before you tie the ribbon.

Create your Halo for your Angel
Take a length of wire and wrap it around something circular that is approximately 1″ across (like your bead). I used a glue stick and it worked really well. Make sure you also have enough length to stick it to the back of the angel’s head.
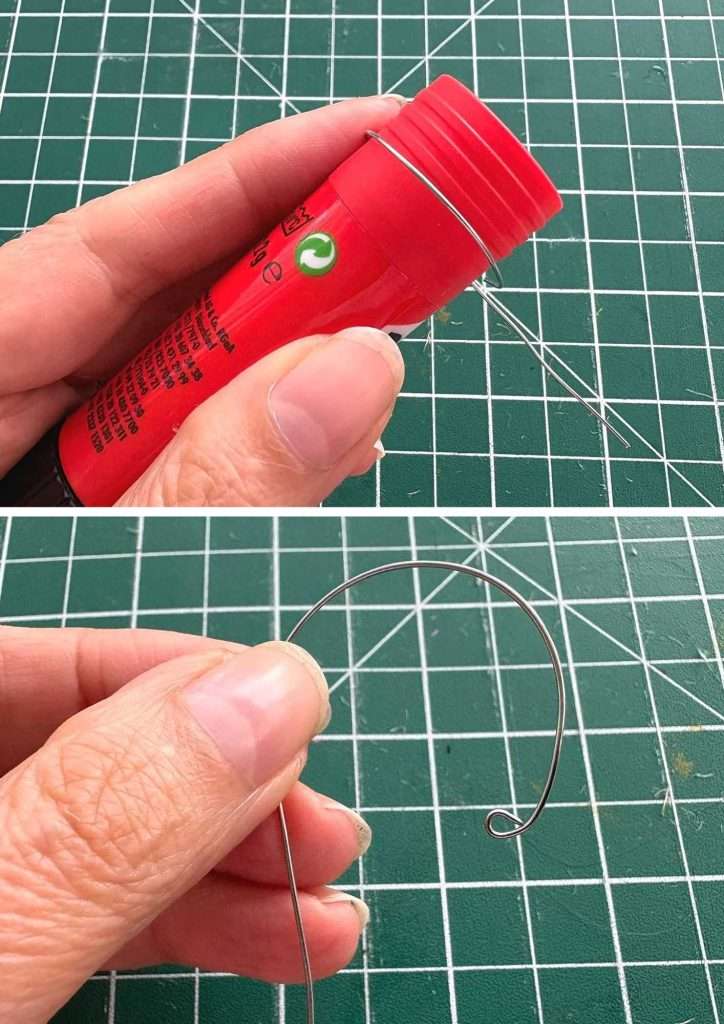
Once you have formed your curved wire, bend the end round to form a small circle. I used round ended pliers but you can use ordinary pliers instead.
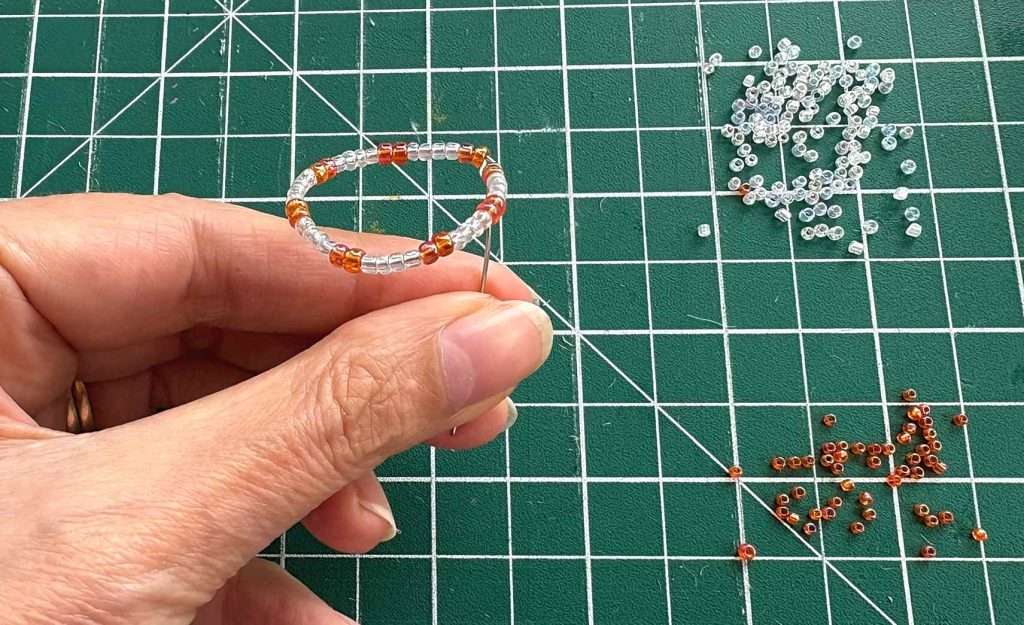
Then, feed your chosen beads onto the wire. I find it easiest to place the beads on a surface such as a piece of fabric and then poke the wire through the beads rather than picking them up and feeding them onto the wire.
Get creative here and use different patterns of beads and colours if you wish. Once you have enough beads to complete your loop, feed the straight end of the wire through the small circle you made and pull it so that you have a complete circle of beads. Bend it so that it is at 90 degrees to the circle of beads and does not pull back out. You can even twist it over the circle of beads to secure it if you wish.
Create your Angel’s Head
The next step is hair. Whatever you have chosen you need to decide how you are attaching it. If you use yarn or embroidery thread I recommend cutting it so that it passes over your bead and hangs down either side to longer than you want it to finish. Cut quite a few so that you can cover your bead to make hair.
I glued mine on using multi-purpose glue. I started with one length at the front to mark the front of the hair. Then I attached the rest behind it. Once it was dry I held the bead in my hand and trimmed up the hair so that it was all the same length.
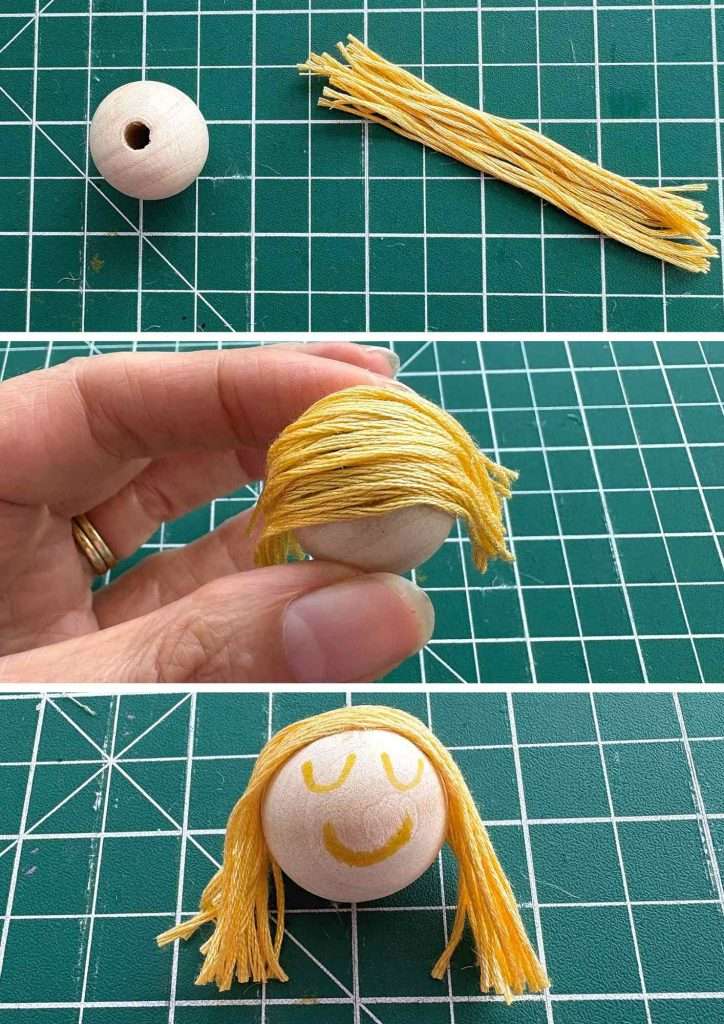
You can leave the face blank or, if you prefer, you can draw on a face. My faces are very simple as my drawing is rather poor!
Assemble your Denim Pocket Angel
Place the long wire of your halo on the back of your angel head. If it is very long trim it up a little before gluing it on. Don’t worry too much as you can always trim it again.
Glue the halo onto the back of the angel’s head so that it stands above the head. I used hot melt glue as it dries very quickly and I didn’t have to hold it in place for ages!
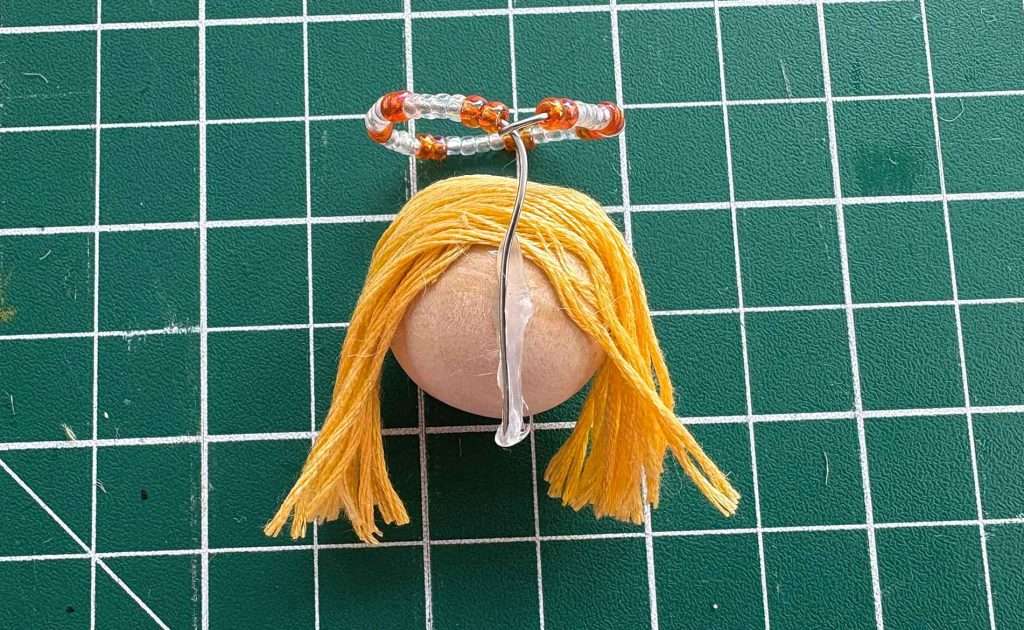
Place your angel head onto the angel so that it sits nicely on top of your ribbon. Check it fits nicely and that you are happy with it. Once you are happy with it glue it in place. Again, I used hot melt glue.

You may now be finished but if you would like to hang your angel then you need to add a hanger to the back of your angel at the top. If you are using ribbon I recommend forming a loop of ribbon, gluing one end on top of the other and then gluing that to the back of the angel wings. If you use twine then perhaps tie a knot in your loop and glue that to the back of your angel.

Now you can make as many as you like and hang them everywhere to cheer up your Christmas.
What else?
If you like angels I can recommend a couple of other great craft ideas. How about taking some paperclips and making cute angels to hang on your Christmas tree or Christmas parcels?
Or perhaps take an old book and fold it into a decorative angel to stand on your mantelpiece or windowsill.
If you like to sew you could make a pretty fabric angel for your tree too.
If you love all Christmas crafts then explore my Christmas crafts section for loads of tutorials.
Perhaps save this tutorial to your favourite Pinterest board so that you can find it again later.