How to Make an Easy DIY Nativity Scene Ornament You Will Love!
As an Amazon Associate I earn from qualifying purchases
Last Christmas a friend showed me a cute Nativity scene that she had been sent from a friend in Scandanavia. I loved it and felt inspired so this Christmas I am making my own DIY Nativity scene. I am now sharing that process with you.
They are easy to make and you can involve the children in the process too if you want to.
So let’s get started.
This page contains affiliate links meaning I earn a little commission if you use those links at no cost to you. I only recommend brands I use and trust.
You will need:
- 12 craft sticks
- Marker pens or paints
- Twine
- Glue
- Angel (optional)


Video Tutorial for your DIY Nativity Scene
This video is also available on my YouTube channel.
Create your Nativity Figures
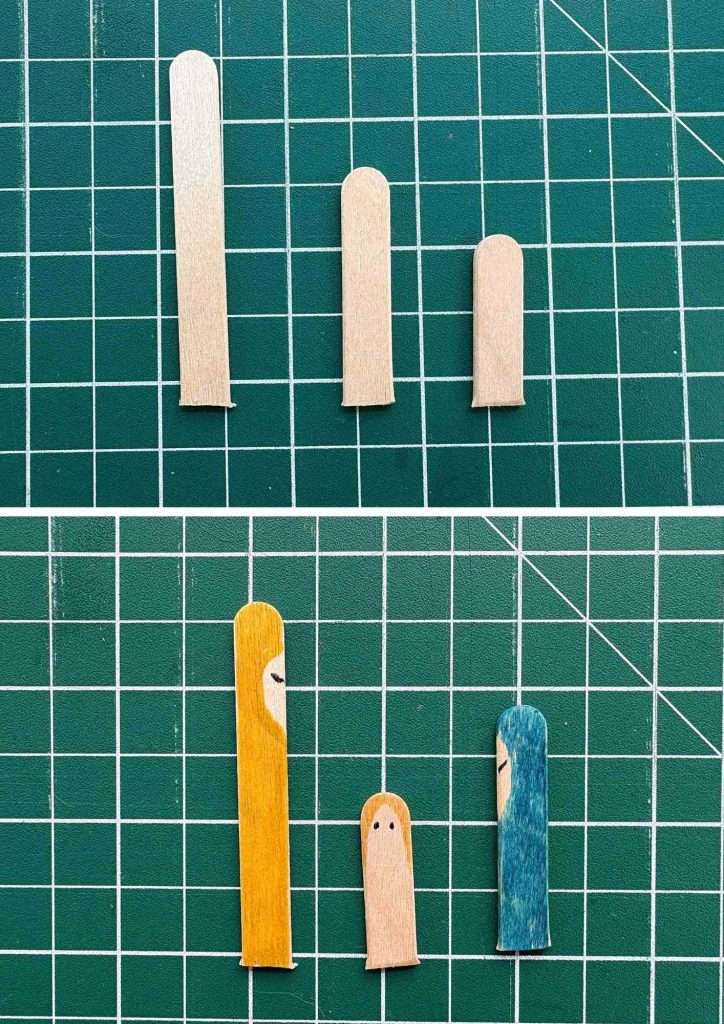
Take a craft stick and cut it into approximately one third and two thirds. Take another craft stick and cut off a piece smaller than either of the other two. The largest one is Joseph, the next one Mary and the smallest one is Jesus.
Add a cloak to both Mary and Joseph and leave a small area for a face. Then add a small curved line for an eye (or more detail if you are talented). Add a small area of colour to the top of Jesus to represent a blanket he is wrapped in. Then add two small eyes.
I also coloured around the edge of the craft sticks to make sure they looked fully coloured.
Build your Nativity Stable
All the other craft sticks are used full length. Arrange your figures how you would like them to look and then place the two craft sticks for the base of the stable on top of them. At this point check that you are happy with how it looks. If not, you can always trim your figures down a little bit.
If you are happy add a little glue to the front of each figure at the bottom and glue the base of the stable in place.
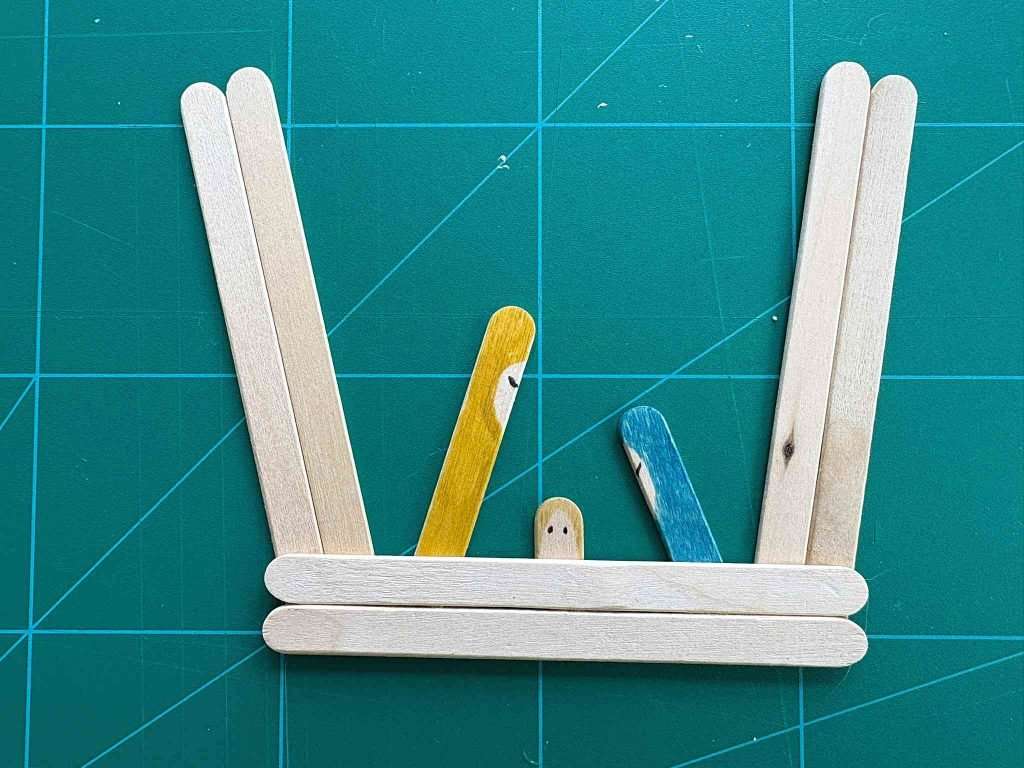
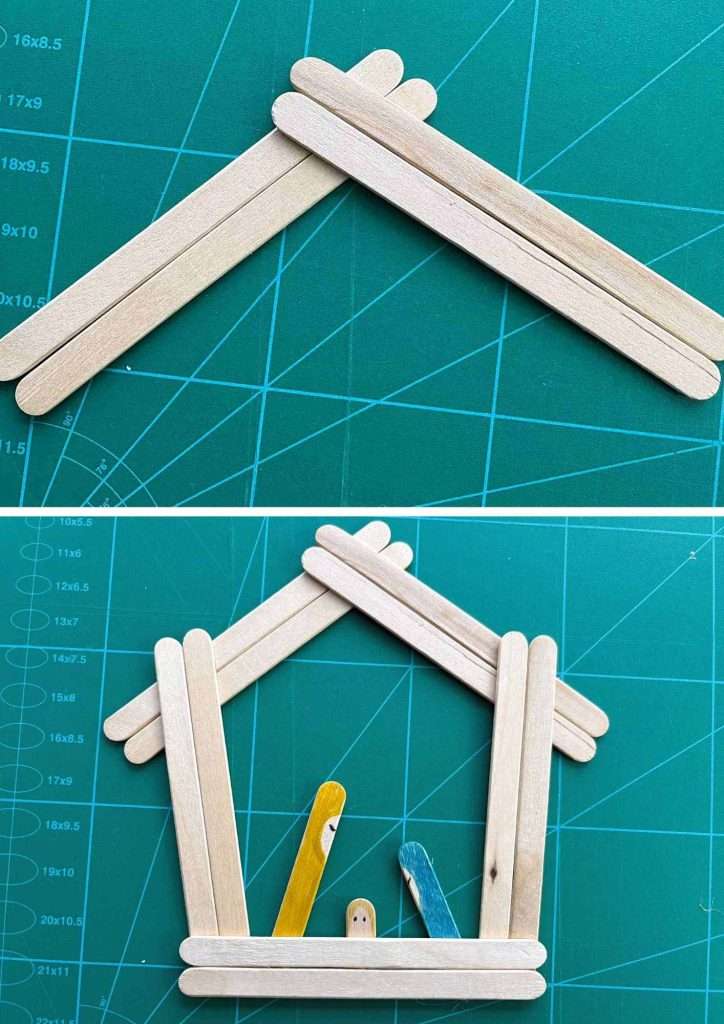
Then glue the sides of the stable in place too. Stop and check that your roof will fit on top of your walls before you glue them in place. There is no fixed angle for them, you just want them to look right!
Glue the remaining four craft sticks together to form the roof. Once they are dry enough to stay together glue them onto the stable sides. I chose to place the roof behind the sides but the choice is yours.
Add the Straw / Hay
Cut a few lengths of twine so that they are about the width of the bottom of the stable. Pull them apart with your fingers so that they look more untidy and fibrous.
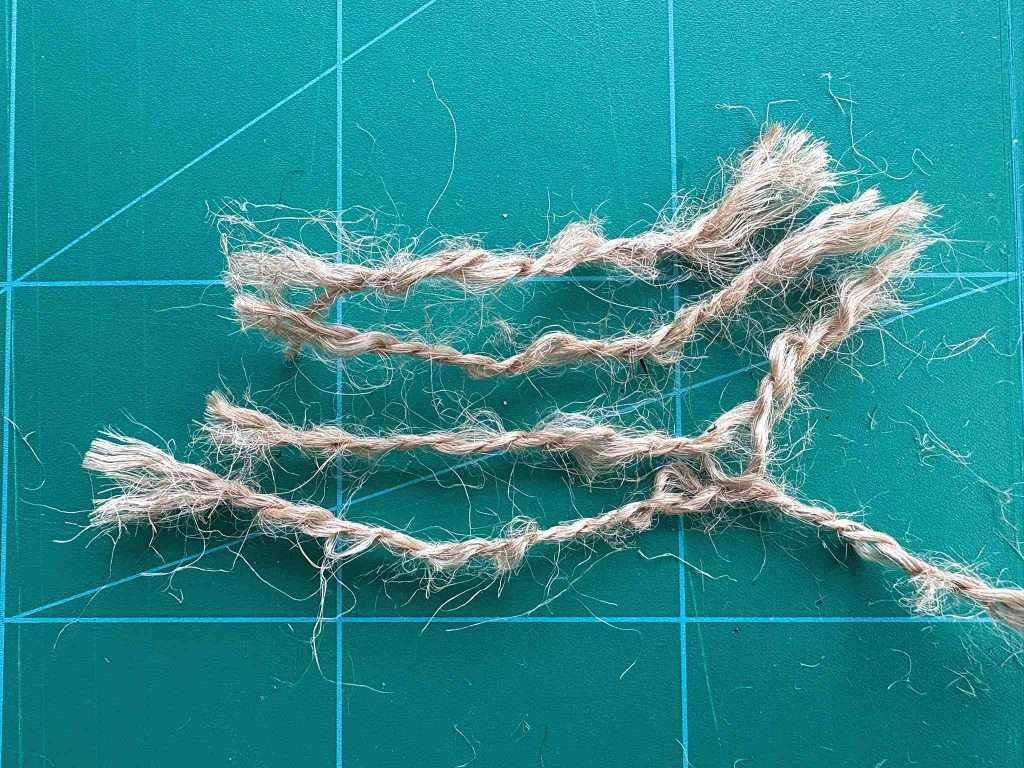
Turn your stable over and glue a couple of bits of twine onto the back of your figures. Turn it back over to the right side and glue a couple more onto the bottom of the stable. Use as many bits of twine as you like so that you like the effect.
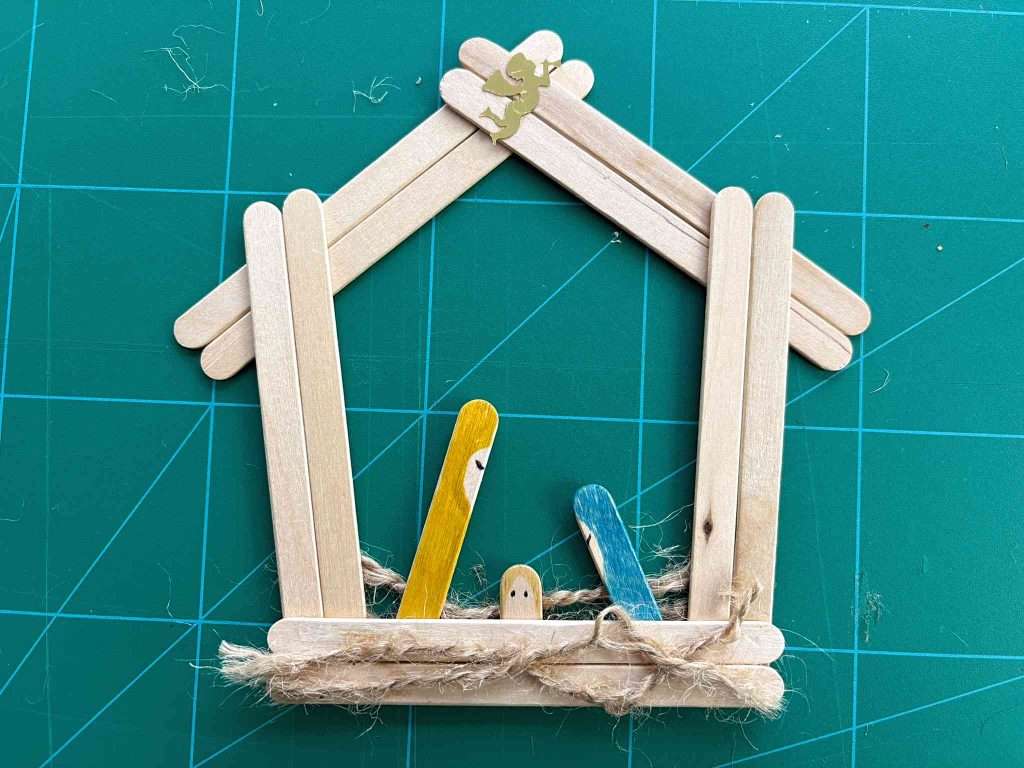
Add your angel now too if you are using one.
Add a Hanging Loop
There are two easy ways to hang your Nativity scene. You could take a length of twine or ribbon, loop it through the stable and tie it in a large loop around the roof. That is what I did with this one.
Or you could make a loop and then glue that to the back of the stable roof like I did in the video tutorial. Either works just fine.
Congratulations, now you have your first DIY Nativity scene.

And next …
There is a whole section on this website dedicated to Christmas crafting so please feel free to take a look and see what else you might craft this year.
Also remember to pin this to your favourite board on Pinterest so that you can find it again in future years.