Make Your Own Christmas Angel Decoration: A Fun and Festive Holiday Craft
As an Amazon Associate I earn from qualifying purchases
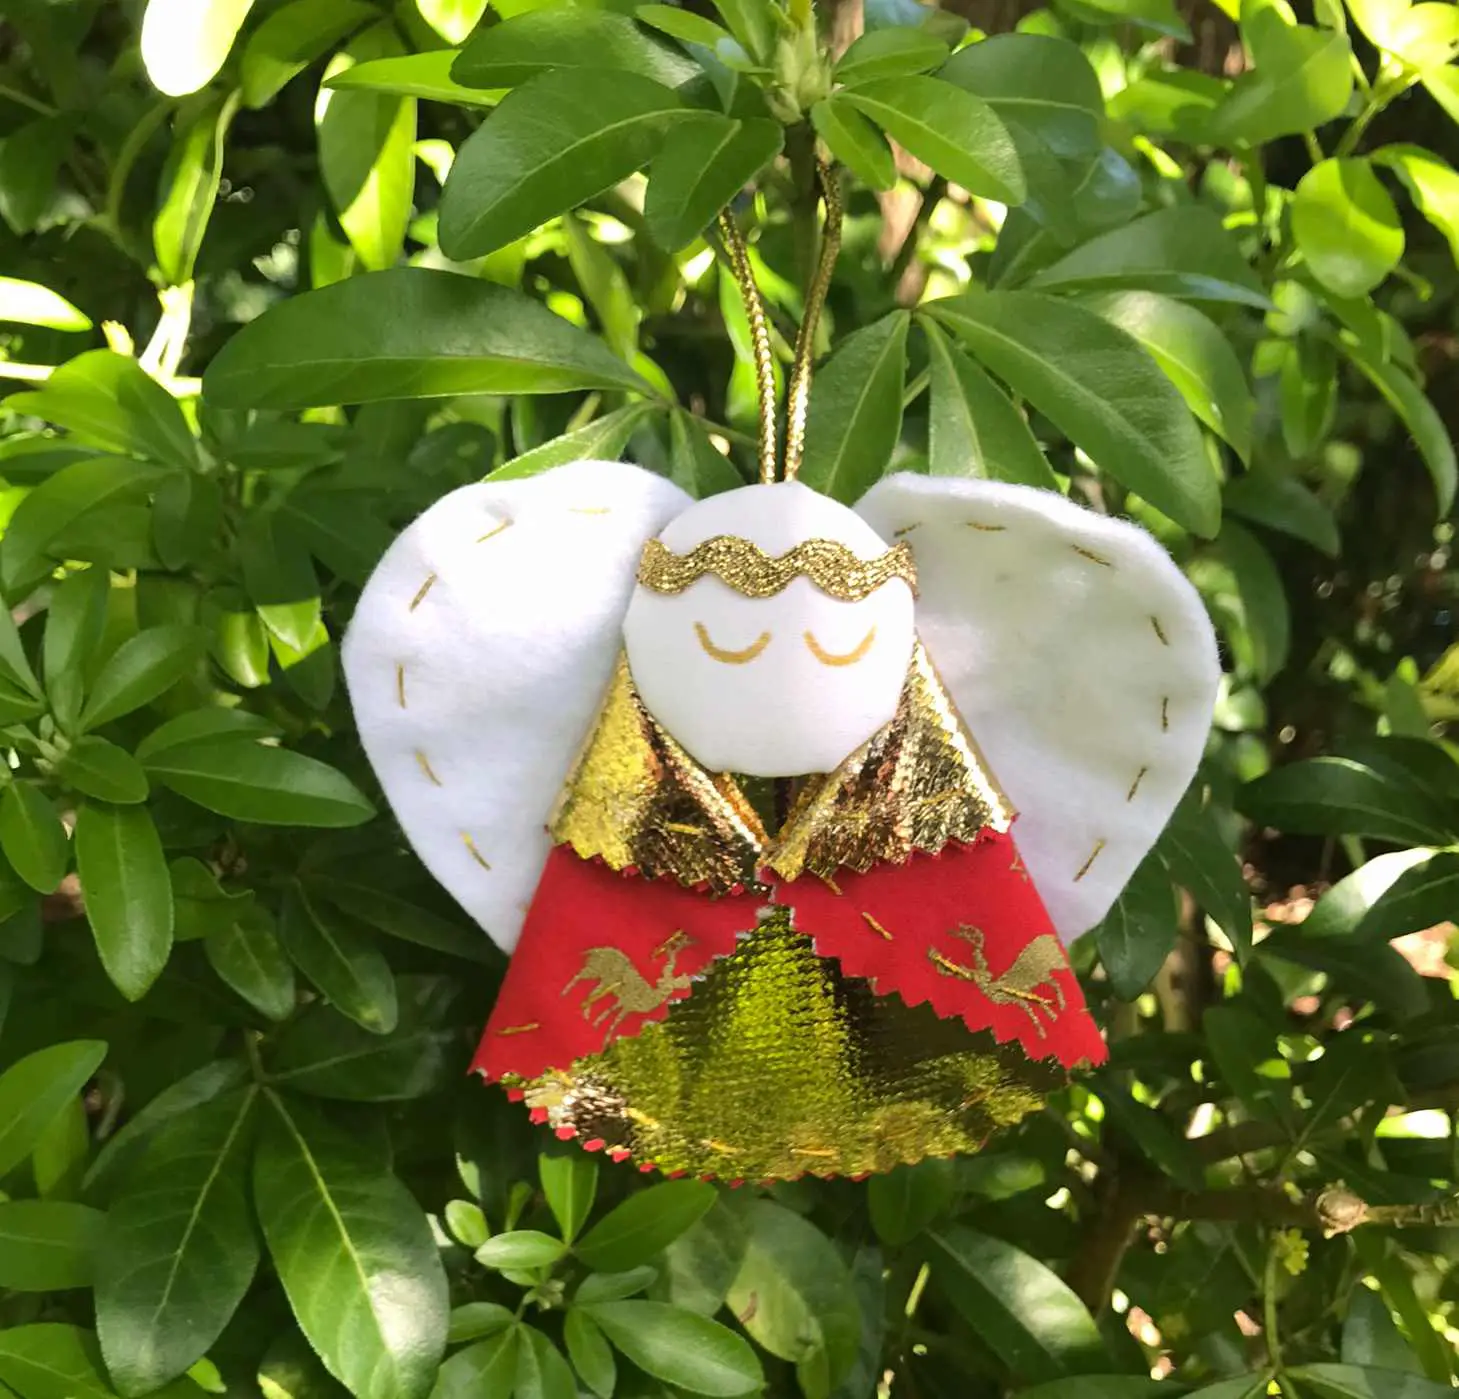
Christmas angel decorations can be quite tricky to make but these are not. So, why not make one of these Christmas angels to hang onto your Christmas tree or indeed anywhere you like? They are easy to make and you can choose whether to sew and glue them or glue them entirely.
You get to choose your fabrics (one or two contrasting ones), skin tone and indeed all the decorations. Feel free to get creative and develop this angel to suit your Christmas home decor. Great for using up fabric scraps leftover from other projects. As ever, use what you have available but here is a list of what you will ‘need’ to help you prepare.
So, let’s get started.
This page contains affiliate links meaning I earn a little commission if you use those links at no cost to you. I only recommend brands I use and trust.
Supplies you will need:
- Free Downloadable Template Available Here
- Cotton fabric
- Shiny gold (or silver) fabric – optional as you could use any fabric
- White felt for wings
- White (or your choice of skin tone) fabric for the face
- Gold pen
- Hanging ribbon or cord or Gold ric-rac or similar for the halo and hanger
- Gold thread (if sewing)
- Cardboard for face
- Small amount of filling or pieces of fabric for the face


Video Tutorial for Christmas Angel
This video is also available on my YouTube channel.
Prepare your Angel Pieces
Cut out the main components
Printout the template pieces listed above ready to cut out all the components you need. Cut out one large cloak circle in your Christmas fabric and one in your gold fabric. I have used pinking shears to cut out the large circles for the cloak but you can use ordinary scissors. Remember that you can use any fabric you like – it is your angel.
Cut out one face in cardboard as directed and one circle of your chosen skin tone fabric as directed. Cut out one heart for wings. If you are using a soft fabric which will not hold itself up you may need to cut 2 out to attach together. I have found felt is stiff enough with only one layer.

Prepare your Angel Cloak and Wings
Sewing Version
If you are sewing your cloak and wings as I have then follow along here. If you are gluing them move on to the next heading. Place your two large cloak pieces together so that the wrong sides are facing each other. Sew a simple running stitch around the outside edge.
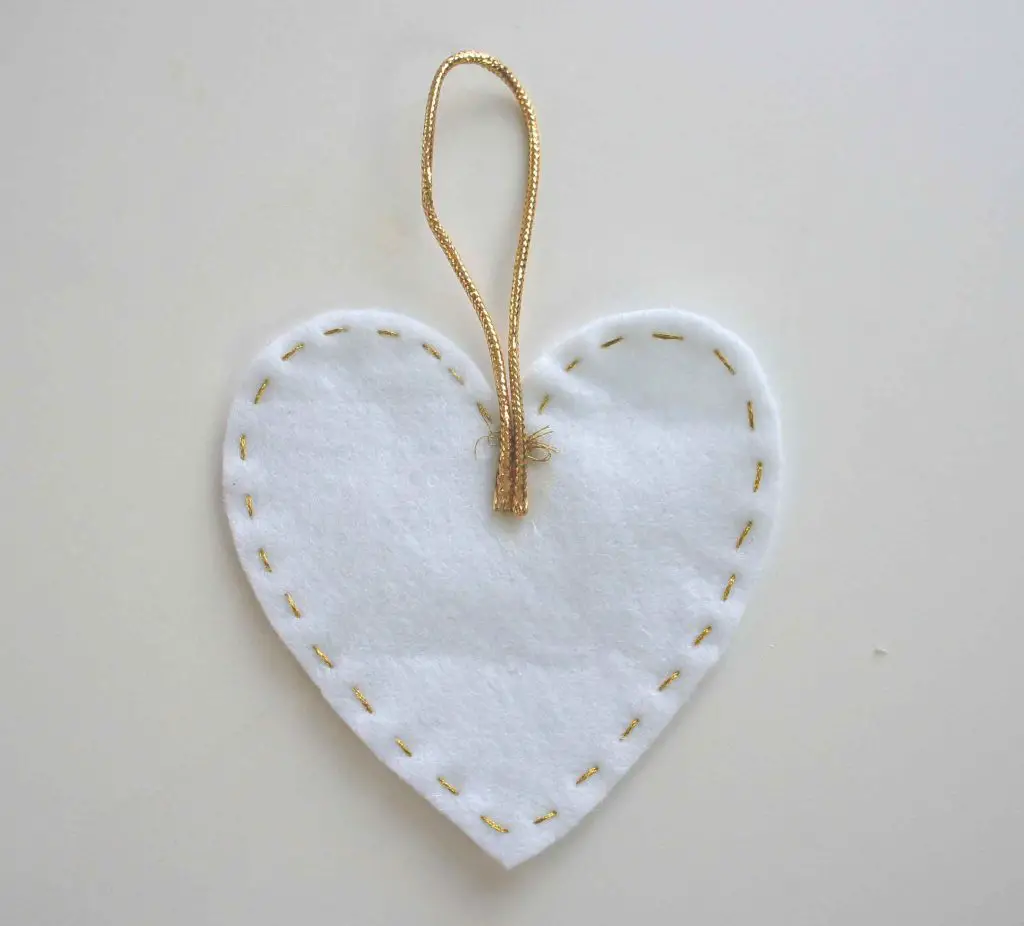
Do this for the heart shape (the angel wings) even if you only have one layer. I think it is simply a lovely effect and ties the wings into the cloak visually.

No-Sew Version
If you are not sewing your angel then simply place your two large cloak circles together with wrong sides facing each other and glue them in place. You do not need to do anything to your wings (the heart shape) unless you have 2 layers. In that case, glue those together with wrong sides facing each other.
Prepare your Christmas Angel Face
You will need your card and fabric face pieces plus your filling or additional layers of fabric. Place your face fabric circle face down and then add some filling (or fabric layers) to the centre. Place the card on top. Pull the fabric around the card and check that you are happy with how 3d your face is. If not, add some more filling or layers of fabric.
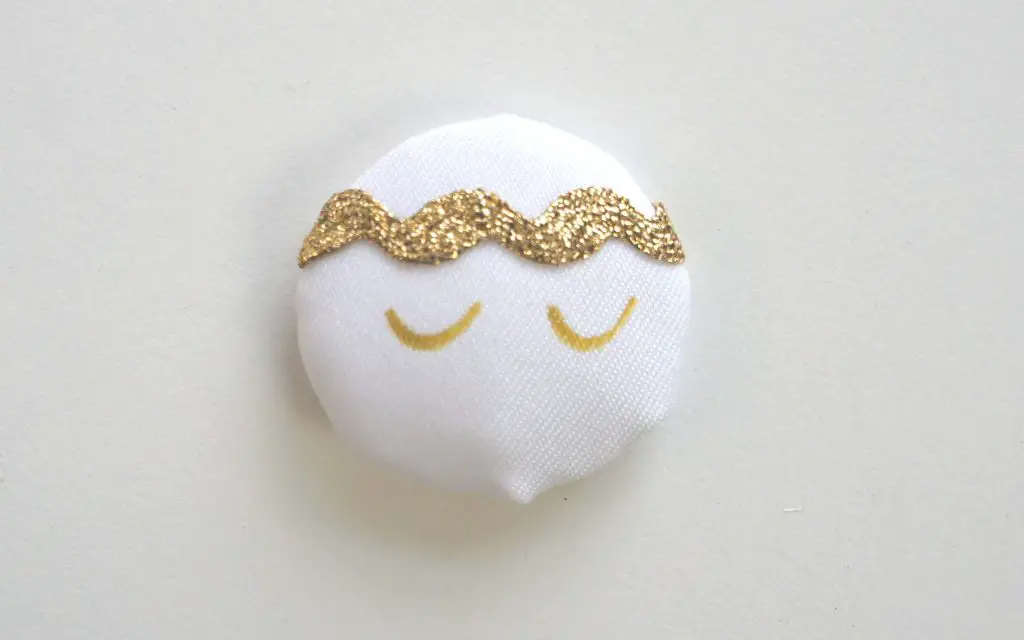
Once you are happy with it glue the fabric that you wrap around the back of the card to the card. You will now have a face ready for decorating. Cut a piece of ric-rac or gold cord so that it wraps around the face and can be glued on the back of the cardboard. Glue it in place.
Then draw on the facial features that you want. I added 2 simple eyes using my gold pen as I am no artist.
Complete your Christmas Angel Decoration
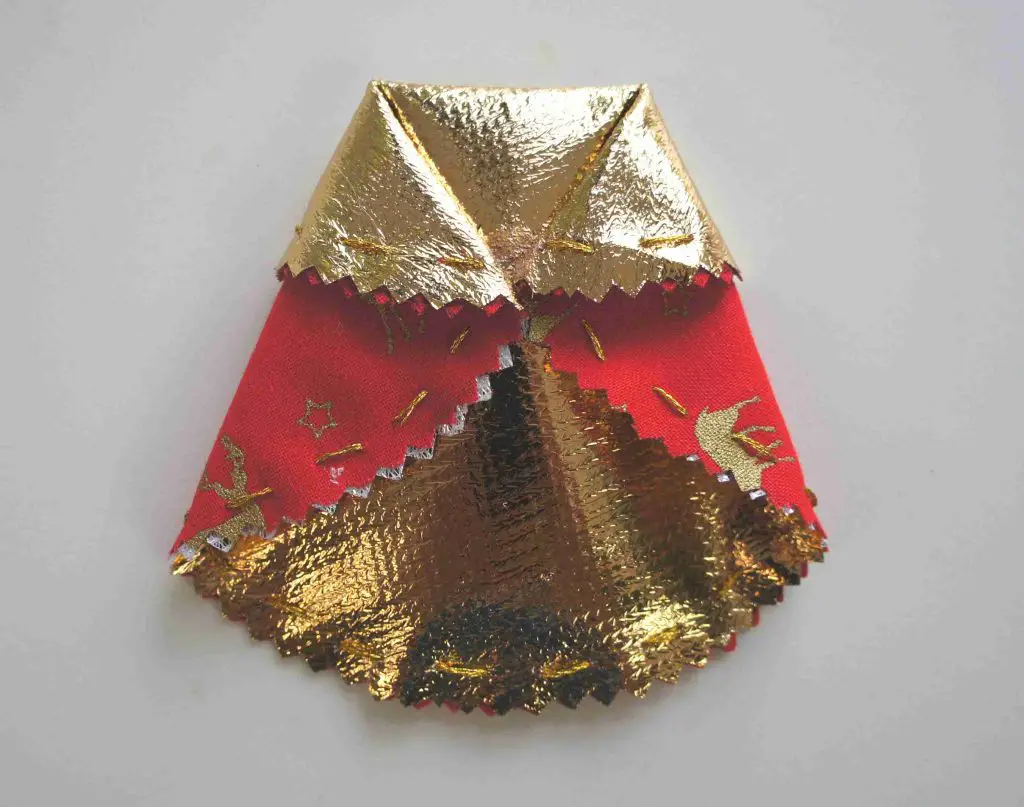
The first step in constructing your angel is to fold and glue the cloak into shape. Place it shiny side up on the table and then fold a small amount back over the top of the circles. Then bring the two edges in as shown below. Place the face where it will be going and check you are happy with the cloak. Fold and re-fold it until you are happy with it. Then glue the two sides down.
Then we will assemble the whole thing starting with the wings and the hanger. Place the wings onto the table and decide how long you want your hanger to be. Make sure you have the hanger you want and some extra length to glue onto the wings. Glue the hanger into place.
Then add some glue to the centre of the wings and place the cloak so that it looks right. You can use the head to make sure you are happy with how it will look. Then glue the head in place.
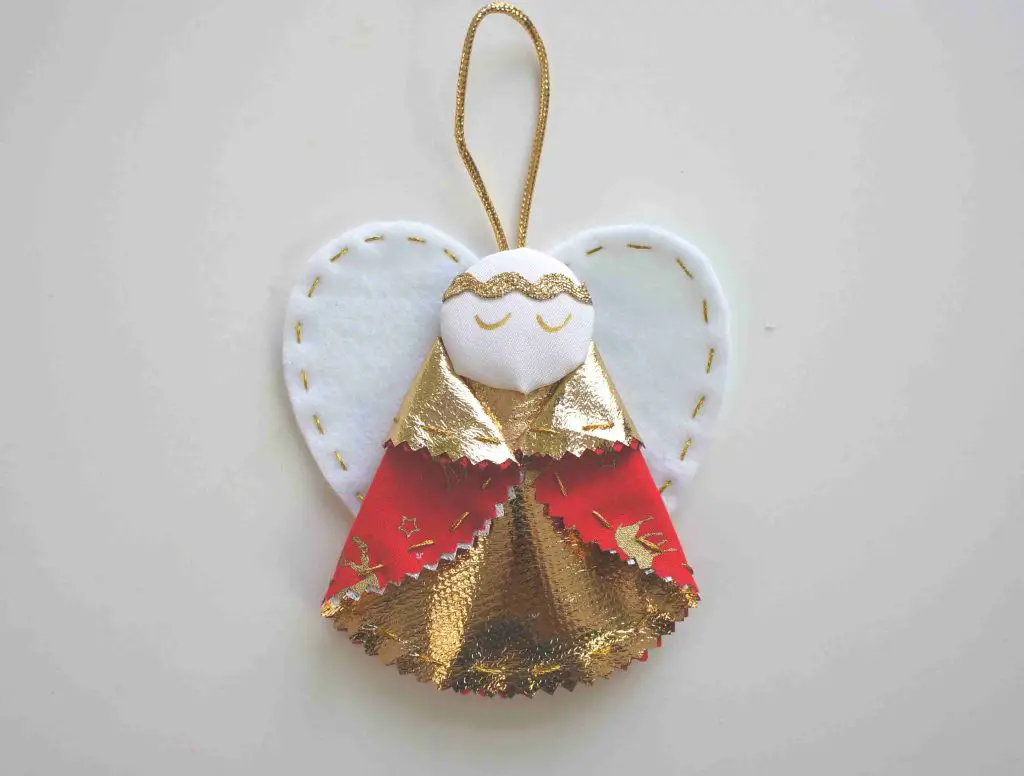
Well done, you have completed your Christmas angel decoration. Now, go and make some more!!!
What else can I make for Christmas?
Christmas is a great time to get crafting and creating the perfect Christmas decorations for your holiday decor so here are a few ideas that are on this website with full tutorials.
Another super easy hanging decoration you can make is felt stars. They are so cute and you make them up really quickly. Great for small gifts too!
If you have any old books (and who doesn’t) you could make a folded book Christmas tree or a folded book Christmas angel. They are super easy to make and look really stylish.
If you are looking for more Christmas tree decorations then how about cute miniature woolly hat ornaments. These are also great for kids to make too!
Or if you have fabric scraps that you want to use then how about a cute fabric bauble that uses up lots of fabric scraps. Or if you don’t have loads of fabric scraps then try out this alternative fabric Christmas tree bauble.
Hopefully you now have lots of ideas as well as an angel for your tree. Let us know in the comments below what you make and any Christmas decoration ideas you have to help us all make our Christmas decorations this year.