Sew Fleece Mittens in Under 30 Minutes – Any Size!
As an Amazon Associate I earn from qualifying purchases
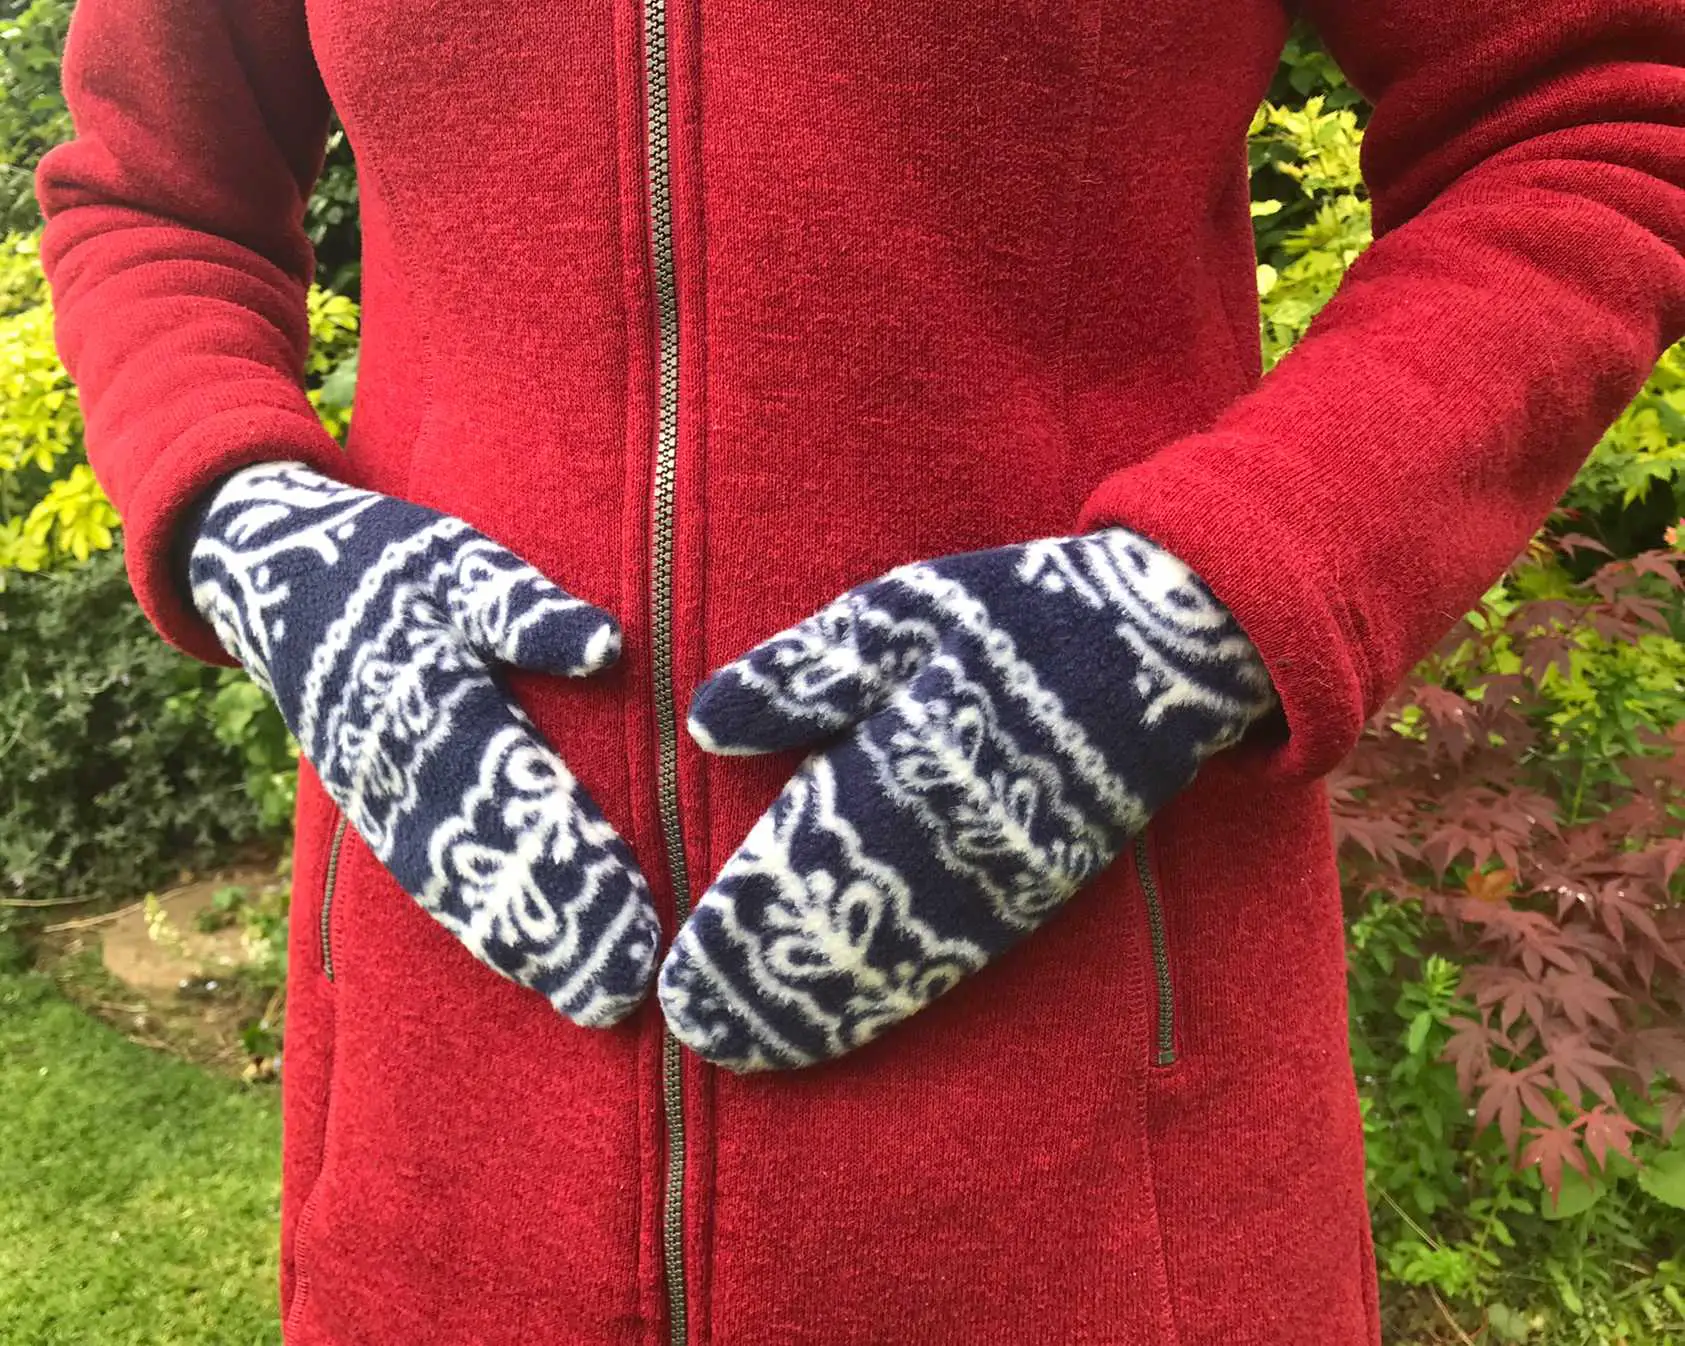
Do you fancy some lovely warm mittens? Perhaps you were inspired by Bernie Sander’s mittens. They looked so warm and I must admit I find mittens lovely and warm too.
Whatever your inspiration you can sew a pair from some lovely thick fabric and they will work a treat. No need to be able to knit or crochet for these mittens!
They make great gifts but you do need to know the size of the hands of the person who will be wearing them so that could be your challenge.
If you like watching a tutorial then scroll down to the bottom and enjoy my video tutorial for these fleece mittens that I made.
You will need:
- Fabric of choice – fleece works really well
- Sewing supplies
- Paper and pen

Mittens Video Tutorial
This mittens video is also available on my YouTube channel
Make your pattern
Firstly make your pattern for your mittens. Simple place the hand of the person who will be wearing the mittens face down onto your paper. The fingers should be together and the thumb sticking out. Make sure that the hand is far enough onto the paper that you can make the wrist section.
Draw around the hand approximately 1″ from the hand. If you want a looser mitten simply draw further away from the hand. 1″ makes a close fitting mitten. BE CAREFUL at the wrist to make sure that your mitten will be wide enough there for your hand to fit through. You may need to go wider than 1″ here. Mine just fit and I have slender hands.
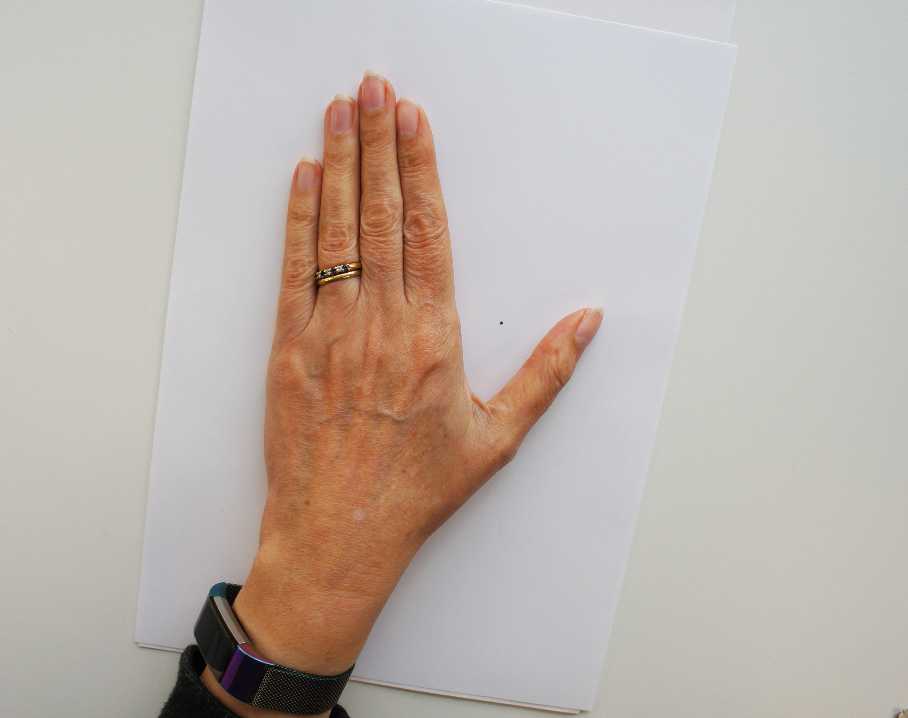
Once you have drawn around the hand, and you are happy with the mitten shape, cut it out. This is your pattern template.
Cut out Your Mitten Fabric Pieces
Fold your fabric in half so that you have 2 layers to work with. If you have a patterned fabric like mine you may want to be careful to make sure that your mittens match. If so, fold it over carefully and make sure your pattern matches up on both layers.
Pin the pattern piece that you made to the fabric making sure that you pin through both layers.
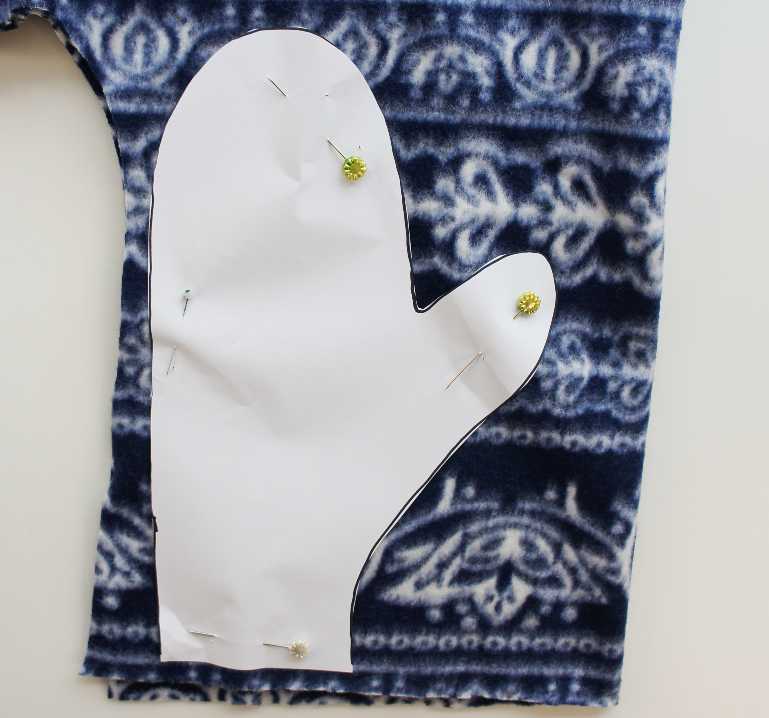
Cut around the pattern and you will have 2 mitten pieces that will make one mitten. Now use the pattern to make another pair of mitten pieces in exactly the same way. Remember to carefully line them up if you are pattern matching at all.
Sew your Mittens
I will show you how to make one mitten and you simply repeat these instructions for the other mitten. However, I did both mittens at the same time.
Take your 2 mitten pieces and place one on top of the other so that the right sides are facing. Pin or clip the two together so that the edges match. Do not pin the wrist edge as that is how you will get them on.
Sew around the mitten using a 0.5″ seam allowance. Then, I recommend neatening your seam with a zig zag stitch. This will strengthen your mittens. If your fabric is stretchy at all then use a slight zig zag stitch when you sew the seam too.
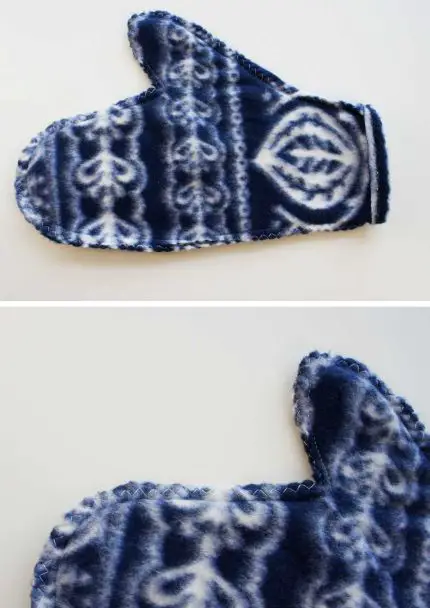
Finally, turn a small (about 0.5″) single hem over on the wrist edge of the mittens onto the wrong side. Pin it and sew it in place. This will give you a nice tidy edge and make the mittens feel better against your skin.
Turn your mittens out to the right side and you are finished.
And now …
Congratulations on finishing your first pair of mittens. How easy were they? You can now play around with developing your pattern and mitten making.
Some ideas for development are:
- Make them longer so that they cover more of the wrist area
- Add more fabric so that they have a looser fit
- Line them for added warmth
- Embroider them before sewing them up to personalise them
- Add a fur edging at the wrist
Further Sewing Projects
If you enjoy sewing then check out some more great projects:
- Sew a Stylish Infinity Scarf
- Scrap Busting Hair Scrunchies
- Create a fabric Covered Notebook
- Sew a Fully Lined Drawstring Bag
- Make your own Teabag Wallet
- DIY Fabric Coasters
Please leave any ideas for developments of the mittens in the comments below and help all of us to develop our mittens!

