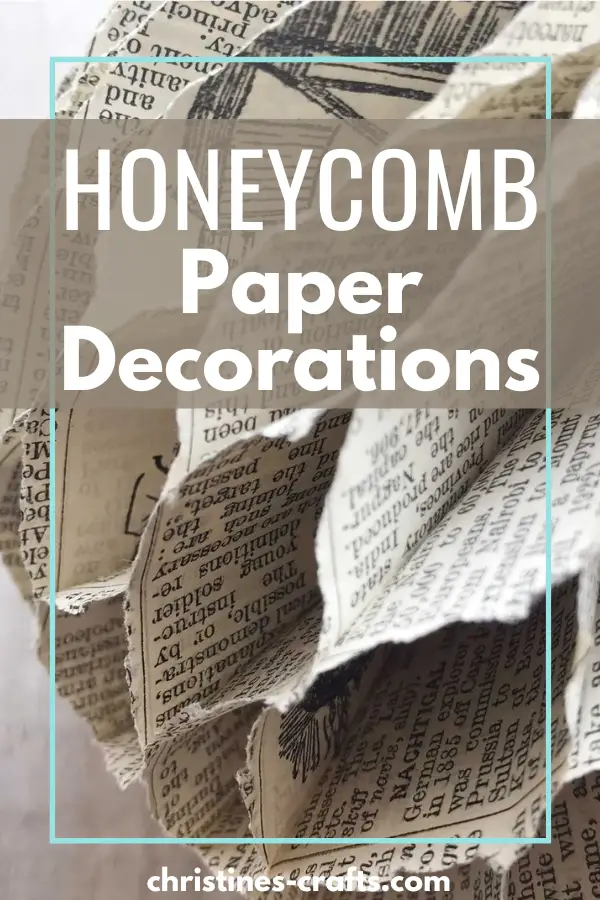
2 Easy Ways to Make Gorgeous Honeycomb Paper Decorations
As an Amazon Associate I earn from qualifying purchases
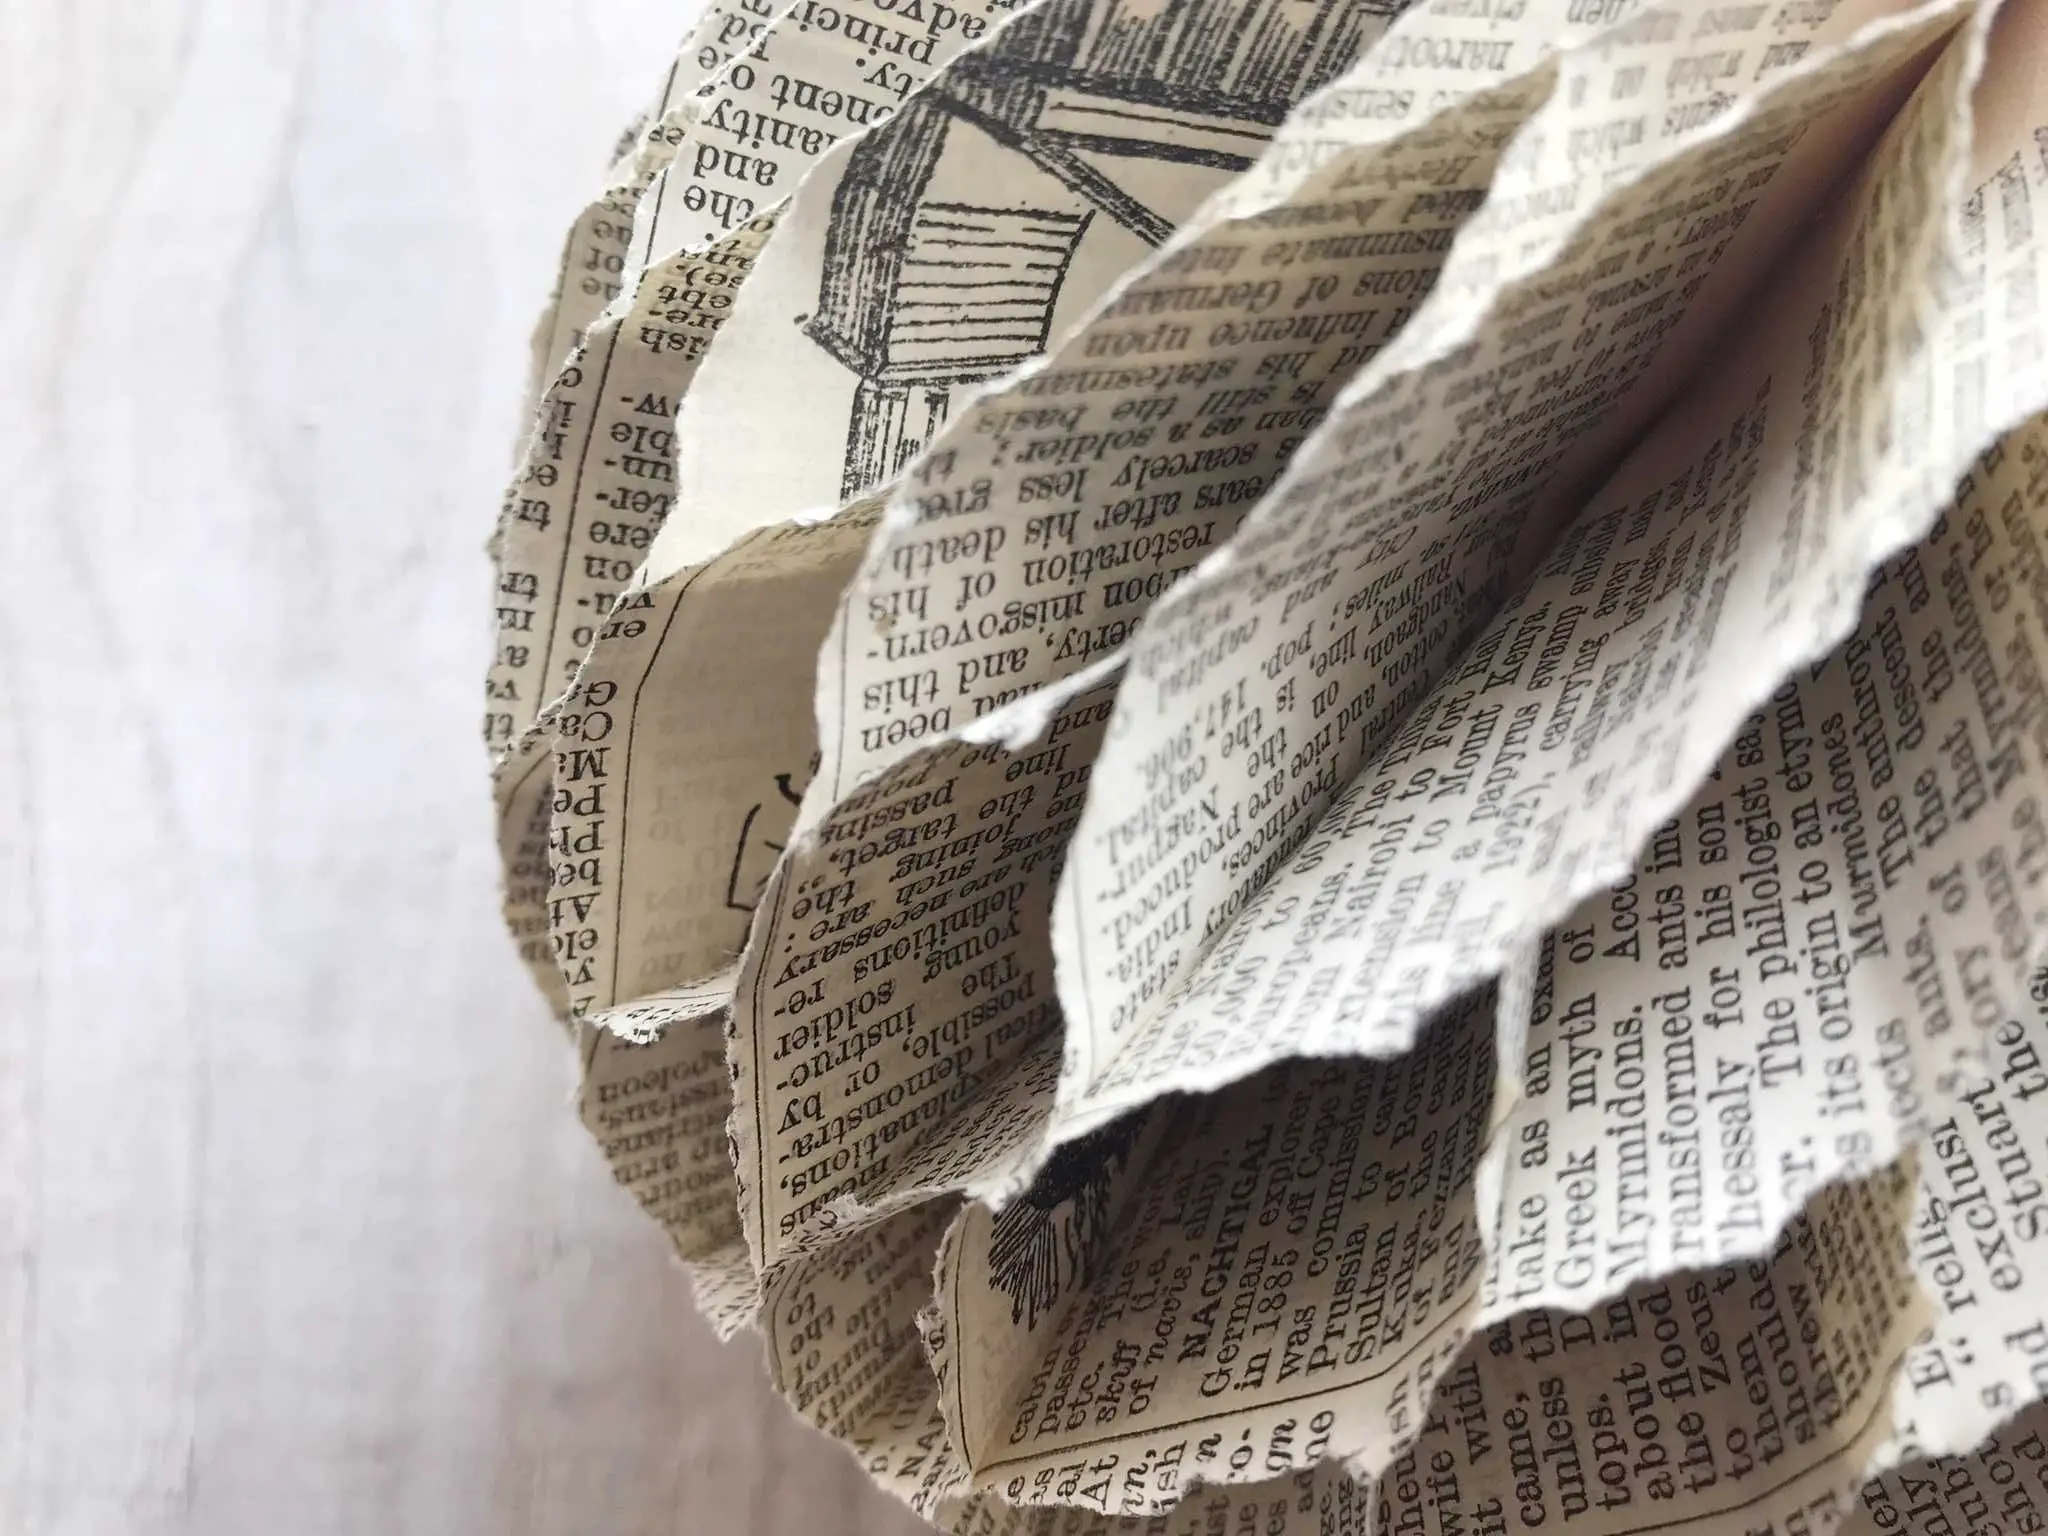
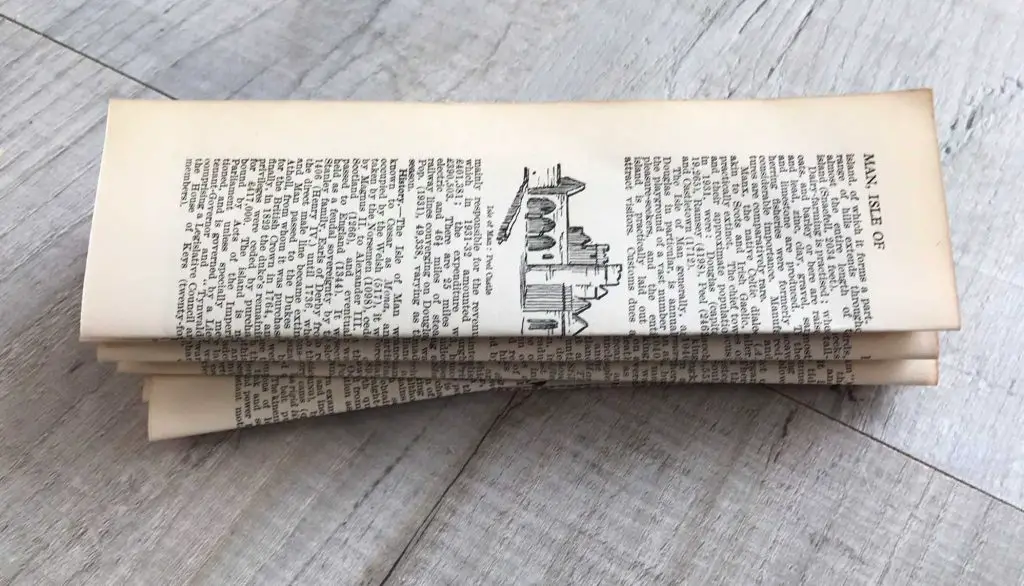
Paper decorations are a fabulous way of decorating your home for an event on a budget. These honeycomb paper decorations are gorgeous! I have made mine out of old book pages for a certain vintage look but you could use any paper that you like.
They are great for Christmas made in any size you like and how about a colour c0ordinated set for a wedding or a party? I am showing you 2 ways to make them so pick the one you like the best.
This page contains affiliate links meaning I earn a small commission if you use those links at no cost to you. I only recommend brands I use and trust.
You will need:
- Paper – book pages and tissue paper work well
- Paper Glue
- Scissors
- Clips (to hold it together while it dries)
- Twine / string / ribbon if you want to hang it
- Template for the shape (or a semi-circle)
- Thin card for Method 2


Video Tutorial
This video is also available on my YouTube channel.
Method 1 – Folded Shapes Honeycomb Paper Decorations
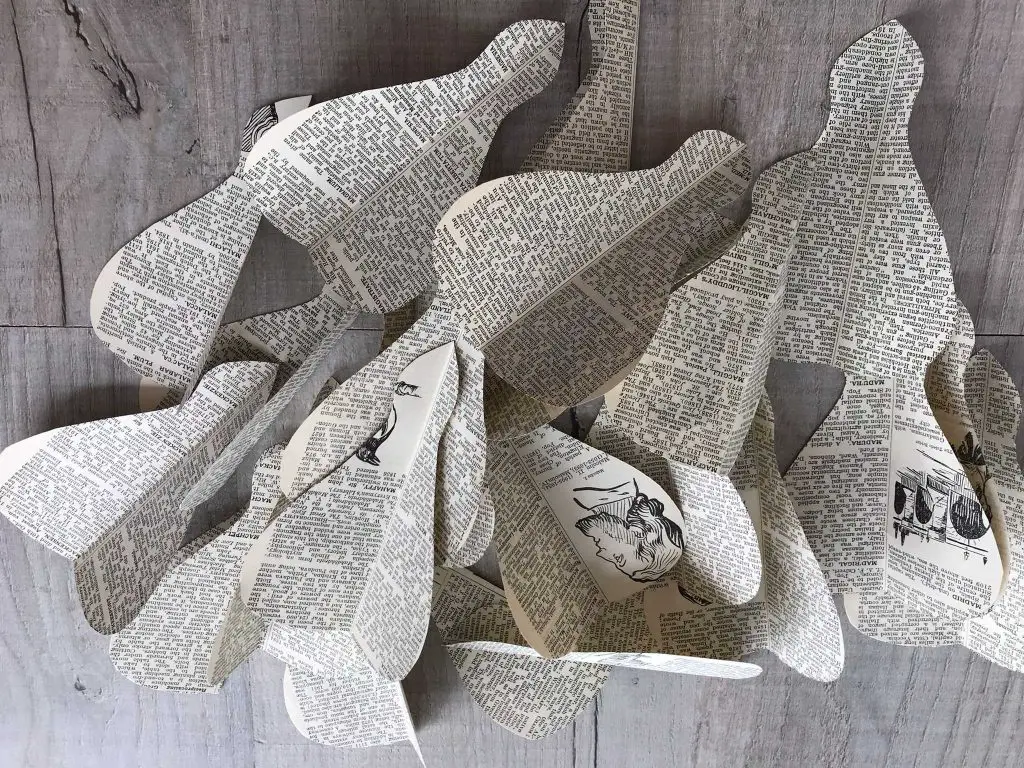
Cut out your paper shapes
Take an even number of your pieces of paper. I recommend at least 24 to get a good honeycomb finish. Fold them all in half. You can easily do this in batches to speed things along.
Now draw around your template so that the straight edge is along the folded edge of your page. I recommend placing a few pages together and simply drawing on the top one.
Then cut out you shape and repeat for all your sheets of paper.
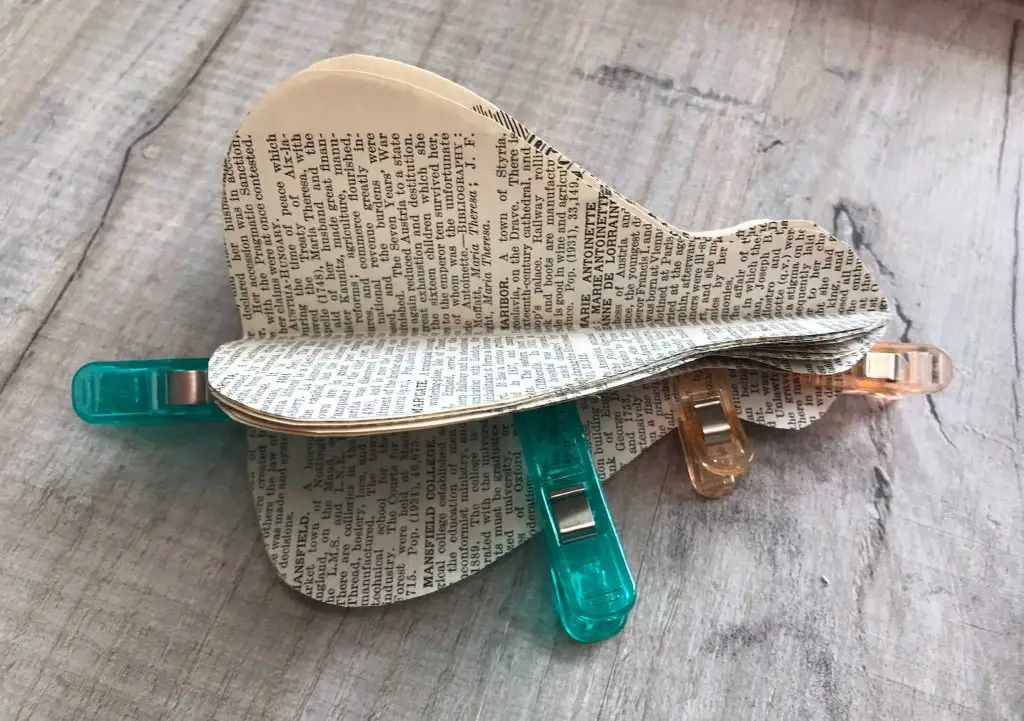
Glue the shapes together
Now you need to glue all your pages together. Keep them folded and glue along the straight edges only so that the shaped sides can freely move. Take care not to get glue on the rest of the shape. This will allow you to open them up and form a circle at the end.
Let the glue dry thoroughly before moving on.

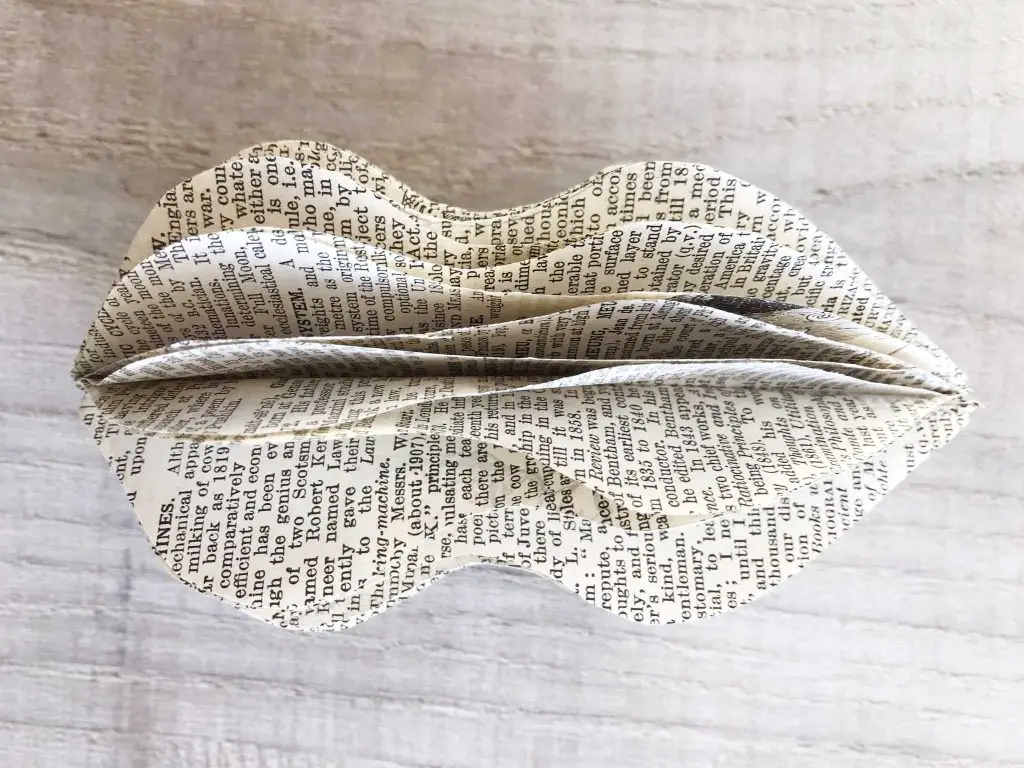
Once the glue is thoroughly dry fan the shapes around the ‘spine’ that you glued to form your basic shape. When the 2 shapes meet glue them together. I recommend pinning them together until the glue dries as they may try to open up again.
Make the honeycomb effect
If you are happy with your paper decoration then you can stop here but if you want a honeycomb effect then keep going! Simply open up between 2 sheet and add a tiny bit of glue or a glue dot where you want them to join. Open the next gap up and add glue between the ones you added in the last layer.
Keep alternating like this until you are all the way around. The level of complexity is up to you. You could just add a couple of spots of glue or several. All that matters is that you alternate between the layers. This is also why you need an even number of layers!
Method 2 – Honeycomb Paper Technique
Make the honeycomb paper
The first step is to produce your working surface. You will need a sheet of paper that is larger than the paper you are working with. Measure across your page drawing lines at 1″ intervals. However, make sure that you draw the lines alternating colours as you need to have that pattern.
Next place one piece of paper onto your marked up paper and glue along the first, third, fifth, lines, etc. In my case these are the red lines. Place a second piece of paper on top of the first, This will be glued down in lines only.
Now apply glue onto this piece of paper but only along the second, fourth, etc lines which in my case are the black lines.
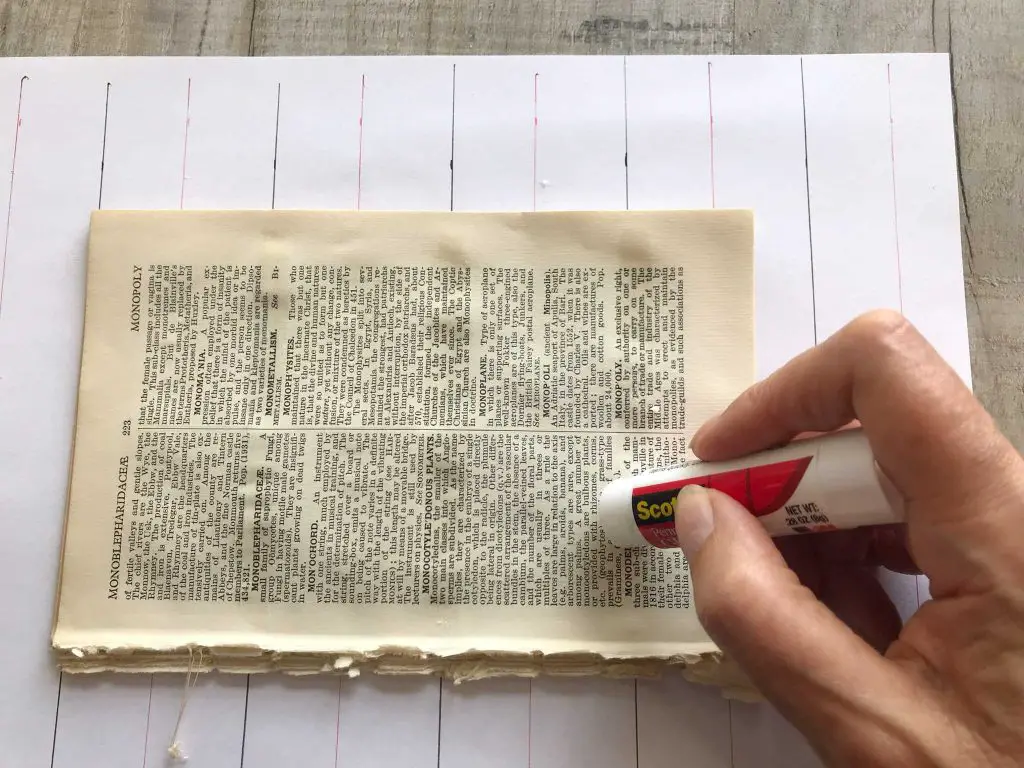
Keep repeating this until you have enough sheets. I suggest about 50 is a good amount that will allow you to form a good honeycomb decoration.
At any time you can try to open up the pages gently and see your honeycomb paper developing. It can also help you to check which lines you did last. You will forget!
Leave it to dry before moving on.
Create the 3d shape
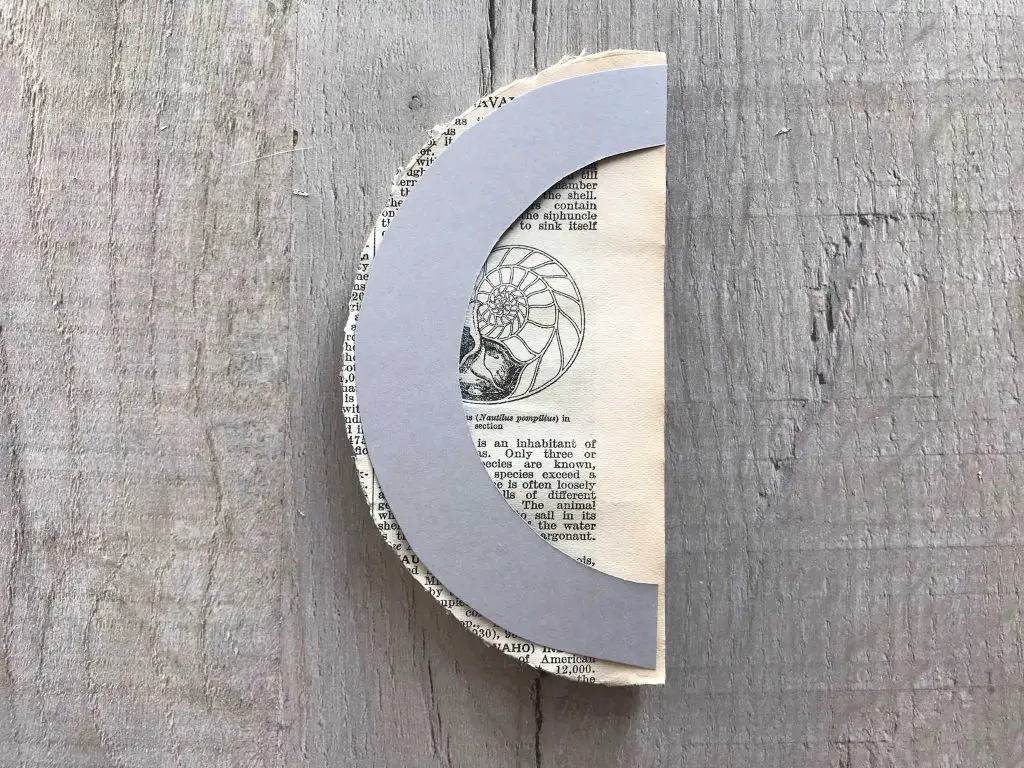
Once it is dry place your template onto the top of your ‘paper’ and draw around it. Cut it out! This will be difficult as you have very thick paper so take care!
Cut out 2 shapes from the card that match your original template shape exactly. Then trim down the outside so that they will not stick out beyond your decoration. You can also cut some of the bulk out of the centre of the shape.
Glue one to each side of your honeycomb paper shape.
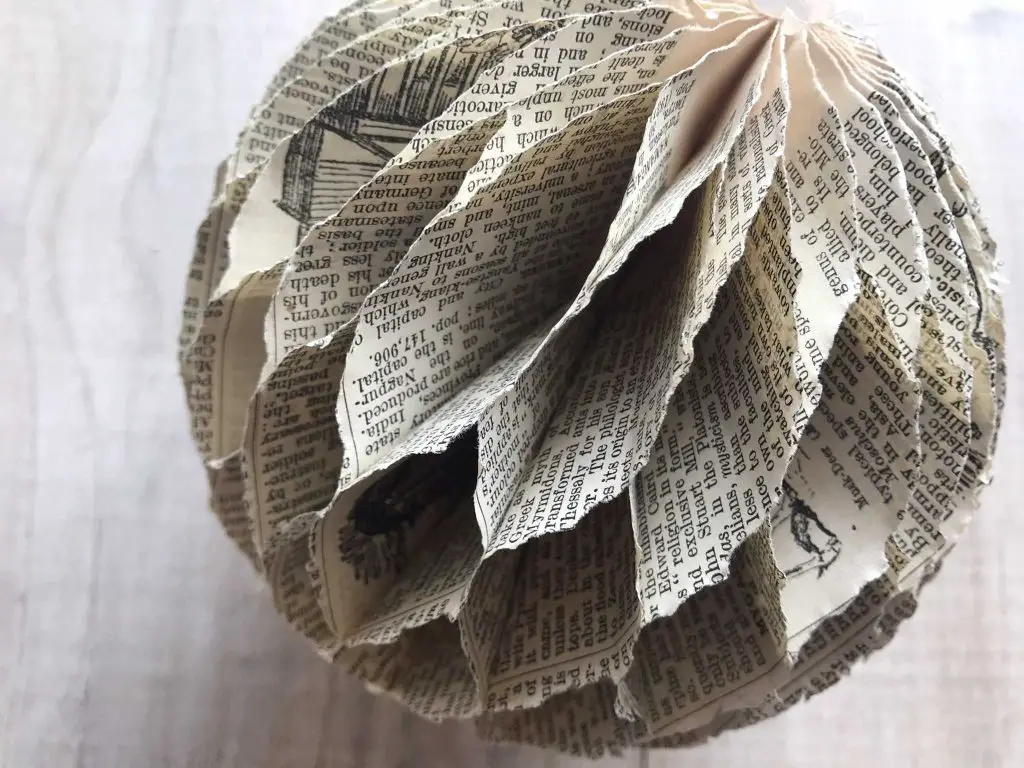
Open up your shape so that it forms a 3d decoration and glue the pieces of cardboard together. It will really help to clip or pin the two pages together while the glue dries.
You should now have a completed honeycomb paper decoration. You can use the leftover paper to make more, perhaps of different sizes.
If you want to hang your decoration simply glue some ribbon, twine or string to the top of the decoration. I recommend tying a knot in your twine and then gluing that down for a firm joint.
And next…
I hope that you have really enjoyed making your honeycomb paper decorations and that you will experiment with different shapes. You are not limited to balls and these templates – get creative and draw your own!
If you are looking for some more paper crafts then check out:
- Make Parcel Bows from Old Magazines
- Christmas Polish Star Ornament
- Iris Paper Folding
- DIY Seed paper
- Folded Book Christmas Angel
Let me know in the comments below what event you make your honeycomb paper decorations for and share any ideas you have for developing them.