Beeswax Wraps: A Natural and Sustainable Food Storage Solution
As an Amazon Associate I earn from qualifying purchases
I first came across beeswax wraps a few years ago but I only started making my own a few months ago. So, I thought I would share with you just how quick and easy it is.
You can also make these wraps with soy wax if you are vegan and uncomfortable with using beeswax. I will refer to beeswax wraps throughout but everything applies to both beeswax and soy wraps.
If you have any concerns about using beeswax or soy wax to wrap your food then there is an interesting guidance article produced by the British BeeKeepers Association. It is entirely up to you where you source your supplies but this article may give you some ideas of what to look for.
This page contains affiliate links meaning I earn a little commission if you use those links at no cost to you. I only recommend brands I use and trust.
What are beeswax wraps?
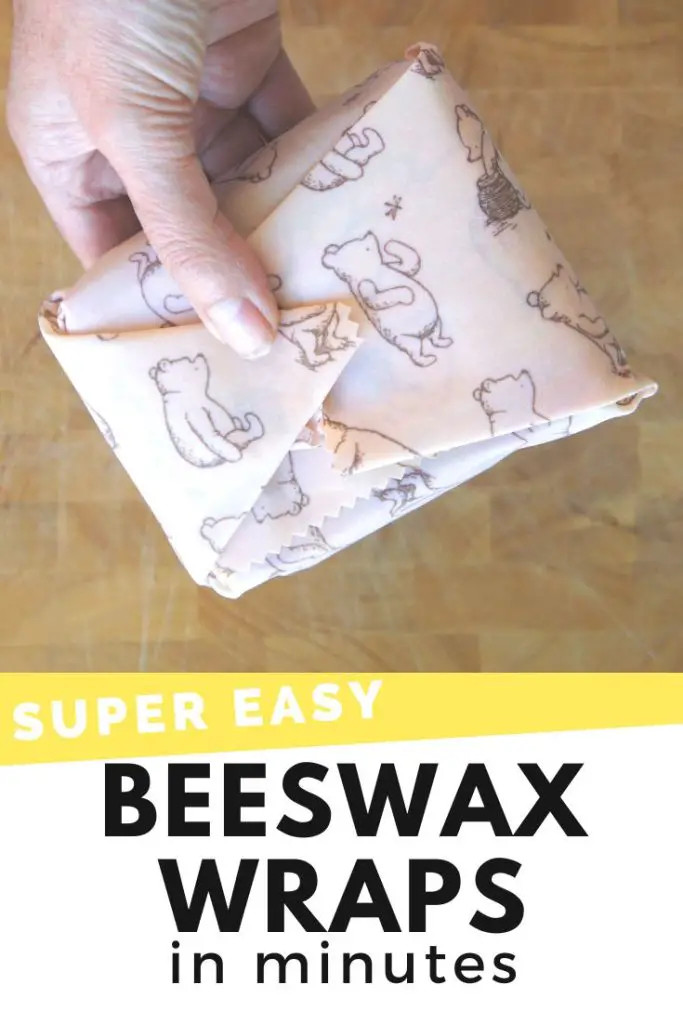
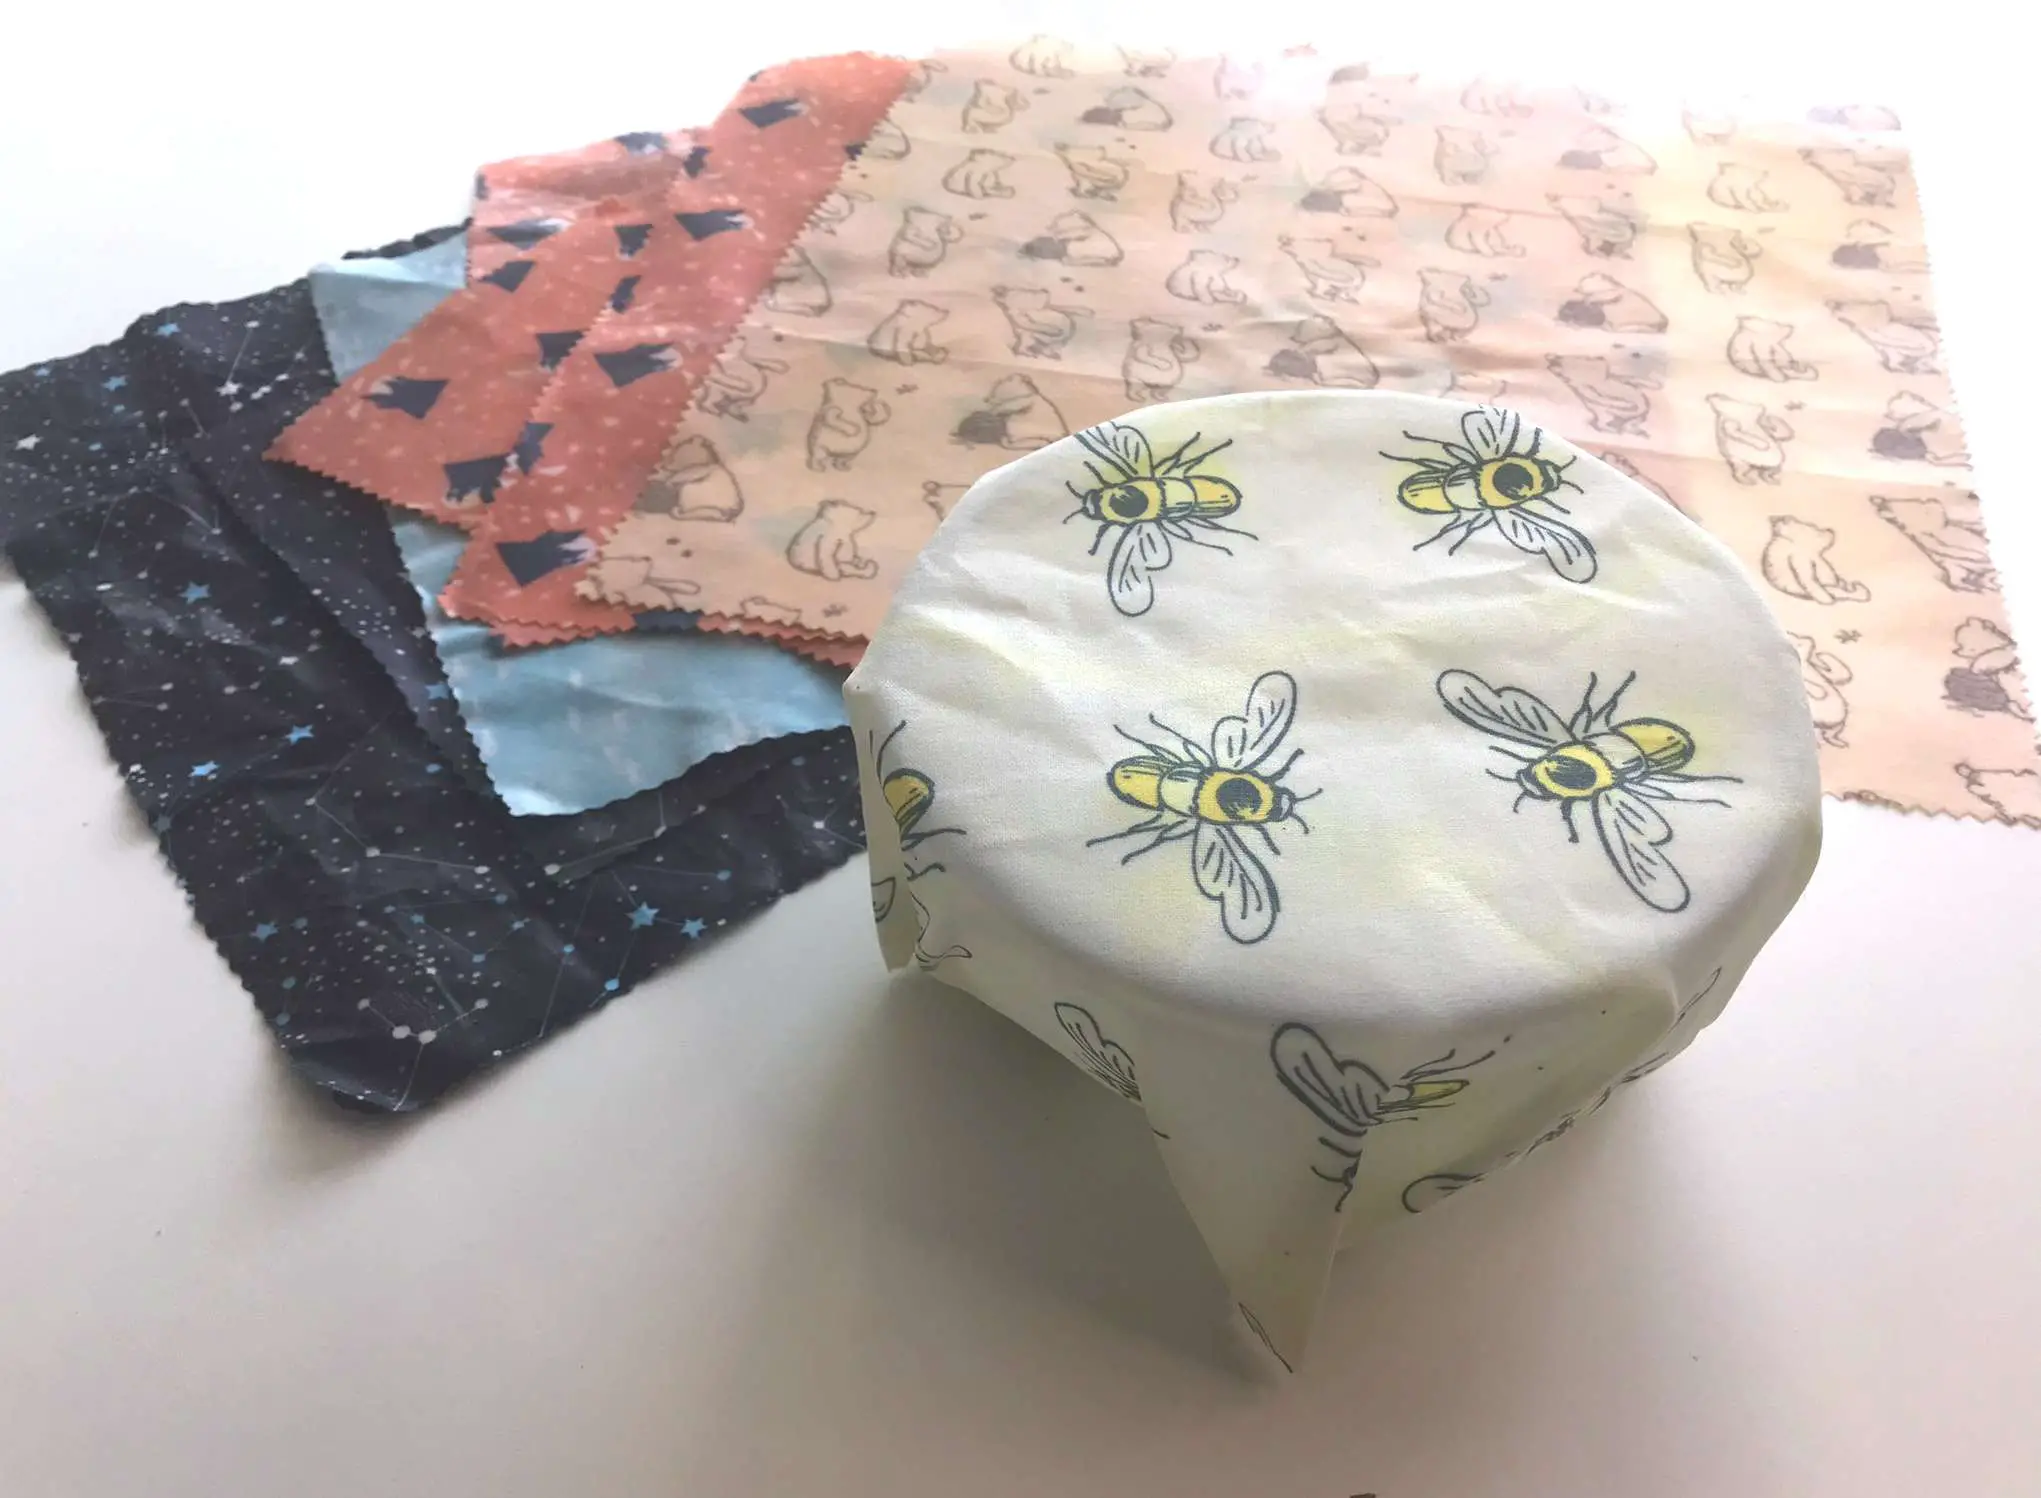
Beeswax wraps are a sustainable and eco-friendly alternative to plastic wrap. They are made from a blend of beeswax, organic cotton, and sometimes an oil, which is heated and then applied to the fabric. The beeswax gives the wrap its water-resistant and mold-resistant properties, while the an oil can help to keep it more pliable. I have not added an oil to mine and they are just great as they are (both bees and soy wax).
Beeswax wraps can be used to store food in the fridge or on the counter. They are perfect for covering bowls, wrapping sandwiches, or sealing up leftovers. Beeswax wraps are also reusable.
Benefits of Beeswax Wraps
- They are a sustainable and eco-friendly alternative to plastic wrap.
- They are reusable and can last for up to a year.
- They are non-toxic and food-safe.
- They are easy to use and clean.
- They can be customized with your own designs.
- At the end of their life you can compost them
How to Make Beeswax Food Wraps
So, let’s make your own beeswax wraps.
You will need:
- cotton fabric (fat quarters are great for this)
- Beeswax or Soy Wax
- Iron
- Greaseproof Paper / Baking paper
- Ironing Board or Mat


Video Tutorial for Beeswax Wraps
This video is also available on my YouTube channel.
Prepare your Fabric
Your first task is to cut your fabric to the size that you want your food wraps to be. This is entirely up to you. If you are going to be wrapping sandwiches then make sure your bread fits inside your wrap. If you want to seal food inside a bowl then make it large enough to comfortably fit over the bowl.
I made a selection of sizes ranging from 8″ by 6″ to 15″ by 15″. You can cut the shapes out using ordinary scissors but if you use pinking shears then you get a lovely edge to the wraps and the fabric is less likely to fray while you are making the wraps.
Create your Beeswax Cloth Wraps
Cover your ironing board with greaseproof paper. I recommend a couple of sheets that are overlapping to make sure that no wax leaks onto your ironing board.
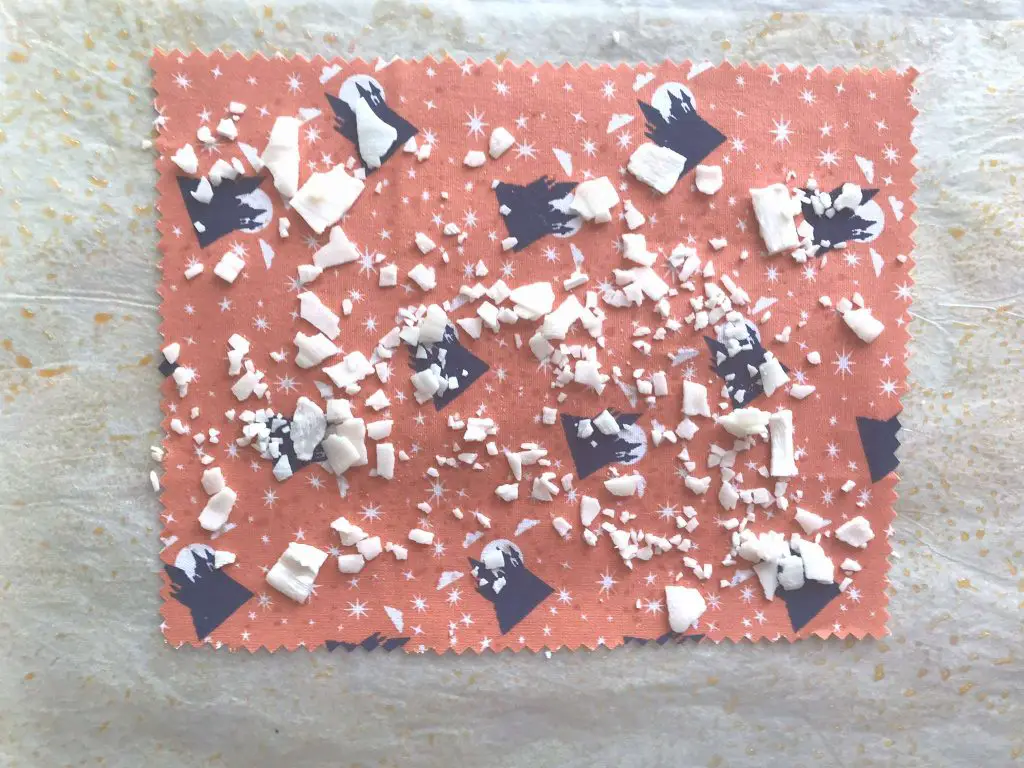
Place one of your pieces of fabric down onto the greaseproof paper. Cover it with a thin layer of your chosen wax. If it comes as shavings or small pellets then use them as they are. If you have a block of wax you can either grate it onto your fabric or peel it from your block. All that matters is that the wax is spread out.
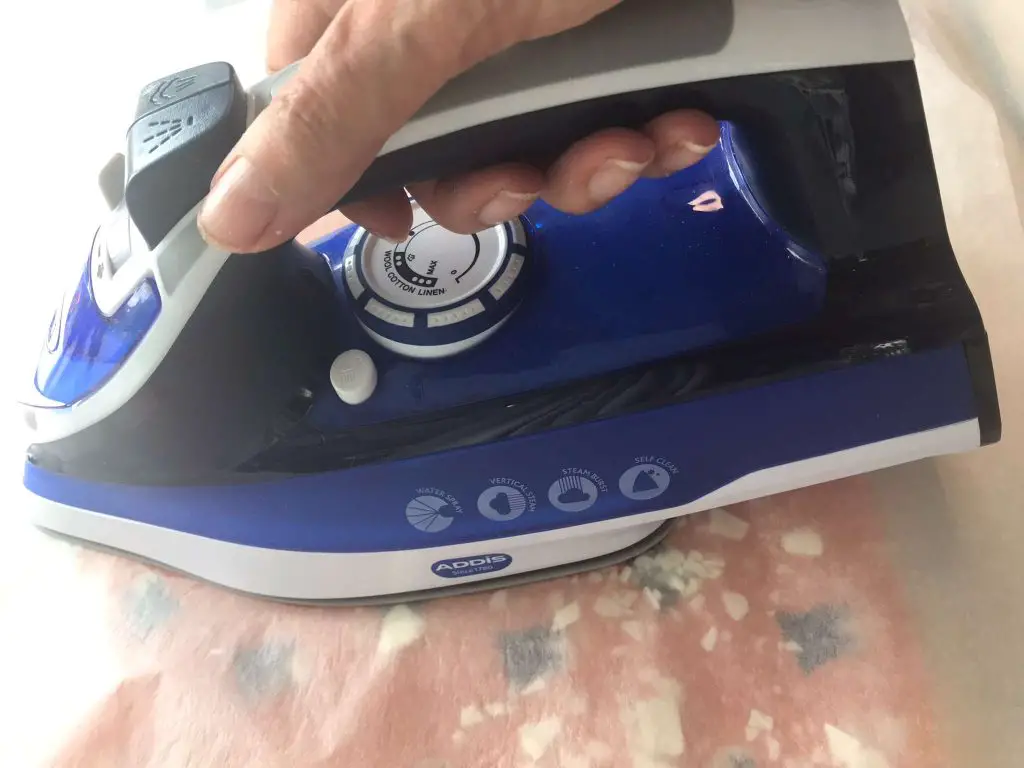
Then cover the whole thing with another sheet of greaseproof paper. You do not want any wax getting onto your iron or ironing board.
You now need to melt the wax into the fabric using your iron. DO NOT use any steam – you need a dry iron. I used a low cotton temperature on my iron but it worked better slightly cooler on the soy wax.
Gently move your iron around on the fabric so that the wax melts and spreads around the fabric.
Once you think it is all thoroughly melted and spread around the fabric peel back the greaseproof paper and have a look. You will be able to see if any bits of your fabric are not soaked in wax. If you are not sure hold it up to the light and it will be obvious.
BE CAREFUL: remember that you have just ironed this fabric and melted the wax so it will be hot to touch.
If you have missed any bits simply add a little wax, replace the greaseproof paper and iron it again. Repeat until it is all covered. Once you are happy with it simply peel the fabric up from the lower greaseproof paper and let it dry. It will dry really quickly so, to be honest, I just held mine for a few minutes and then placed it down on the worktop – all finished. You could peg them up to dry if you wanted.
So now you have your DIY beeswax wraps and can start using them or gifting them.
Top Tips for Using your Beeswax Wraps
- Beeswax wraps are not heat-resistant, so do not use them to cover hot food or to store food in the oven.
- Beeswax wraps are not airtight, so they are not suitable for storing foods that need to be tightly sealed, such as cheese or meat.
- How long do beeswax wraps last? Beeswax wraps can be reused for up to a year, but they will eventually start to lose their effectiveness. When this happens, you can recycle them or compost them.
- When trying to fit a beeswax wrap around a bowl make sure your hands are warm so that they soften the wax enough to mould the wrap around the bowl rim.
- How to clean beeswax wraps. Beeswax wraps are also reusable and can be washed with mild soap and water. Remember that you do not want to use very hot water.
- How to store beeswax wraps. The best way to store your wraps is to roll them up so that they do not crease too much.
And so …
Enjoy using your own homemade beeswax wraps and doing your bit to help the environment. No more cling film (plastic wrap) for you. I hope you agree that these are a great eco-friendly project that is not too bad on the budget. Overall we will all save money, I am sure.
If you are looking for some more projects then check out the rest of this site. What about sewing your own hair towel wrap using an old robe or towel?
Or perhaps you would prefer to use your old jeans for a stylish mobile phone stand or apron. You can even make the apron without doing any sewing!
Please let us all know in the comments below what you think about these food wraps.