How to Make Easy Kids Crafts Christmas Tree Decorations using Milk Carton Tops
As an Amazon Associate I earn from qualifying purchases
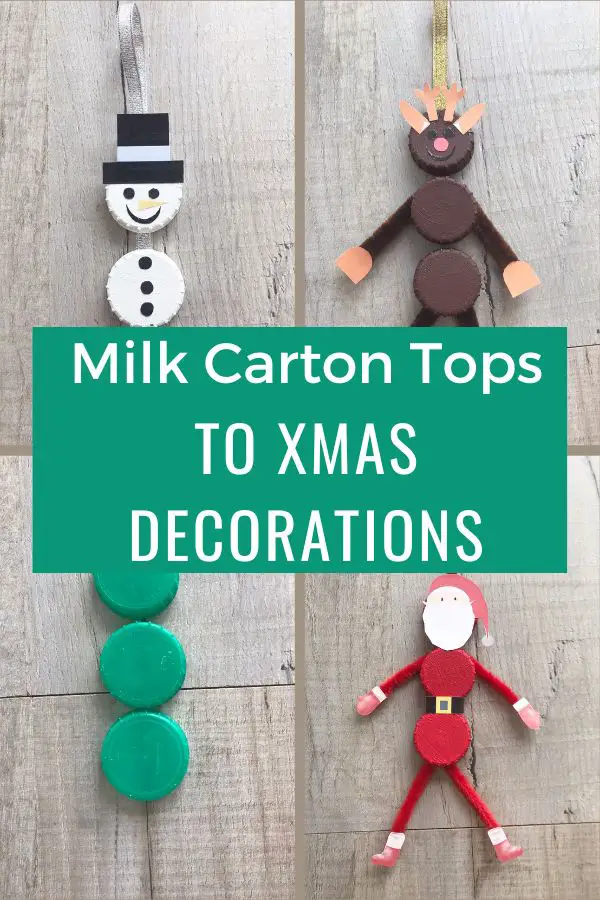
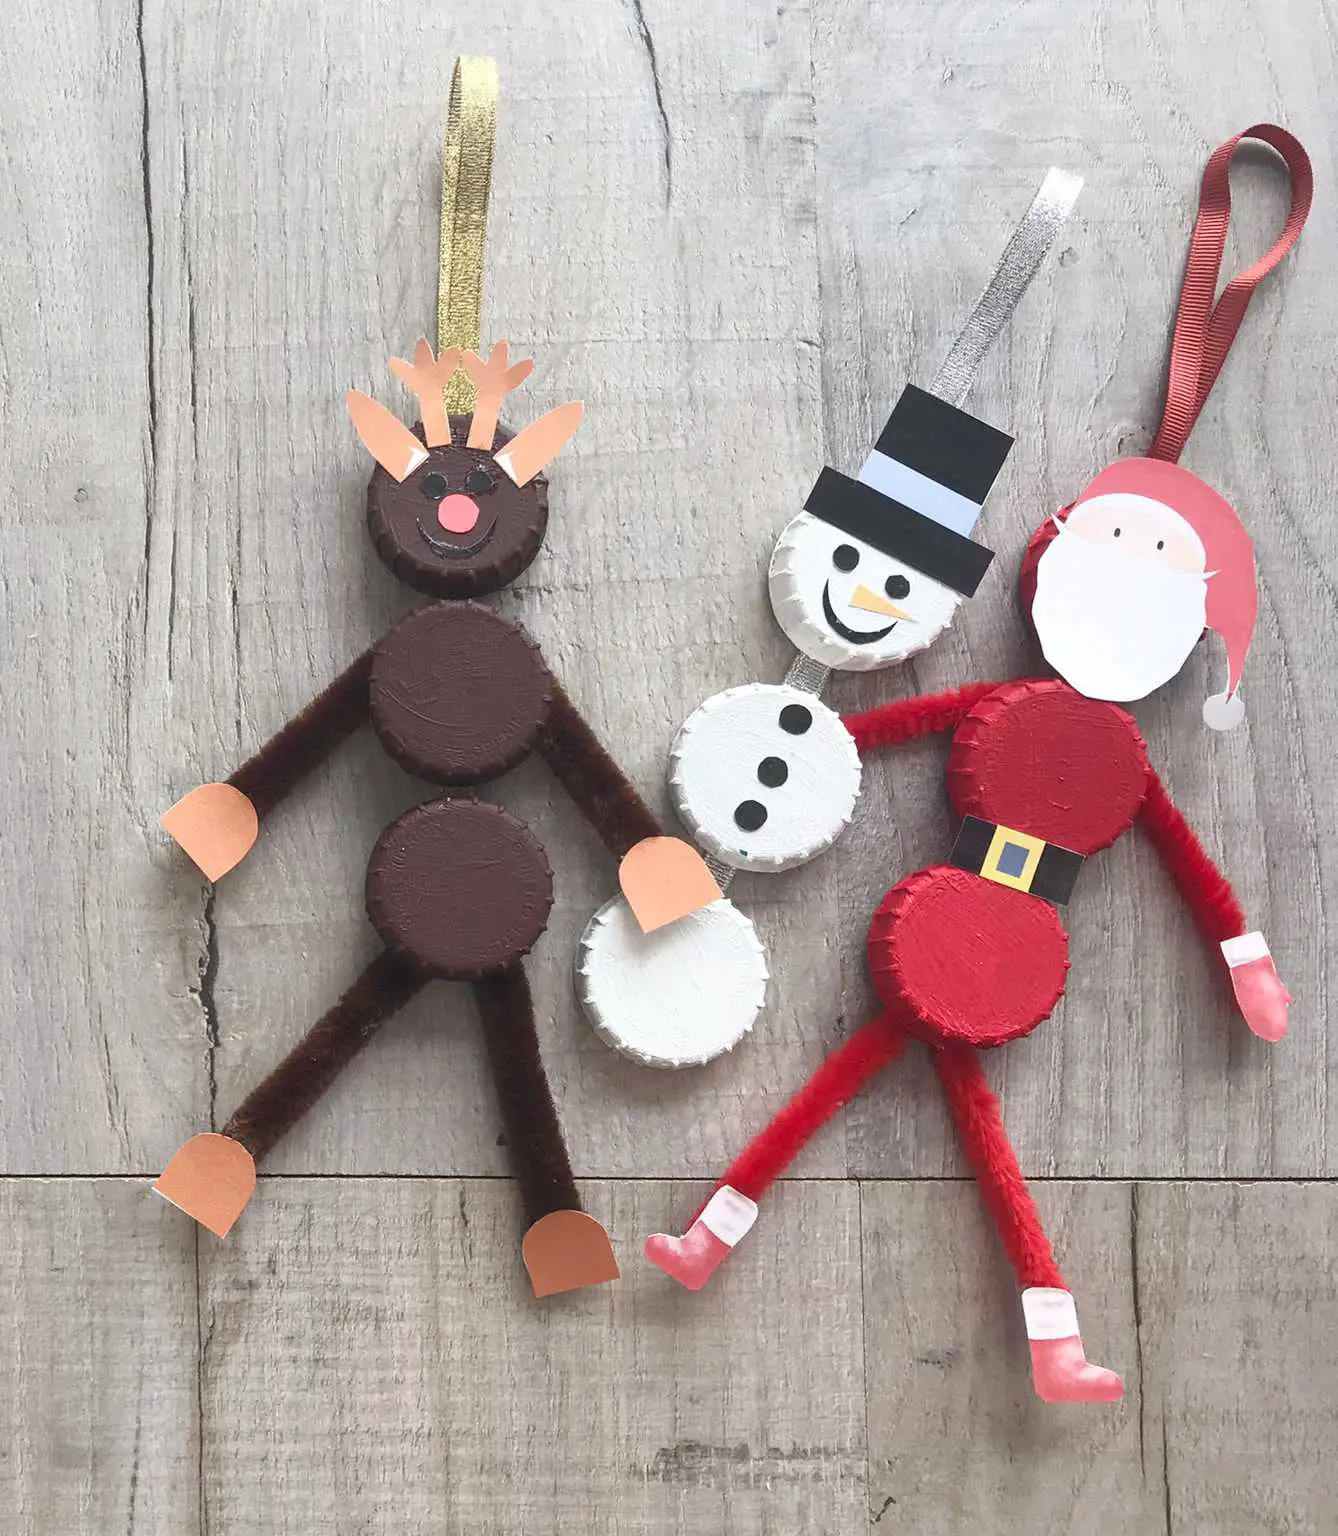
Kids love crafting and never more so than at Christmas. These adorable dangling kids Christmas tree decorations are fun to make and use up some of those old milk carton tops. You could make all 3 of them or just a snowman, Rudolph or Father Christmas whichever you prefer.
There is nothing more special than a personalised Christmas tree with decorations that have been acquired and made over the years. Why not add these to your Christmas tree decoration ideas this year?
I will show you how to make each one in turn but you will find that they are all made in a very similar way so once you can make one you can make them all!
I was inspired to make these by a few ideas that I saw on Pinterest using milk cartons and lids or old bottle tops. I love using old ‘rubbish’ to make something new.

Julie | Sum of their Stories
Gail | Purple Hues and Me
Julie | Treasures Made From Yarn
T’onna | Sew Crafty Crochet
Niki | Life as a LEO Wife
Mel | Decor Craft Design
Christine | Christine’s Crafts
Vicky | Vicky Myers Creations
Donna | Modern on Monticello
Allyson | Southern Sunflowers
Ann | The Apple Street Cottage
Jo | A Rose Tinted World
This tutorial is part of a whole team of great creative people who all have fabulous sustainable Christmas ideas for you this month. When you get to the bottom of the tutorial you will find all their great ideas and links to the tutorials.
You will need:
- 3 milk carton tops for each decoration
- Length of ribbon – approximately 12″ long and any width for each decoration
- Features Template – download here for free
- Acrylic paint (or similar)
- Multi-purpose glue
- Red pipe cleaner for Father Christmas
- Brown pipe cleaner for Rudolph
- OPTIONAL – small pompoms or buttons for added features!
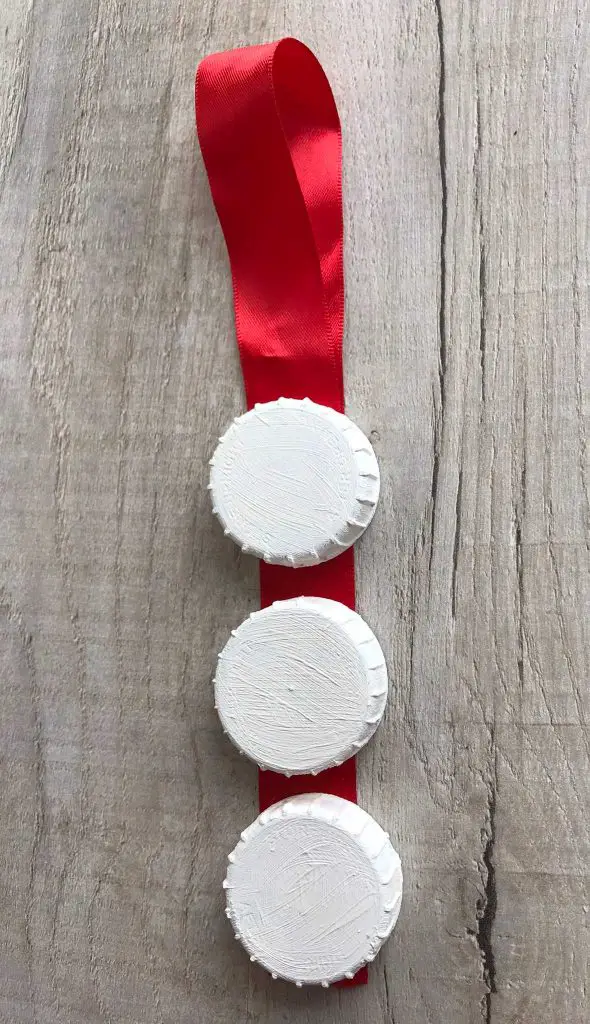
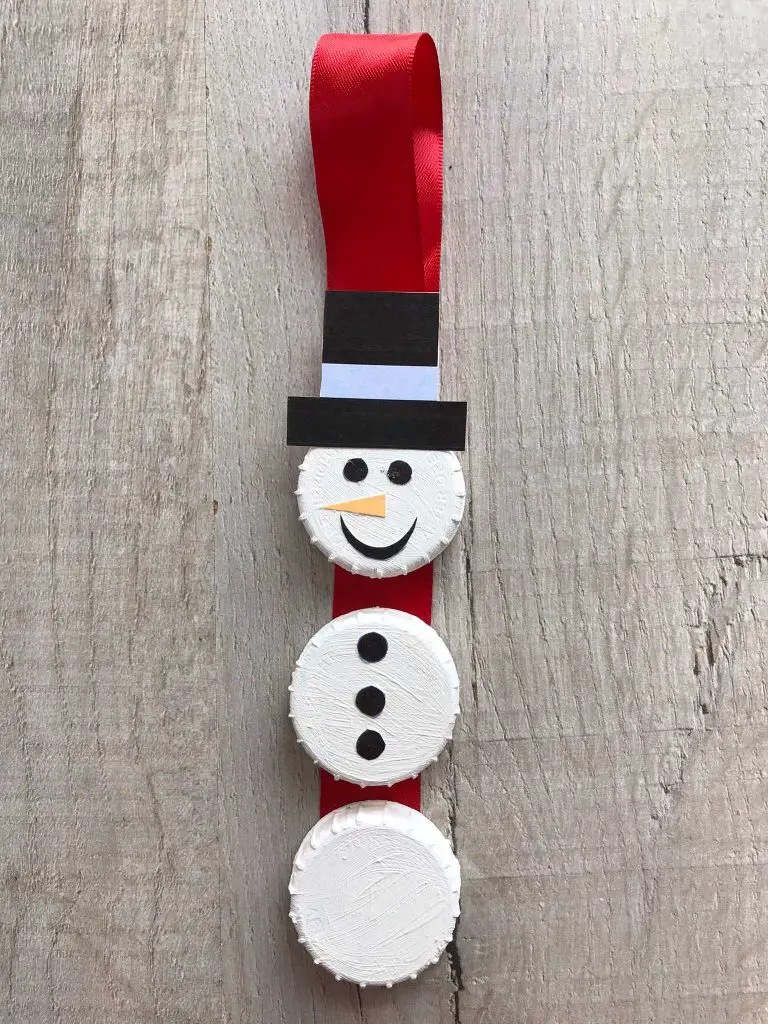
The Snowman
Take 3 milk carton tops and paint them white on both sides. I used 2 coats to make mine thoroughly white as they started out green but if you have clear tops you may only need one coat. Let them dry.
Glue them to your ribbon as shown in the picture. Then fold a loop over the top of the ribbon and glue this down to the ribbon along the back of the milk carton tops. If you have any ribbon poking out at the bottom of the snowman simply trim it up.
Now simply cut out the features from the printed template and glue them in place. If you want to add some more interest you could use buttons or pompoms instead of the template for his buttons.
You now have a completed Snowman kids Christmas tree ornament to hang on your tree.
Father Christmas
Father Christmas is very similar to make but has a few additions! As with the snowman, start by painting your milk carton tops but this time paint them red. Once they are dry glue them to your chosen ribbon just as you did for the snowman.

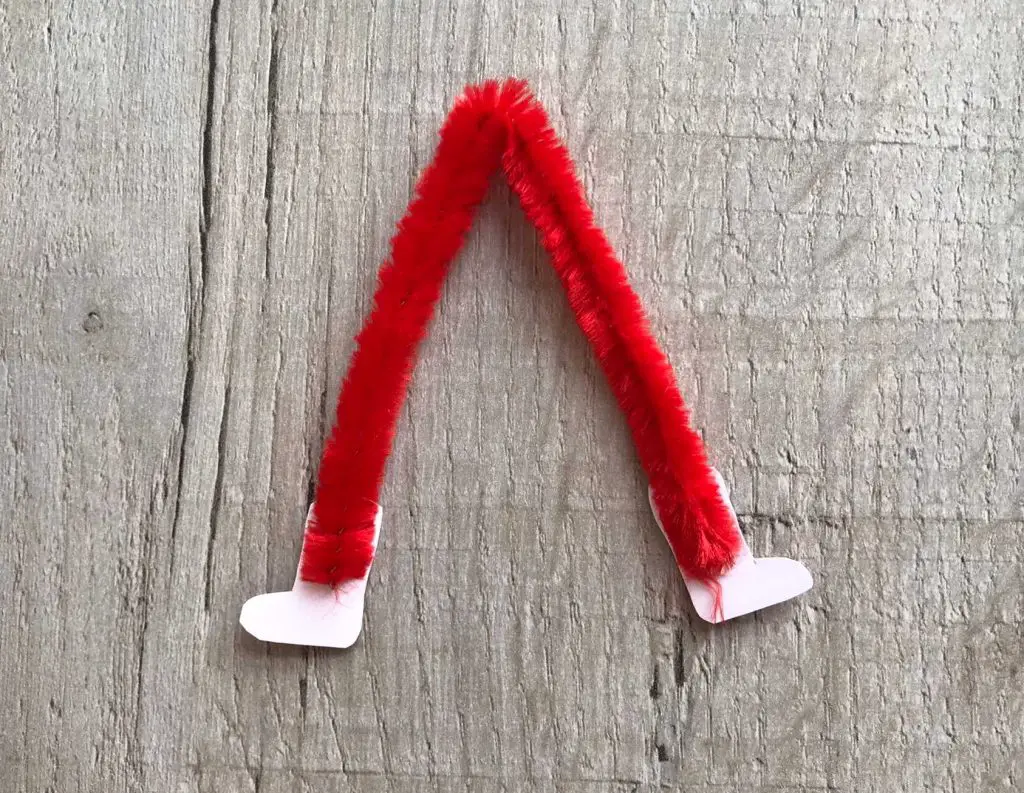
To make his arms and legs simply cut your red pipe-cleaner in half. This assumes that you are using a 12″ pipe cleaner. If yours is a different length simply make sure you have two 6″ lengths of red pipe cleaner.
Glue the boots to the end of one pipe cleaner and fold it in half to form a v shape. Then glue the hands to the ends of the other pipe cleaner and form a more gentle fold in that one.
Glue the legs to the bottom of the back of the lowest milk carton top (furthest from your loop). Glue the arms along the top of the middle milk carton tip making sure they are at a nice angle so that you are happy with them.
Then simply glue the Father Christmas face onto the top milk carton top and the belt between the bottom two milk carton tops.
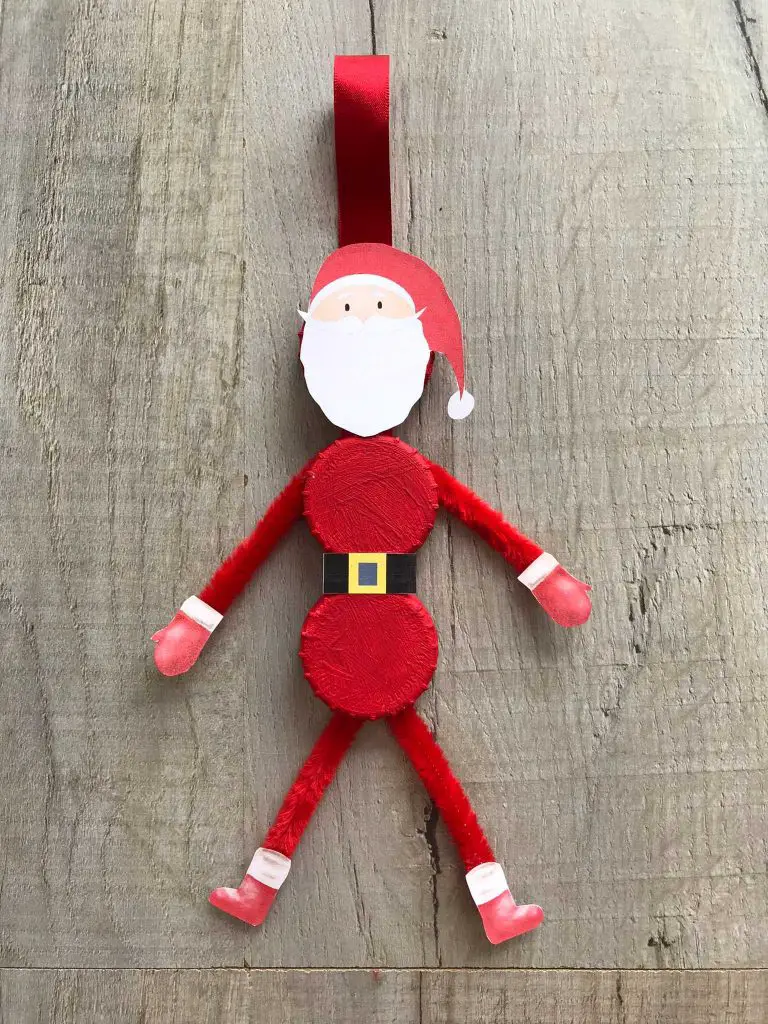
Congratulations you have completed your Father Christmas tree decoration.
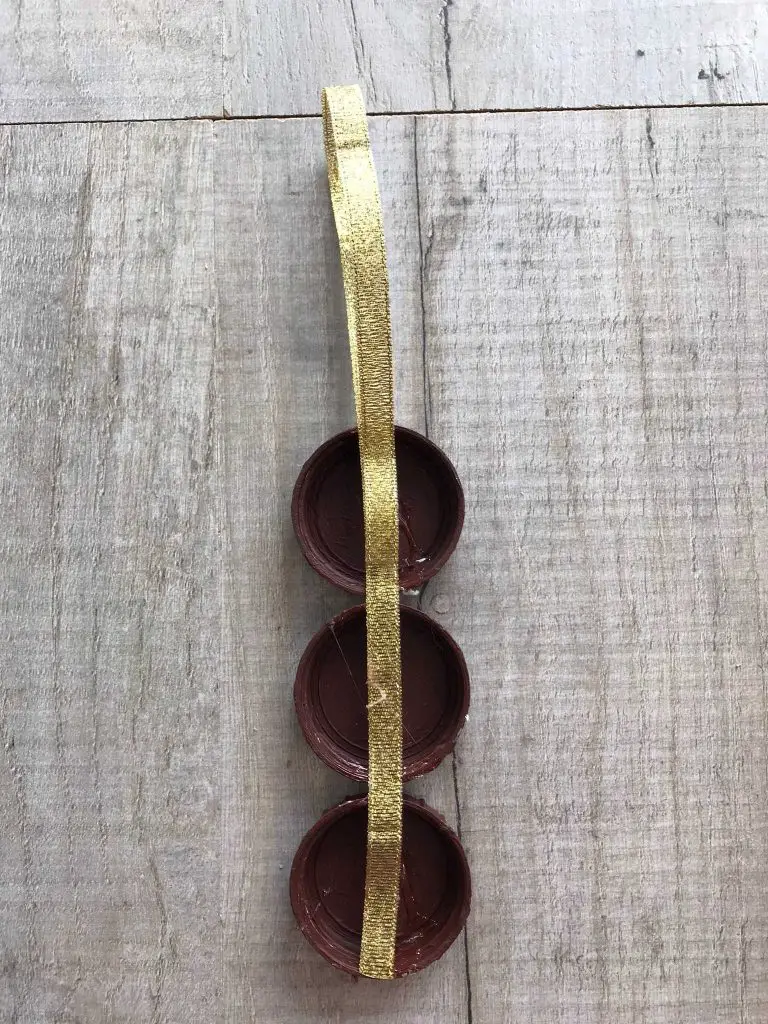
Rudolph
Finally, let’s make Rudolph! This time you need to paint your milk carton tops brown and then once they are dry glue them to your ribbon in exactly the same way as you did for the snowman.
To make Rudolph’s legs simply cut your brown pipe-cleaner in half. This assumes that you are using a 12″ pipe cleaner. If yours is a different length simply make sure you have two 6″ lengths of brown pipe cleaner.
Glue the hooves to the end of one pipe cleaner and fold it in half to form a v shape. Then glue the other 2 hooves to the ends of the other pipe cleaner and form a more gentle fold in that one.
Glue these on in exactly the same way as you did for Father Christmas with his arms and legs.
Then simply glue his antlers, ears, eyes, nose and mouth to his head. I highly recommend a small button or pompom for his bright red nose to make it really stand out.
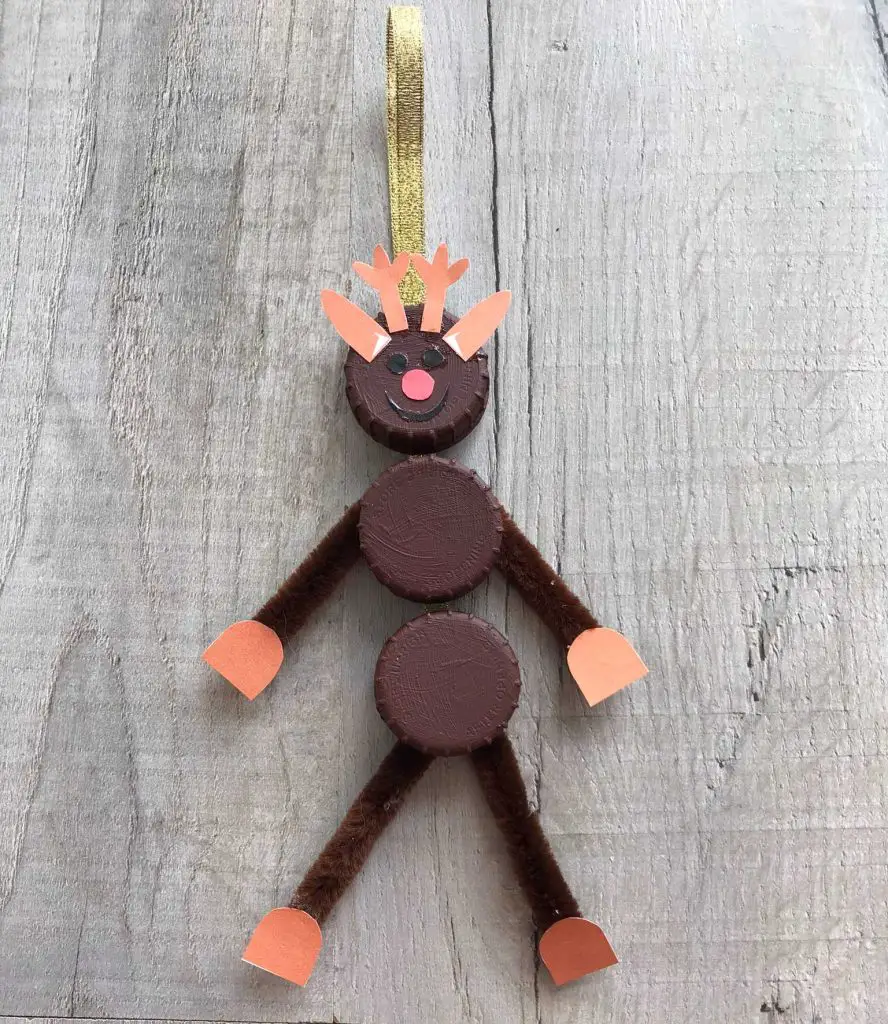
Congratulations you now have a completed Rudolph the Red Nosed Reindeer Christmas tree decoration.
I hope you have enjoyed making your kids Christmas tree decorations from old milk carton tops.
So What Now?
Why not try some of these other great projects to make your Christmas more creative.
If you are looking for even more great Christmas craft ideas then how about:
- Honeycomb Paper Decorations
- Woolly Hat Ornaments
- Folded Book Angel
- Cute Lined Christmas Stocking
- Paper Polish Star
Share with us all what you make and how it goes. Did the kids enjoy making these? How sweet do they look on the tree? Let us know in the comments below.