Stool Makeover (DIY) – a detailed tutorial
As an Amazon Associate I earn from qualifying purchases
You may well have an old stool at home that you like but is a little old and worn. Perhaps, like me, it is a piano stool but to be honest the process is similar whatever stool you have. You probably do not want to throw it away because it has sentimental value or you use it all the time. Well, why don’t you give it a makeover? Yes, you can do it without too many tools or special skills. I have never been trained and while I would not tackle a sofa I can work on small pieces and so can you!
Just think about how it will look when you finish and how you will be able to proudly tell people that you did that. You will give the stool a whole new lease of life for very little expense, certainly much less than a new one. You will also be helping the planet by improving the stool instead of sending it to landfill.
So, what are you waiting for, let’s get started:
This page contains affiliate links meaning I earn a small commission if you use those links at no cost to you. I only recommend brands I use and trust.
You will need:
Old stool
Woodstain (and brush)
Padding
Fabric
Upholstery tacks (and hammer)
Small crowbar or similar ( a screwdriver can work well)
Step 1: Remove the upholstered top
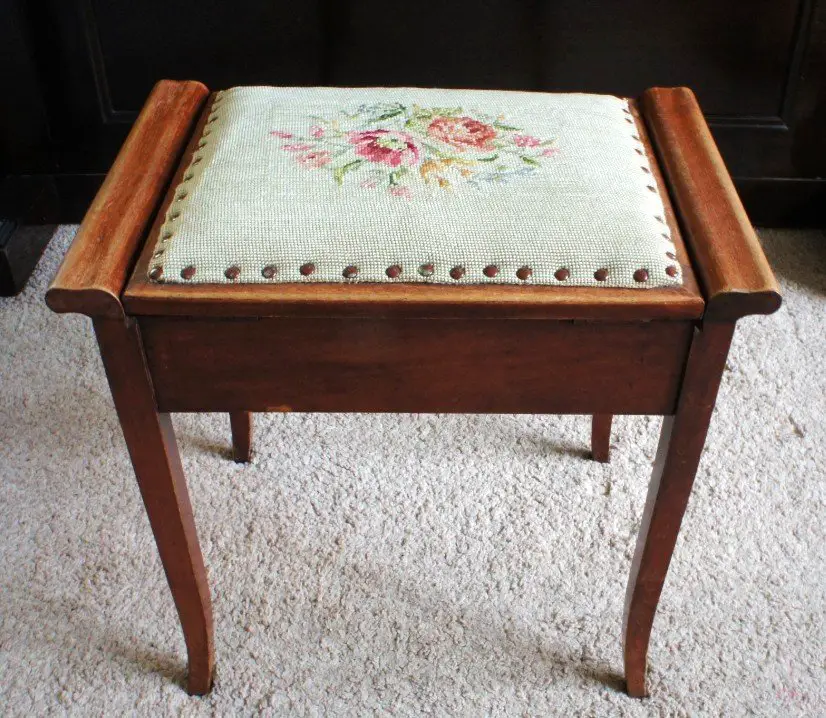
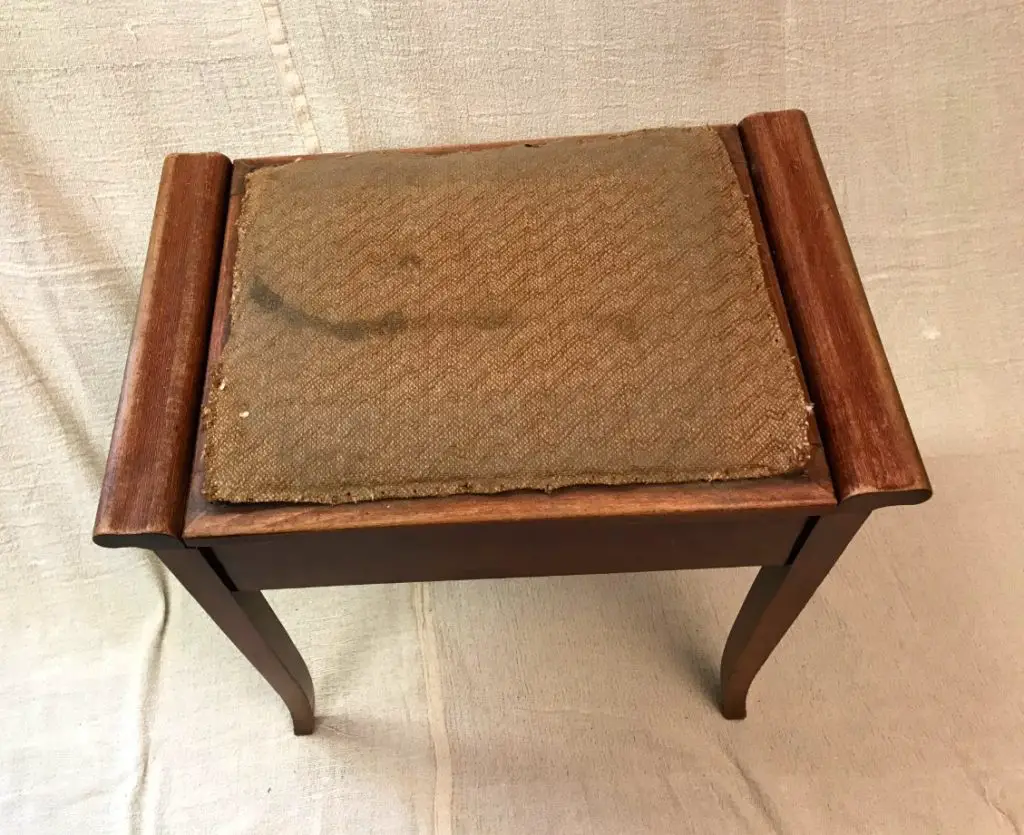
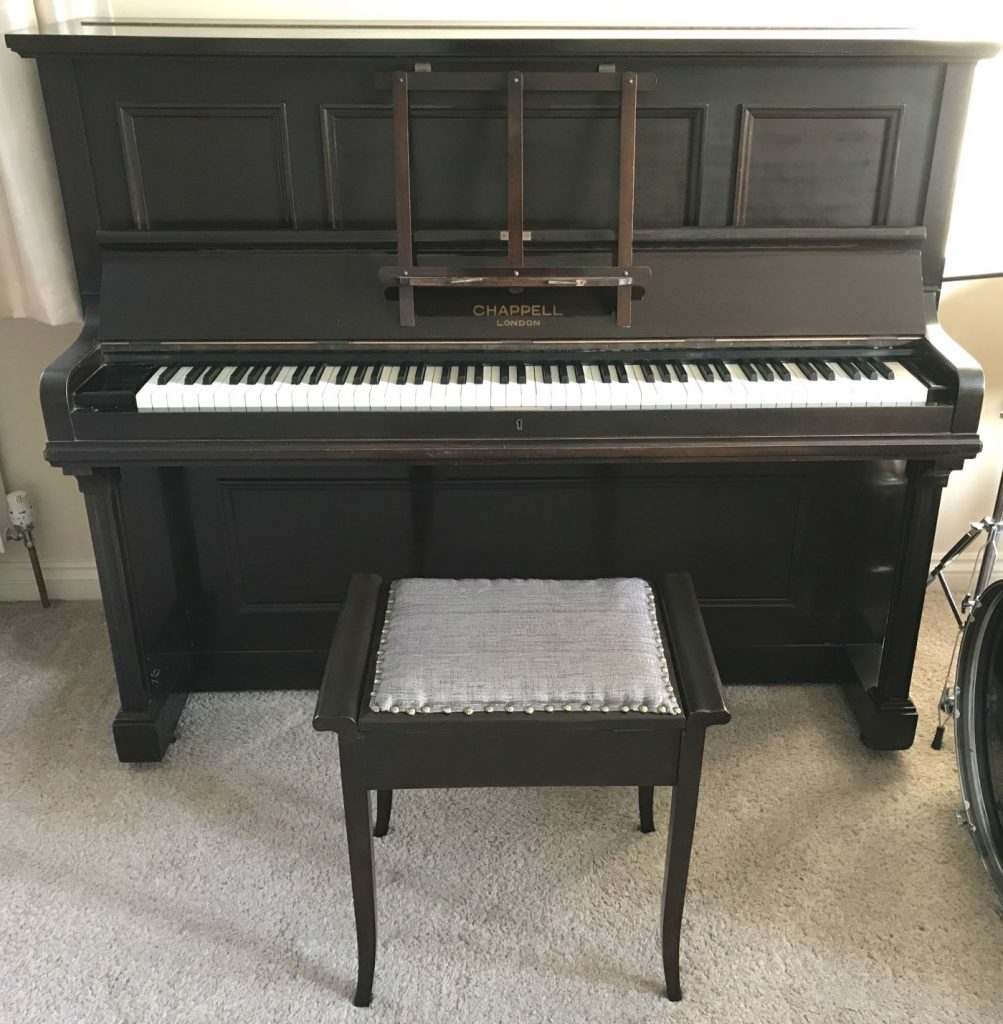
Take your old stool. This is mine that I will be using throughout this tutorial.
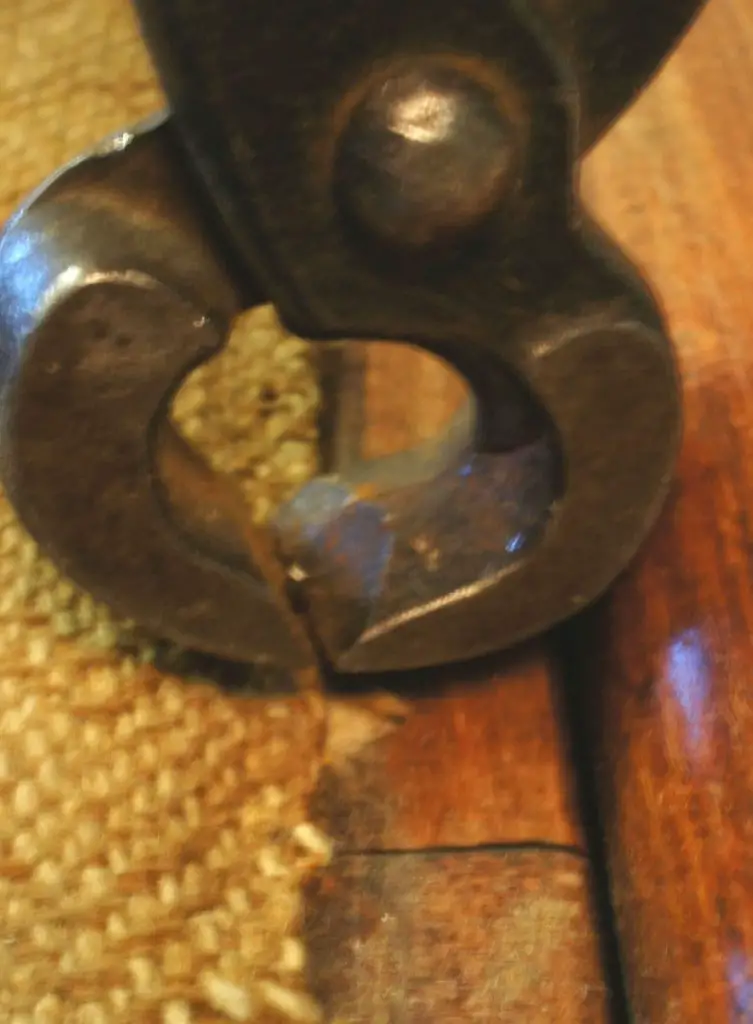
The first task is to remove the upholstered top of the stool without damaging the wood. I used a small crowbar and some hardboard. Use the crowbar to lever the upholstery tacks around the fabric out of the wood. Place hardboard or similar under the crowbar to prevent it marking the wood.
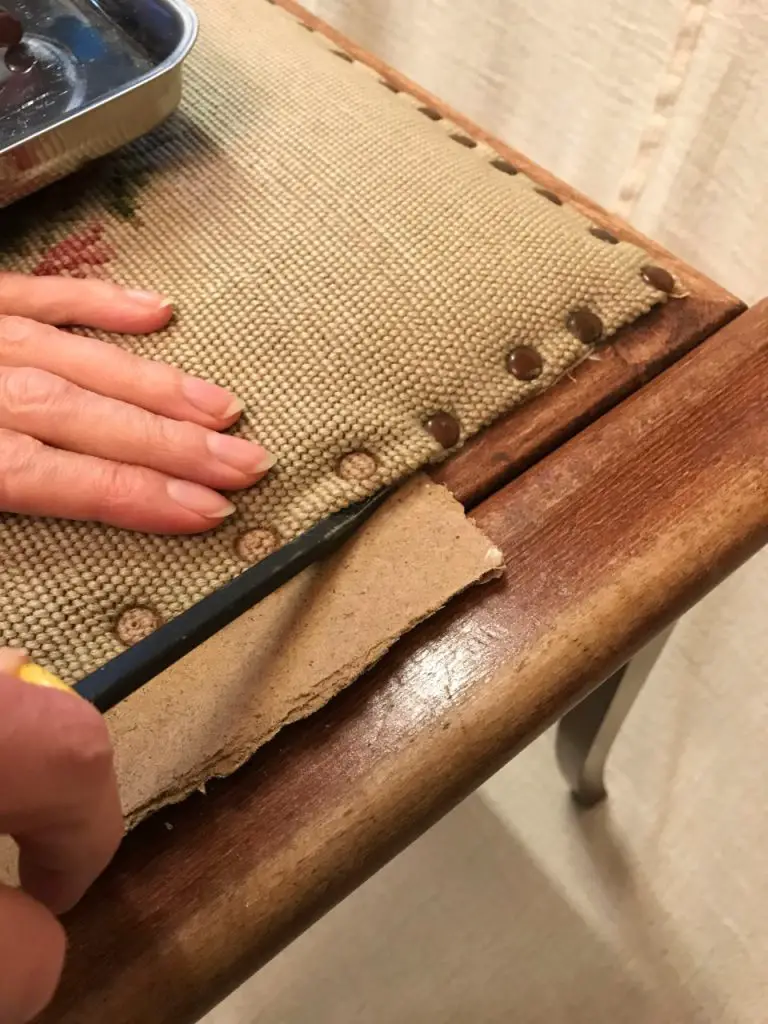
In my case, many of the tacks snapped as they were rusty. If this happens remove the pin that is left in the wood using some pincers (if you have some). Apologies for the poor photo but I hope you get the idea!
Continue until all the tacks are removed and then remove the top fabric. Keep this to act as a pattern for your new fabric later. You will now be able to see what is underneath. Usually, as in this case, there will be another fabric layer.
You now need to remove this layer. In my case it was held down with small tacks which I removed using the pincers. Underneath this will be the padding layer.
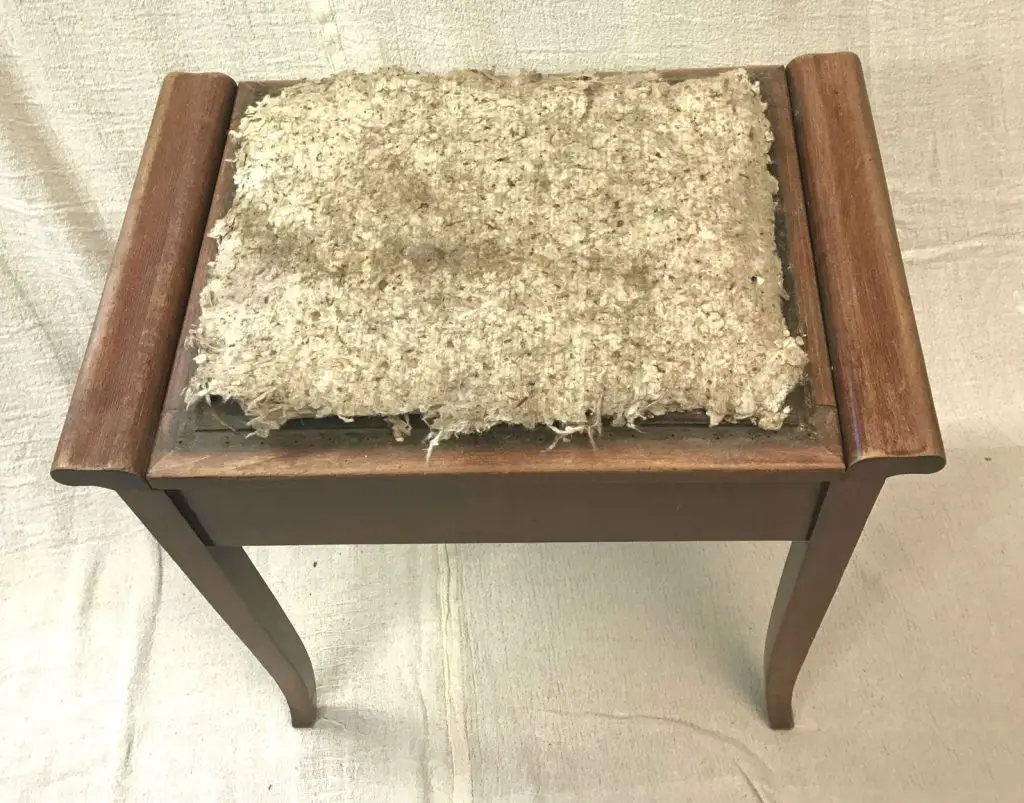
Take this layer off the stool. You should now have the padding layer, intermediate fabric and top layer. You will use all of these as patterns for your new items. In my case, I did not order my padding and intermediate fabric until I had stripped the stool down so that I could match as closely as possible.
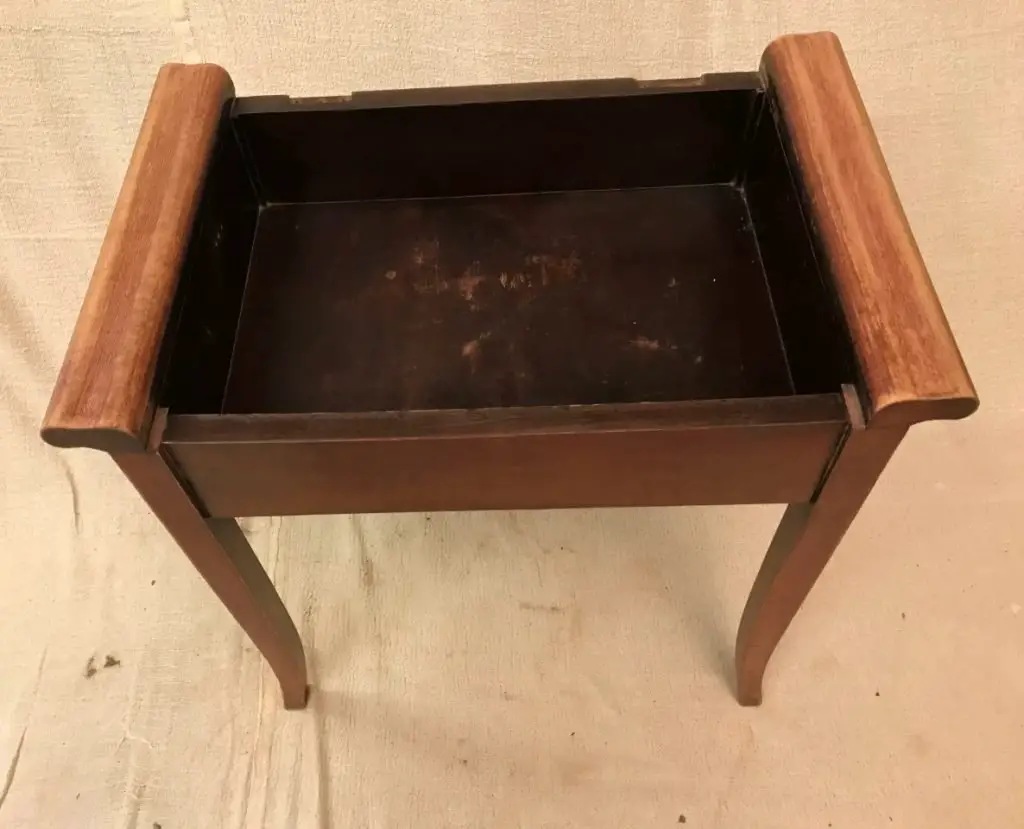
You will now be left with the wooden stool.
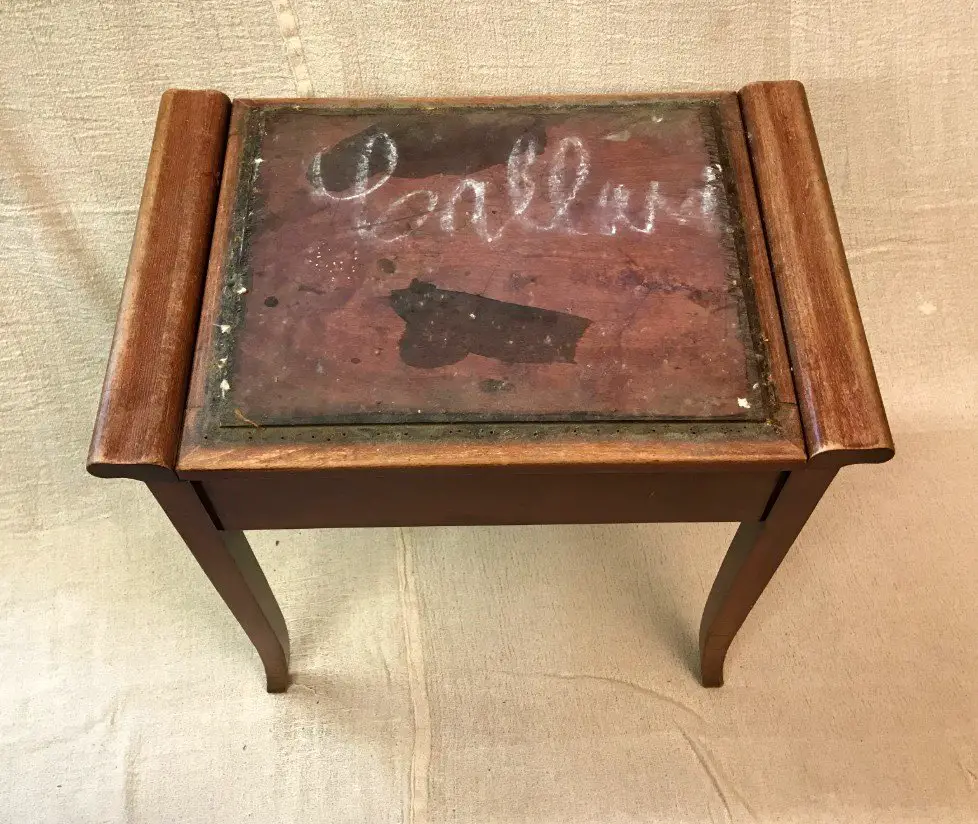
I then removed the lid of my stool because it was attached using hinges. Do not worry if you do not have a removable lid just carry on to step 2.
Step 2: Prepare the wood
Prepare the wood of your stool by sanding it down using your sandpaper. If your wood is nice and smooth already then you probably only need to do a light sand. What does that mean? Simply, it means rubbing your sandpaper over all the wood but not going over and over it lots of times.
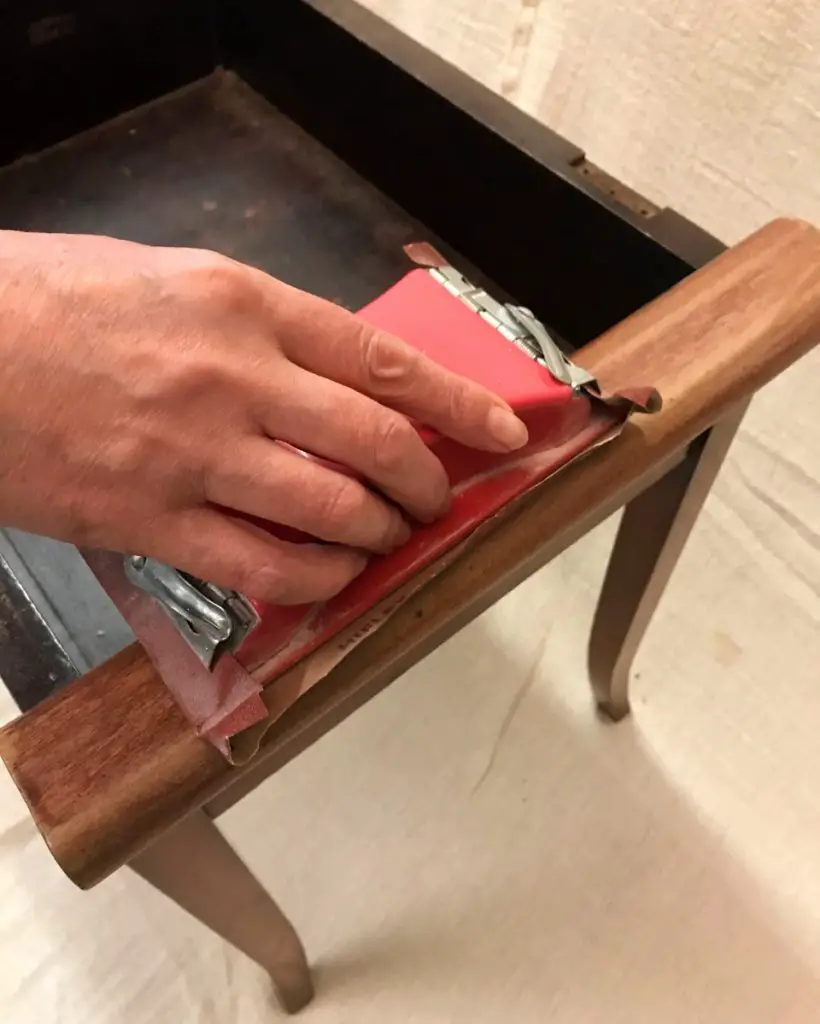
Sand the wood until you are happy with the finish. I run my hands over the wood until I like the feel of it. You want no rough edges that could catch on your hands or clothes.
Step 3: Stain the wood
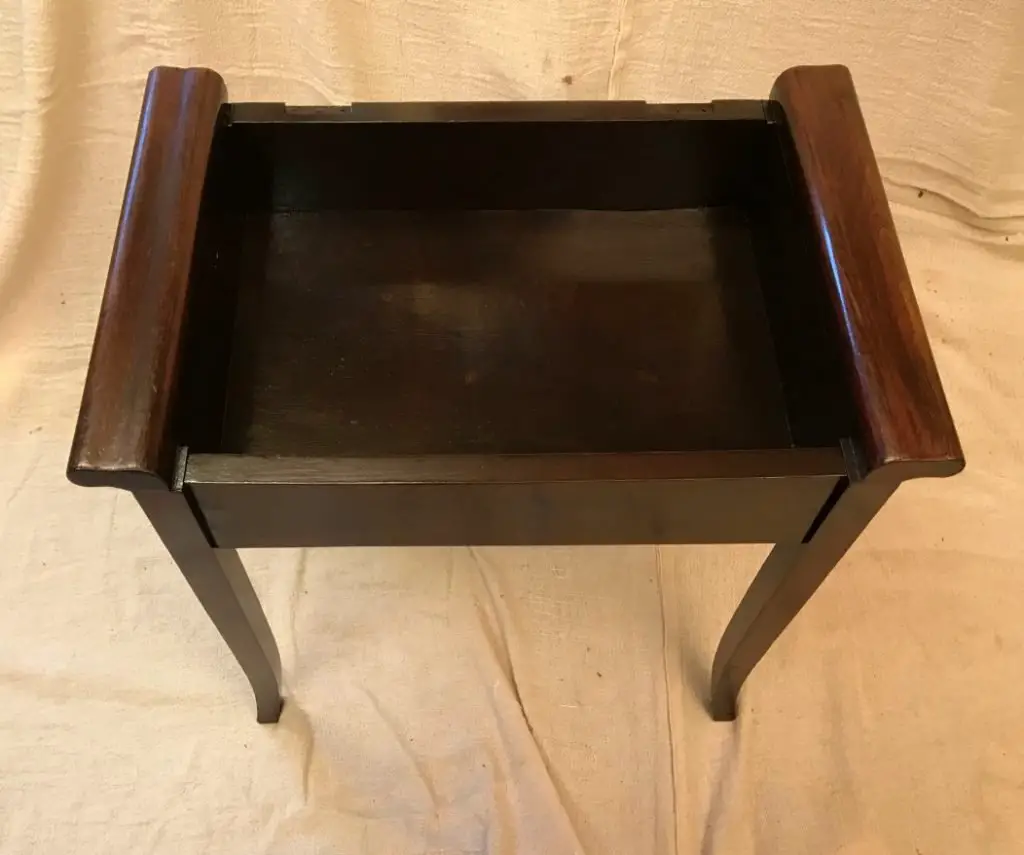
Now, I have written stain the wood because that is what I did to my stool. Staining allows you to get exactly the colour you want (in my case I wanted to match the piano) and cover blemishes. However, it is your stool so you could try varnishing or painting it or treating it with beeswax for a different finish. If you are not sure what you want research different finishes and perhaps visit your local DIY store for inspiration. However you decide to treat the wood follow all the recommendations especially regarding ventilation. I completed mine in my garage where I could just open up the large front door and effectively be outside (but without the rain).
Give the whole stool (plus lid) a coat of wood stain. Leave it to dry completely and then decide if you are happy with the finish and colour. If not, apply another coat and wait again. I needed 3 coats to get my stool to the correct colour.
My best advice here is to not try to cut corners. Be prepared to leave each coat to fully dry. In my case this was at least 24 hours. It will be worth it and you will be looking at your stool for a long time!
Step 4: Cut out your materials
Remember that you kept all the material that you took off the stool. Well, now you need it.
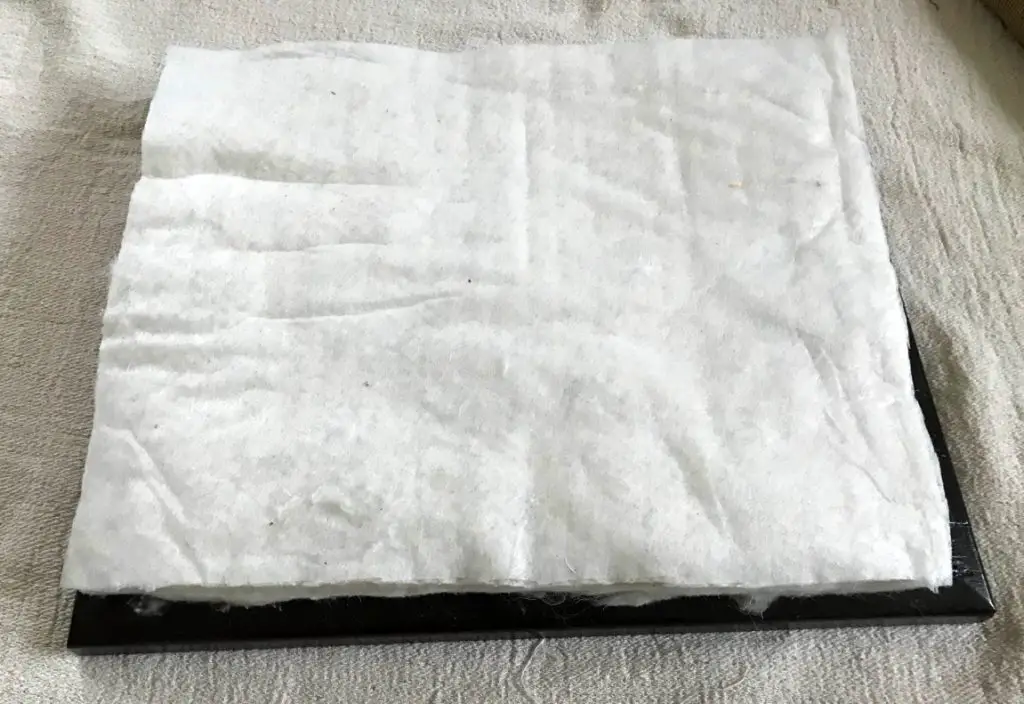
Place the old padding on top of the new wadding you have purchased. I used a nice cotton based wadding as it was the closest I could find to the original padding. You are using the old padding as a template so cut around it. Be generous, you can always trim it up if you feel that it is a bit large.
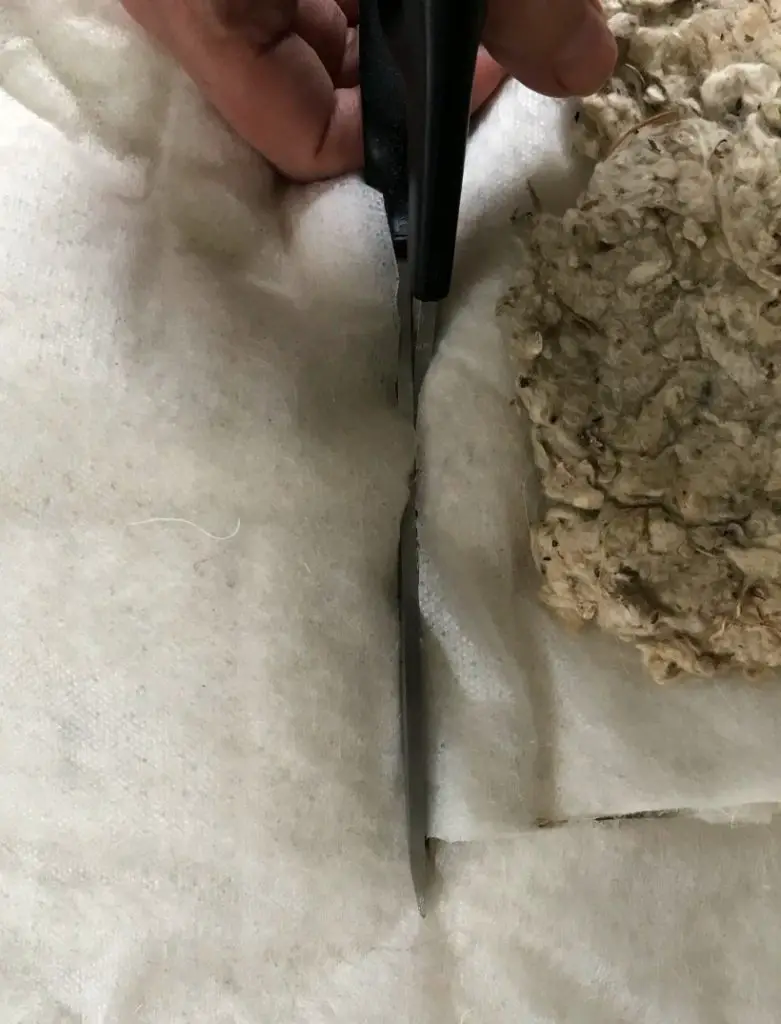
Repeat this process with the hessian and your top fabric. Again, be generous and accept that you may need to trim them down again. It is much better to trim again than have a piece that is too small.
Step 5: Upholster the stool
Place your padding piece on the top of your stool. You can glue it down if you want to or just place it there. You will be fixing it down with the hessian.
Place the hessian on top of the padding. On one side fold the hessian under and tack it down using a small tack in the centre of the edge. You will be able to see where it was tacked last time as a guide.
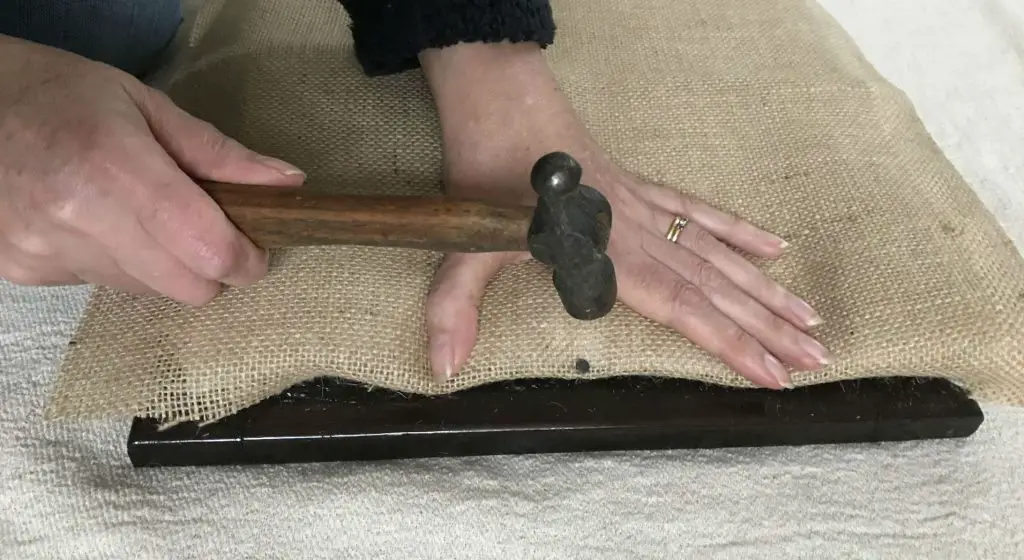
Repeat on the opposite side making sure that you pull the hessian tight. Repeat on the other two sides. Then tack along each side until the hessian and padding are secure.

Now you just need to cover this with your chosen fabric.
Place your fabric over the hessian and make sure your fabric piece is large enough. It should be if you cut generously! If you think it is a little too big then trim it now.
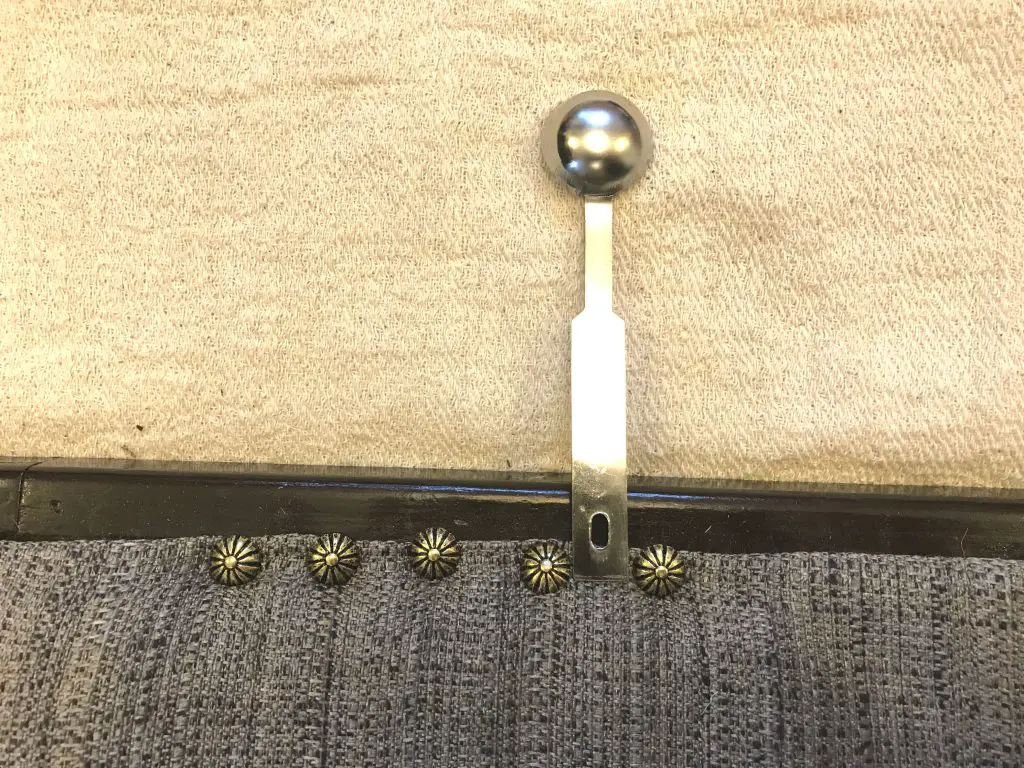
You will effectively repeat the process that you undertook with the hessian but this time all your tacks will be on show. I chose decorative tacks and to leave a space between them. You can place your tacks touching each other or use a strip that you only tack down every couple of inches.
As before, fold a hem along one side and tack it down in the centre of one side to cover the hessian. Repeat on the opposite side pulling the fabric tight.

Repeat on the other two sides. Now you need to continue along each side towards the corners ensuring you keep the fabric taut. If you want a space between your tacks choose something that is the correct size. I used a spoon handle! Place it next to the tack that you have already done and attach the next tack. If the stool has been upholstered more than once then there will already be a lot of holes and your tacks may not always go where you want them to. Do not worry, persevere until you are happy with them. Repeat until you are nearly at the corners.
I did not use a ruler to get mine exactly in a straight line. When I am looking at it closely I regret it but to be honest when it is in the room being used I do not notice that they are not perfect.
At the corners fold the fabric under neatly. If it is too bulky (as it was in my case) then simply fold the corner out and trim some off. Re-fold the corner neatly and tack it in place.
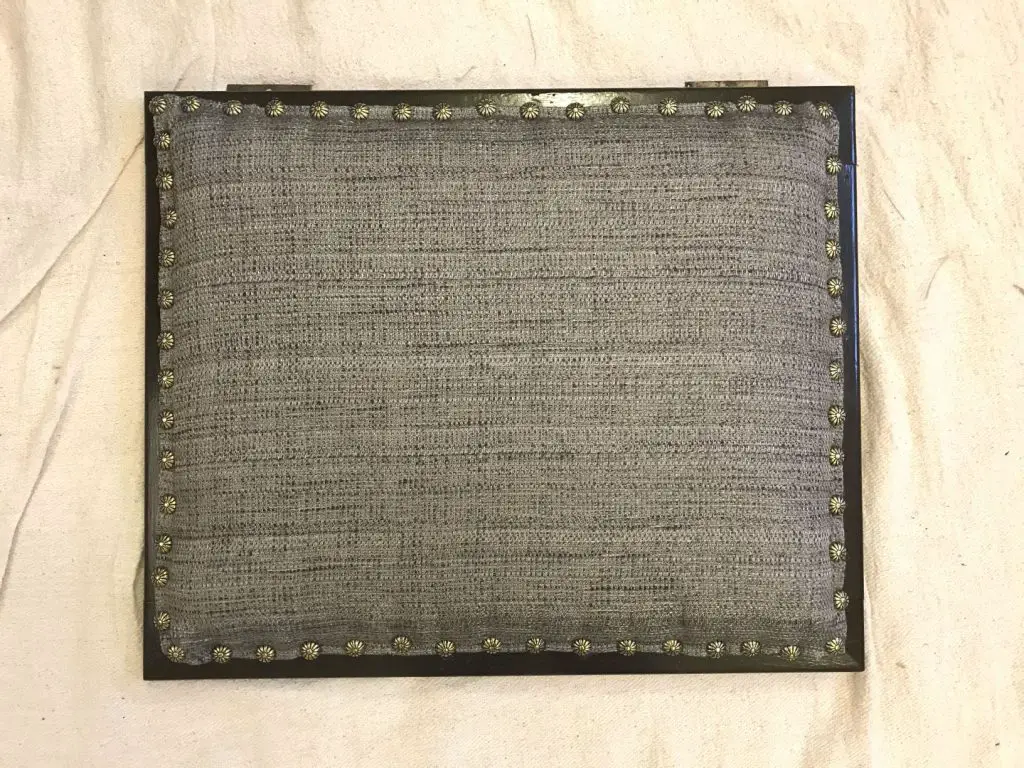
You should now have your stool neatly upholstered in your chosen fabric.
If your lid was removed then now is the time to re-attach it.
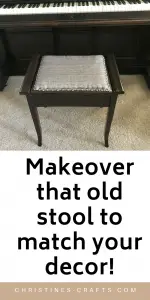
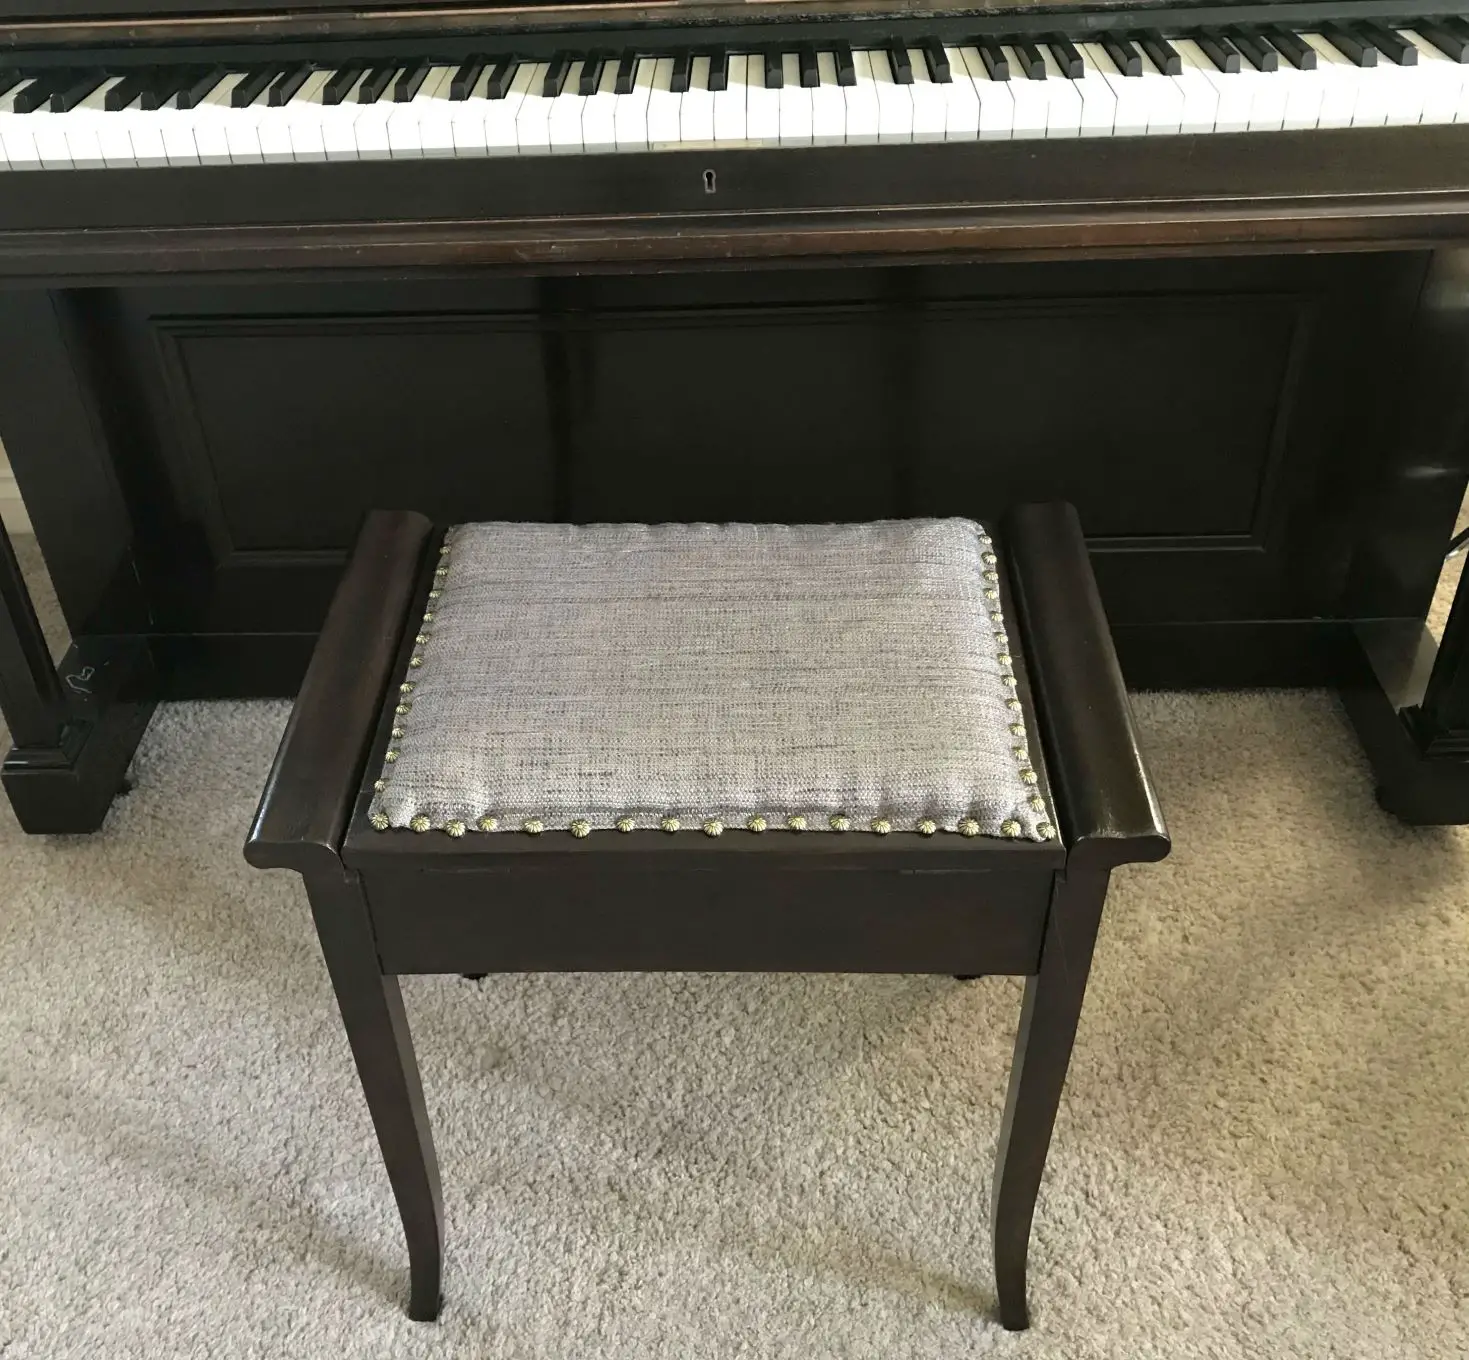
You are finished. Stand back and enjoy all your hard work. You now have a stool that looks brand new and fits your location perfectly. As you can see, I got mine to match the piano beautifully and I am really pleased with it. So is my son, the piano player!
If you enjoy making over your home then take a look at some of my other tutorials that will help you:
Make a doorstop to co-ordinate with your decor
Use the subscriber form on the page or the pop up to join our newsletter and hear about lots of great craft ideas and inspiration every week.
You can also find me on Pinterest as Christine’s Crafts for even more inspiration. Remember to pin this article so that you can find it later.