How to Sew Satin Stitch: A Step-by-Step Beginner’s Guide
As an Amazon Associate I earn from qualifying purchases
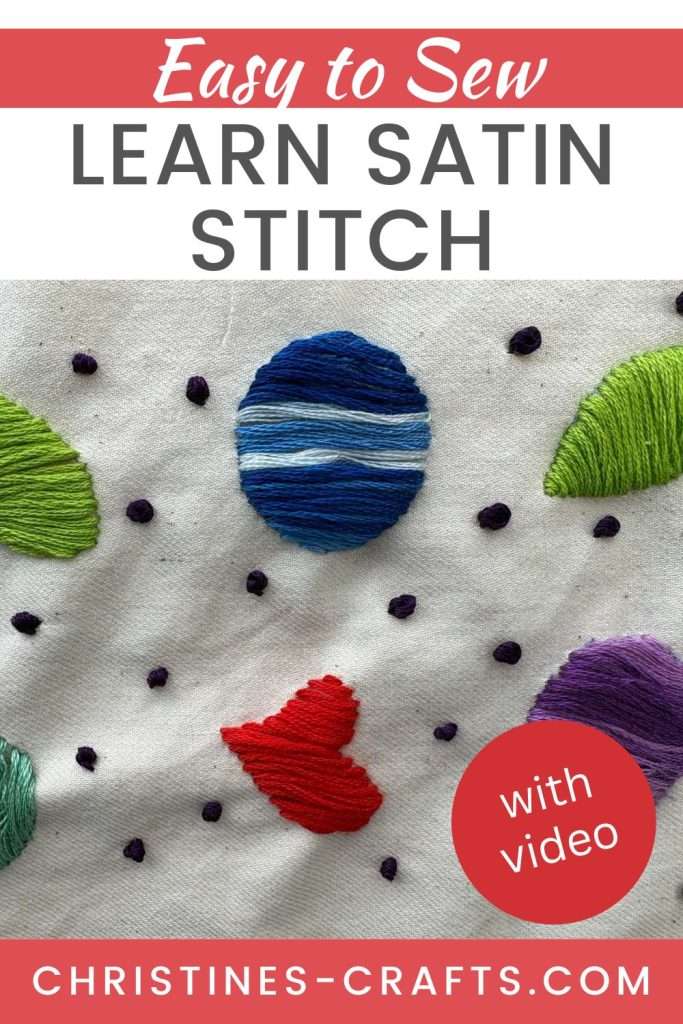
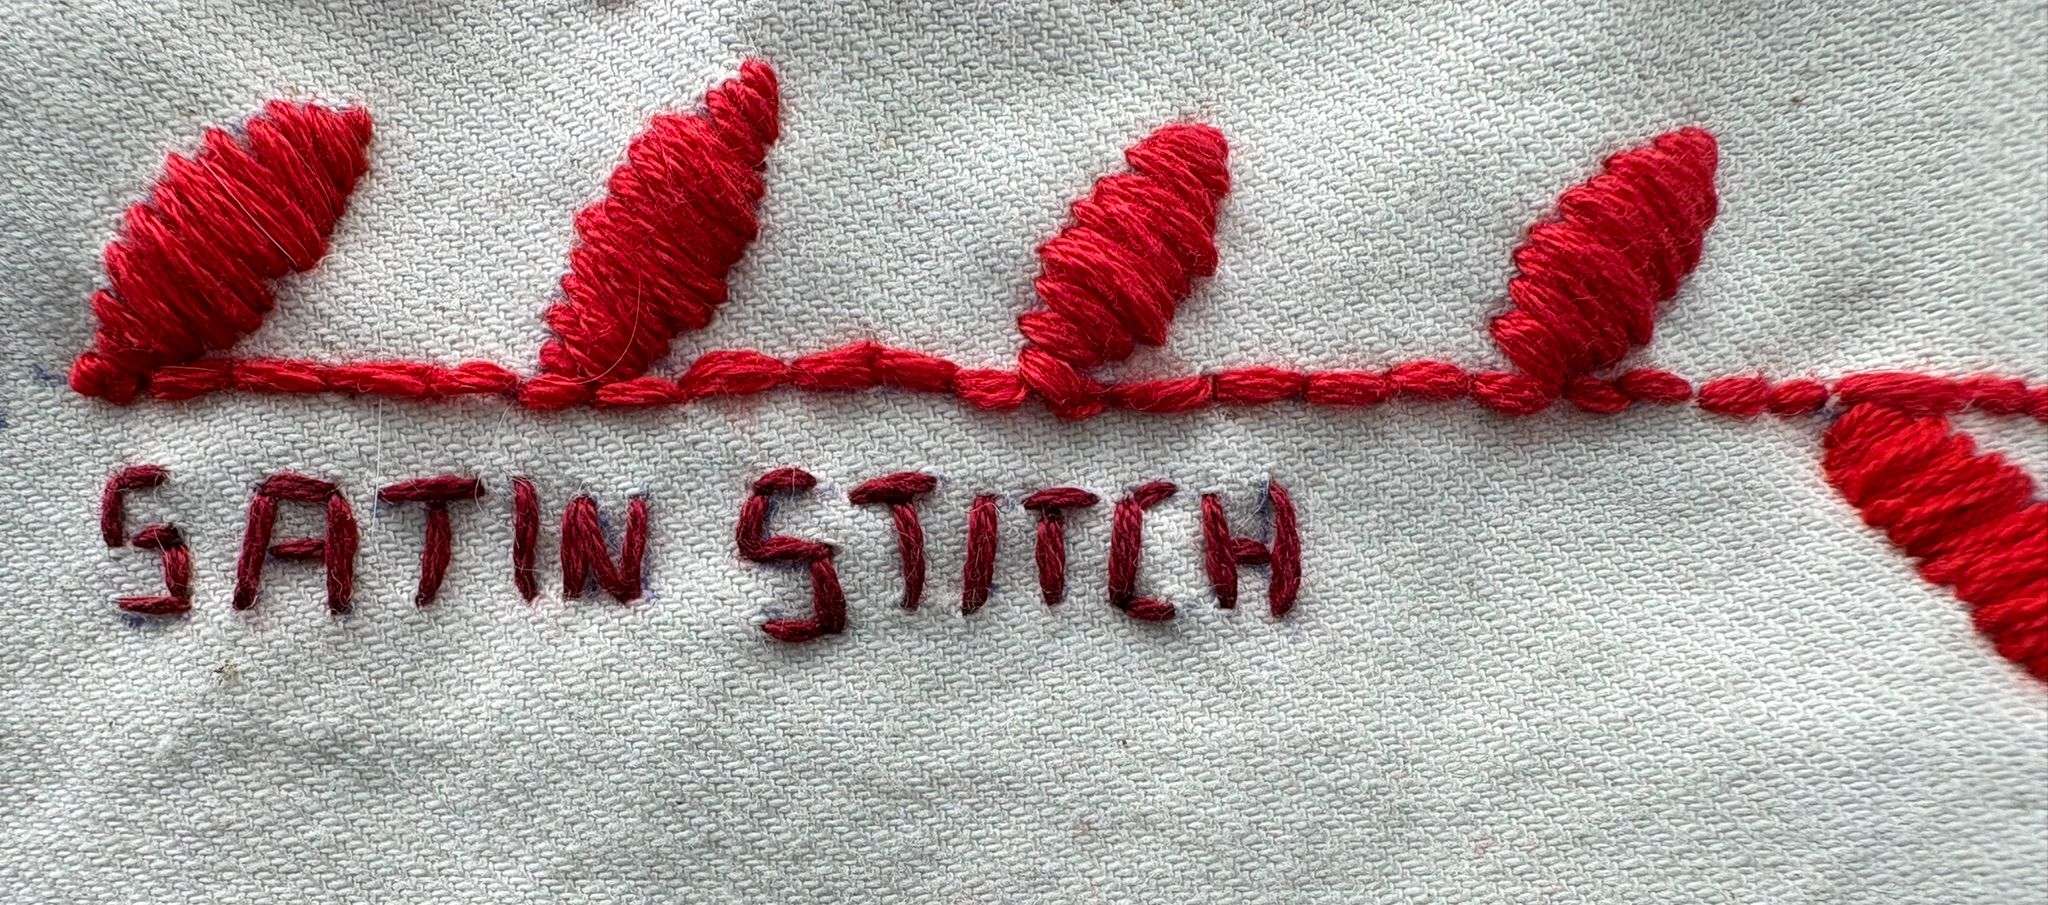
Satin stitch is a fabulous stitch for filling areas in on your projects. Great examples of this are leaves, trees, the sun, balls, etc
I love using it in my slow stitching projects like this slow stitching book. It may be simple but it is very useful. There are some easy ways to make sure you get good results too!
This page contains affiliate links meaning I earn a little commission if you use those links at no cost to you. I only recommend brands I use and trust.
You will need:
- Fabric (whatever you have)
- Needle (eye large enough for your thread)
- Thread (embroidery thread works really well)
- Scissors


Video Tutorial for Satin Stitch
This video is also available on my YouTube channel.
Top Tips
- If you struggle to get nice clean edges to your work you can run a small back stitch around the edge of your shape and then sew directly over that.
- Tension is really important. Keep your thread taut enough to lay flat against the fabric, but don’t pull so tight that it puckers the material. Using an embroidery hoop stretched drum-tight makes a huge difference here!
- For the smoothest, silkiest finish, use 1 or 2 strands of embroidery floss. Higher strand counts tend to twist and create a lumpier, uneven surface.
- Keep Stitches Relatively Short. Satin stitch works best on smaller shapes (under 1.5 cm or ~1/2 inch wide). For larger areas, long stitches snag easily so use a different technique.
- As you stitch, your thread naturally twists. Periodically drop your needle and let it dangle freely for a second to let the thread unwind so the strands lay completely flat against the fabric.
- A great idea for leaves is to run a back stitch or stem stitch up the centre and then use satin stitch out to the edges (show in pictures below)
Step-by-Step Stem Stitch Tutorial
Step 1: Prepare your Fabric & Thread
Choose your fabric and cut it to size. If you want a specific design you can draw it on your fabric with a pencil or a heat erasable pen. Generally for satin stitch, you will have a drawn shape to fill and that is how I am going to show you it.
Thread your needle with embroidery floss (you can use anywhere from 1 to 6 strands depending on the thickness you desire) and tie a knot at the end to prevent the thread from pulling through the fabric.
I often use the whole embroidery thread but you can separate it if you are looking for a finer finish.
Step 2: Break up the Shape
Look at your shape and decide which way you would like your stitches to run. I am doing a leaf and I have decided to run the threads across the leaf.
Start at your beginning point by bringing the needle up from the back of the fabric to the front. You need to do this just outside your shape. To be honest, it doesn’t really matter where on your shape you start as we are going to divide the shape up.
Take your needle back down directly opposite where you came up, just outside the shape. Repeat this in a few locations along the length of your shape.
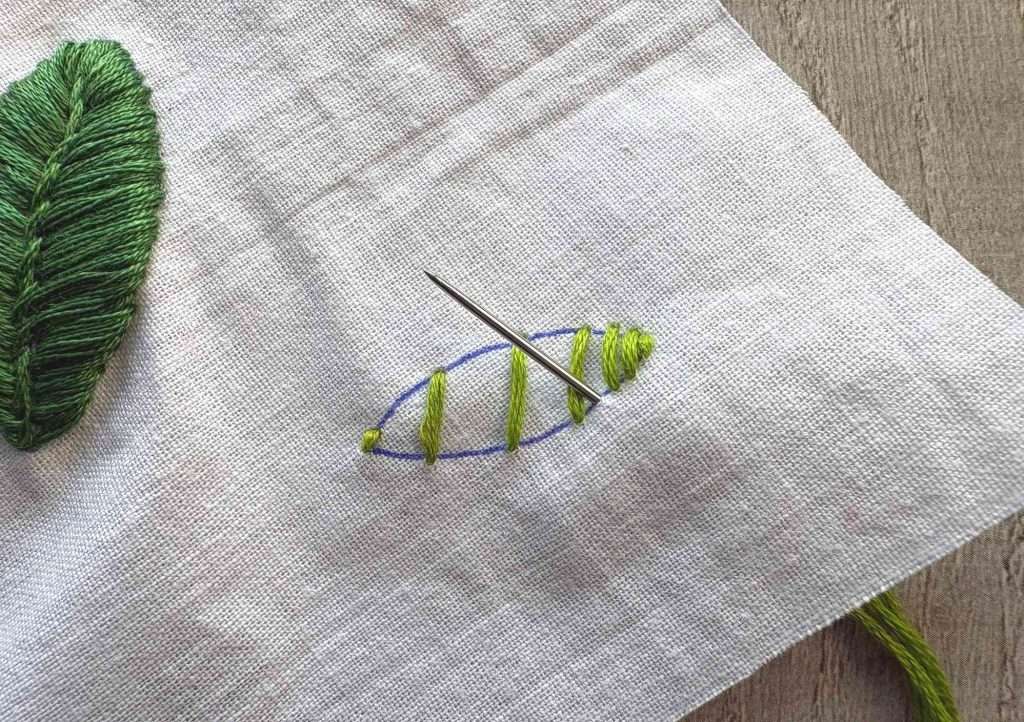
Step 3: Fill in the gaps
Now you will have a whole set of areas to fill. Personally, I always work systematically from one end to the other of the shape. But, in each gap I do a stitch in the middle of the gap, then choose one of the smaller gaps I have created and do a stitch in the centre of that. Then keep repeating that until the gap is filled.
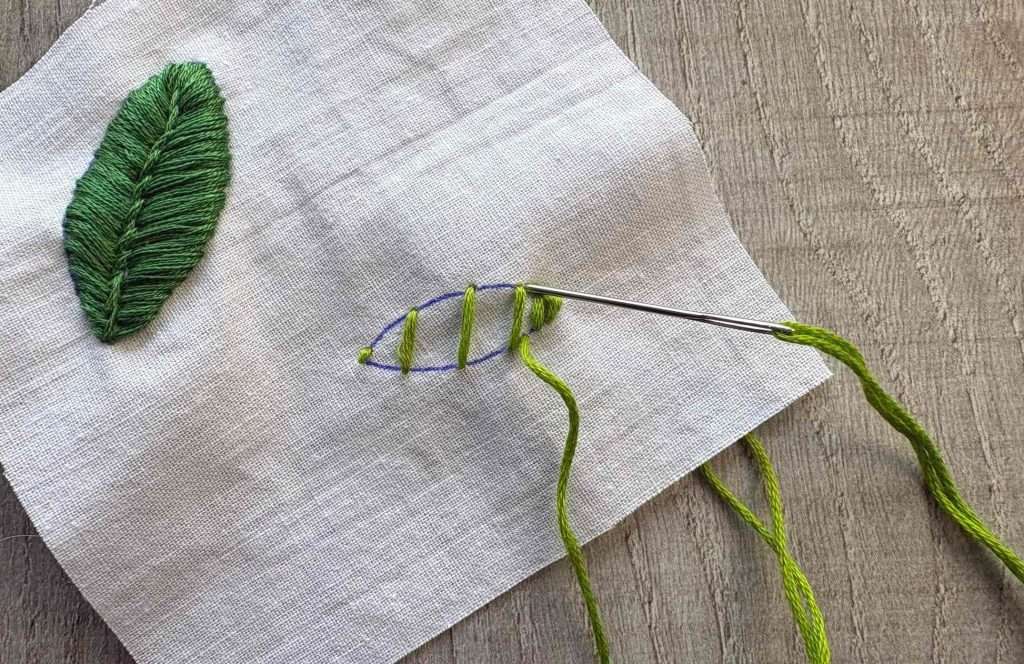
Step 4: Fill the Whole Shape
Then repeat this process along your whole shape. This should result in a uniformly filled shape that looks great. If you are having any difficulties refer back to the Top Tips before this tutorial.
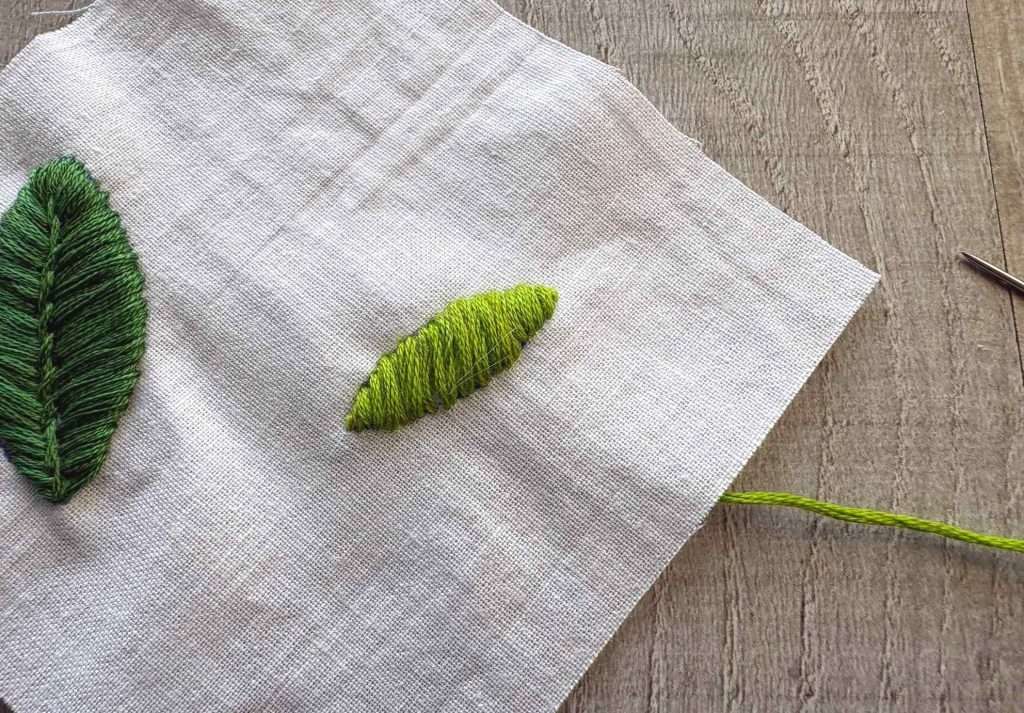
Step 5:Fasten off your Thread
Once you are complete simply pass your needle to the back of your work and then pass it though the back of a couple of stitches and pass your needle through loop that is formed to make a small knot. You can also pass the needle through a few more stitches before cutting your thread.
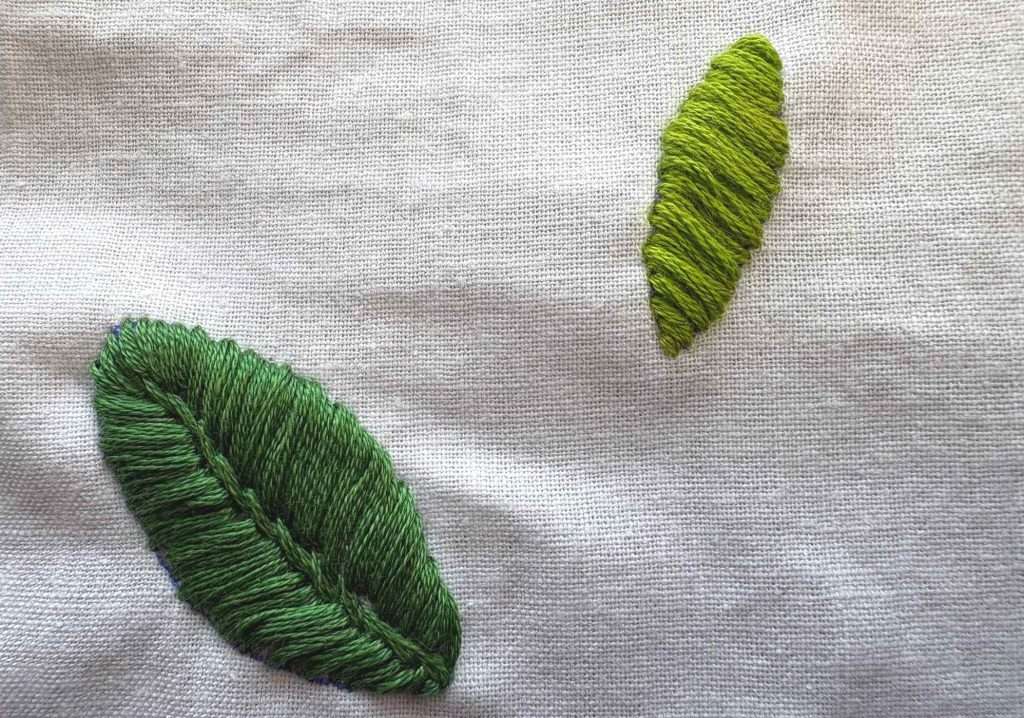
Project Ideas to Practice your Stem Stitch
Once you’ve mastered the basic technique, put your new skills to work with these beginner-friendly projects.
- Use satin stitch to fill in elegant initials, dates, or small crests on cloth napkins, handkerchiefs, or pillowcases.
- It’s the ultimate stitch for filling in smooth flower petals, lush leaves, and ripe berries in a decorative embroidery hoop. You can then hang the hoop when it is completed to show off your work.
- Perfect for stitching bold, vibrant details—like tiny stars, fruits, or geometric shapes—onto jacket collars, pocket corners, or jean cuffs.
- Use satin stitch to fill in solid block shapes to create colorful felt keychains, needle cases, or iron-on patches.
Embrace your hand stitching
Once you start hand stitching you will fall in love with it. It is so relaxing and creative. Another easy stitch to learn is the stem stitch which you can learn here. Or how about chain stitch for cute loops?
Also, here are some projects that you can use your hand sewing for on this website.
Create your own slow stitching journal and see your sewing journey as you develop or use it to record your life or moods.
You can create yo-yo flowers to add to any other projects you may have. They look great in stitching journals, on bags, clothes, etc.
Use up fabric scraps top create pretty leaf brooches. You can add any stitches you like to these and they make lovely gifts.
Or, how about trying your hand at Cathedral Window Patchwork which can look stunning on a large or small scale.
Whatever you decide to sew, pin this guide to your favourite board on Pinterest so that you can find it again.