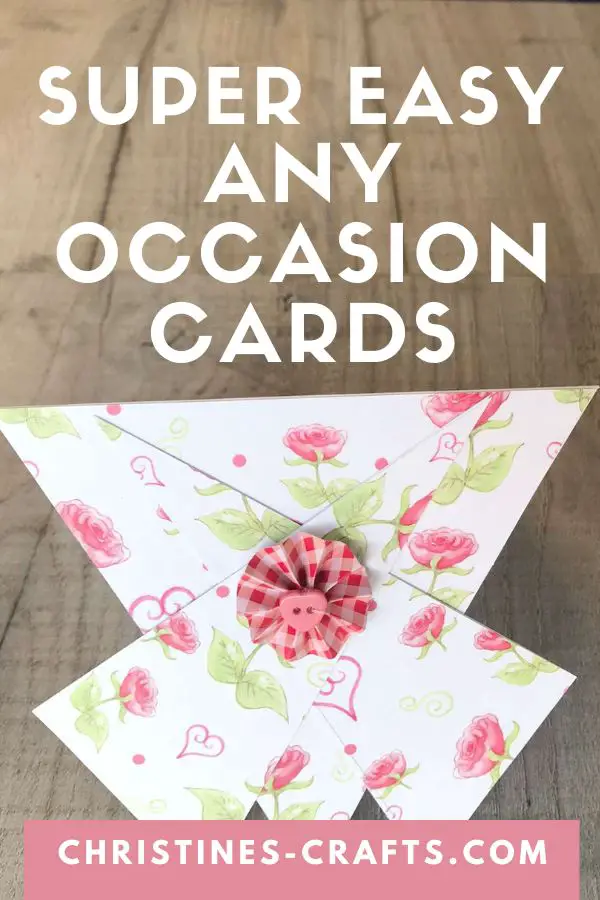
Are You Ready to Make an Amazing DIY Card in Minutes?
As an Amazon Associate I earn from qualifying purchases
Are you looking for ideas for making greeting cards but find that many of them require you to have loads of supplies and often expensive cutting equipment? Well, how about making a stunning DIY card in minutes with basic supplies?
They do not look like DIY cards but they are really simple to make. Once you make one you will not want to stop! Also, they are great for all occasions as you get to choose what to stick on the card and what to write in it. How about one of these cards for Friendship Day or a birthday?
This page contains affiliate links meaning I earn a little commission if you use those links at no cost to you. I only recommend brands I use and trust.
So, let’s get started with some simple card making.
You will need:
- Blank Card (or card folded in half)
- Decorative Paper
- Scissors (or cutting wheel and board)
- Glue
- Any Embellishments you like


Attach Paper to Card Front
Select your paper that matches your occasion and cut it down to the size of the front of your card. If you like, you could even cut it a little smaller and leave a white gap around the edge for a slightly different effect.
Glue it in place making sure that you cover the whole sheet with glue.
Cut the Card Front
Next you need to mark the card front at the bottom edge half way along. NOTE: it is important that you card top is the folded edge of the card. You are marking the opposite edge with a small pencil mark (the side that opens).
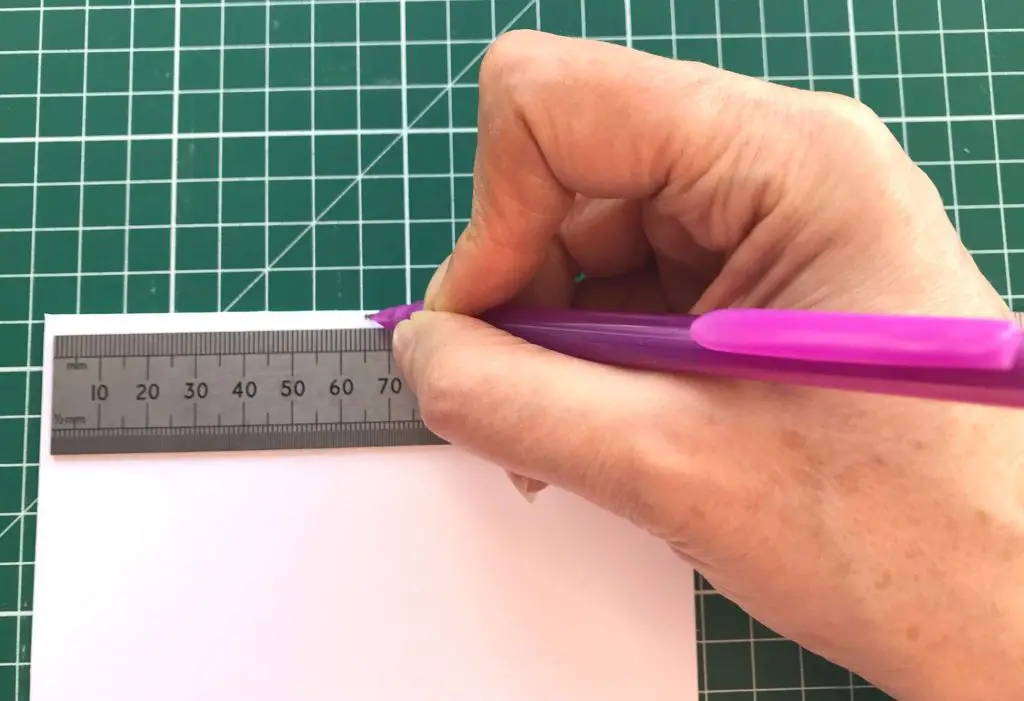
Then cut from the top right edge of your card to the centre point on the bottom edge that you marked. Repeat for the left hand side. You can draw the lines in and then cut along them with scissors or simply cut along the ruler with your cutting wheel.
NOTE: you are only cutting the front of the card.
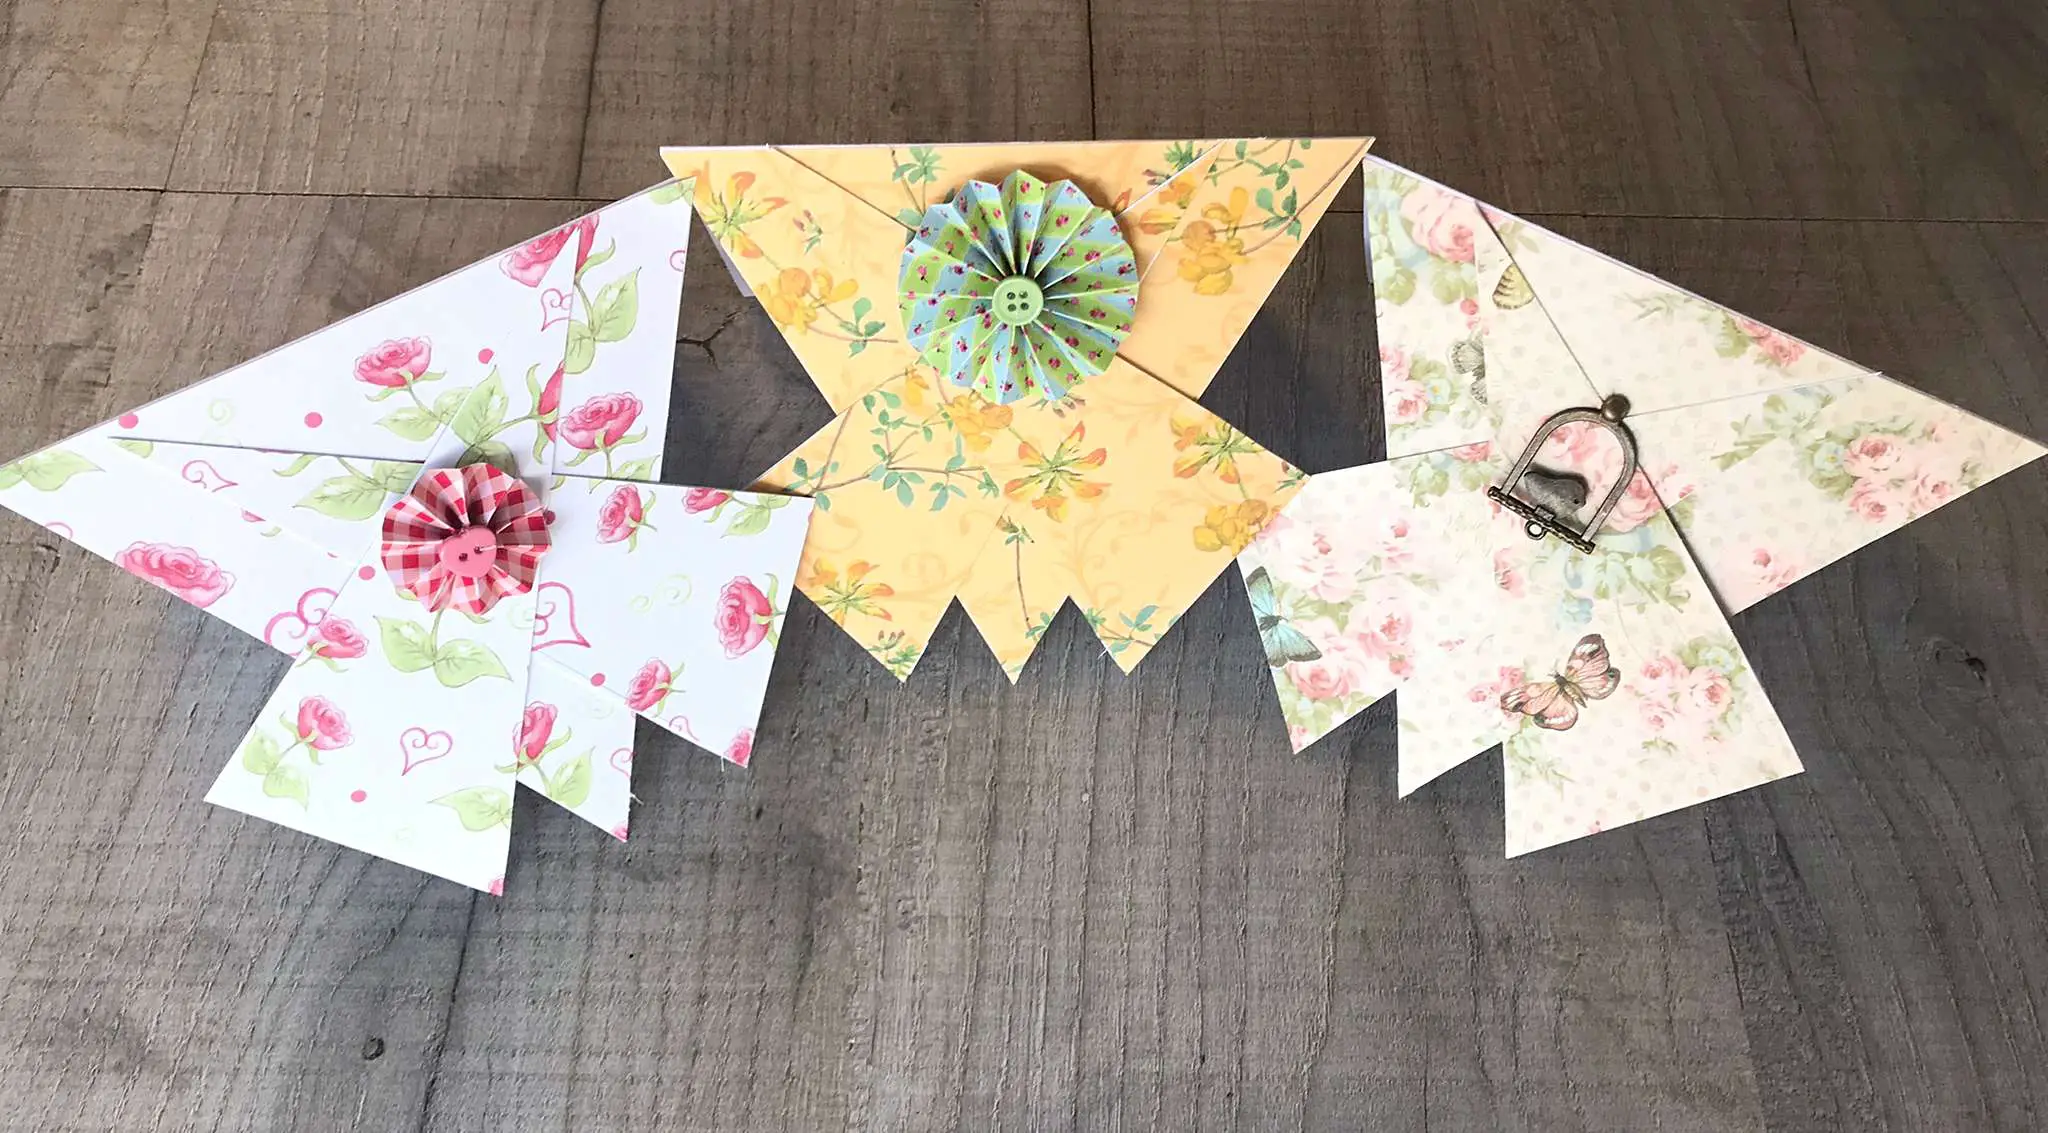
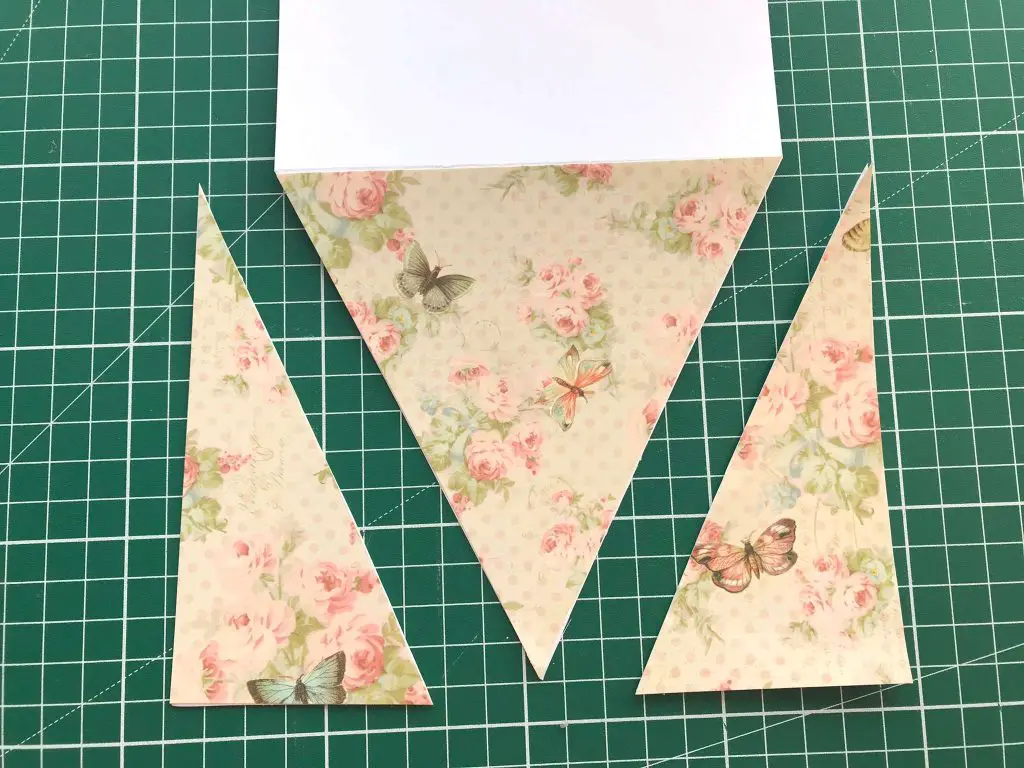
This is what you should end up with.
Assemble your DIY card
If you want your card to fit into the envelope that came with it then I recommend that you follow the guidance here involving rulers. If you are happy for your card to become wider than it started then you can ignore this guidance.
I recommend placing your card on your table with a ruler running down either side of the card. Then place your triangular pieces of card in place such that they line up with the bottom point of the card and they do not stick out onto the rulers.
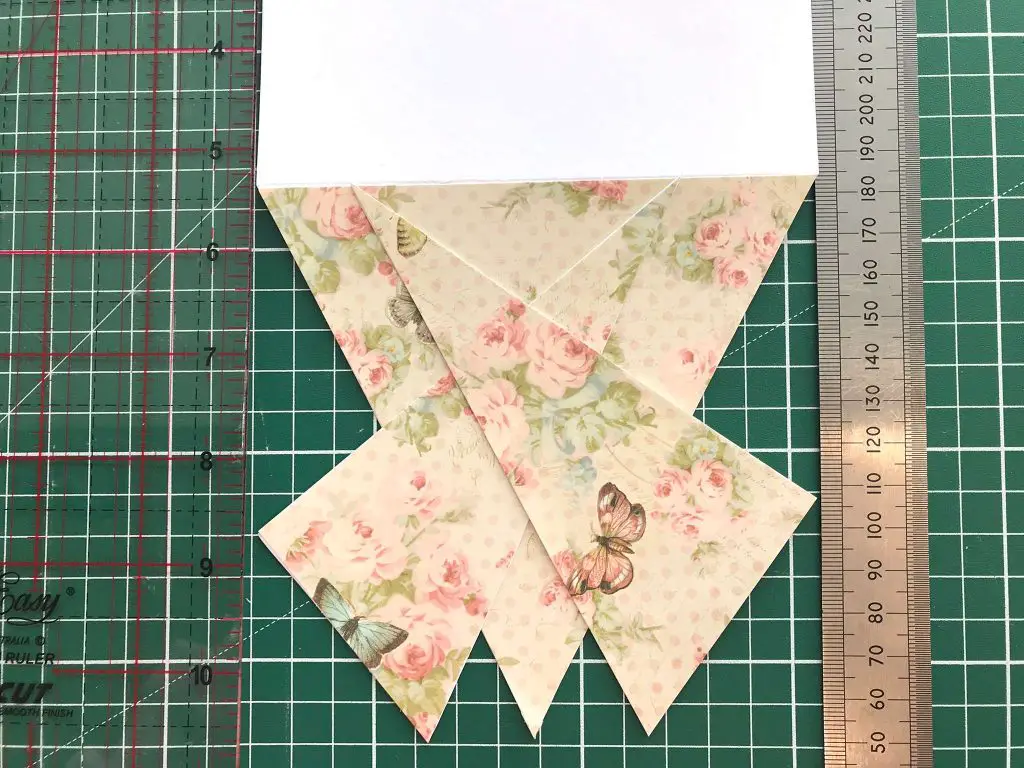
Glue them in place.
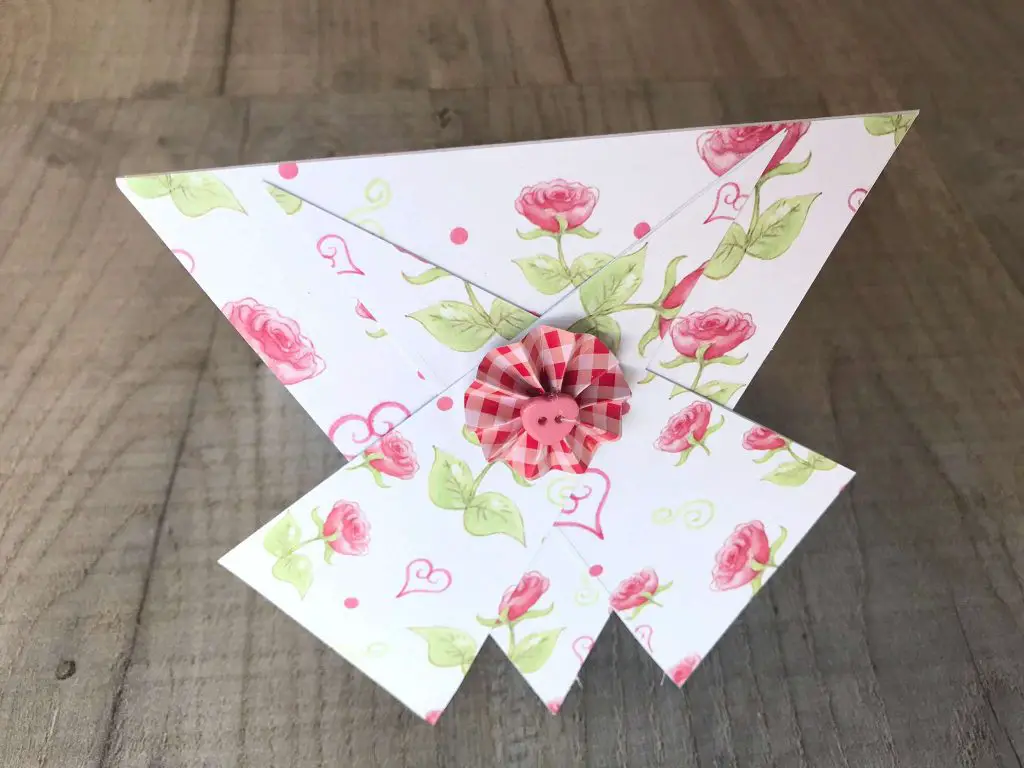
Now, all you have left to do is to decorate your card as much or as little as you like. As you can see I quite like just one embellishment but you can add anything you like.
Now enjoy the delight on your friends faces as they receive such special easy handmade cards.
What next?
If you are looking for more easy card making ideas then how about trying some fabric cards. These are great for using up fabric scarps and are so quick and easy to make!
If you are looking for heart based cards that are 3D but quick and easy then try out these 5 3D heart card designs. They are designed for Valentine’s Day but work great for many other occasions.
If you are also giving a gift then how about making your own pretty bows out of old magazine pages. These make any parcel look special.
You can make super quick and easy DIY gift tags using old book pages for a vintage feel.
If you want a quick but special gift for a close friend with a sense of humour then how about making my super thoughtful gift for a friend.
If you don’t need this card right now then think about pinning it onto your Pinterest board so that you can find it later.