Gorgeous Book Page Roses – Surprisingly Easy to Make
As an Amazon Associate I earn from qualifying purchases
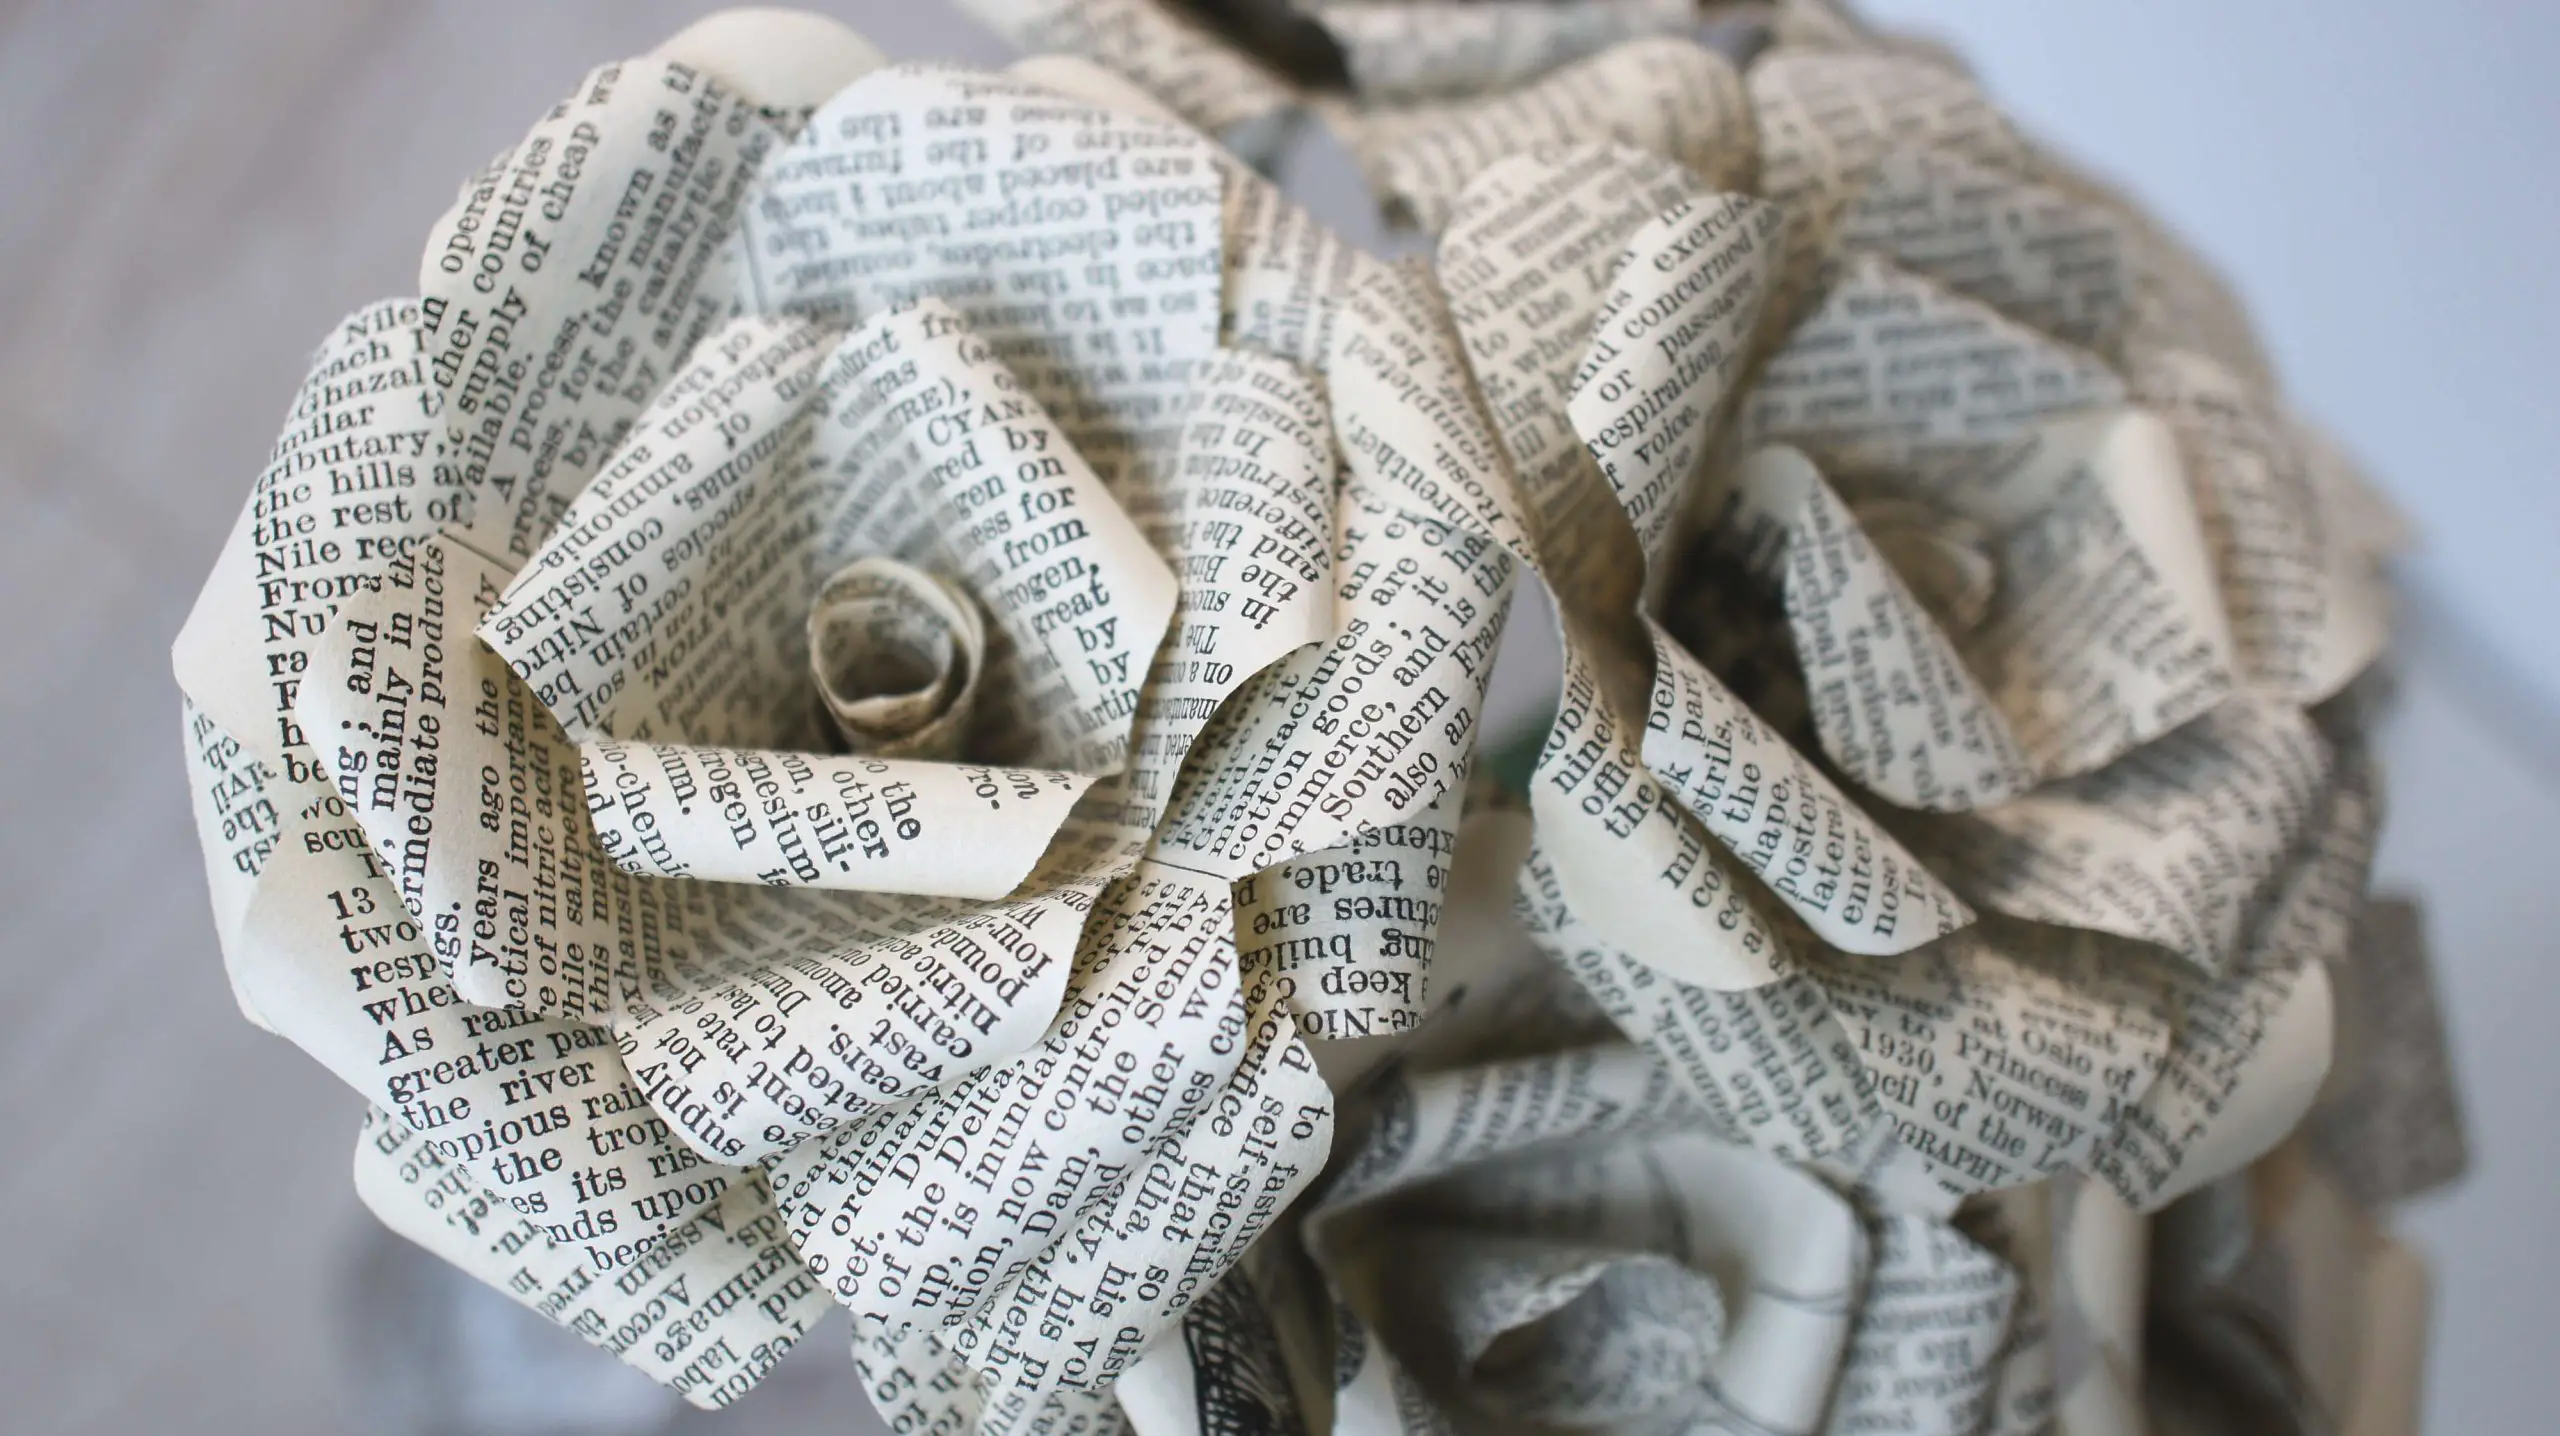
DIY book page roses are absolutely stunning and really easy to make. You will not believe how easy they are. Whether you want a paper rose flower bouquet, a book page flower wreath or a single bloom then this step by step tutorial is for you.
A book page flower is perfect for any time but what about using them for your wedding bouquet and decor. You could use romantic books or music as your basis and make it super special and unique to your wedding day. If you are planning a wedding how about making some matching confetti cones too.
This tutorial is part of the monthly Sustainable Craft Challenge and I am joined by so many talented crafters from all around the world to bring you some great inexpensive sustainable craft ideas. This month’s theme is ‘Flowers’ and at the end of this tutorial you will see links to them all so take a look.
Let’s get started.
Supplies to make your paper rose
- Old book page / sheet music /any paper you like
- Ruler
- Scissors
- Glue (tacky glue / hot melt glue)
- Stem (straws / pipe cleaners / wooden sticks)
- Cocktail stick (or similar)
Video Tutorial for Paper Rose
This video is also available on my YouTube channel.
Create your Rose Petals
Cut out your petal shapes
This tutorial is for one book page rose. Simply repeat for as many as you like.
For each rose you will need 3 squares of paper. I made mine using 4″ squares and my roses are approximately 3″ across. I am not sure I would go any smaller as it may get very fiddly. You could, however, easily go bigger.
Take each square of paper and fold it in half diagonally. Then repeat and repeat again! You have folded your paper 3 times (as per the picture).
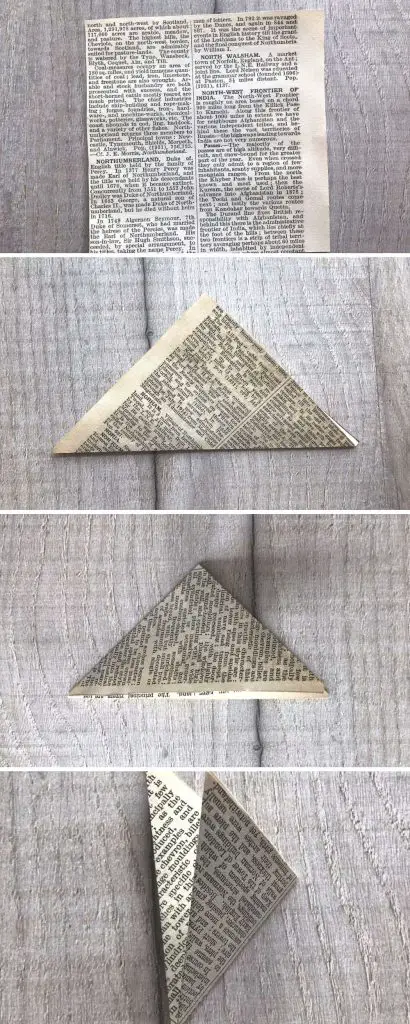
Once you have 3 of these, for each one, hold the pointed end that holds all the sections of paper together and cut a curved shape opposite it. Follow this by cutting the point you are holding off. Only cut about 1/4″ off It should now look a bit like an ice-cream cone.

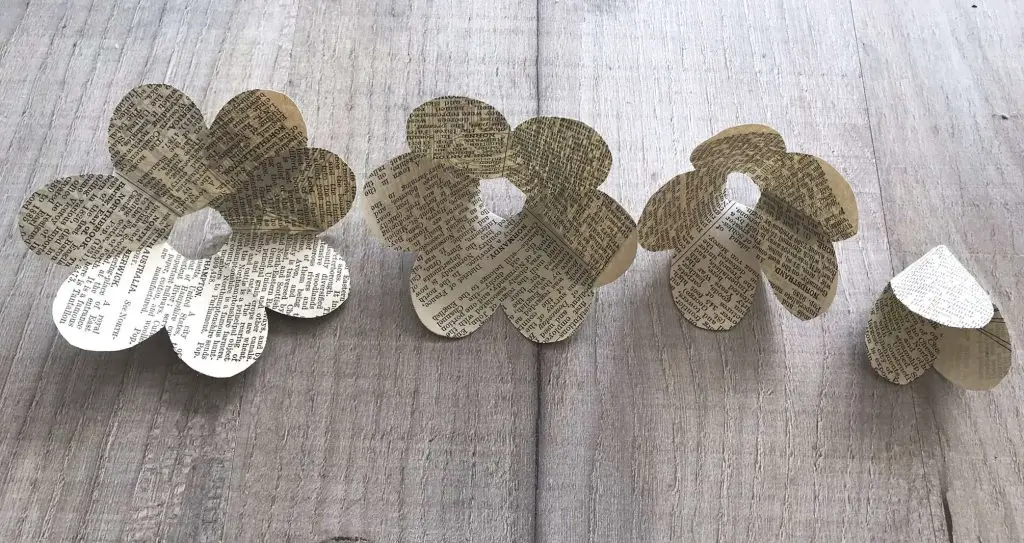
Form rings of petals
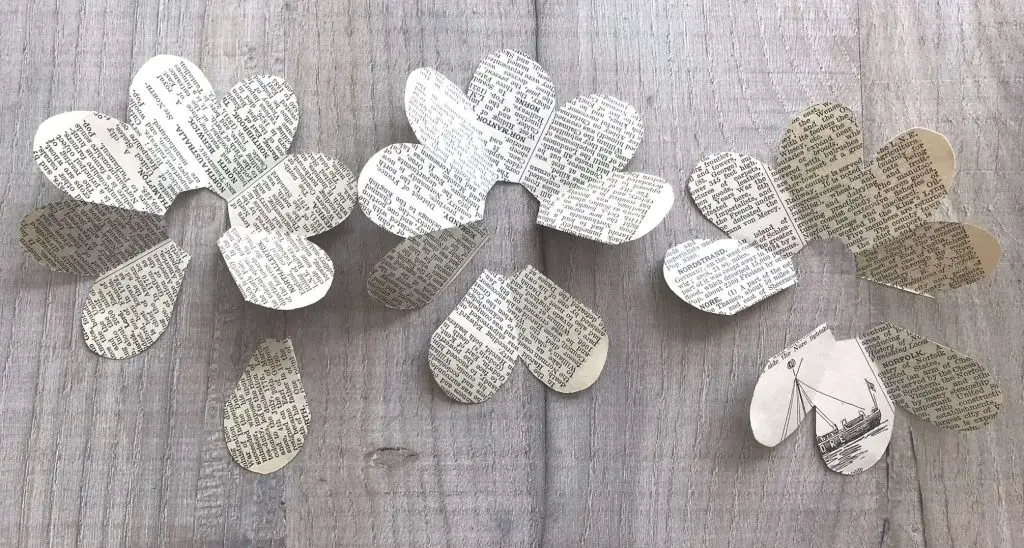
Open up each set of petals in turn. Cut one petal out of the first set of petals. Cut 2 petals out of the second set of petals and cut 3 petals out of the third set of petals. You should now have 6 sets of petals varying in size from 1 to 7 petals.
Put your 1 and 2 petal pieces to one side. For each of the others apply some glue along one of the edges you cut and then glue the petal opposite to it on. You are forming a ring of petals again. But, because one (or more) has gone it will now be 3D. Let the glue dry.
You should end up with this!
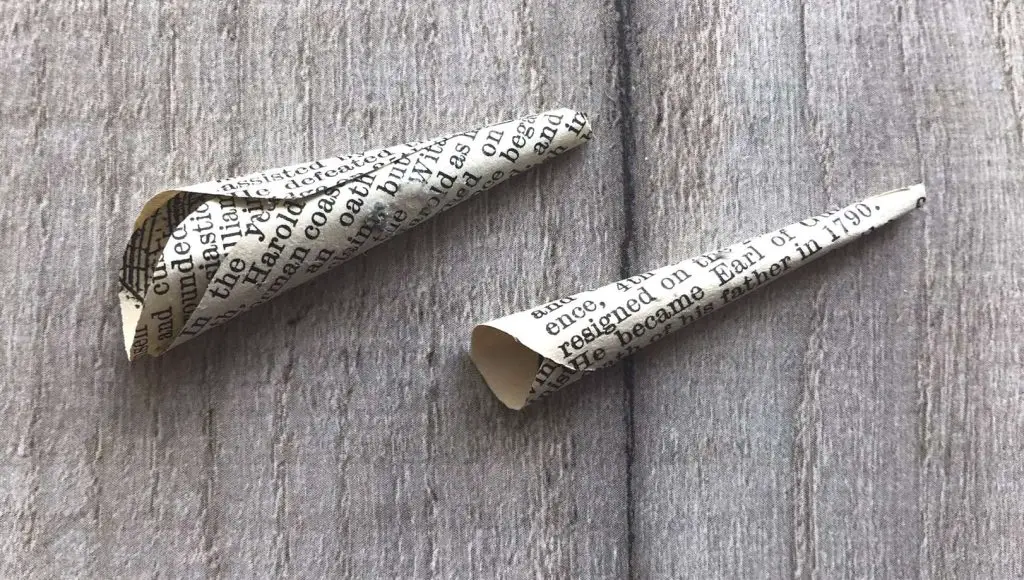
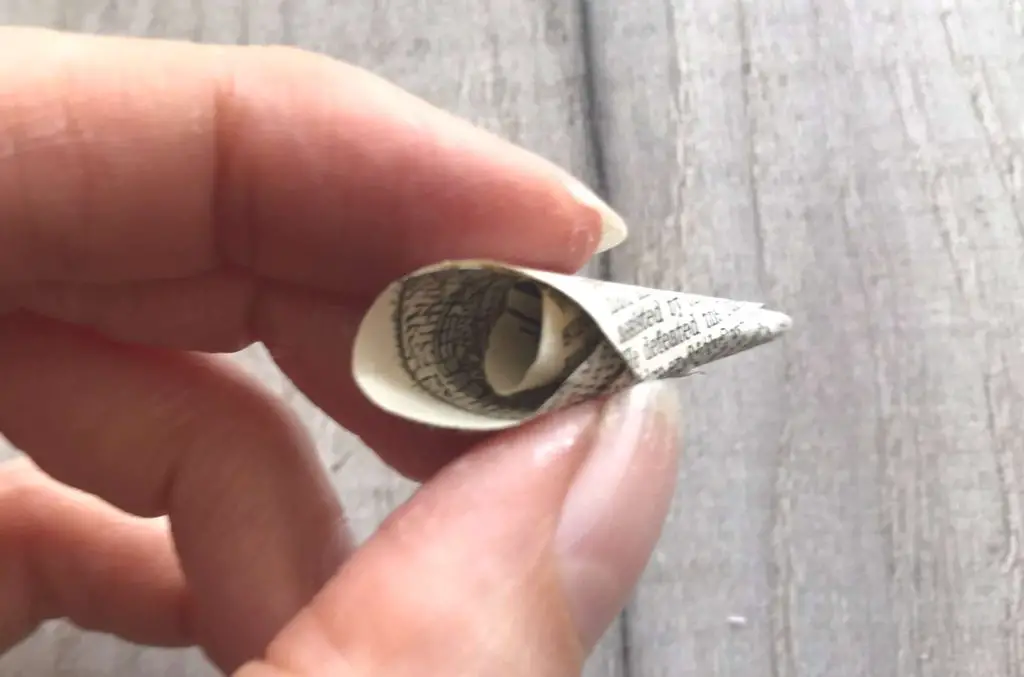
Remember the one and 2 petal pieces? Well, now you want to roll those up and stick them closed so that they can form the centre of your book page rose.
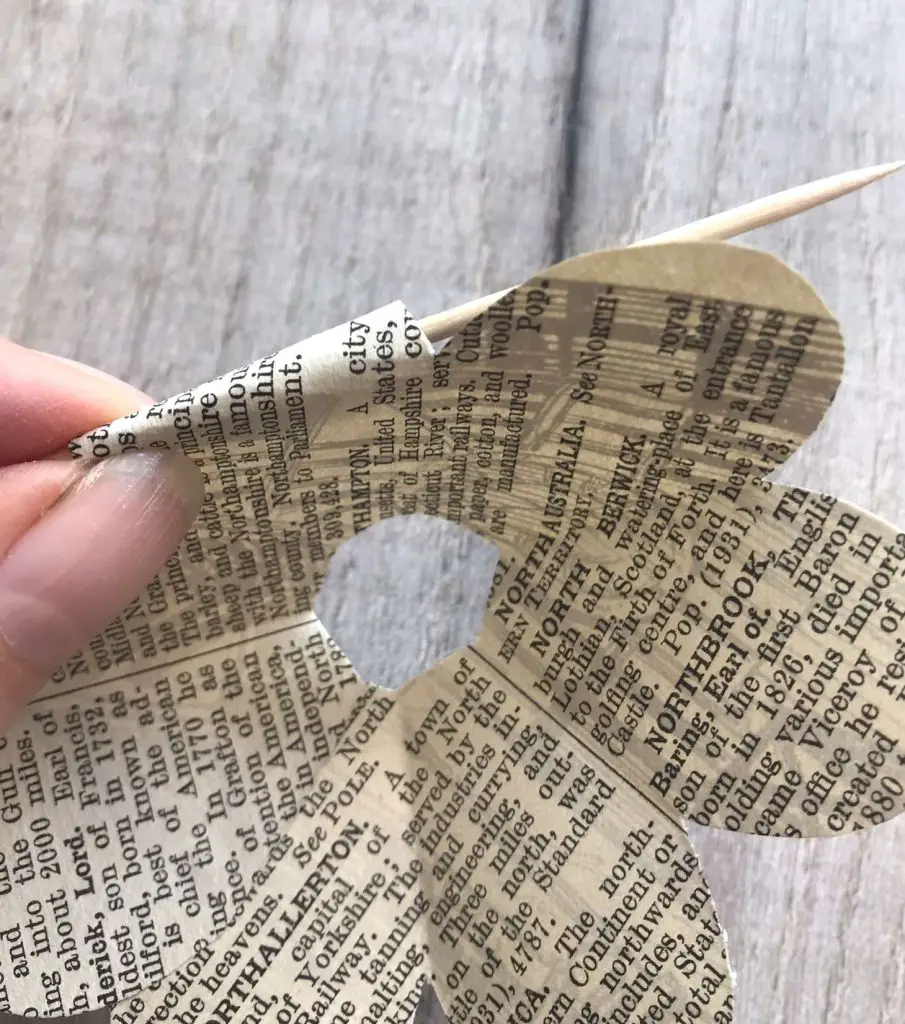
Curl your Petals
Once the glue is dry take your cocktail stick (or similar) and curl the petals downwards so that they look like rose petals. This is what will make your rose look so special! Do this for all the petals that you stuck in rings (not the inner two).
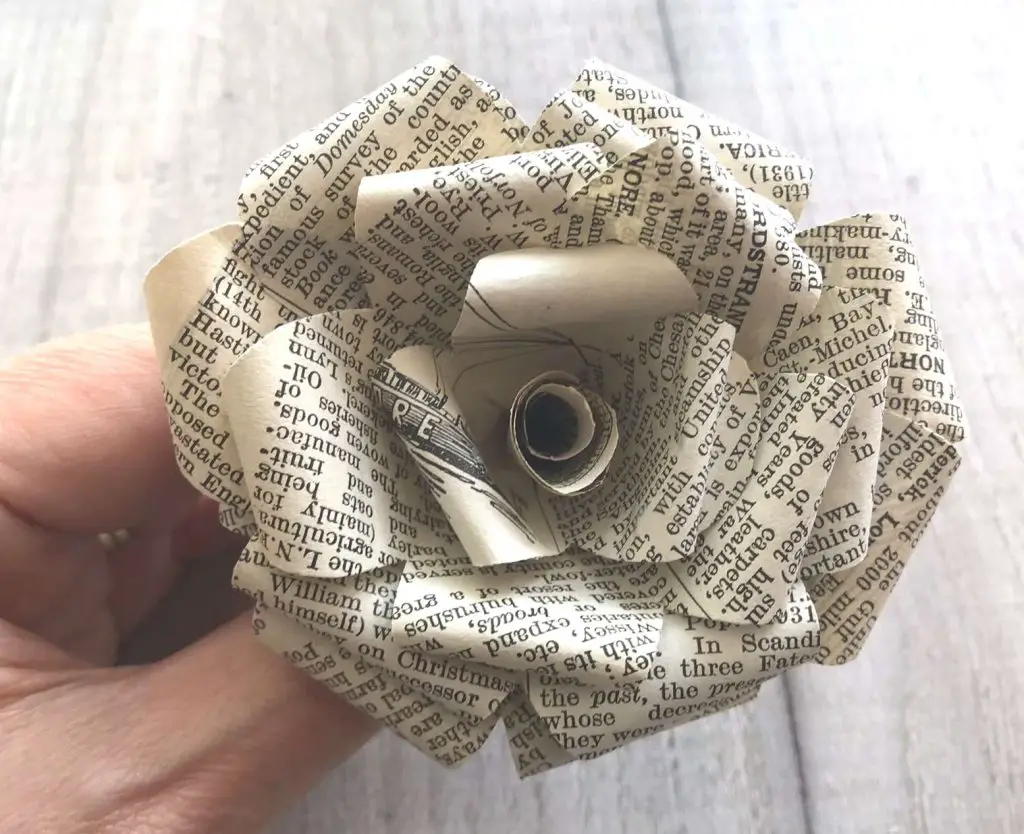
Form your Book Page Rose
Take your largest ring of petals and apply some glue to the inside at the bottom. Place your next ring of petals onto the glue. Repeat for the next 2 sets.
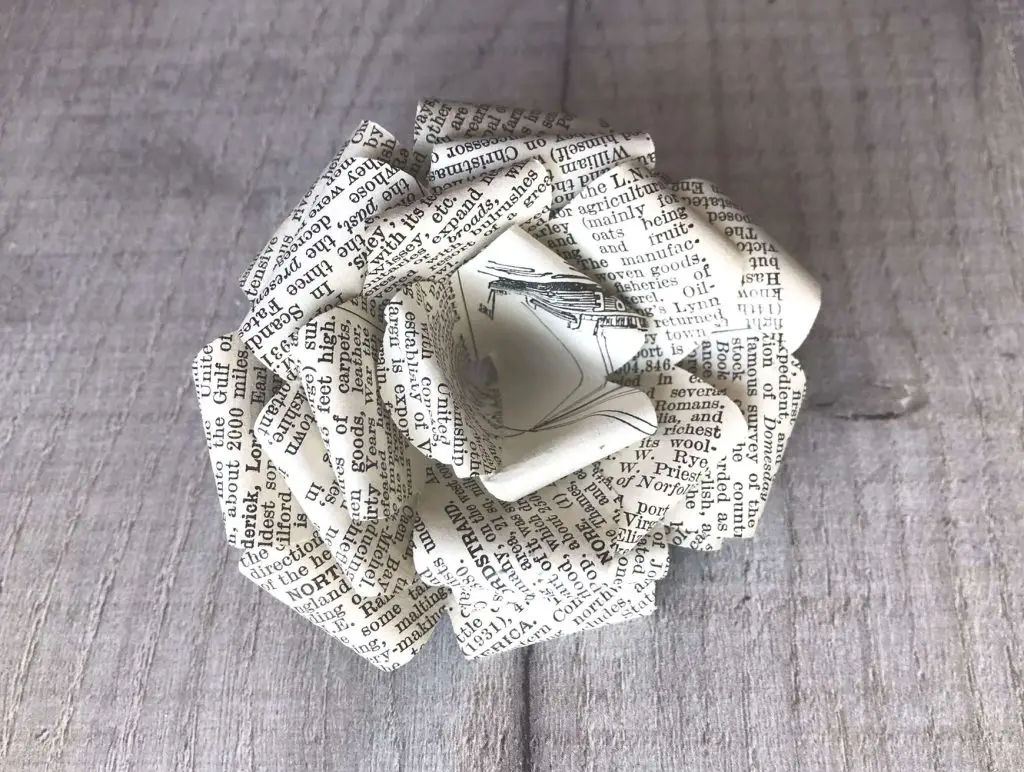
You still have a large hole in the centre of your flower. Take the two centre parts you made earlier. Glue the smaller one onside the larger one and then glue the whole thing inside the flower you have already made.
This inner part will stick through the hole and hold all the layers together while the glue dries.
Congratulations you have finished your first book page rose. I am sure it will not be your last!
You can stop there and use your rose in a garland or a bowl or you can add a stem. Simply glue your chosen stem in place. I also added green tape down my straws to make them look more natural.
And next …
If you are looking for more gorgeous flowers to make then check out my collection of paper flower tutorials and my collection of fabric flower tutorials.
Plus, don’t forget all these other fabulous sustainable flower crafts for you to make. Have a look and be inspired!
Recycled Mini Collage with Crochet Flower
Ironed Pressed Flowers Glass Vessel
How to Update a Thrift Store Find with Paper Flowers
Flora the Reversible Doll
DIY Flower Gift Bucket For Mom
Floral Wood Letters with Free Rolled Flower Cut Files
Whatever you decide to make do please share with us all below any tips, hints or recommendations you may have.