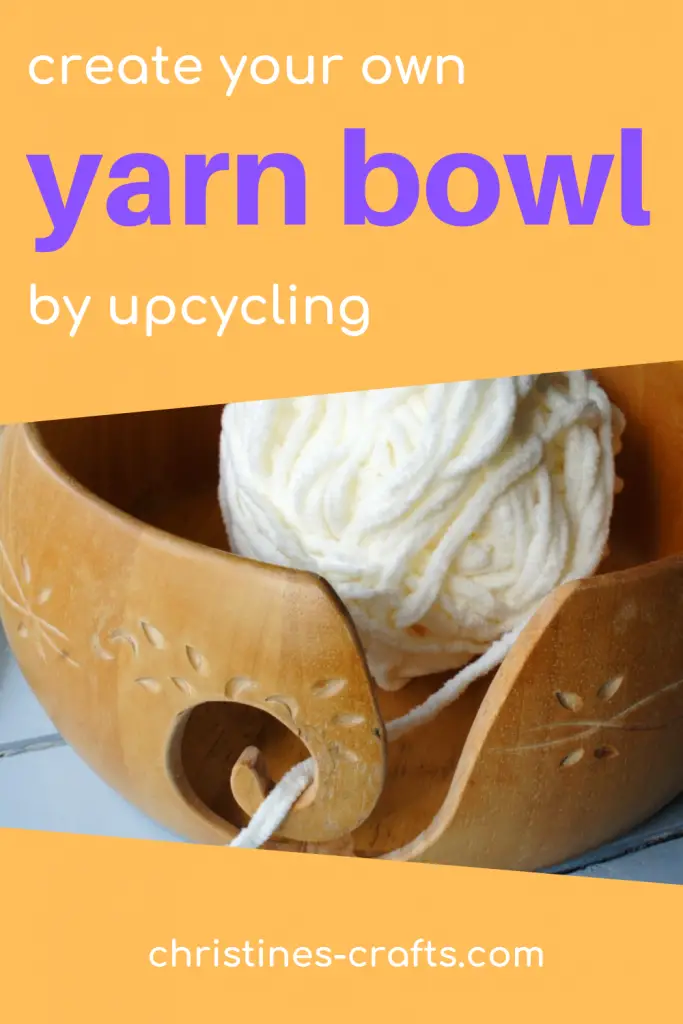
Yarn Bowl from an upcycled wooden bowl
As an Amazon Associate I earn from qualifying purchases
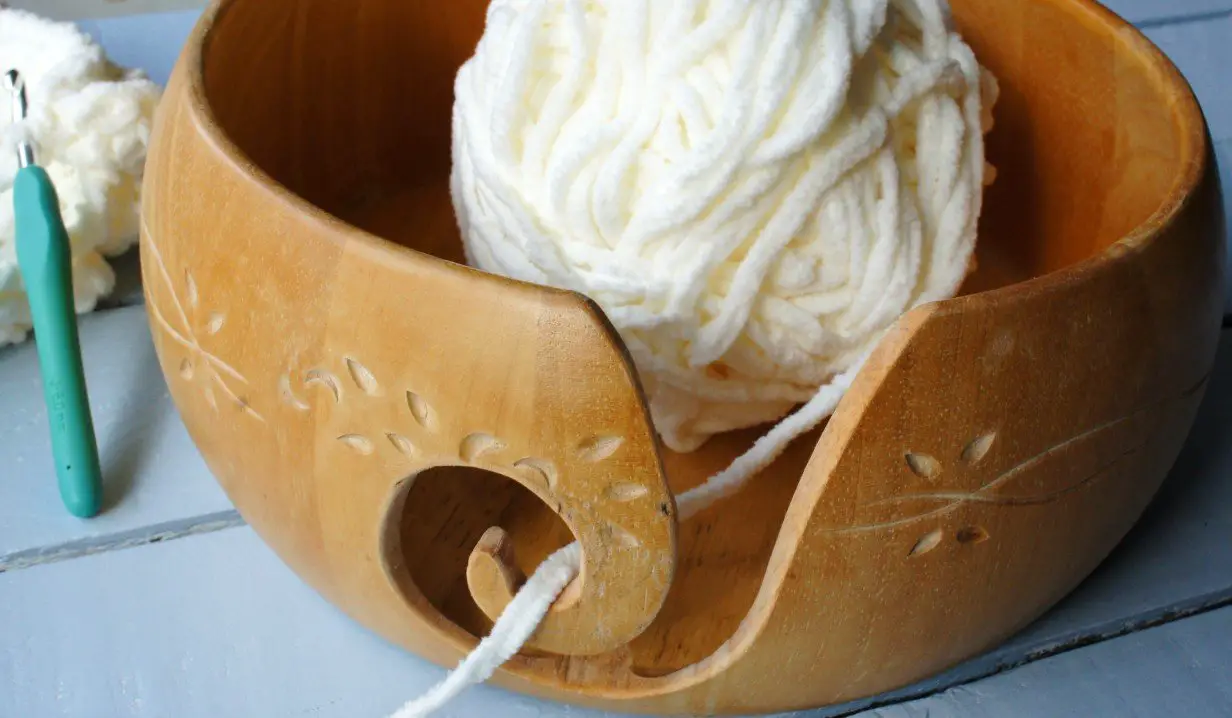
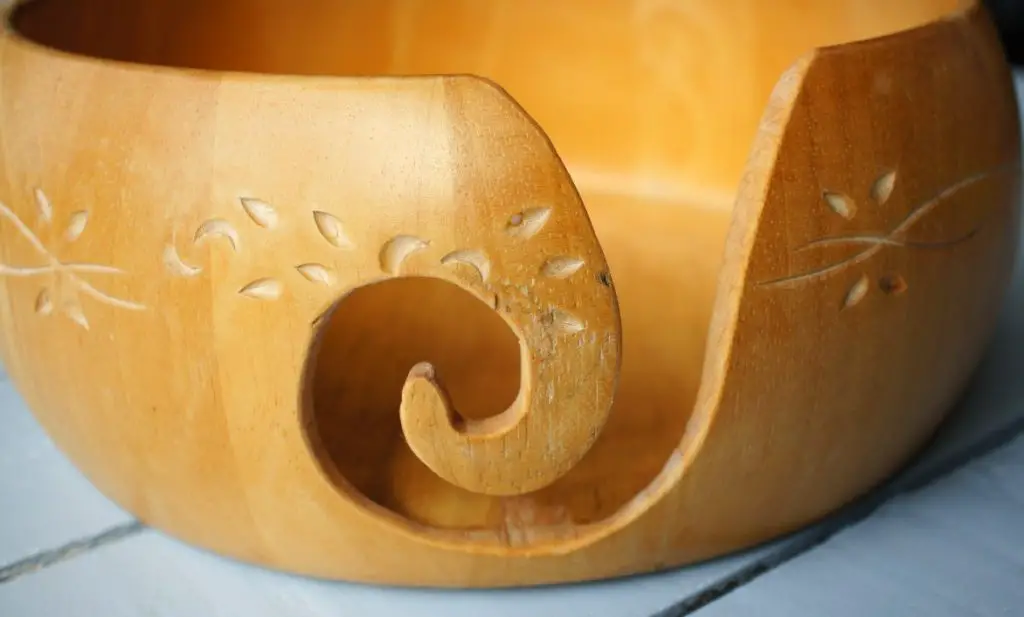
I have used an old wooden bowl that we used to keep fruit in. You can use any bowl but I recommend a depth of at least 4″ and a diameter of at least 6″. Obviously it depends on the size of yarn ball you use what size you actually need.
You will need:
an old wooden bowl
coping saw (so that you can adjust the angle of the blade)
pencil
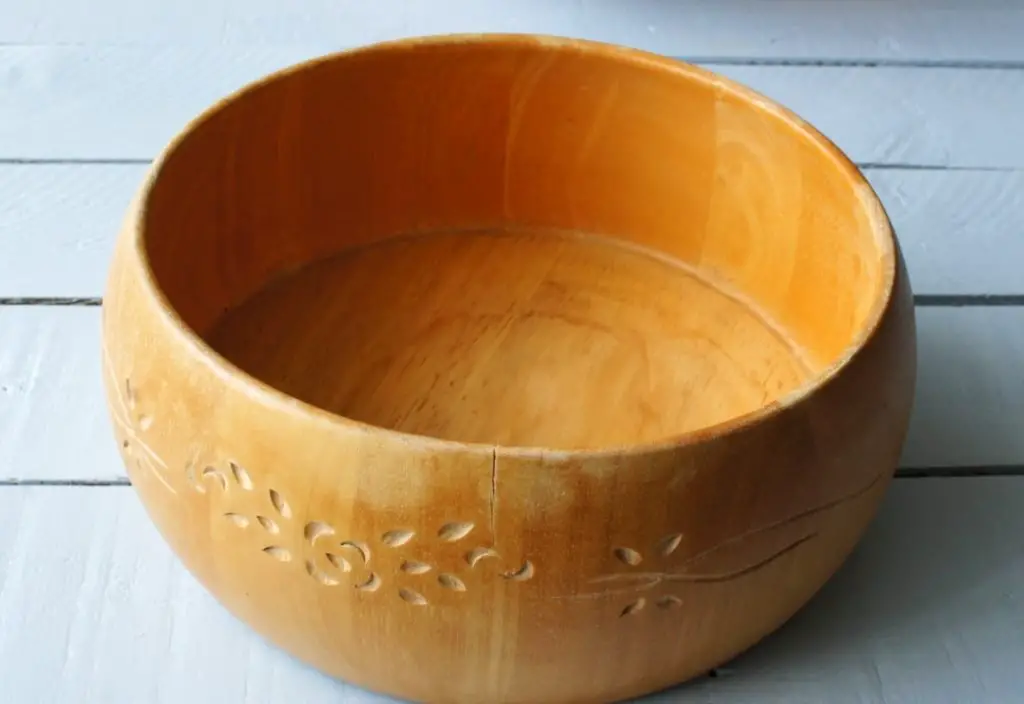
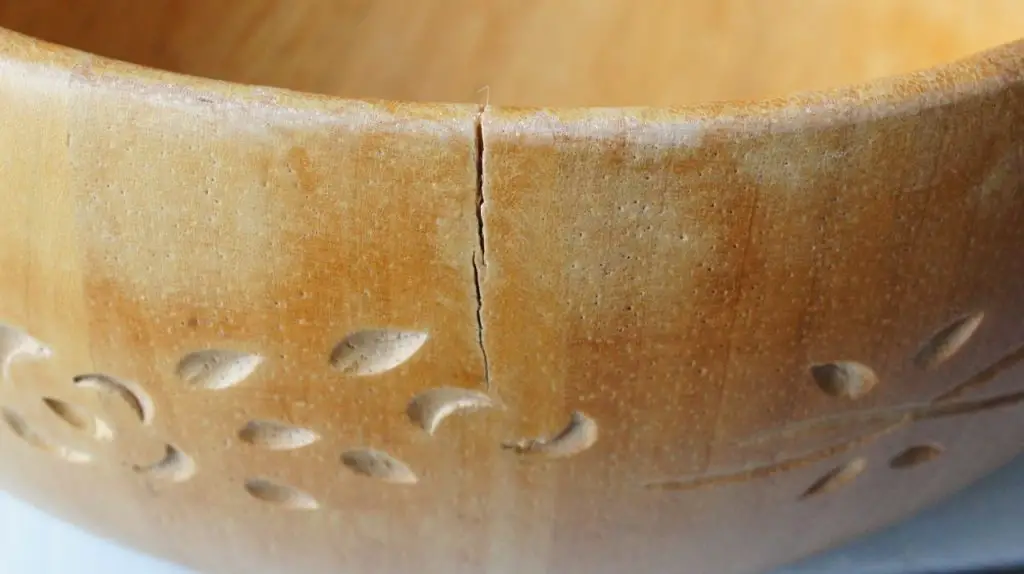
You can see why I used this bowl and why I cut it where I did. I managed to get rid of this crack!
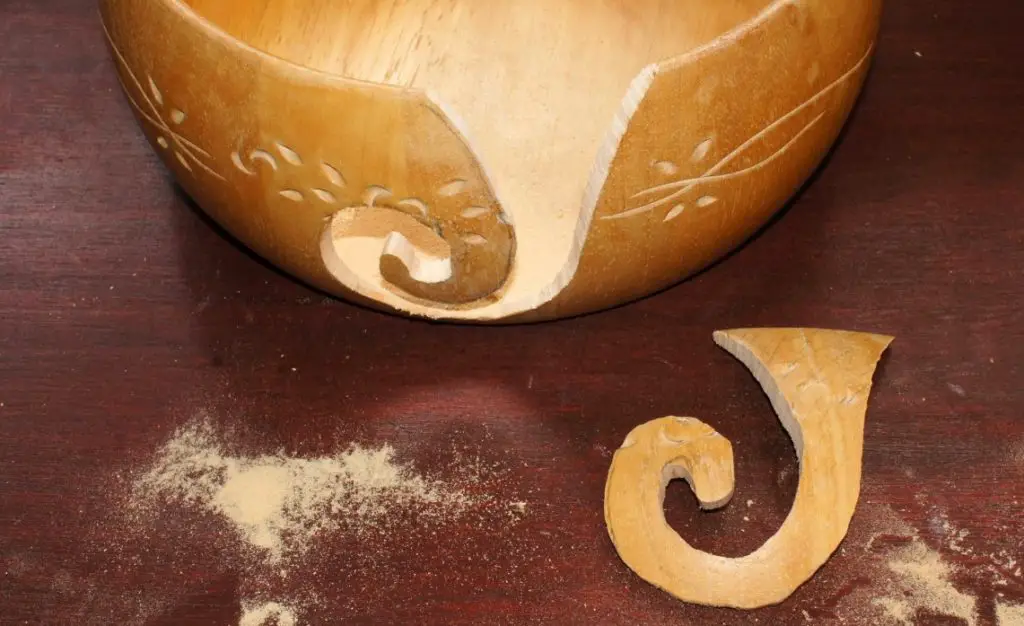
Step 1: Mark out the area to cut away
You need to draw on your bowl where you want to cut away for the yarn to pass through. The exact shape is up to you but it needs to be a smooth curve. If you want to you can also mark up some holes to put yarn through and or to place your hooks / needles in when not in use. I chose not to.

Note: It became apparent that I had drawn this too close to the bottom of the bowl so be careful of that. Consider how you are going to turn at the bottom of the curve – you need some space for the blade.
Step 2: Cut out your marked shape
Use the coping saw to cut along the line that you have marked. Cut and then adjust the blade to change direction. Keep adjusting the blade as you work along the line. Do not worry too much about the line so long as you are working smoothly. No-one will ever know where your line was so if it looks right it is right. Take real care not to break the wood that you are cutting out as some of the shape will produce narrow sections which are vulnerable to snapping as you saw. Two of us cut this together, one sawed while the other one held the vulnerable bits of wood as they became wobbly.

Once you have sawed all the way along the line carefully remove the shape.
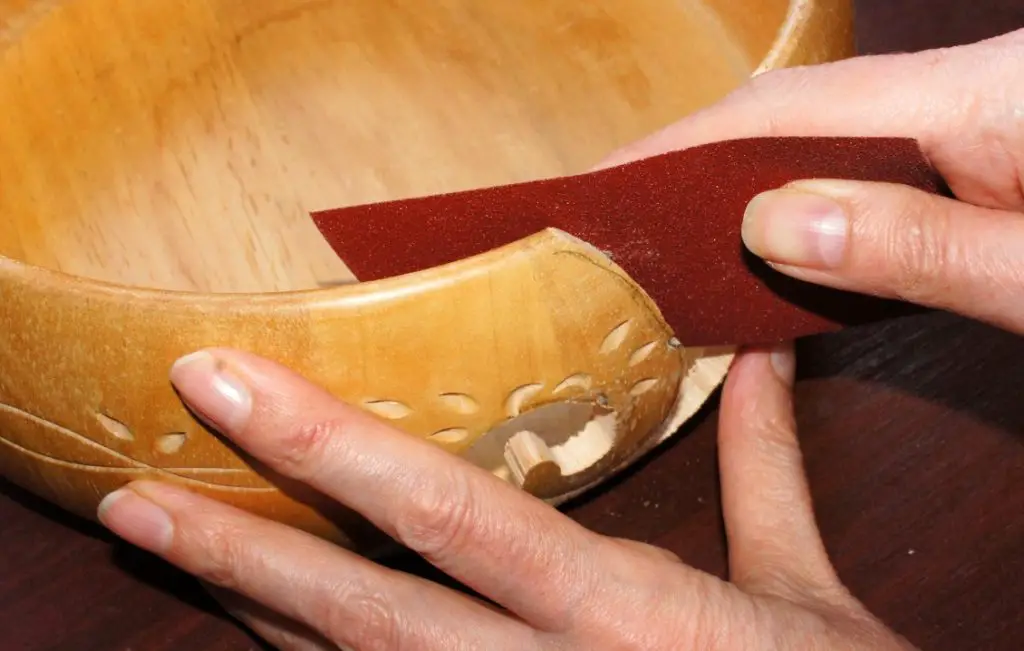
Step 3: Sanding the edges
You now have your basic bowl but the edges will not be smooth at all. Now you need to sand all the edges until they are smooth and you are happy with their appearance. There must be no rough edges for the yarn to catch on. It is worth taking your time over this to avoid any problems. If there are any pencil lines still on the bowl you will probably sand them off. If not, rub them off with an eraser or a wet cloth.
Step 4: Polishing your yarn bowl
Once you are completely happy with your bowl give it a good polish with some furniture polish. It will polish up the whole bowl but more importantly it will seal the new edges that you have made.
You have finished. Well done. Now enjoy using your yarn bowl as you crochet or knit your next project!

I love upcycling projects, particularly ones like this that do not take too long. I also love that I have made something I can use for more craft projects. If you like making your own craft supplies then take a look at a few of my other tutorials:
How to make a Pincushion that Sharpens your Pins
Remember to pin this article on Pinterest for later! You can follow me on Pinterest as Christine’s Crafts for lots of curated inspiration for you.