Cute Washcloth Roses – How to Make
As an Amazon Associate I earn from qualifying purchases

This page contains affiliate links meaning I earn a commission if you use those links at no cost to you. I only recommend brands I use and trust.
This full tutorial is available as a downloadable PDF for a small charge so that you can avoid the ads and easily print it off if you want to. Simply click here for more details.
You will need:
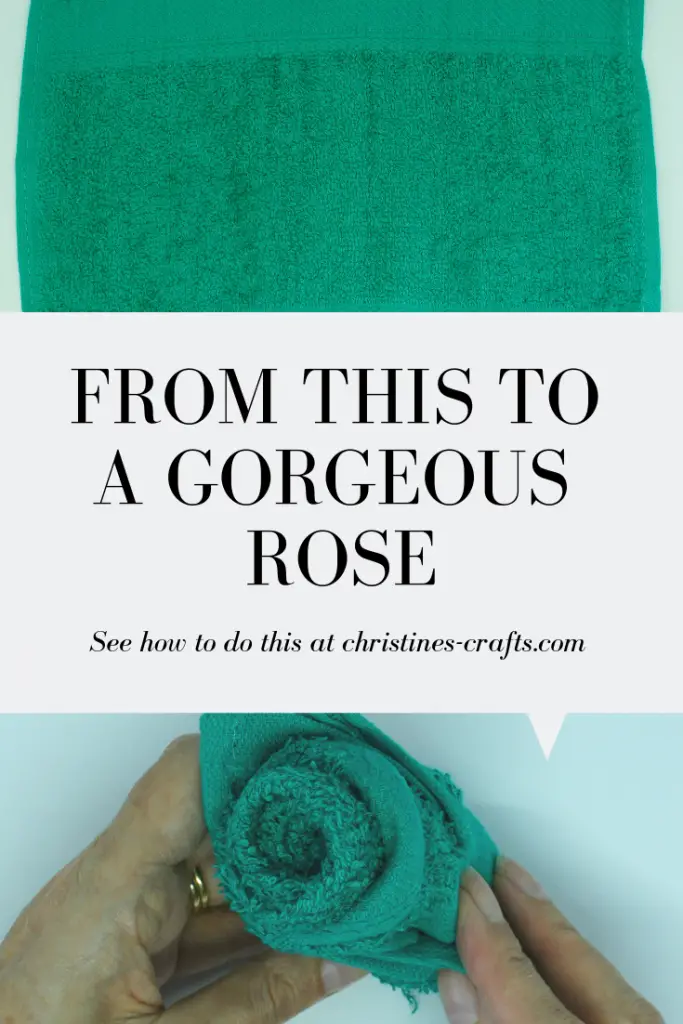
Washcloth or flannel. All that matters is that it is square.

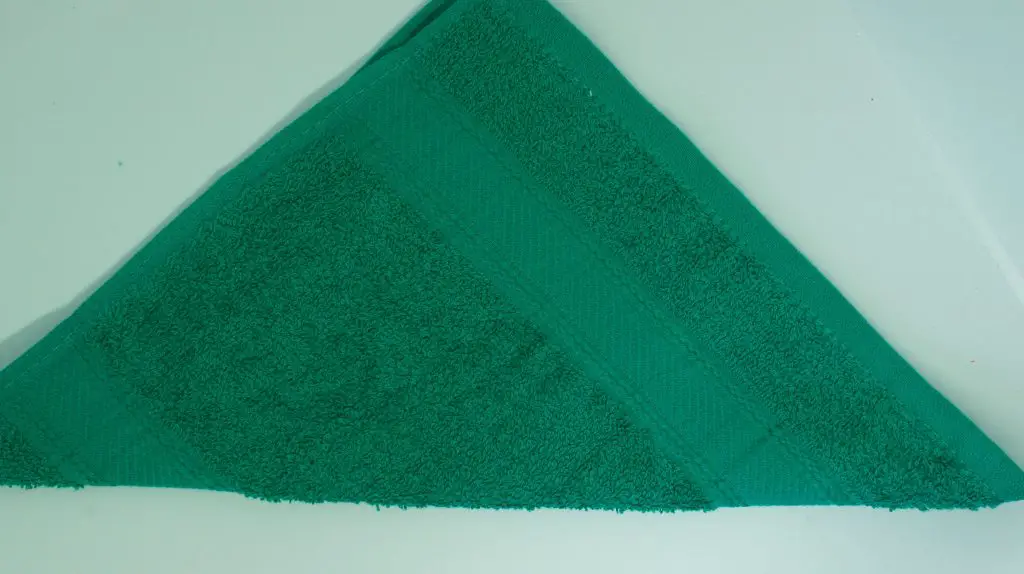
Step 1: Fold in half
Fold the cloth in half across the diagonal so that you now have a triangle.
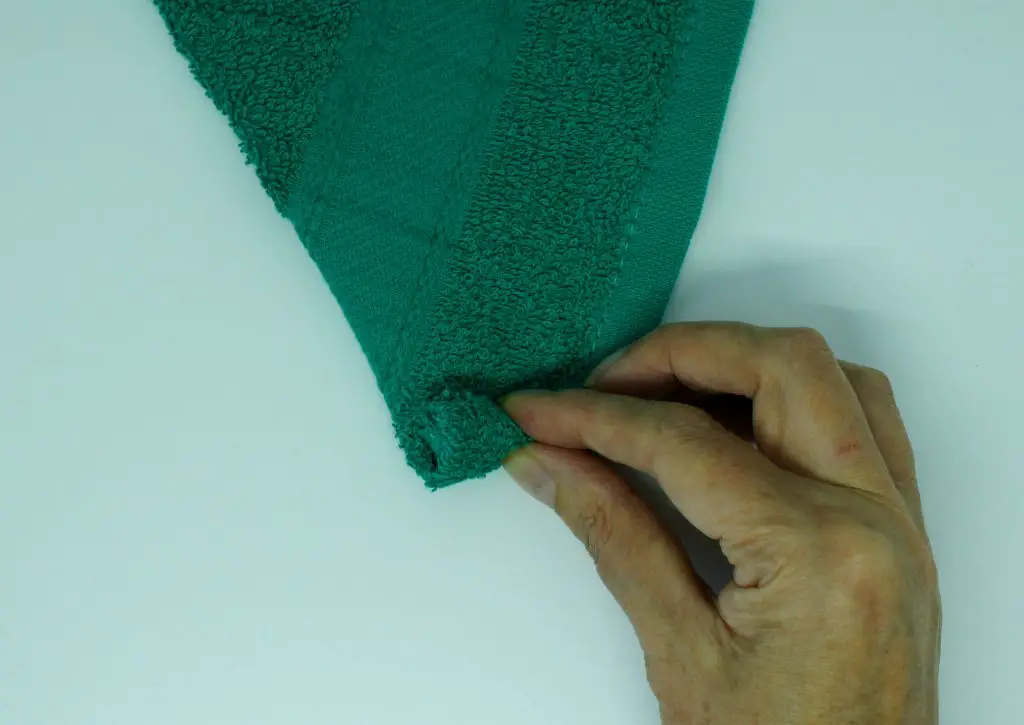
Step 2: Roll the washcloth
From on corner of the triangle start rolling the cloth up along the fold. Continue until you have about a finger length left.
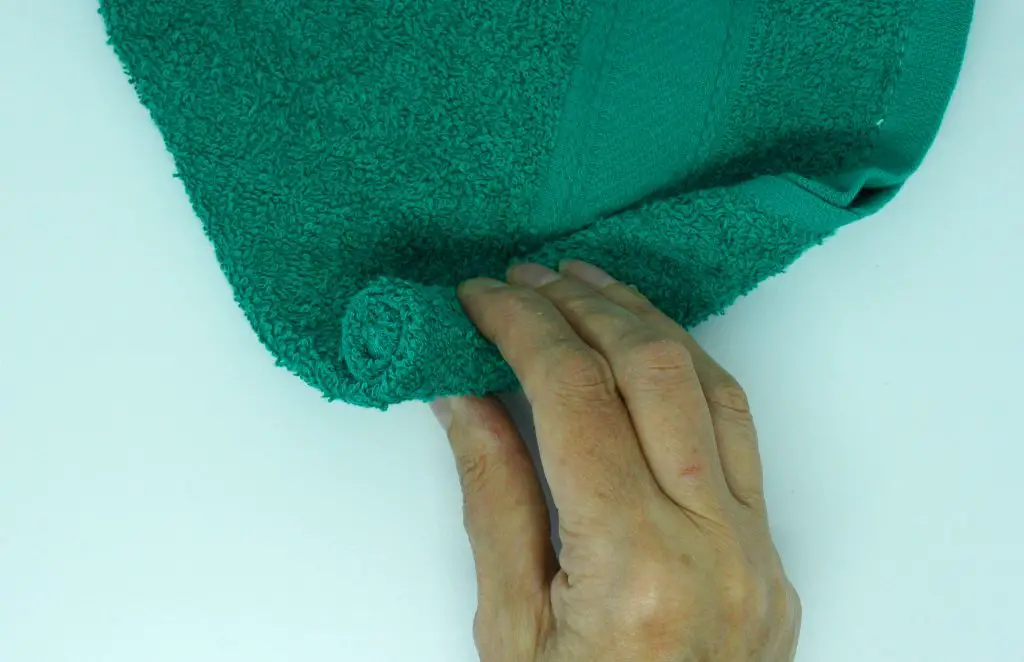
Step 3: Complete Roll Detail
Continue to roll up the cloth to the end of the folded side but turn a small amount of the folded edge outwards to start to form the rose detail.
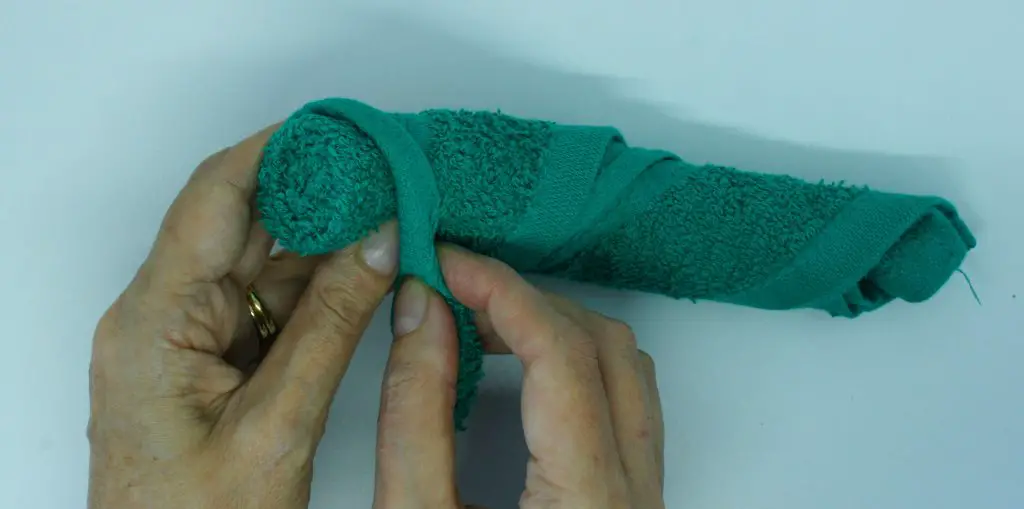
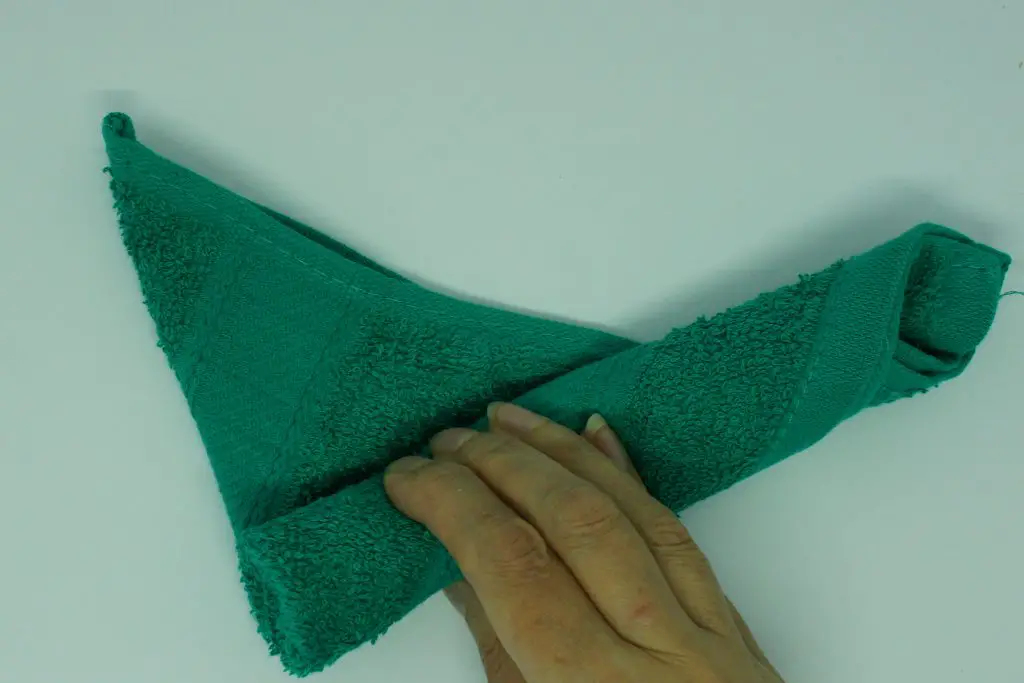
Step 4: Fold the roll
Ensuring that the end of the roll is trapped, fold the cloth in half as shown. You should have trapped the end of the roll so that it does not come undone.
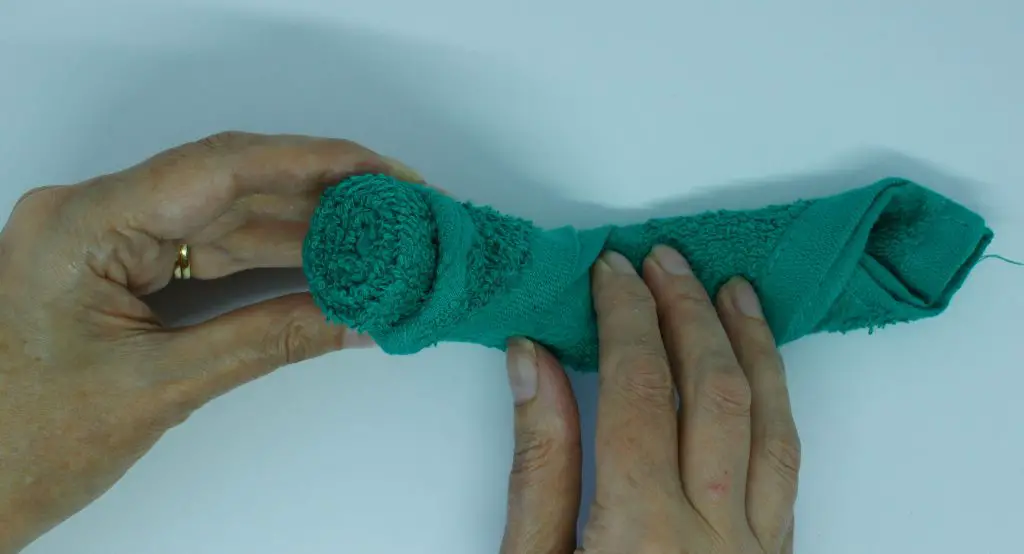
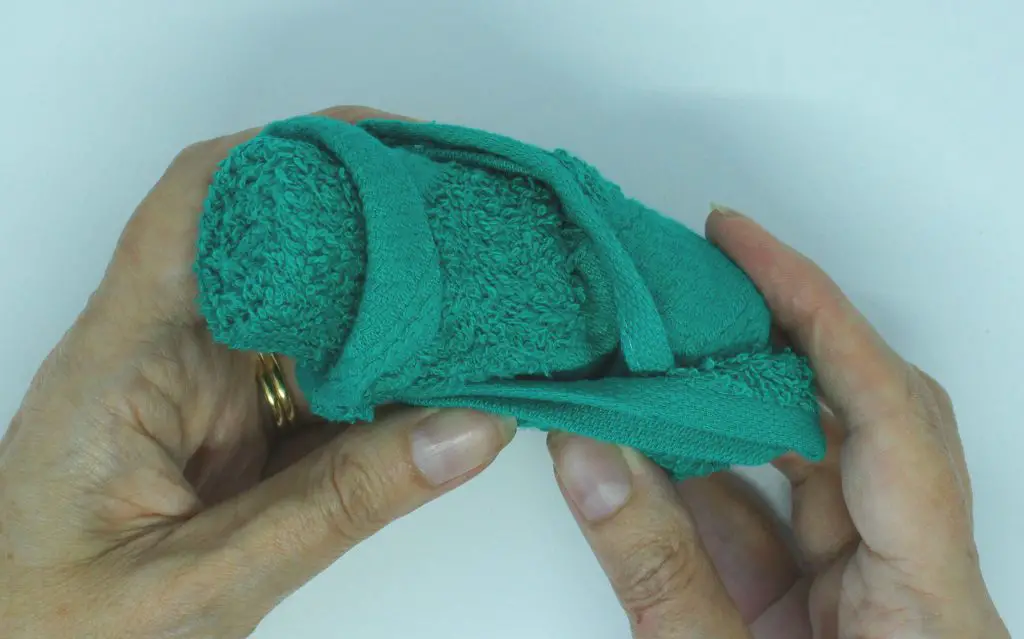
Step 5: Turn the rose out
The fiddly bit! You now need to turn through the ‘rose part’ of the washcloth so that it is inside the other end of the roll. It is rather like pairing up socks into a ball.
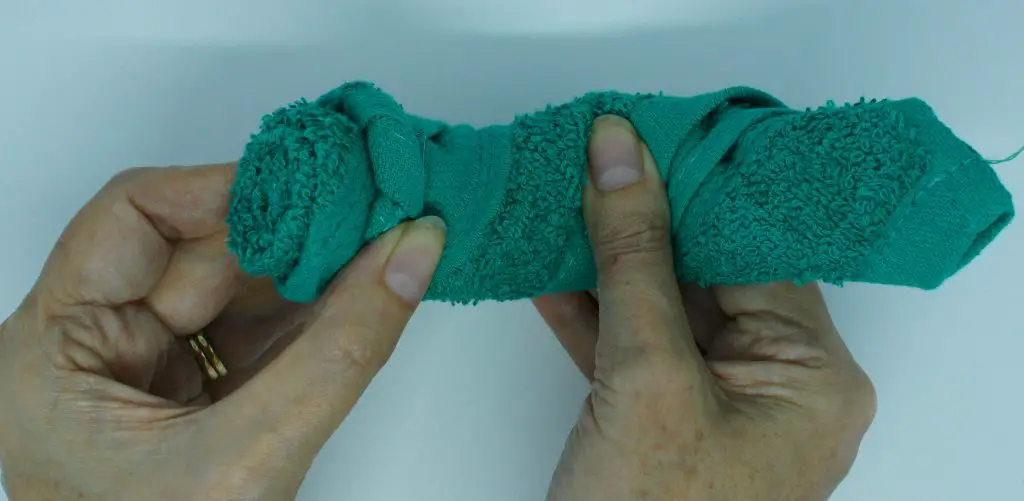
Your rose should now have appeared and be about half the length of the roll you had made.
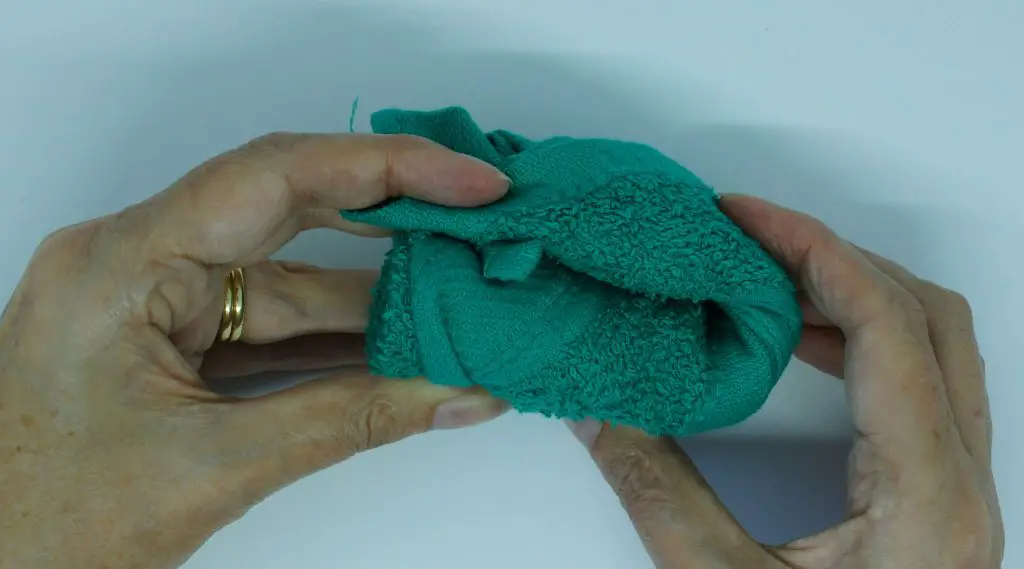
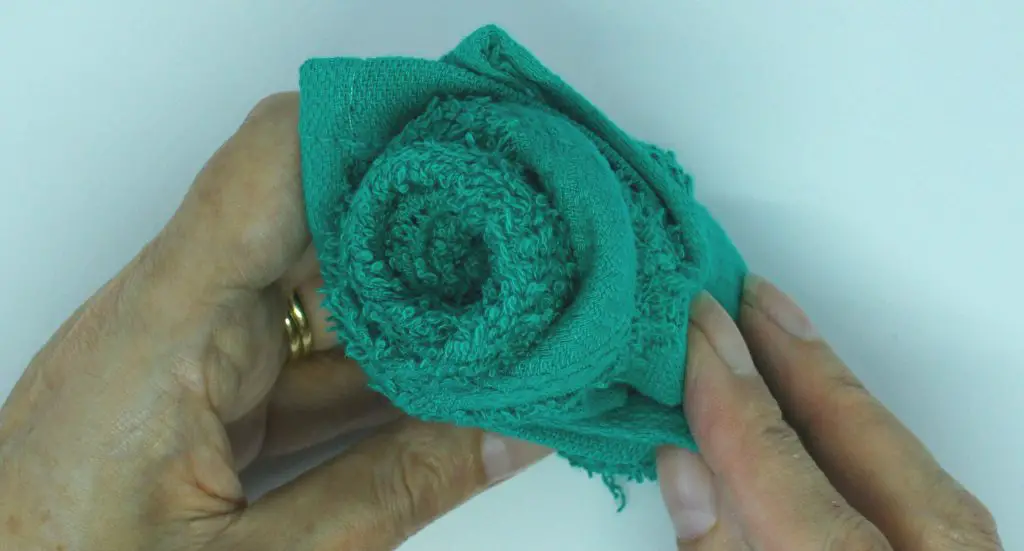
Step 6: Tidy up the rose
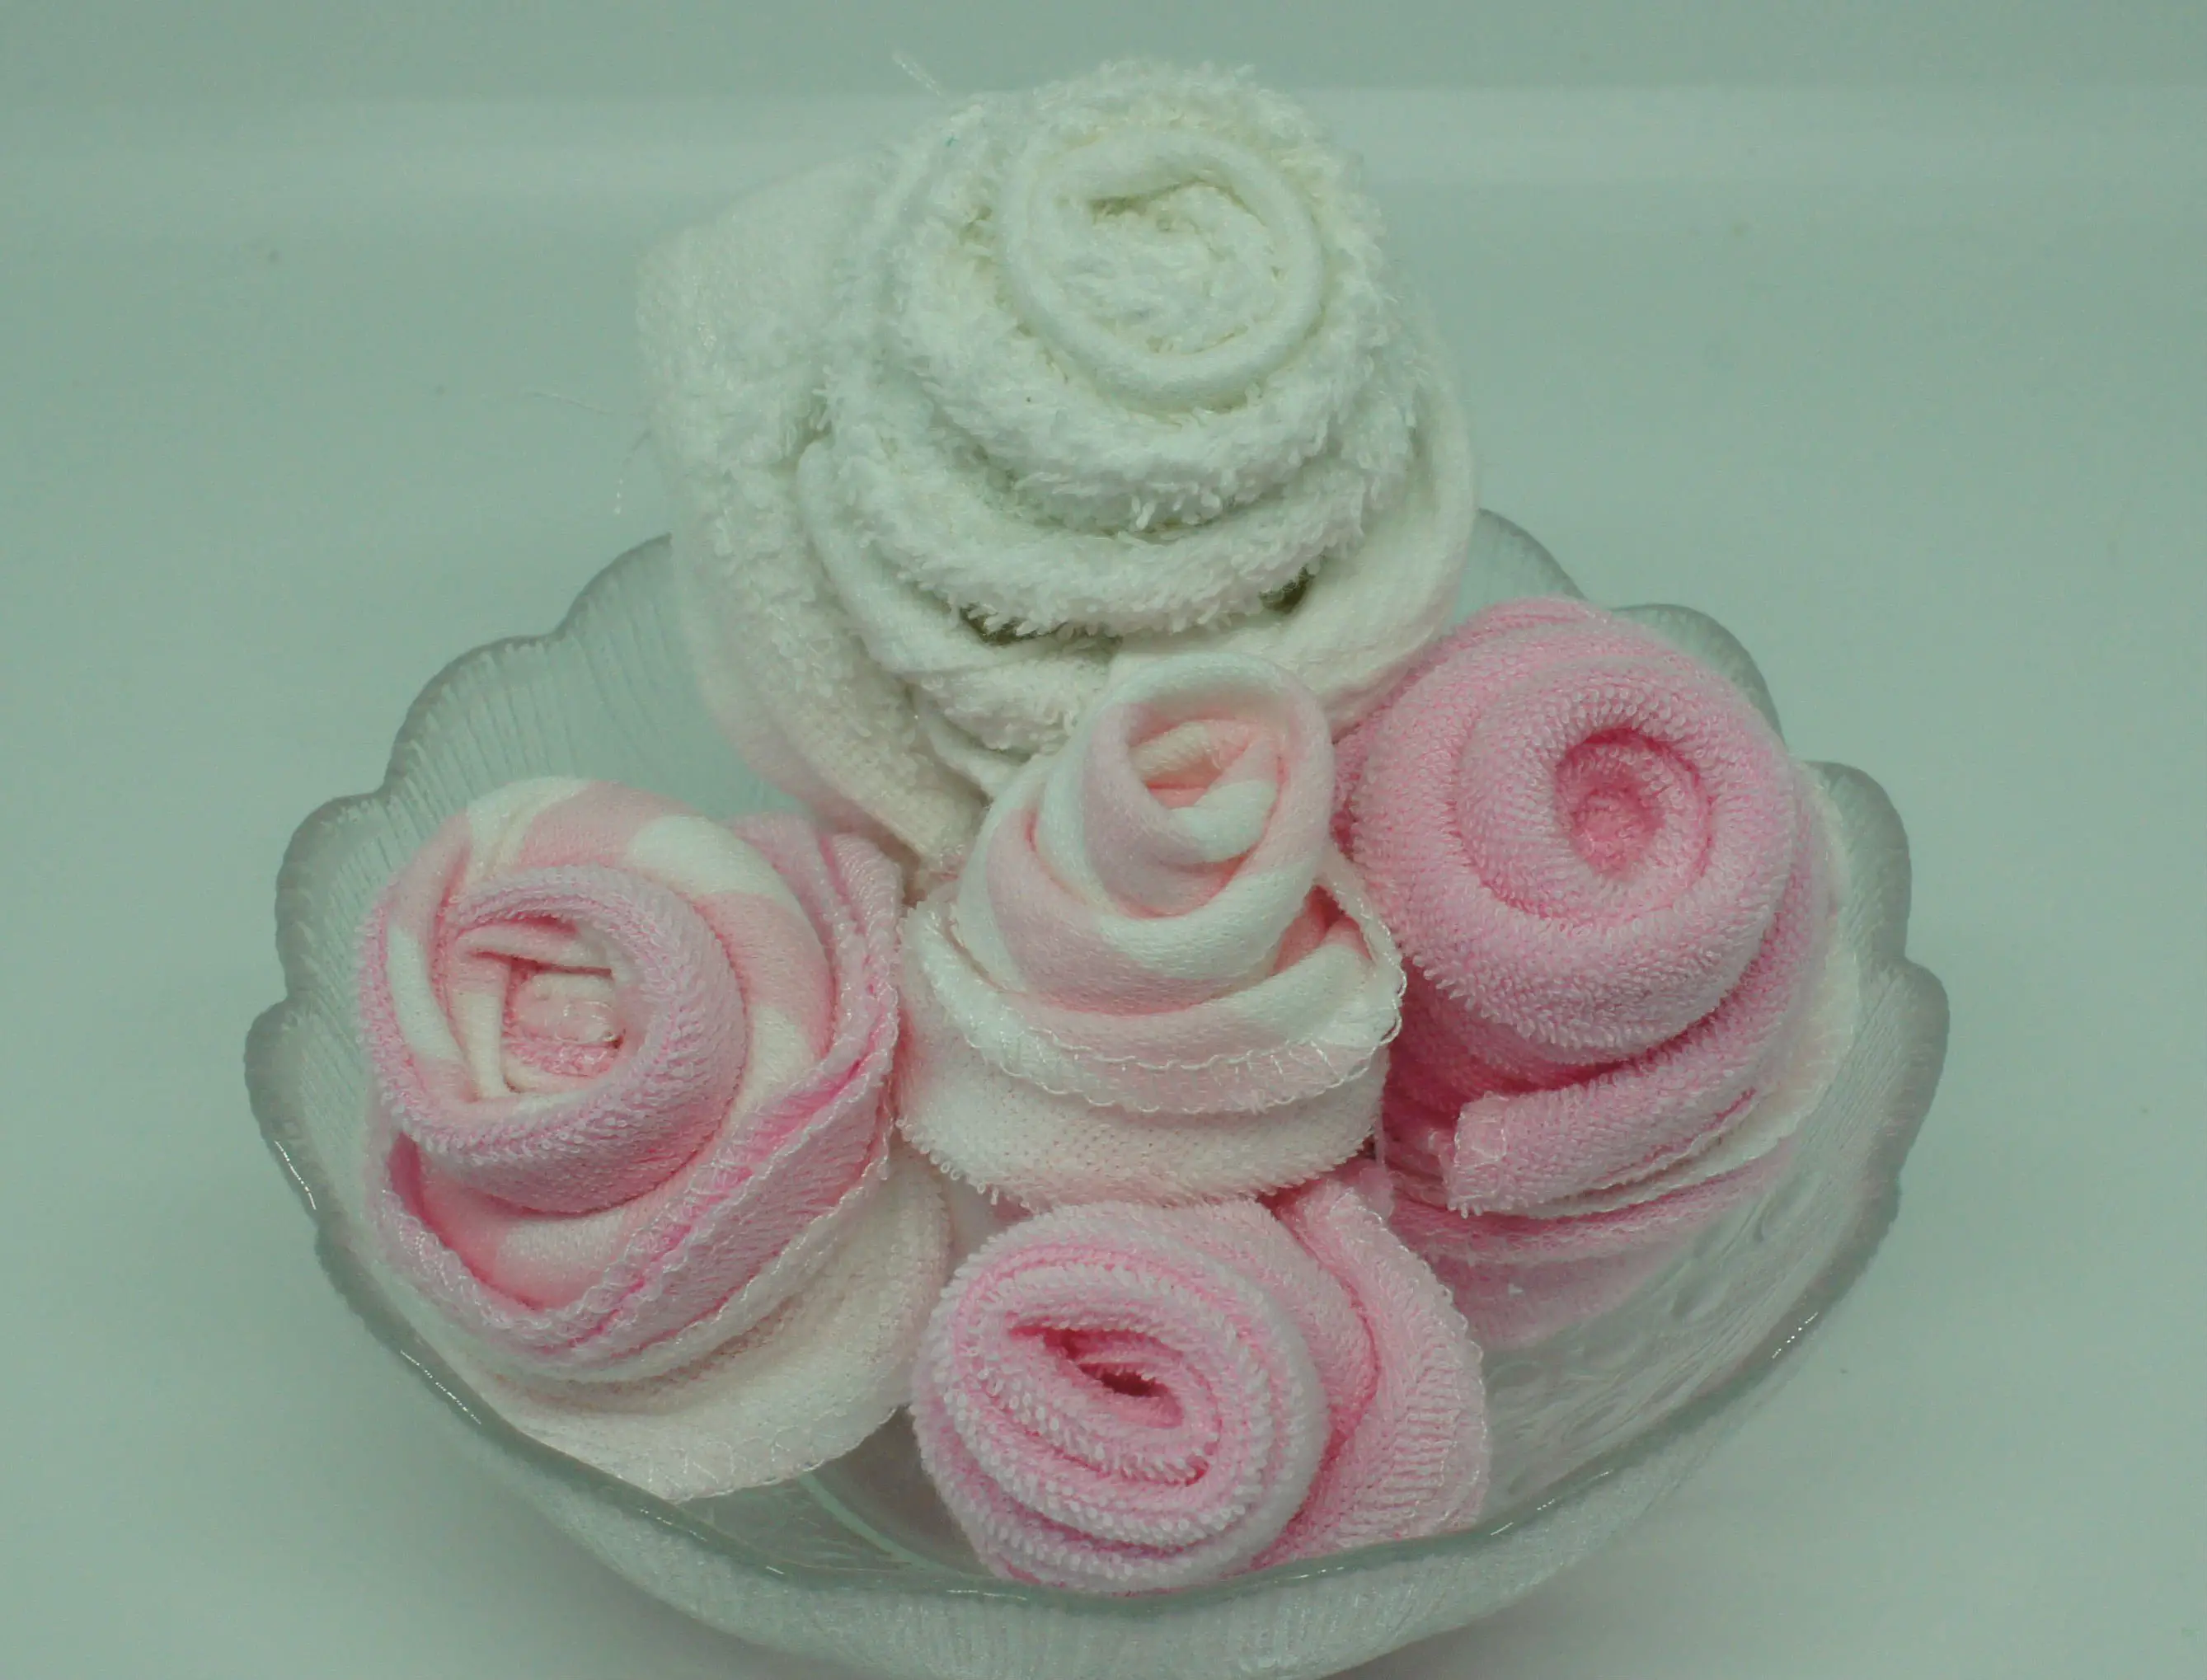
Now you just need to tidy up your rose. It looks great if you draw down the centre of the rose slightly so that it looks more natural. You can also curl back some of the layers slightly so that they look more like petals. You have now finished your rose!

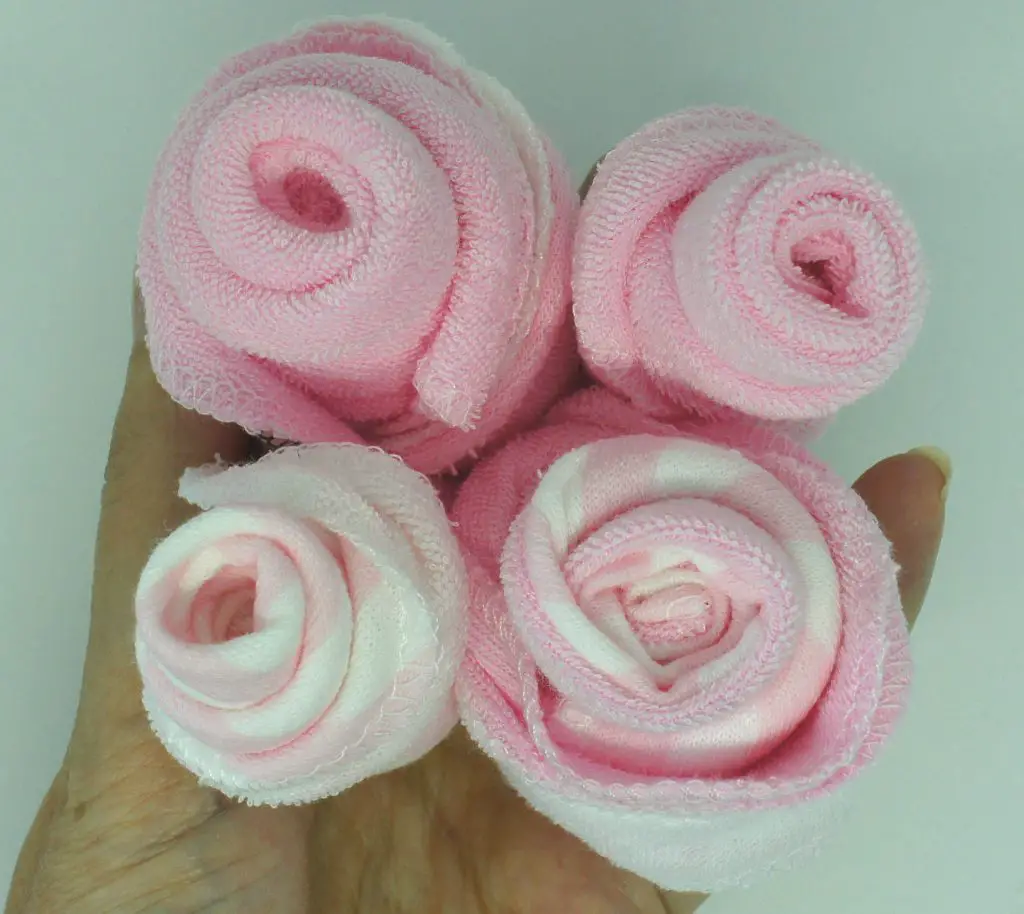
I have shown you with a strongly coloured washcloth as I thought it showed up better in the photographs but I made some gorgeous delicate pink roses. I used these in my gift bags!
So, as you can see, if you persevere a little with the fiddly bit washcloth roses really are very easy and as there is no sewing involved they can simply be unrolled and used as washcloths!
So, have fun, and give these a try. You probably have a cloth somewhere already to use but if not they are available on Amazon.
So if you want this tutorial as a downloadable PDF for a small charge so that you can avoid the ads and easily print it off simply click here for more details.
If you like to craft some interesting things then take a look at some of my other tutorials:
Gorgeous paper flowers from old Magazines
If you want to find this later remember to pin it on Pinterest.