Origami Christmas Trees in under 5 minutes!
As an Amazon Associate I earn from qualifying purchases
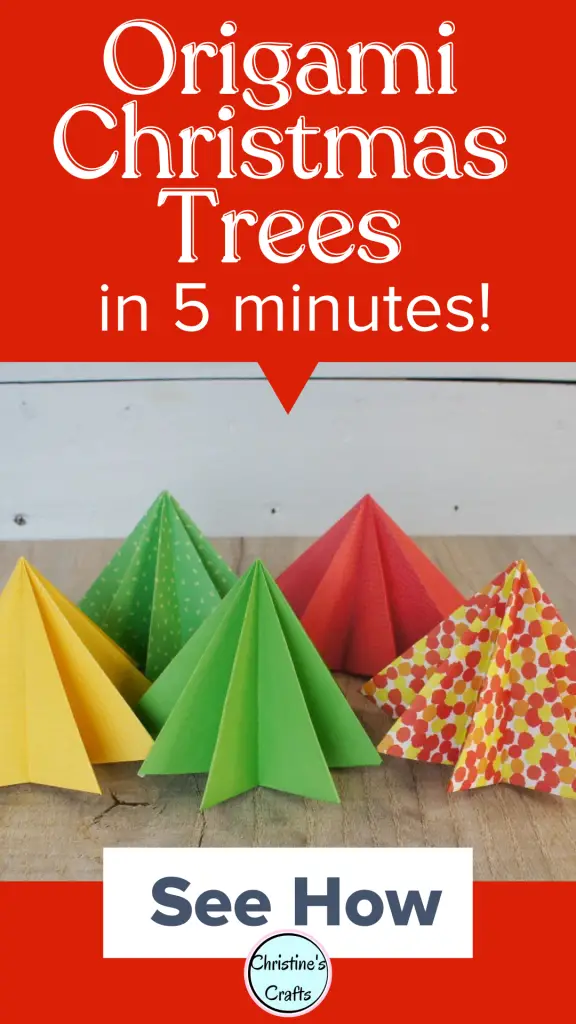
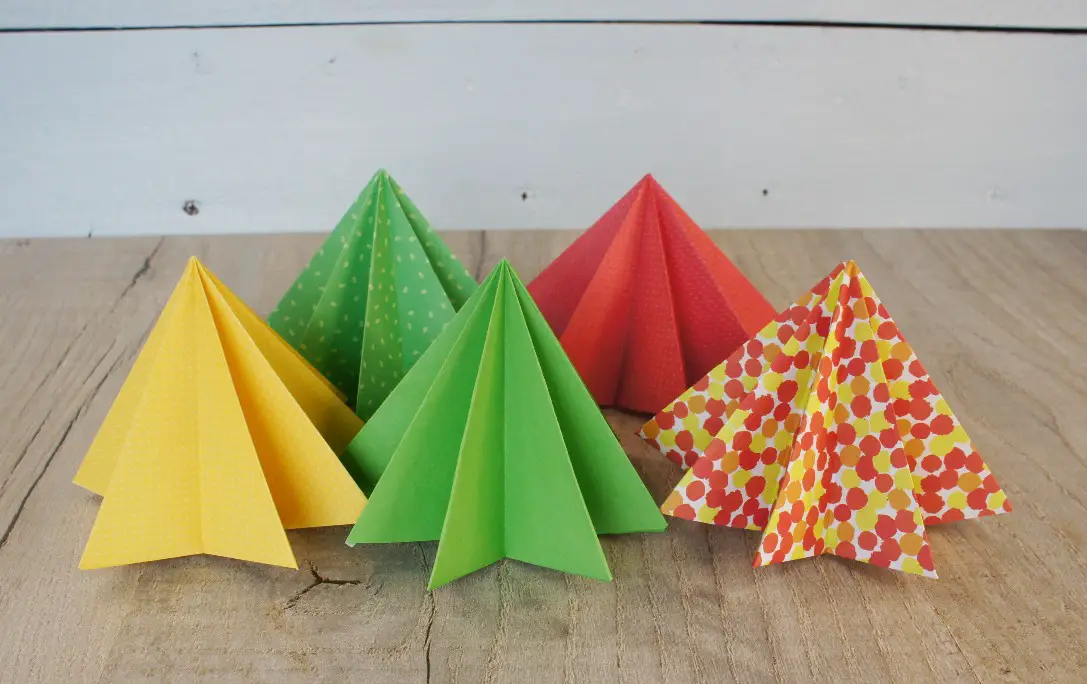
How about turning squares of paper into a forest of Origami Christmas trees? They are super quick and easy to make and they are a great craft activity for adults and kids. A whole class or youth group could make them for hardly any cost.
Don’t worry if you have never done any Origami as these are really easy and the instructions below will show you step by step how to achieve your finished Christmas trees. There is even a video that you can watch if you prefer to watch how to do the Origami.
This page contains affiliate links meaning I earn a little commission if you use those links at no cost to you. I only recommend brands I use and trust.
You will need:
Square of paper. Any size works but mine are 6″ by 6″.

General Origami Tips:
- Ensure all folds are accurate
- Press all folds firmly
- Running your fingernail along a crease makes it a sharp crease
- Ensure your paper is the same way round as mine at every step
- If you want to learn some basic origami folds take a look at The Beginner’s Guide to Origami
Video Instructions
This video is also available on my YouTube channel
Preparatory Folds
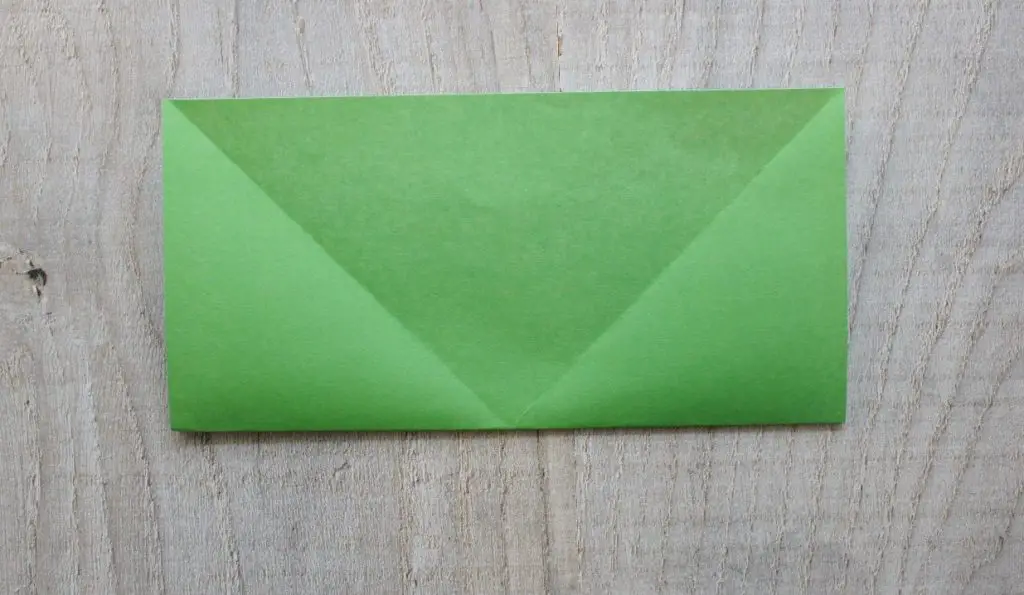
Start with the coloured side of your paper (if it is only coloured on one side) facing up. Fold the paper in half taking one corner over to the opposite corner. Crease well.
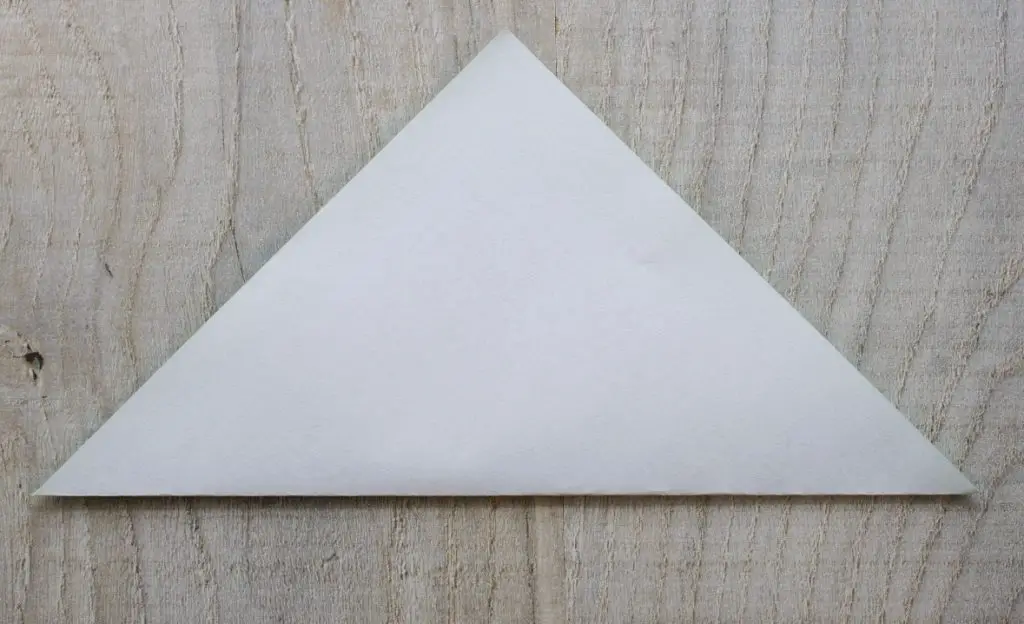
Open the paper back up and repeat this step using the opposite corners. Then open up the paper and it should look like this.
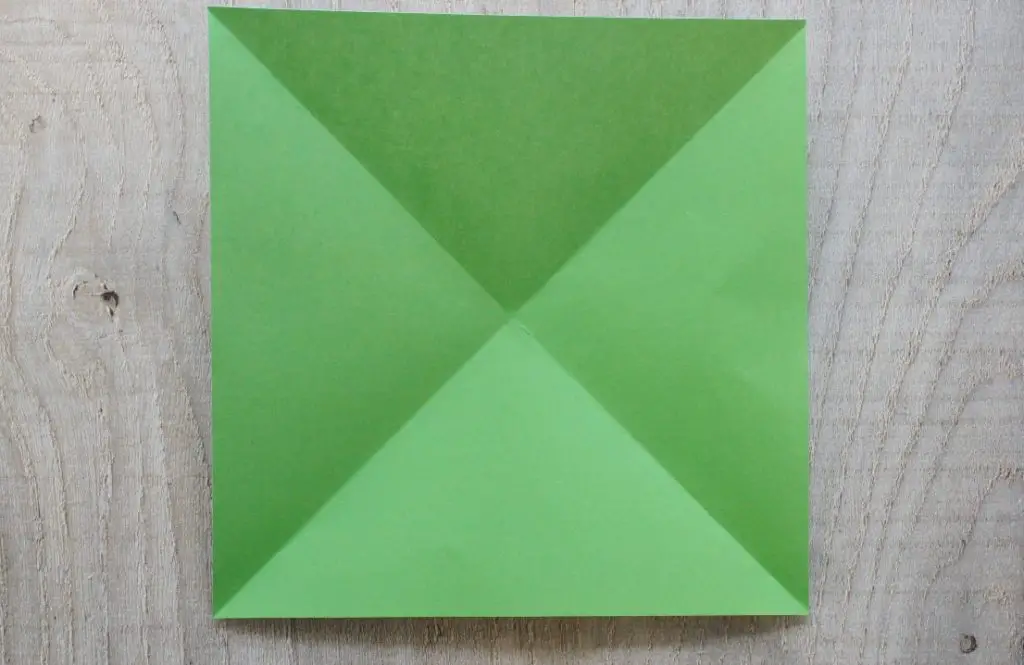
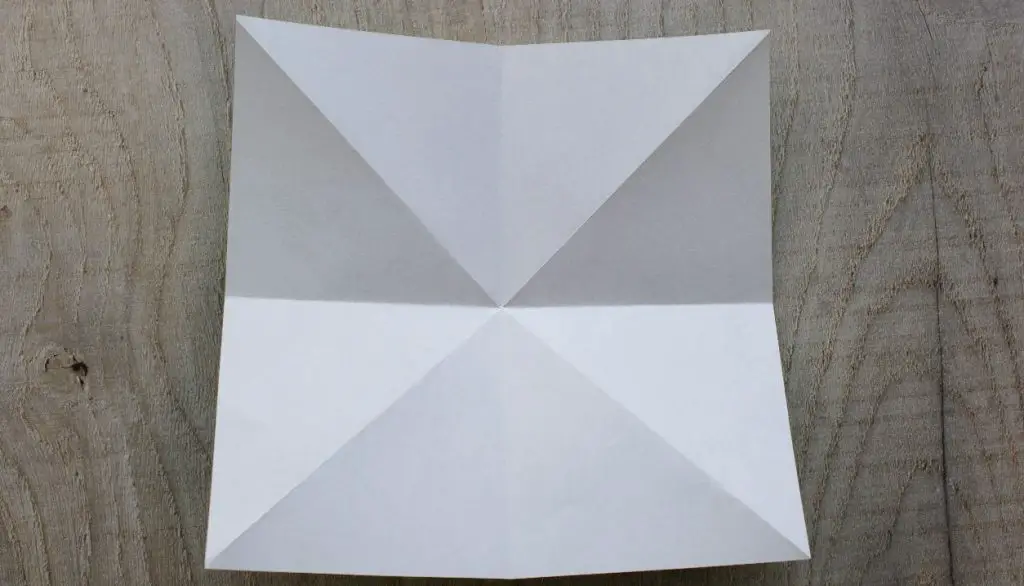
Turn the paper over. THIS IS IMPORTANT! Then fold the paper in half again but this time take one side over to the opposite side.
Open the paper back up and repeat with the opposite sides. Then open the paper up and you are ready to start folding your square of paper into a tree. It should look like this before you proceed.
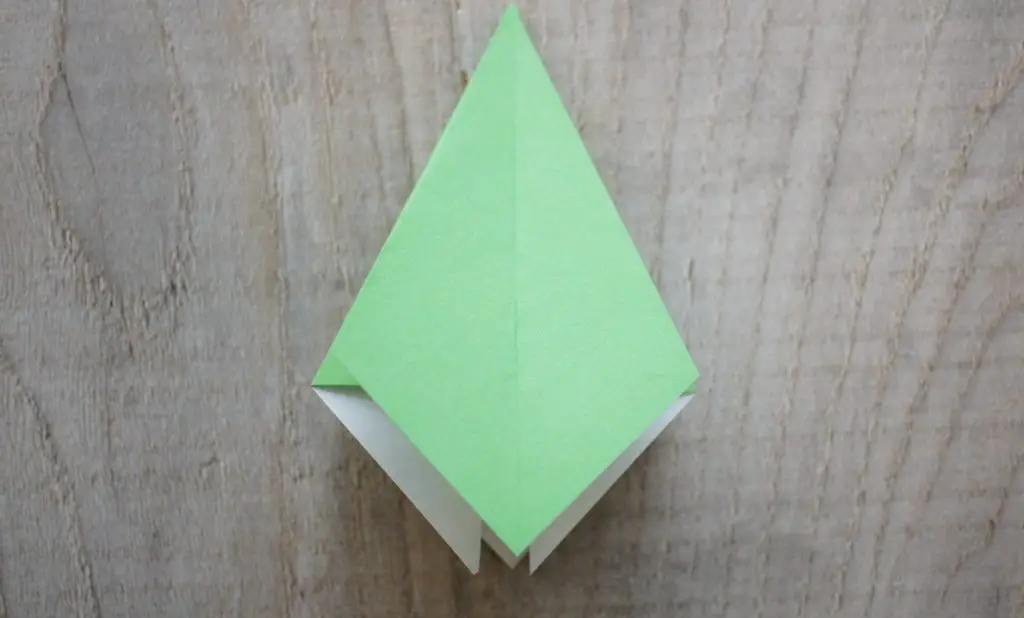
Fold your Christmas Tree
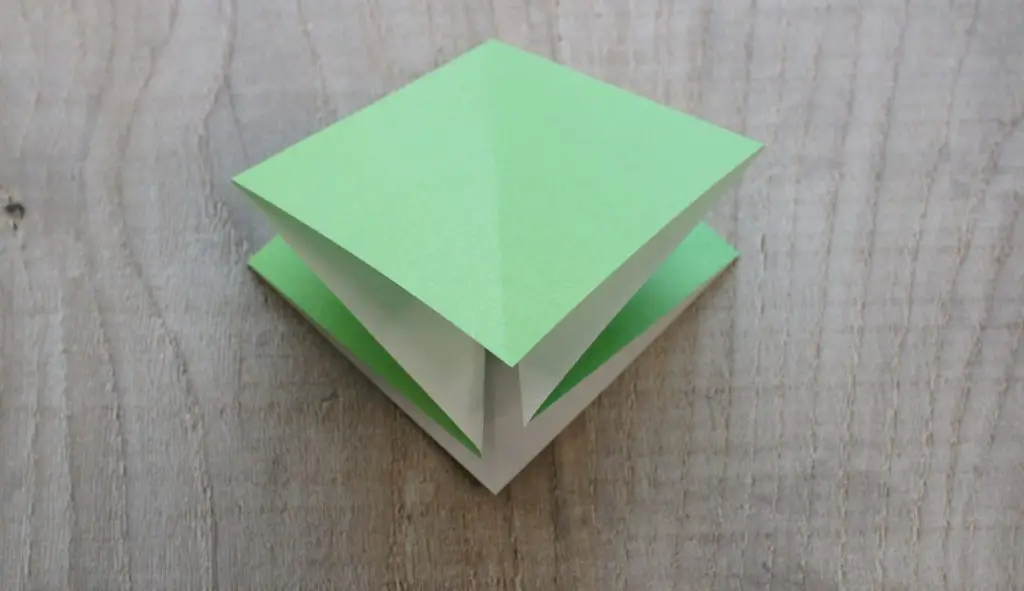
Turn the paper around slightly so that one corner is pointing towards you. Using the creases that you have made fold one side point down onto the bottom point. Repeat for the other side and then bring the top point down too. This is all done in one step. Then firm all the layers down to form a much smaller square than you started with.
If you are confused by this step try watching the video.
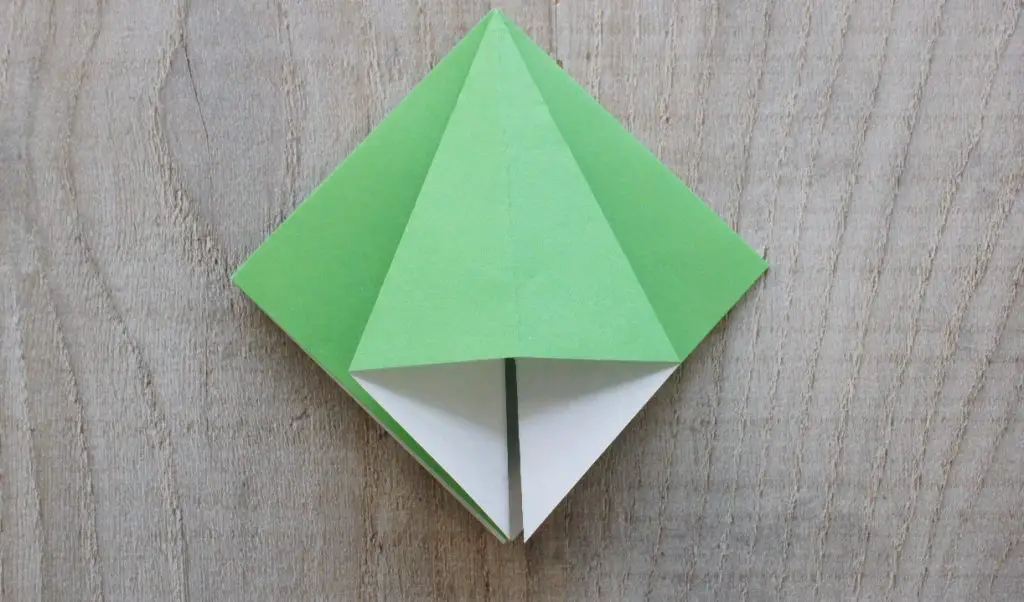
Now take one side of the square and fold it in towards the centre line (crease). Crease it well.

Open the fold back up and poke your finger inside the section that you folded over to open it up. Now flatten this flap into the centre of the square as shown.
Repeat this step all the way around your square. You need to do this whole process to all 4 flaps so that your paper looks like this.
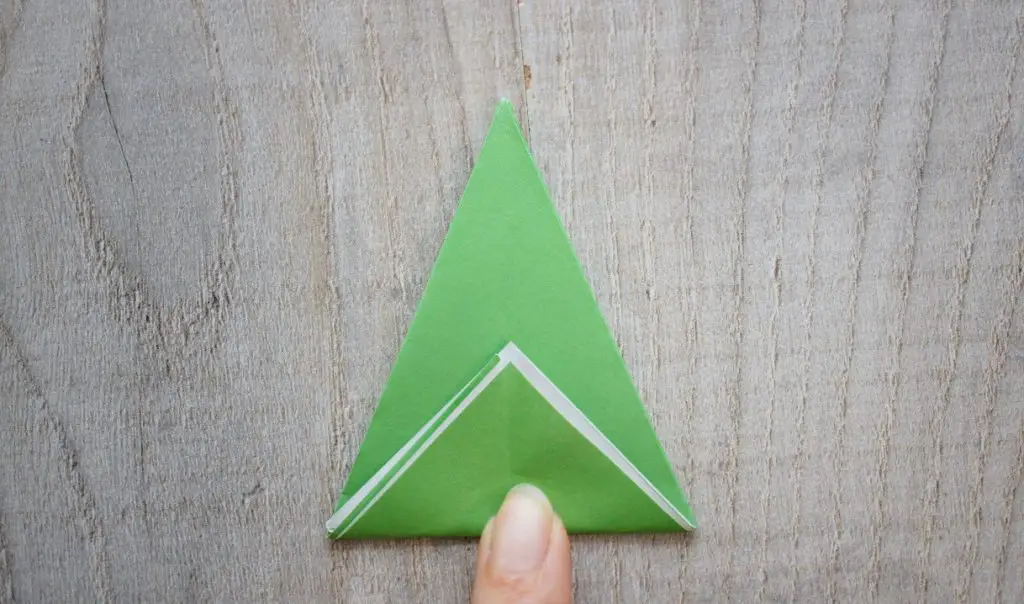
Checkpoint!
Check that you have completed the last step for all 4 flaps. Now, make sure that the top flap is showing full colour and that underneath you have equal flaps on either side underneath. There should be 4 on each side. This is important before you proceed.
Fold the bottom point up towards the rest of the paper along the line as shown below. You are folding all the layers up together.
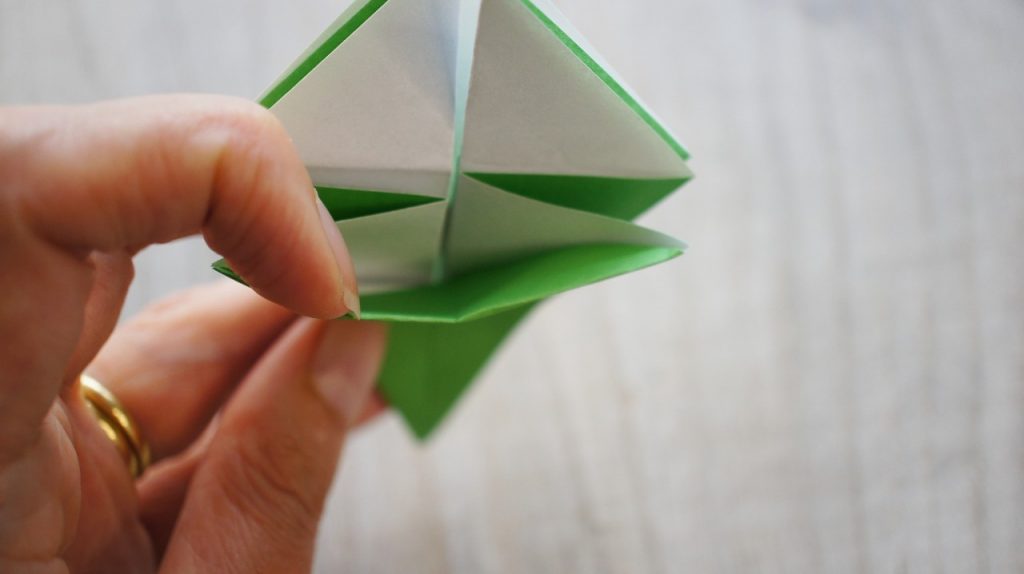
Carefully take each flap that you have created, in turn, and fold them up inside your tree. Make sure that you only fold them over one layer of paper. They should fold up really well if you have made a crisp crease in the last step.
Now you are ready to shape your tree. Simply open up the branches so that your tree stands up and adjust them so that it looks even and stands up by itself. If you want your tree to stay quite narrow then your folds need to be very crisp and you may find that you want to hold them in close to the centre with some glue. I haven’t.
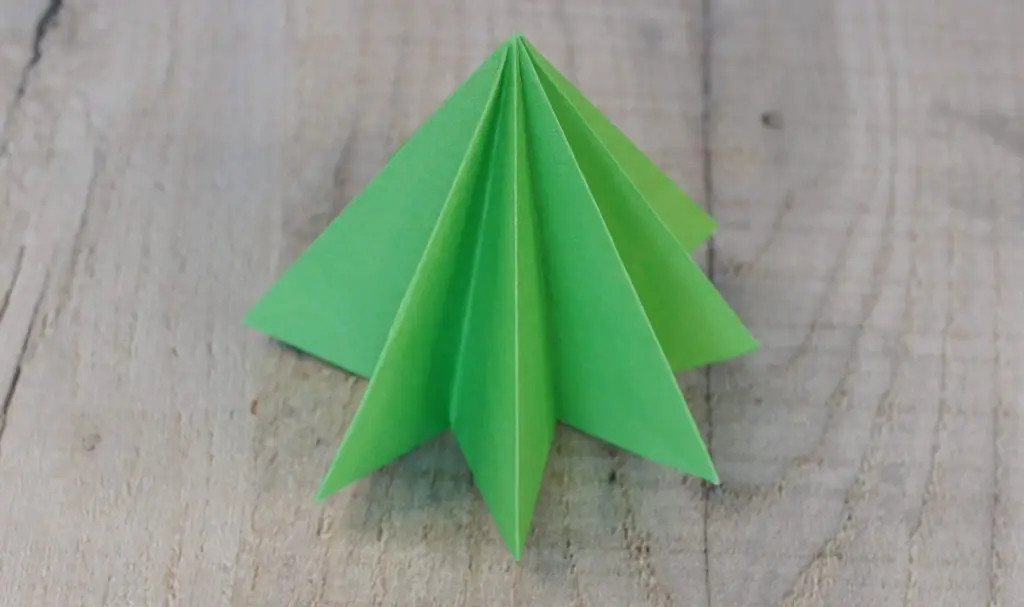
You do not have to stop there, you can easily decorate your tree further by adding a star or glitter or small stickers as baubles. Get creative!
And Finally
You can now make as many trees as you would like, a whole forest. They look great as table decorations or on a mantelpiece. Try different sizes and papers. Get creative and use your Origami Christmas trees throughout your decor.
While you are decorating for Christmas why not check out these great Christmas decoration tutorials:
Traditional Norwegian Christmas Coronets
Popsicle stick Christmas Sled Decoration
Enjoy making your forest of trees and please comment below and let me know how you decorate yours to make them unique for you.