Learn How to Crochet Part 1: Chain Stitch – Step by Step
As an Amazon Associate I earn from qualifying purchases
At the heart of crochet is the chain stitch. Many projects are started on a row of chain stitch and most stitches require some chain stitches to be used with them at the start of rows. Chain stitch is a very valuable stitch to learn at the start of your crocheting journey.
This tutorial also includes how to form a slip knot to start your crocheting. A vital skill for all crocheters and indeed knitters!
If you are ready, let’s begin.
This page contains affiliate links meaning I earn a little commission if you use those links at no cost to you. I only recommend brands I use and trust.
You will need:
- Yarn – just have a go with any that you have
- Crochet hook – use any that you have but ergonomic crochet hooks are fabulous
- Scissors to cut the yarn
Form your Slip Knot
Form a loop of yarn, leaving a tail of about 6 inches. Create another smaller loop in the long length of yarn (that goes to your ball of yarn). Poke that smaller loop through the larger loop that you made.
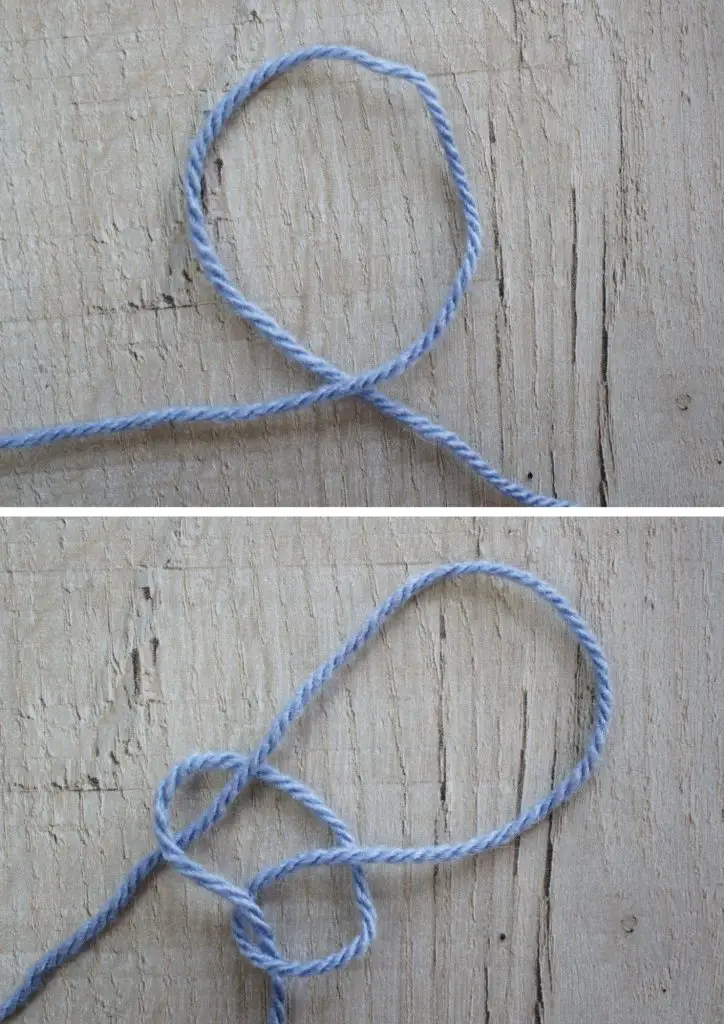
Pull the smaller loop through and then put your crochet hook through that smaller loop. Pull the shorter length of yarn to tighten the slip knot onto your hook.
If you need a little more help here is a very short video showing you how to do a slip knot.
Well done! You are ready to start your chain.
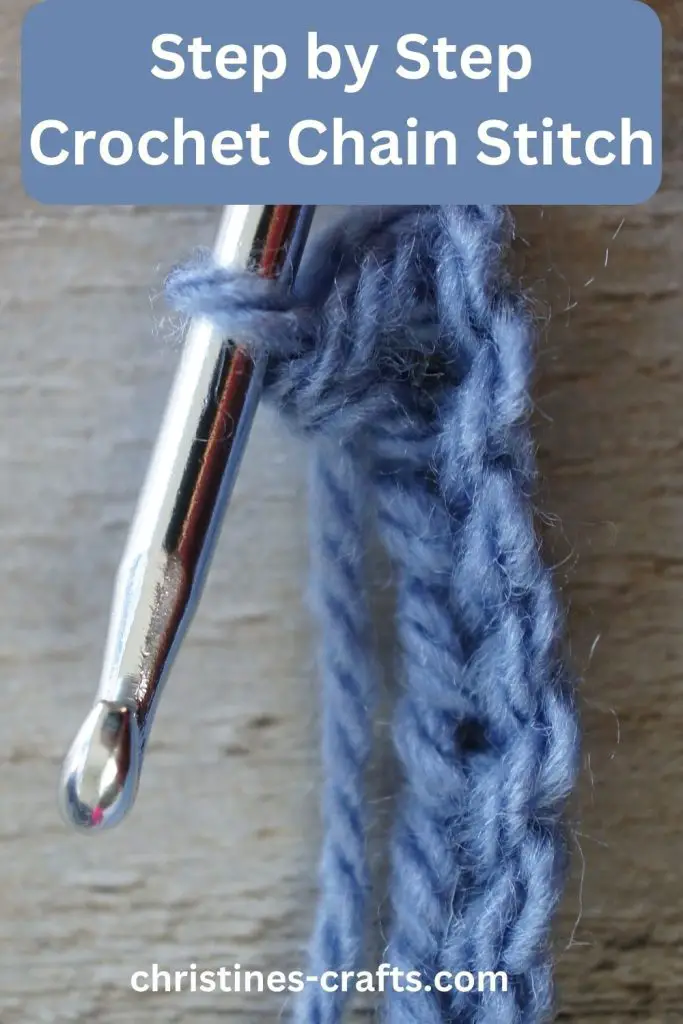
Chain Stitch
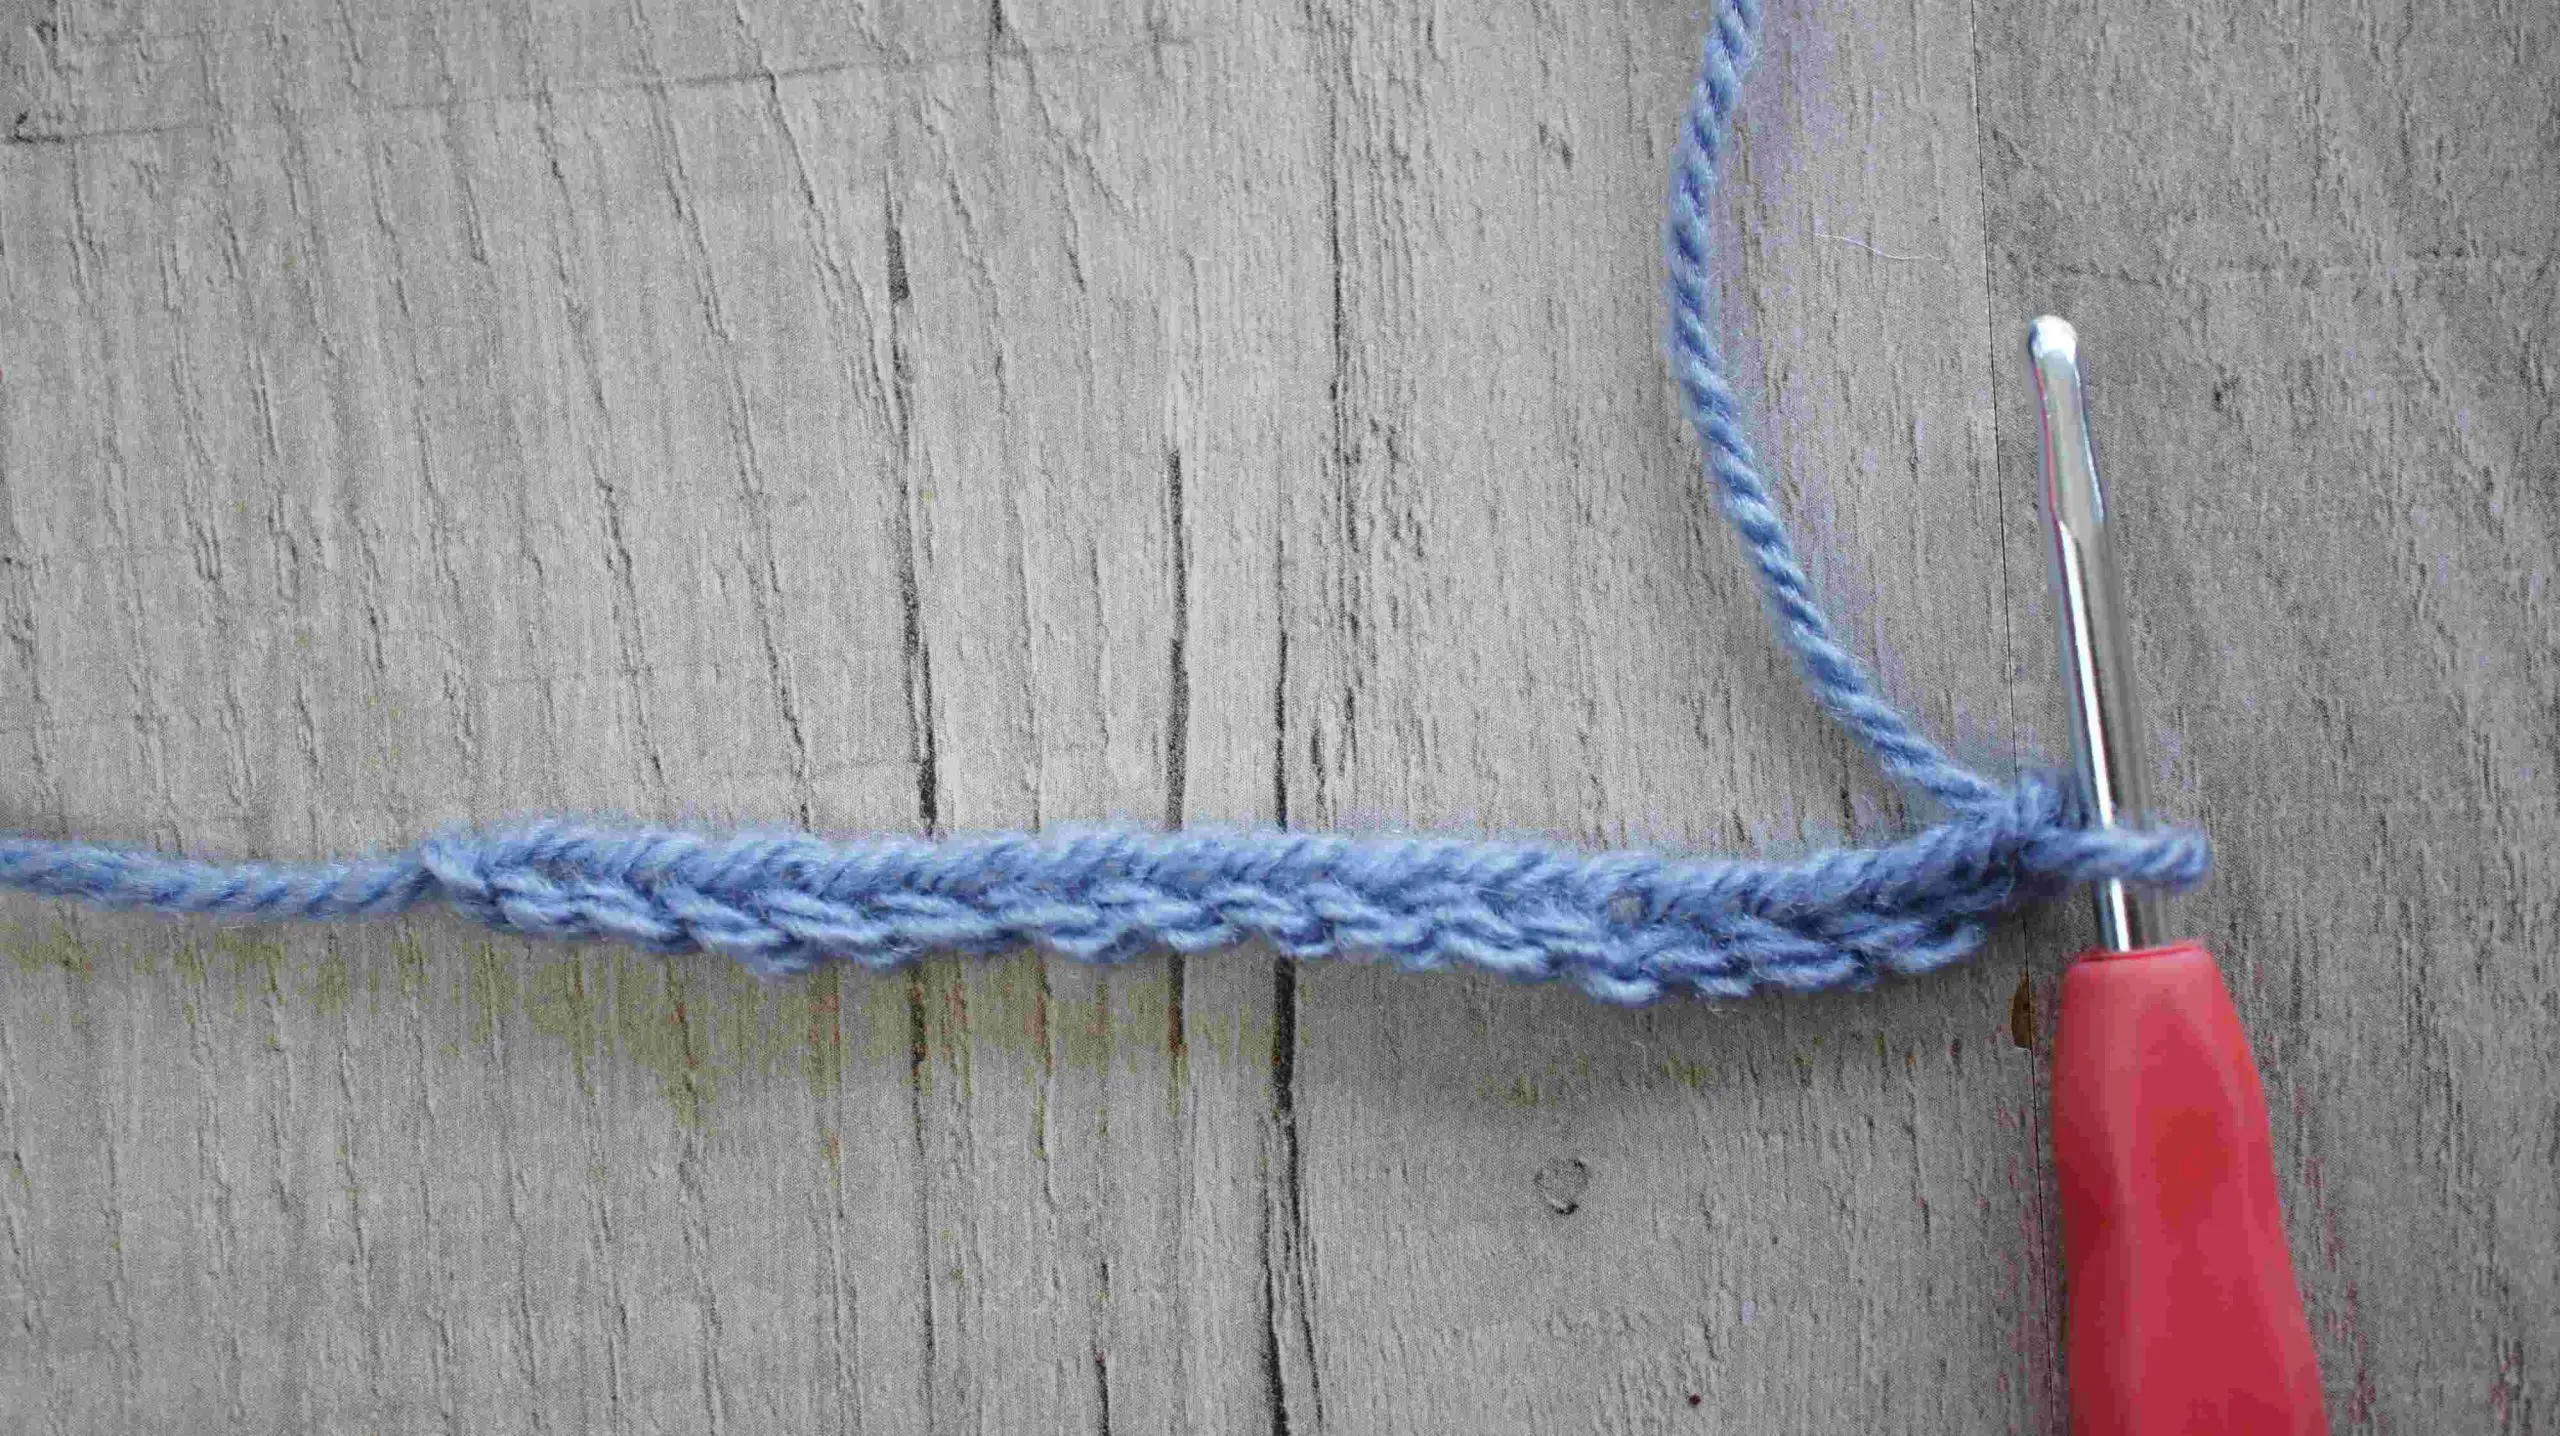
Once you have a loop on your crochet hook you are ready to form your chain. The first step is to make sure that your yarn is under some tension. I wrap it around my first finger but many people wrap it around their smallest finger. There are many combinations and all you have to do is play around with hooking the yarn around the fingers of your non-dominant hand until you are happy with it.
All that matters is that there is some tension but the yarn can still flow freely so that you can work with it. Twist the hook so that you hook the yarn and then pull the hook back through the loop on your hook making sure that the yarn stays hooked around the hook.
Some people prefer to think of it as wrapping the yarn over the hook and then pulling the hook through the loop. Do whatever works for you.
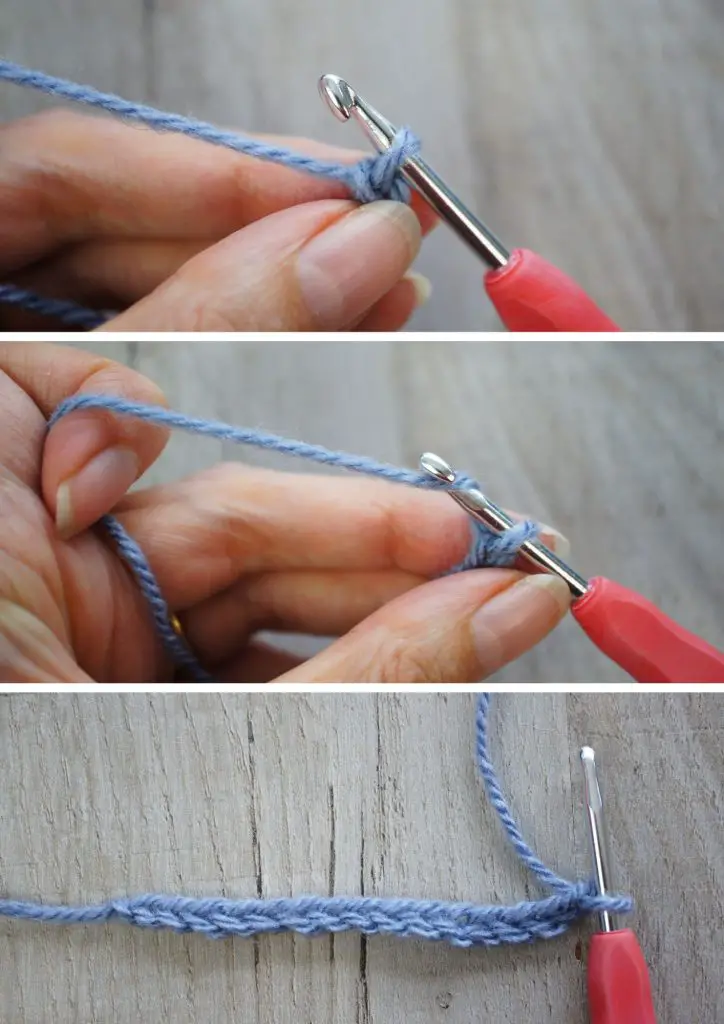
You will now have one loop on your hook again but you will have ‘dropped’ the original loop off the hook. This is forming your first chain stitch. Just repeat this process for as many chain stitches as your pattern needs.
The front of your chain is all v shapes and the back has a row of bumps. Take a look so that you recognise the front and the back.
You will get into a rhythm and find it rather soothing to do. Just make sure that you try to make all the stitches a similar size and try to avoid getting them too tight or you will struggle to work into them later.
Chain Stitch Video Tutorial
This video is also available on my YouTube channel.
Top Tips
- Use the correct hook size for your yarn – see your yarn wrap or your pattern
- Practice! The more you do the better you will become
- Watch video tutorials to help you visualise it
- Join crochet groups (in person or online) for support and advice
- Try to keep a consistent tension in your yarn and your work
- Do not make your stitches too tight
And next …
This is the first tutorial in a whole series dedicated to learning to crochet so I will add links to the next best tutorials for you to develop your skills as I write them!
In the meantime how about making your own fabric yarn ready for a crochet project? You can learn how here with step by step and video instructions.
If you would like access to a ‘table of common crochet terms and abbreviations’ then sign up to my newsletter at the top of this post and you will get access to my whole resource library including the table.
Good luck with your crocheting and sign up at the top of this page to receive news whenever a new part of the series is published (as well as get your free table).
- Master the single crochet /double crochet stitch
- Master the half double crochet / half treble crochet stitch
- Master the double crochet / treble crochet stitch
- Master the treble crochet / double treble crochet stitch
- Common Questions about Crochet
- Crochet some adorable small hearts using up your yarn scraps.