Easy Button Flowers for Home Decor
As an Amazon Associate I earn from qualifying purchases
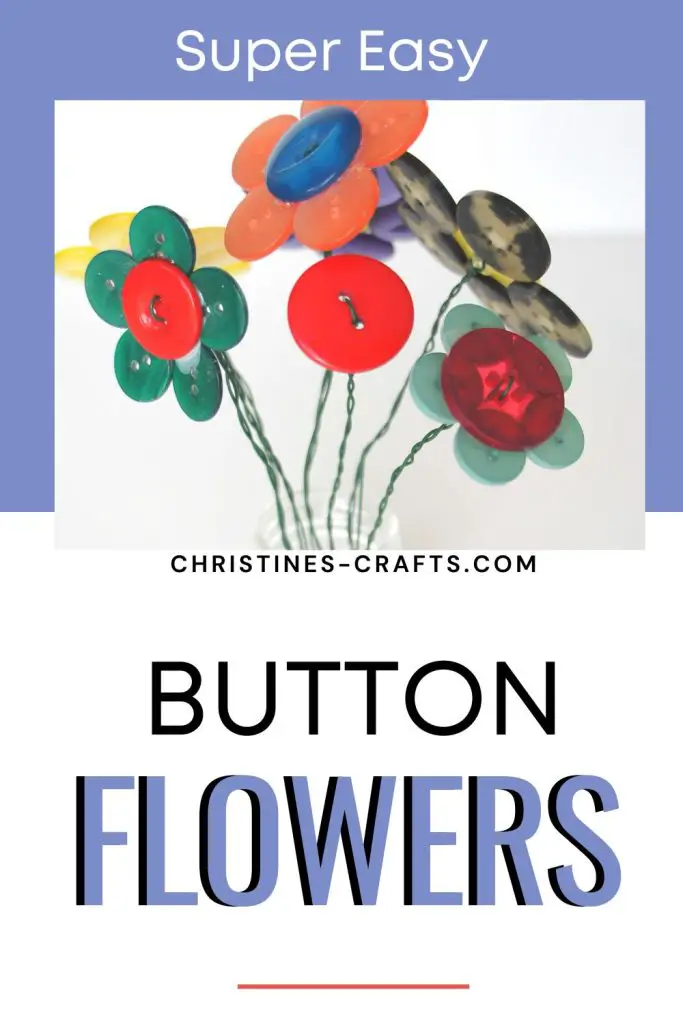
How cute are these flowers made with buttons? The first time I saw button flowers I knew that they were for me as I have a large collection of buttons that I have accumulated over the years. This is a great way to use them and add some bright and beautiful flowers to my home all year round.
There are two different kinds of button flowers here and I will show you how to make both. One uses 5 buttons plus a larger one and one type only uses one button.
I like to think of these as a little bit of sunshine in the home at any time of year. If you make them out of yellow flowers they will even look like little sunshines! This month the theme for
the monthly Sustainable Craft Challenge is sunshine. I am joined by so many talented crafters from all around the world to bring you some great inexpensive sustainable craft ideas. All of them are sunshine themed so will brighten your day and at the end of this tutorial you will see links to them all so take a look.
This page contains affiliate links meaning I earn a little commission if you use those links at no cost to you. I only recommend brands I use and trust.
Video Tutorial
This video is also available on my YouTube channel.
One Button Flower (and felt / paper)
You will need:
- Buttons
- Felt or Paper
- Flower Template – Free!
- Multi-purpose glue
- Florists Wire (or similar)
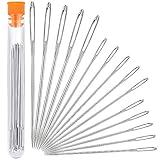
- Large Needle
- Small pliers


Form your Flower
Cut out your chosen flower template. You can use the one linked to on this tutorial or you can use one you already have. Place it onto your felt or paper and draw round it.
You can use one layer like I have done or add more layers for a thicker flower. This may be a great idea if you are using paper.
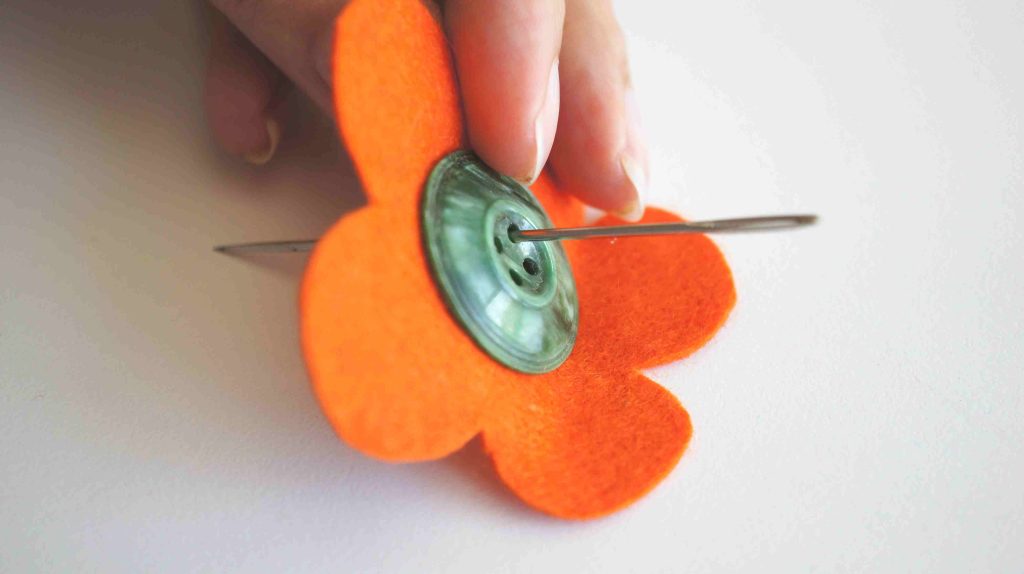
Glue the button onto the middle of your flower petal piece of felt or paper and leave it to dry. If you are using several layers then glue those first and then add the button.
Add your Stem
Once your flower is dry take a large needle and push it through one of the holes in the top of the button and through the felt or paper underneath. Repeat with another hole.
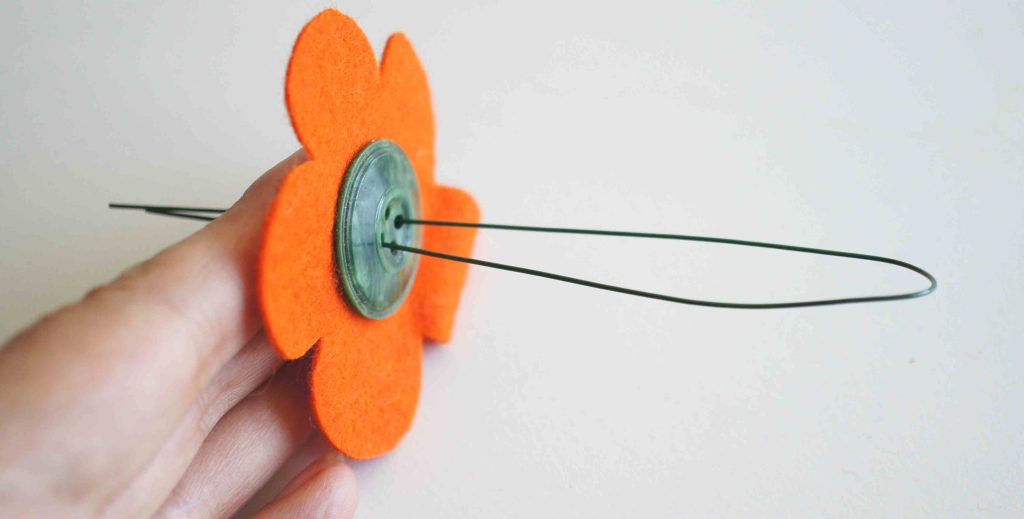
Take a piece of florists wire (or similar) and either bend it in half or bend a short length over at one end (approximately 2″). Feed the two ends of the wire in through the holes that you made from above. By that I mean, through the button and then the felt or paper.
The ends of the wire should end up poking out of the bottom of the flower. Pull all the way through!
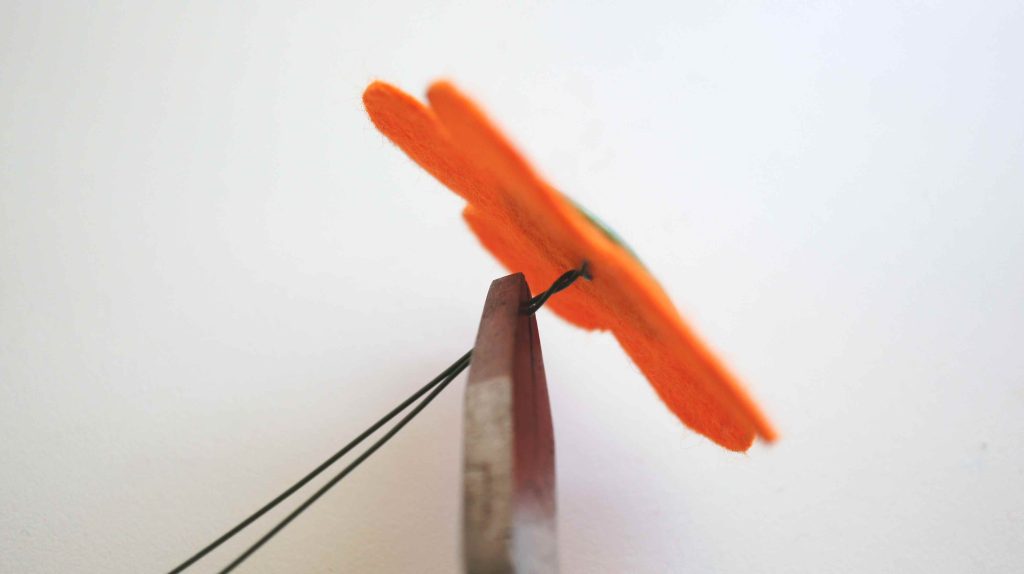
Once the wire is all the way though twist the two ends together along their length. I recommend twisting them up very tightly behind the flower head. This means that the flower head will not flop down when in your vase. You may need to use pliers to get these tight enough. I did.
Your flower is complete. Simply bend your wire into the shape that you want and arrange it with your other button flowers. I think that they look fabulous in a small jam jar. If you add polystyrene or playdoh or something similar to push the stems into they hold up really well.
If you have plain wire and would like it to be green you could always wrap it in green tape.
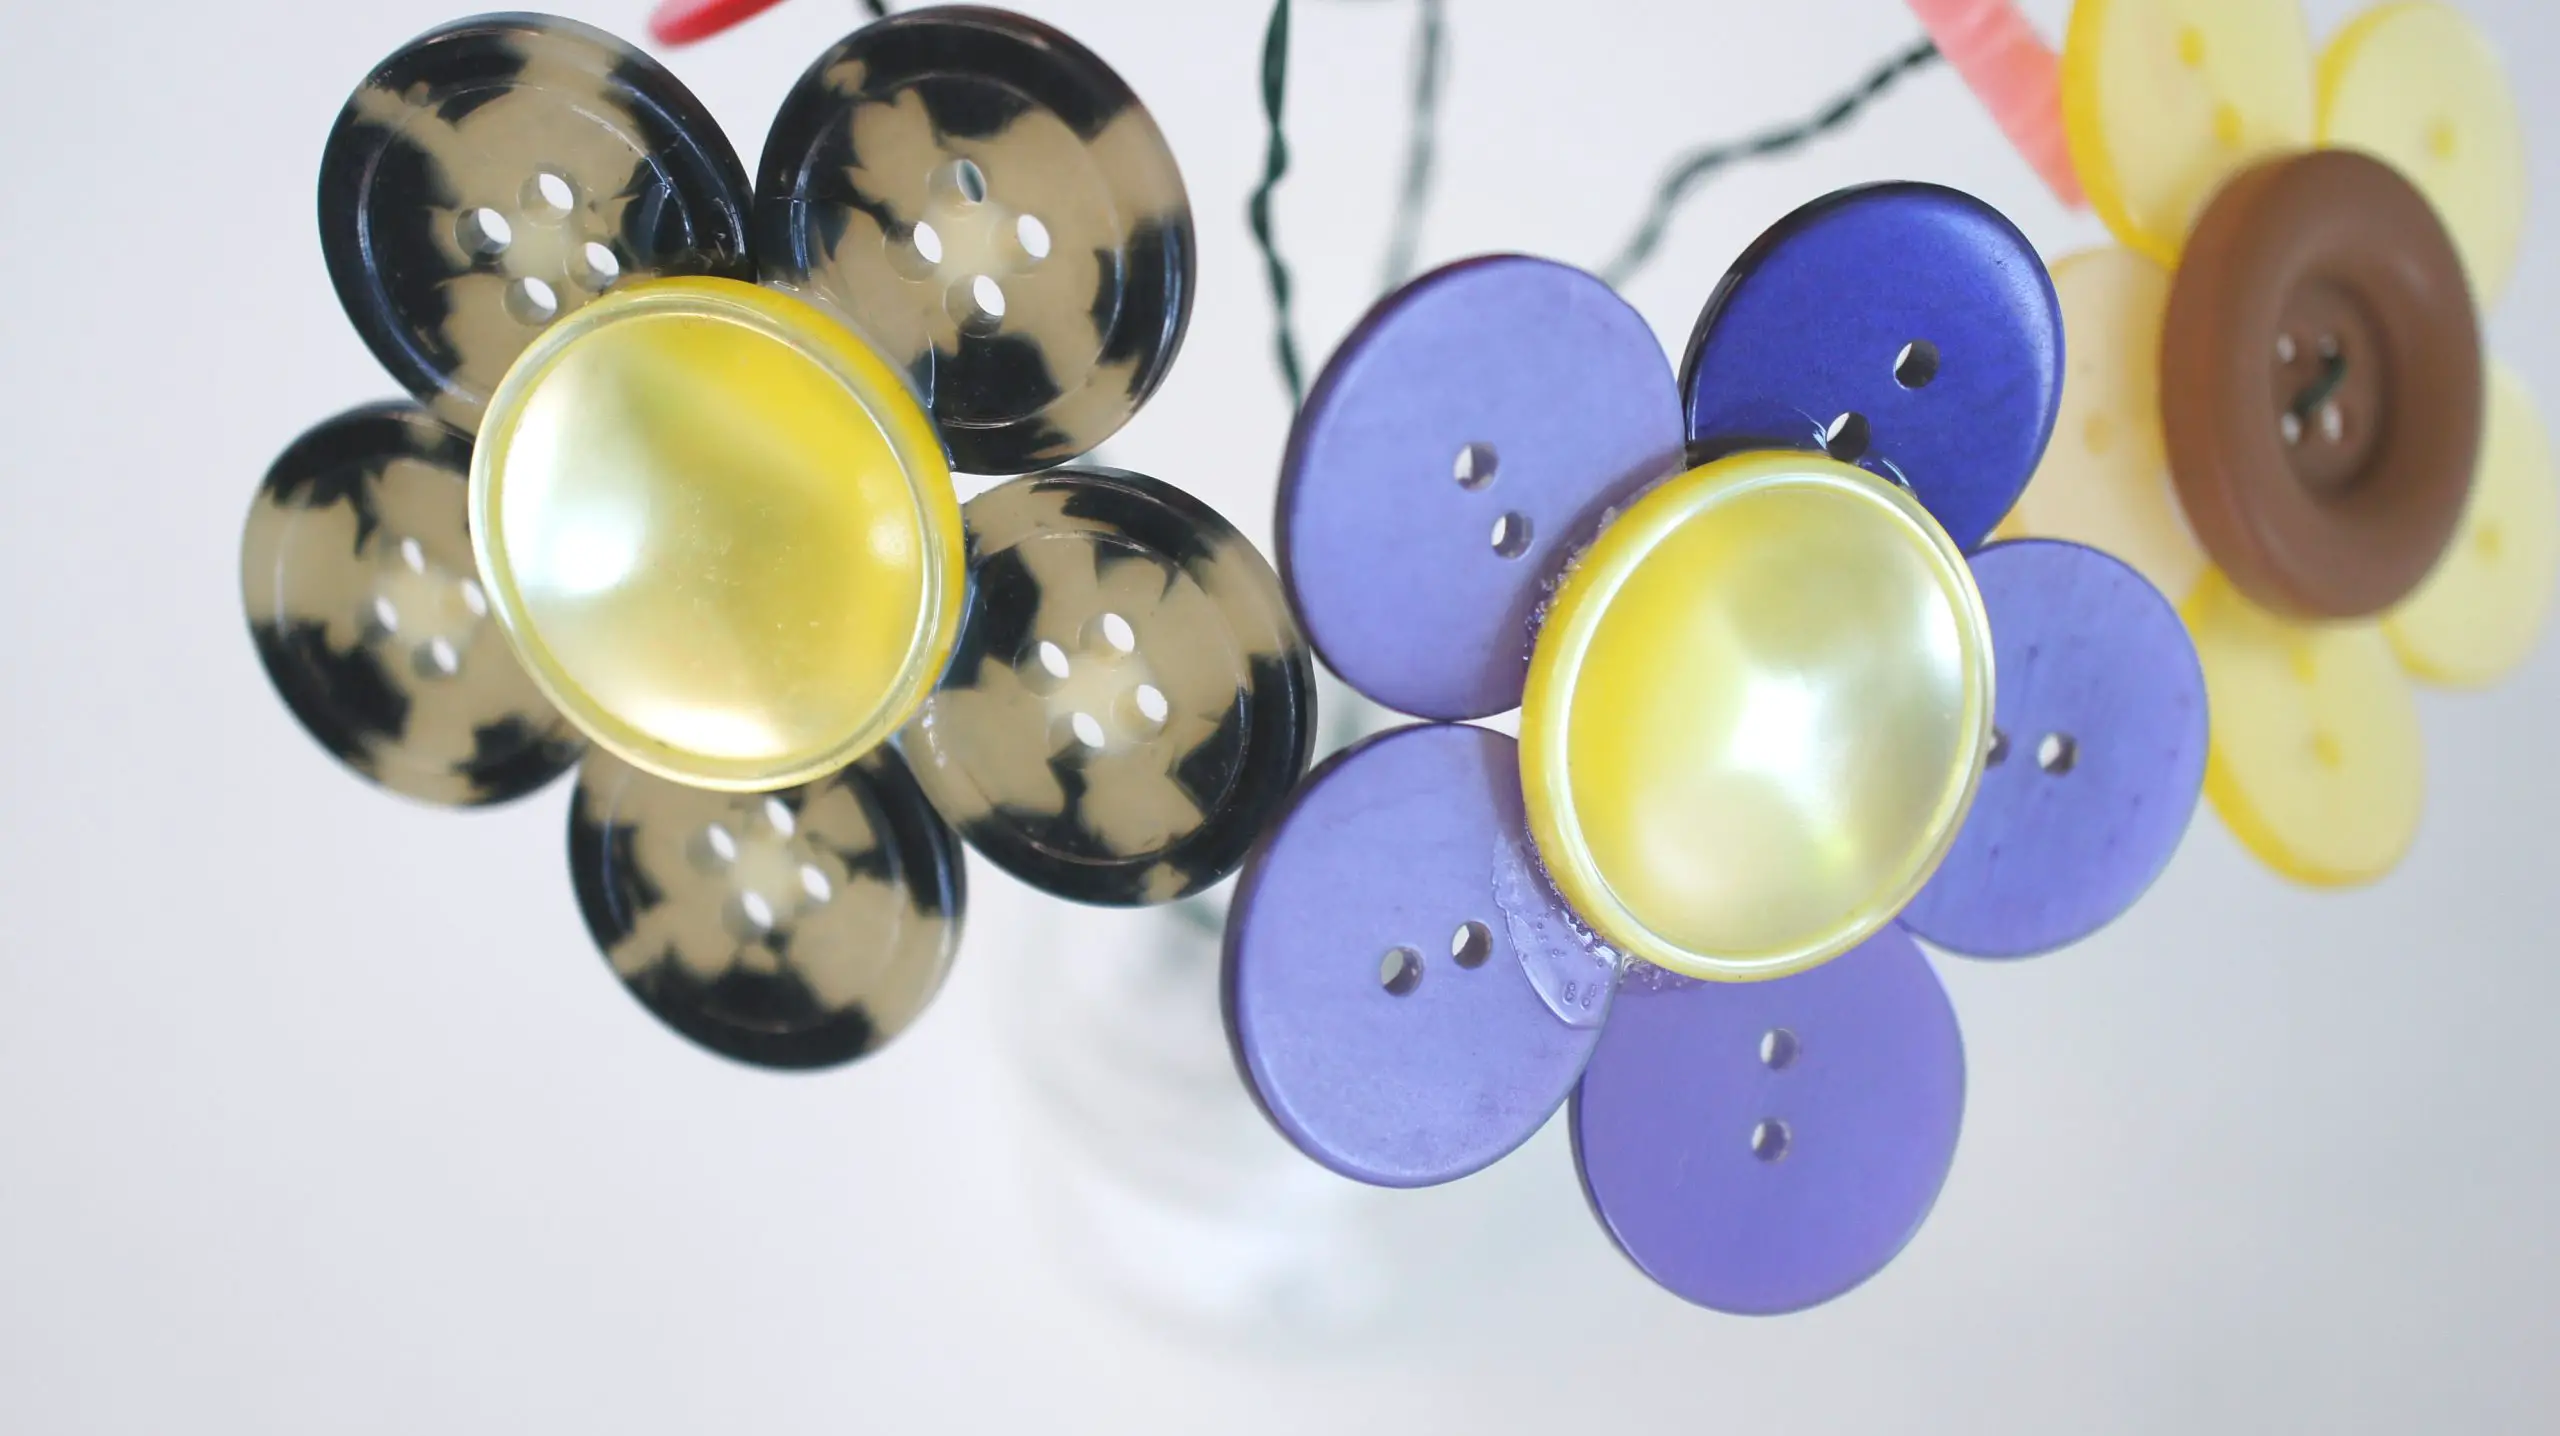
Five Button Flower (plus a large one for the centre)
You will need:
- 5 Identical Buttons
- 1 Larger button
- Multi-purpose Glue
- Florists wire
- Small Pliers
Form your Flower
Another way to make button flowers is to take 5 identical buttons and arrange them in a flower petal pattern. Check that your large pattern overlaps all of the buttons enough to glue to them when you place it in the centre.
It is a good idea (but not essential) to have the flat side of the buttons facing the centre large button. This gives a larger area to glue them together.
Then add glue to the inner sections of the buttons.
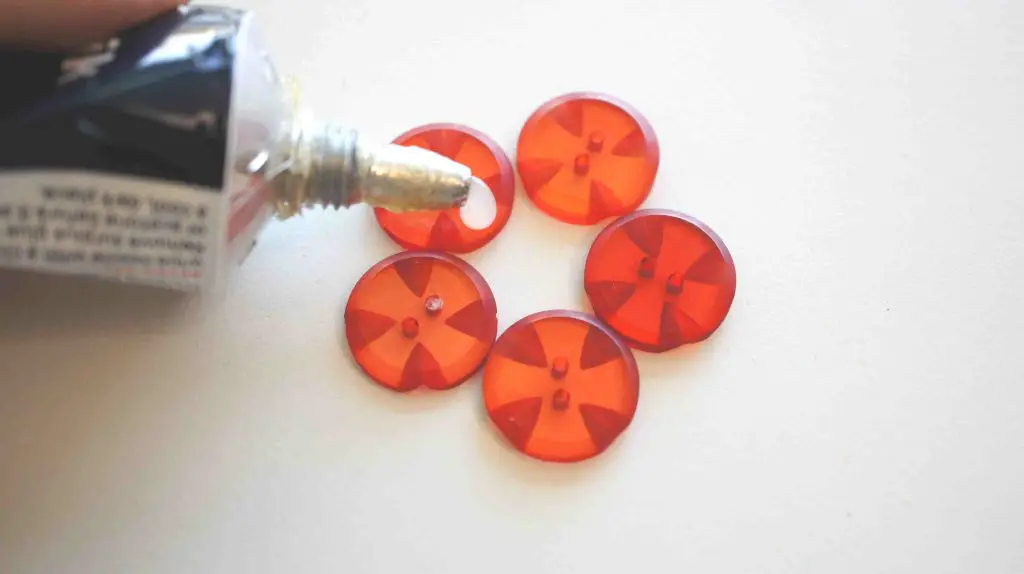
Place the central button in place and adjust the petal buttons as you need to. Once you are happy with it leave it to dry. You need the glue thoroughly dry so I recommend overnight.
Add the Stem
This is the tricky part of making these flowers. You do it in exactly the same way as you do for the felt flowers above but the flower is much more delicate.
Take a piece of florists wire (or similar) and either bend it in half or bend a short length over at one end (approximately 2″). Feed the two ends of the wire in through the holes in the central button from above.
The ends of the wire should end up poking out of the bottom of the flower. Pull all the way through!
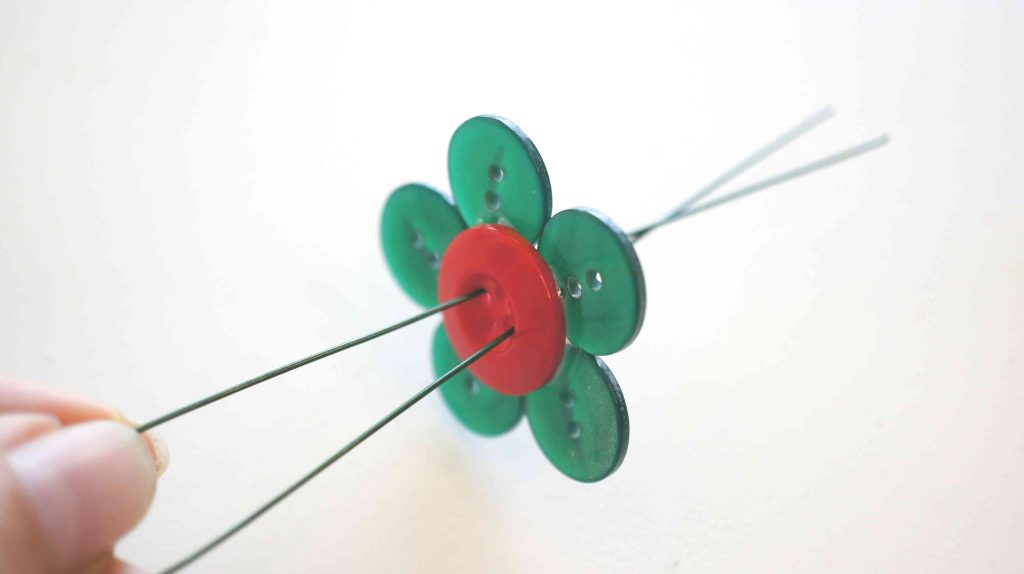
Once the wire is all the way though twist the two ends together along their length. I recommend twisting them up very tightly behind the flower head. This means that the flower head will not flop down when in your vase. You may need to use pliers to get these tight enough. I did.
Take real care not to apply any pressure to the petals of the flower. Work against the central button. If you do apply any pressure to the petal buttons they may fall off. These flowers are very delicate. If one does pop off simply glue it back on and let it dry again.
Your flower is now complete. Enjoy!
And next:
Enjoy making loads of these flowers and arranging them so that they look absolutely stunning wherever you need them. You could even make a bouquet up for a valued friend!
If you are looking for more great flower projects then check out these fabric flower tutorials that are all tried and tested for you.
Or how about some paper flowers to brighten up your home? If you would like to try making some Dorset buttons for any of your projects then check them out here.
How about some of the great sunshine crafts from the Monthly Sustainability Challenge?
- Sunburst Greeting Card idea made with Old Magazines
- DIY Resin Suncatchers
- Sun Painting Bandana DIY
- Sunburst Artwork using Paper DIY
- DIY Summer Sunflower Sign
- Creating faux stained glass using plastic plates
- Box Full of Sunshine Idea with Free Printables
Whatever you decide to craft enjoy bringing a little sunshine into your home!