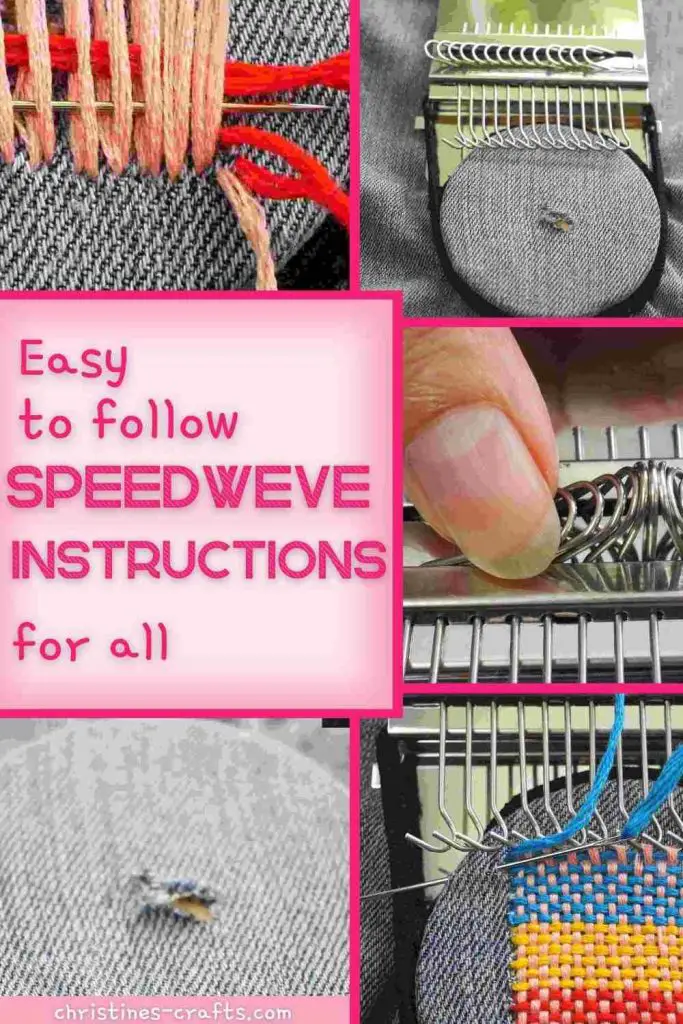
How to Repair Clothes Visibly: A Step-by-Step Guide using a Speedweve Loom
As an Amazon Associate I earn from qualifying purchases
When you get a hole in your clothes do you panic and throw them away? Or do you attempt an invisible repair? Well, how about an alternative called visible mending? This is made really easy if you have a speedweve loom. These are sometimes known as speedweve darning looms.
If you have never heard of a speedweve loom, or speed weve loom, then I am going to explain all about it here and show you exactly how to use one. If you have one but, like mine, the instructions are rather poor then this article will show you exactly what to do when mending clothes.
Visible mending is where you embrace the hole and make a repair that can easily be seen. The trick is to make it pretty or exciting or whatever you want to show.
This page contains affiliate links meaning I earn a little commission if you use those links at no cost to you. I only recommend brands I use and trust.
You will need:
- Speedweve Darning Loom
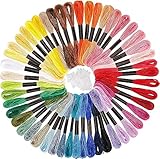
- Embroidery Threads
- Scissors
- Pen / pencil /chalk – optional


Video Tutorial
This video is a full run through using a speedweve. It is also available on Youtube.
Step by Step Instructions
Step 1 – Attach the Loom to your Fabric
In these instructions you will see that I am mending holes in jeans but you can mend many different clothes including t shirts.
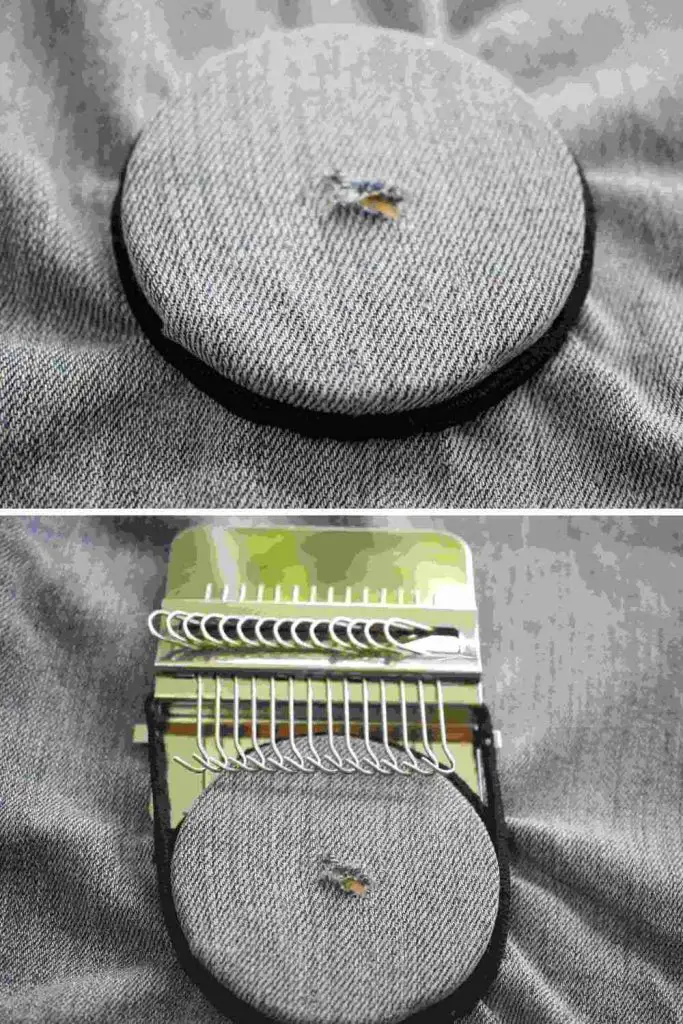
The first thing to do is to take your round piece of wood (or equivalent) and place it under your hole so that your hole is in the centre. Fasten it in place using one of the elastic bands. Then feed your loom into one side of the circle and make sure it is pushed well into the groove. Now fasten that onto the circle using another band. Take your time to make sure it is secure.
Step 2 – Put your Warp Threads in Place
Now, you need to decide on your design and colour scheme. In this example I am keeping it quite simple but you can get really creative. I am using one colour for my warp threads and three colours for the weft so I get a simple striped effect.
It can be a good idea to draw the shape that you want your completed embroidery patch to be so that you keep it very tidy. I didn’t this time and you will see that it is not perfect but no-one will ever notice when I am wearing it.
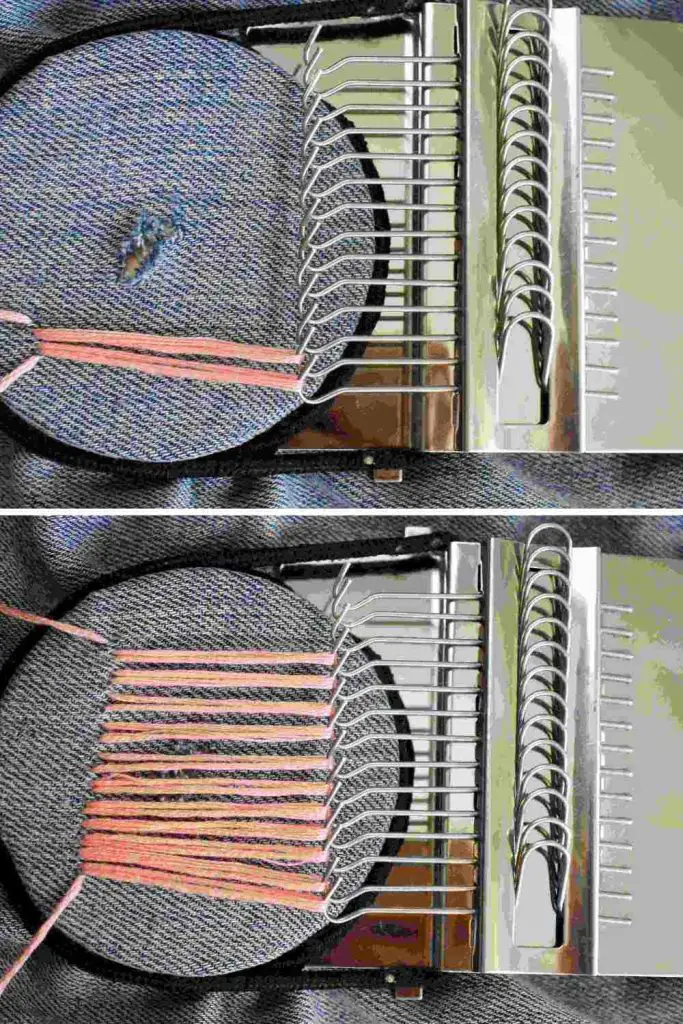
Take a reasonably long length of your chosen warp thread and thread up your needle. Most kits come with needles but you need a needle that will penetrate your fabric and is quite long.
Insert the needle into the fabric on the disc but near the edge and bring it up where you want your first warp thread. NOTE: In these pictures I did not do this and it made it tricky to take my threads to the back at the end. Do not repeat my mistake! Do a small stitch to hold it.
Now take your thread and wrap it around the first hook (assuming you are using them all and you do not have to if you want a smaller patch). Then place another small stitch next to your first one. Repeat all the way across the hooks. If you have any difficulties try standing the hooks up or flicking them across.
Then take your needle and make a stitch away from your patch and remove the needle. You are not finishing off any of your ends. You will do that at the end!
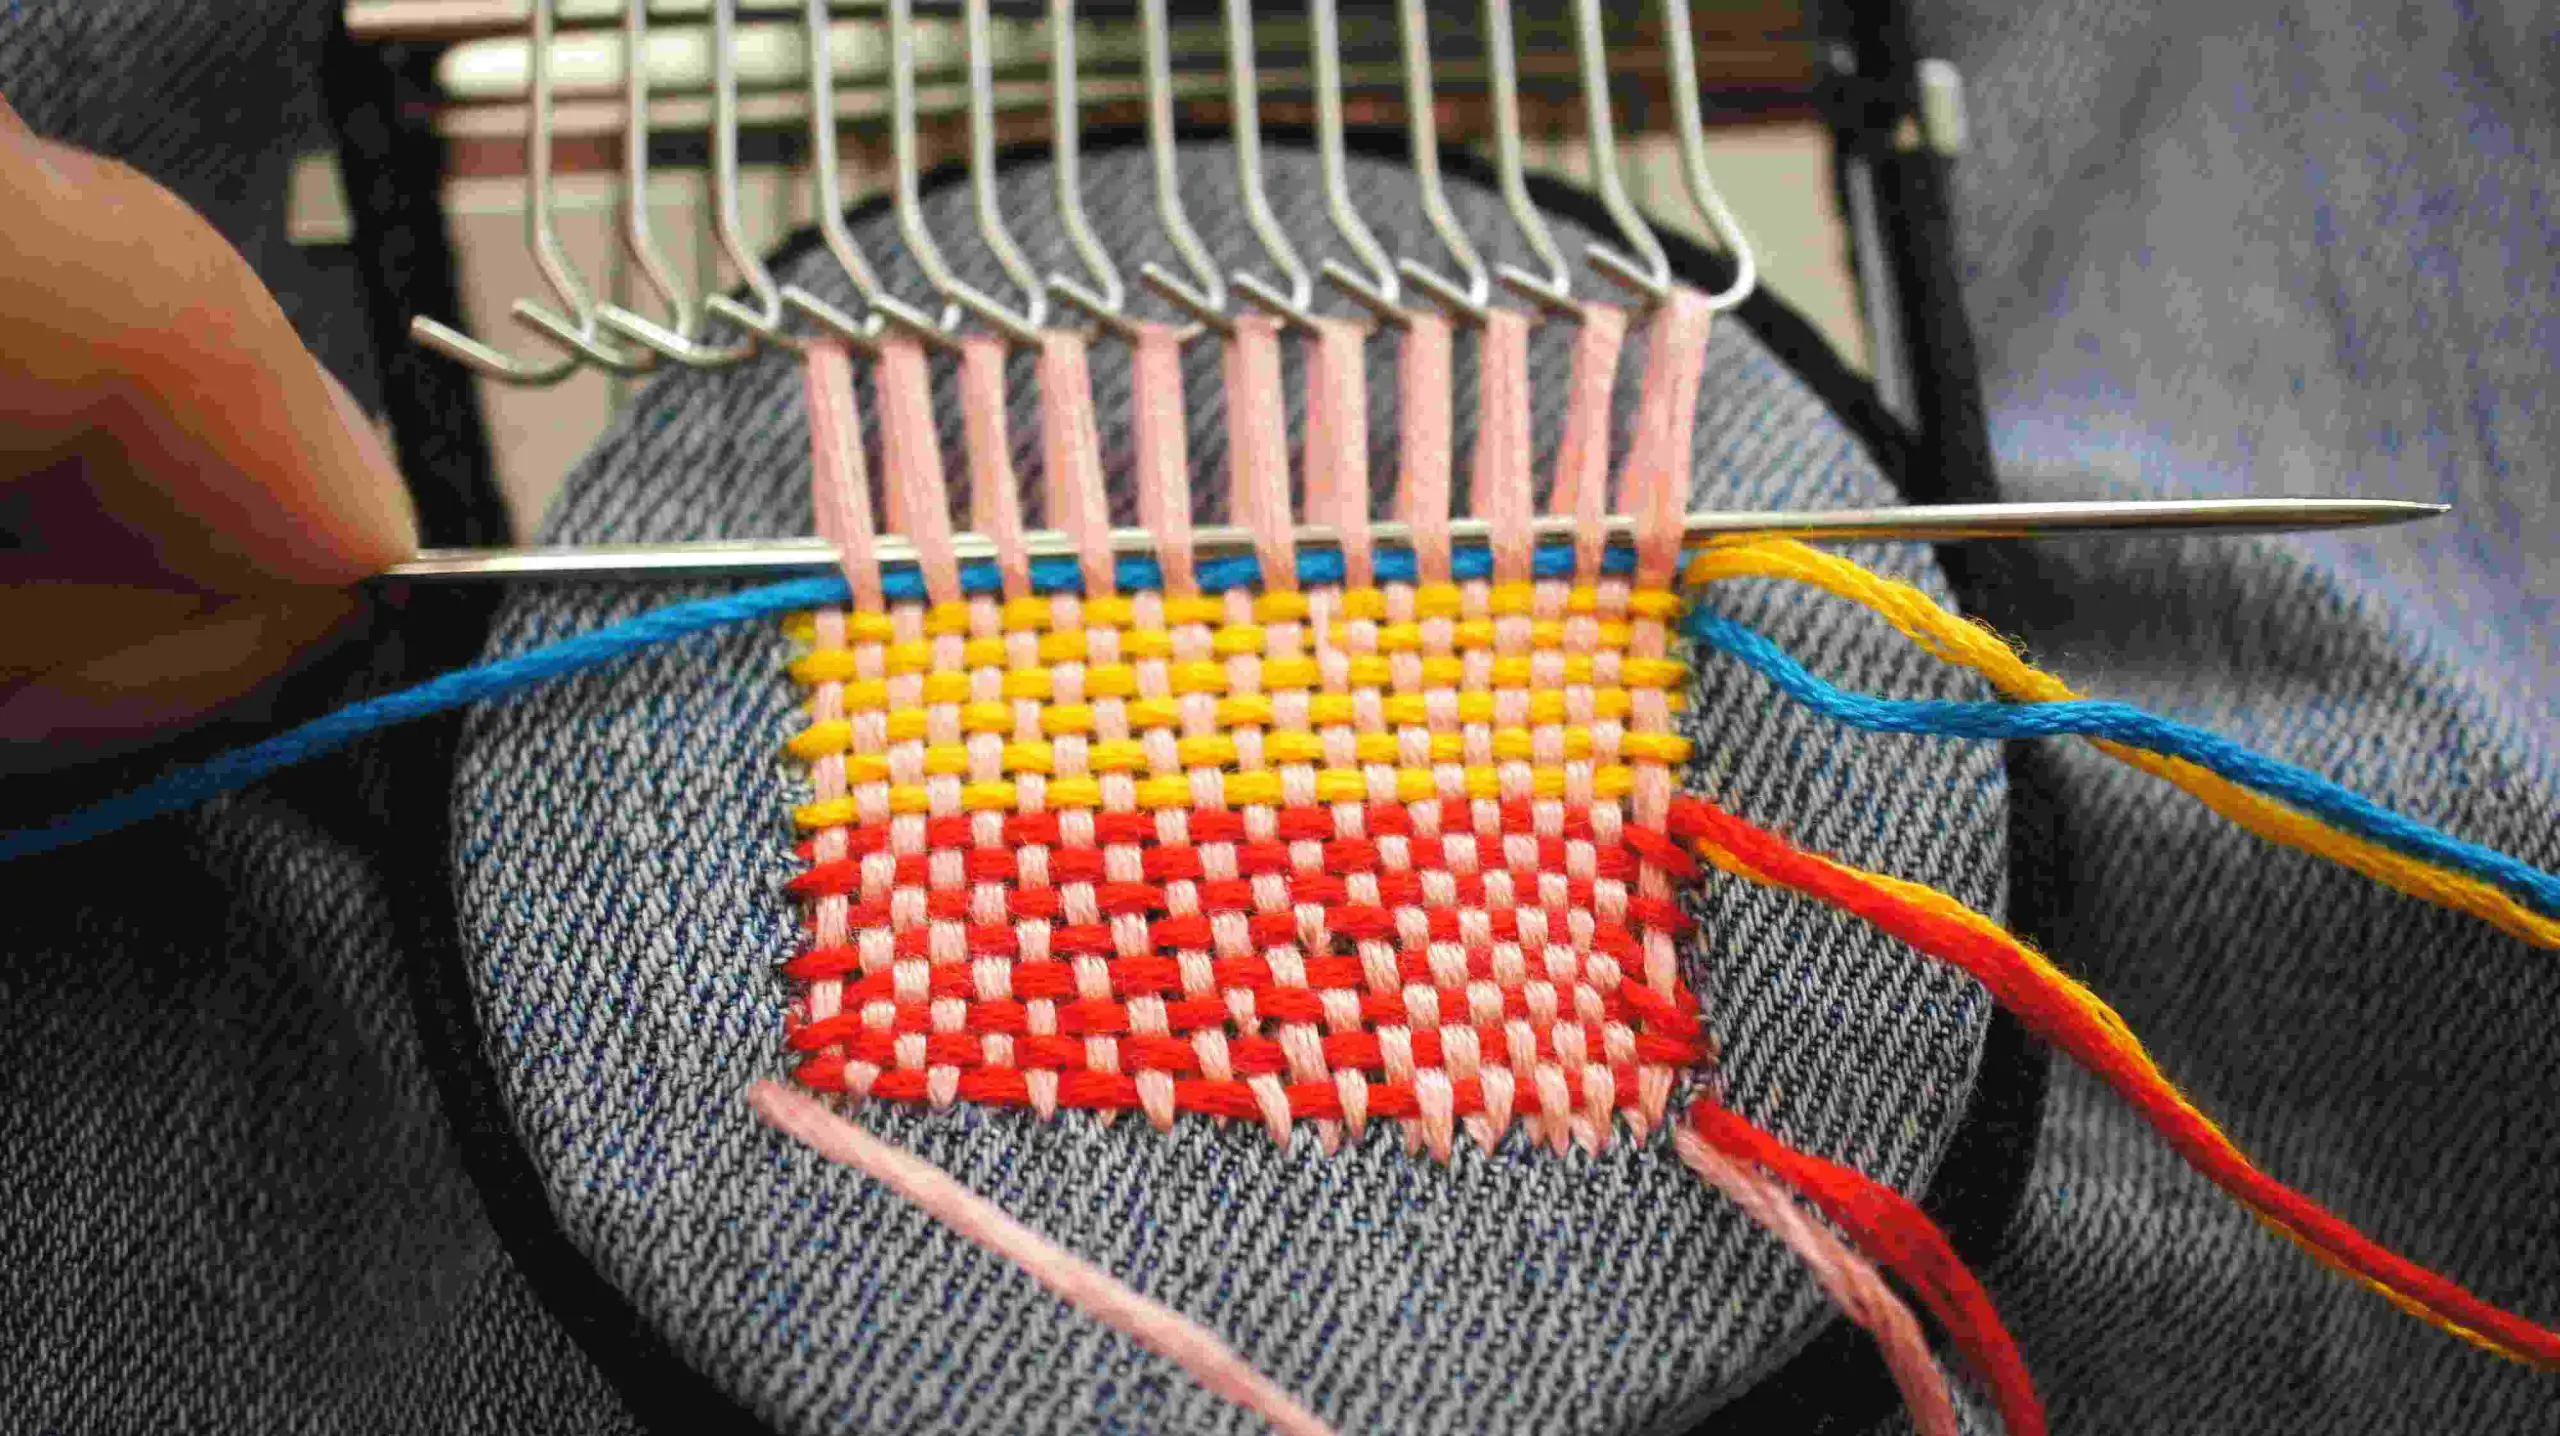
Step 3 – Add your Weft Threads
This is where you really start to build your design! Take a long length of your chosen thread colour and thread up your needle.
Make sure all your hooks are facing one way. I always choose to lie them down the way I am working so that when I get distracted I can work out where I am up to. Insert the needle into the fabric on the disc but near the edge and bring it up where your first warp thread starts. Do a small stitch.
Feed your needle through the threads from right to left. All the hooks must be facing the same way. This is easier if you put the blunt end (the eye) of the needle through first. Some kits come with a really long needle or stick to put through first and use to tidy up your weave. If you have one great but you don’t need one.
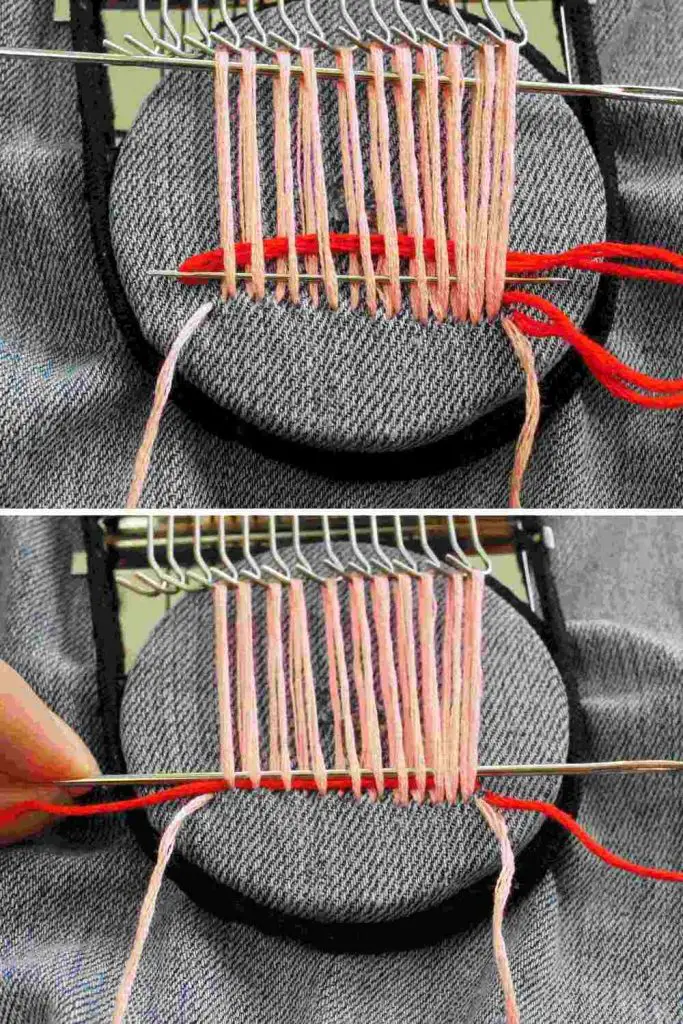
Pull your thread taught and push it down against the bottom of the warp stitches. Then do a small stitch to hold the thread there. You have now completed one pass.
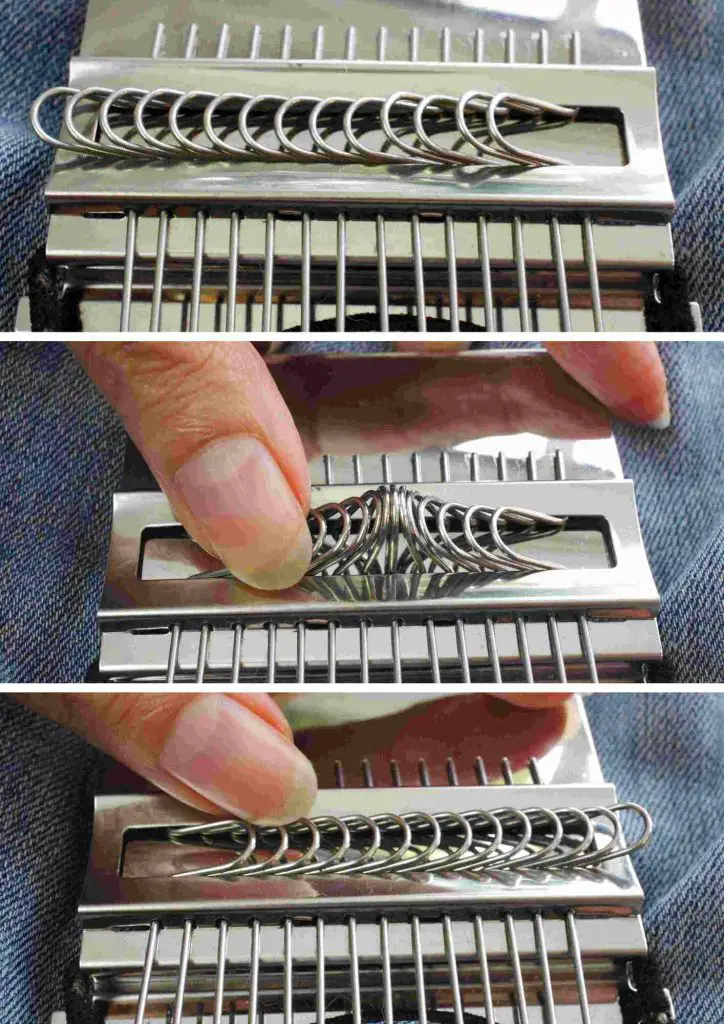
Flick all the hooks across so that they face the other way.
Now, feed the needle back the other way through the warp threads. Note that they will have swapped over and you should start to see your woven effect appearing. As before, pull your thread taught and push it down against the bottom of the warp stitches. Then do a small stitch to hold the thread there.
Repeat this process until you have completed your stripe and then simply swap to a new thread colour. Keep going in your chosen threads until you reach the hooks.

Step 4 – Complete your Repair Patch
Now it is time to carefully remove the speedweve loom. Remove the outer elastic band and gently remove the loom, easing the stitches off the hooks. Then remove the disc by taking off the other elastic band.
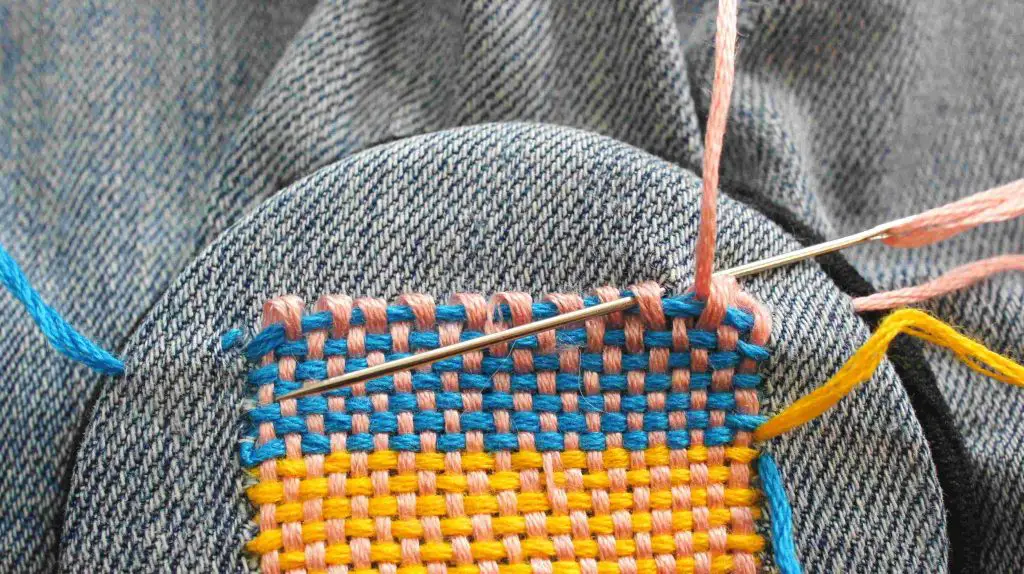
You now have a patch but it is open at the end that had the hooks. Thread up your needle in your chosen thread. I used the same thread as the warp threads but it is up to you. Again, insert the needle into the fabric away from the patch and bring it up in the through the right hand loop.
Now pass the thread back in through the fabric and back up through the next loop. Continue this all the way along until you have caught all the loops down. You have whip stitched them in place.
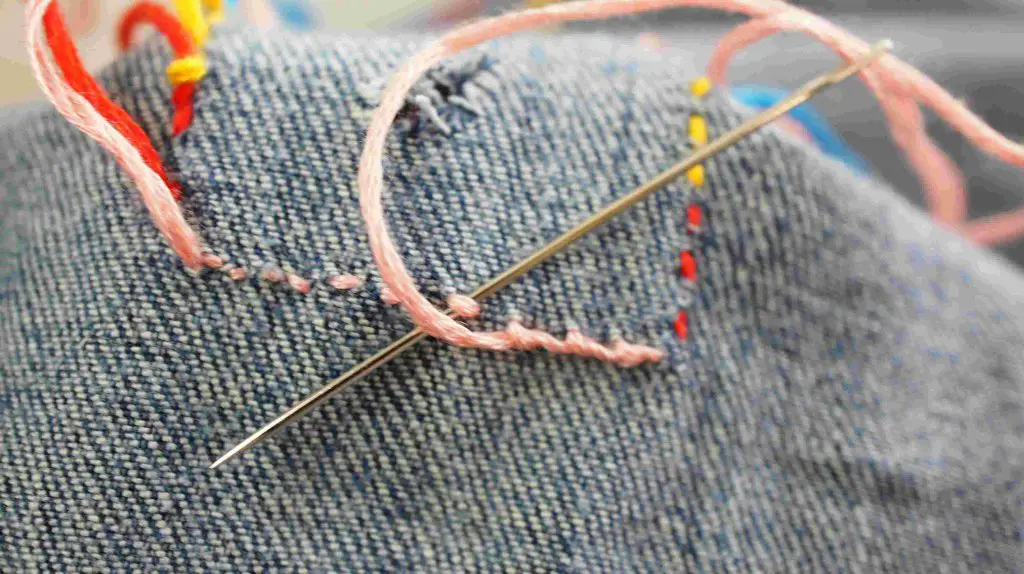
Once you reach the end take your needle through to the wrong side of the fabric and finish it off securely. You can choose how to do this. You can weave the needle through the back of the stitches and / or you can secure with a knotted stitch.
Then bring all the threads that you left through onto the back of the fabric. This will be easy as you left them away from the patch so you can see those large stitches. Then secure all the threads with your chosen method.
And now …
Congratulations you have completed your first visible mend of clothes with a Speedweve mending loom. But, don’t stop there! Why not try doing triangles, checked patterns or even hearts. Enjoy how fabulous your clothes look and know that you have prolonged their life and contributed to sustainability in fashion!
When your clothes really are ready for getting rid of how about upcycling them into other items. You could try sewing a stylish phone and tablet stand so that you no longer have to get an aching arm on video calls.
Or how about some make up remover pads that are reusable.
If you have some old fleecy clothes you could make some snuggly mittens to keep your hands warm this winter.
Enjoy your Speedweve mending loom now that you can use it confidently and create all sorts of designs while enjoying your clothes for much longer!
Leave me a comment in the comments below if you have any great tips for using a speedweve from your experience.