How to Transform a Pot by Sewing a Super Simple Plant Pot Cover
As an Amazon Associate I earn from qualifying purchases
This tutorial will show you how to make a really simple plant pot cover for any plant pot. They are particularly good for those boring plant pots that your plants tend to come in from the garden centre. If you buy a large plant or tree you get a large pot that should be great for planting up in the summer but it is not very pretty. Cover it and make it a patio feature!
Or how about making them to add to houseplants as a gift bag. What friend wouldn’t want to receive their new houseplant in a pretty cover? Just remember that this cover is not waterproof so if it is a houseplant you will need a waterproof pot inside it.
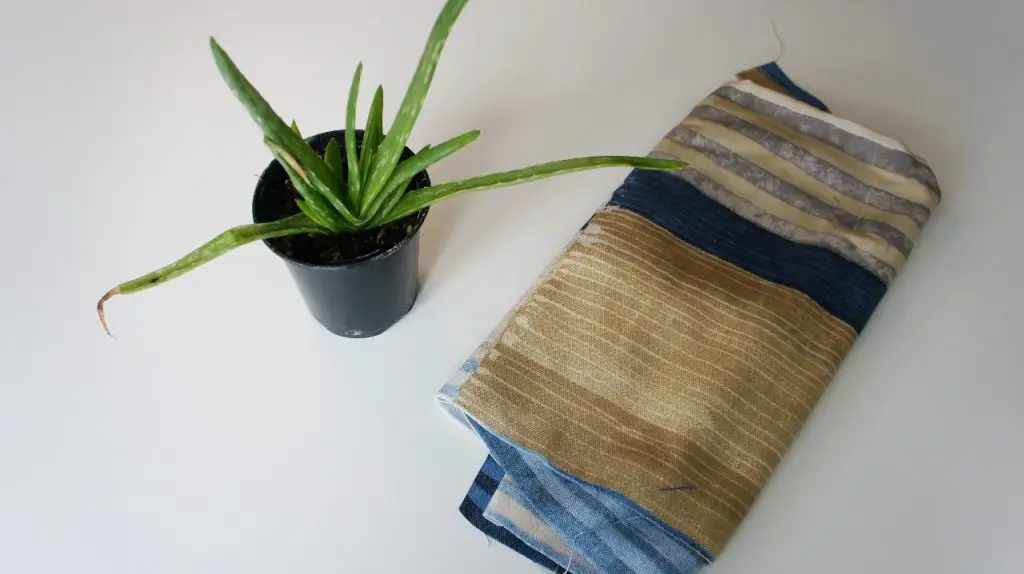
You can make these to match your decor and they are great for using up fabric. You may notice that the fabric I am using in this tutorial was left over from a simple tote bag I made recently and you can see that tutorial here. The large pot covers that I made for the garden were from an old curtain. So, all these were free!
So, let’s get started!
This page contains affiliate links meaning I earn a small commission if you use those links at no cost to you. I only recommend brands I use and trust.
You will need:
Pencil or air erasing pen
Sewing Supplies


If you like watching a tutorial then scroll down to the video at the end of the written instructions.
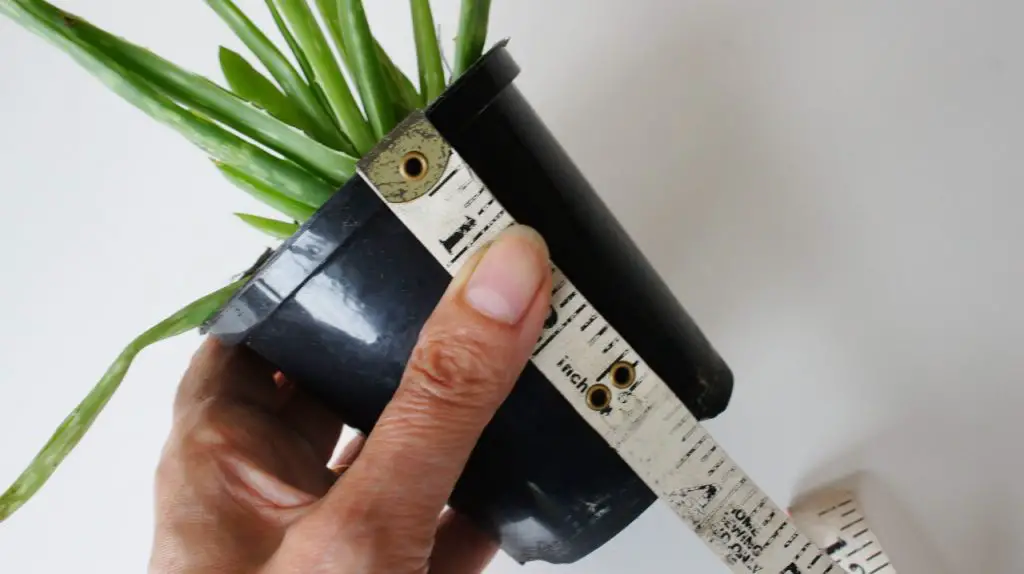
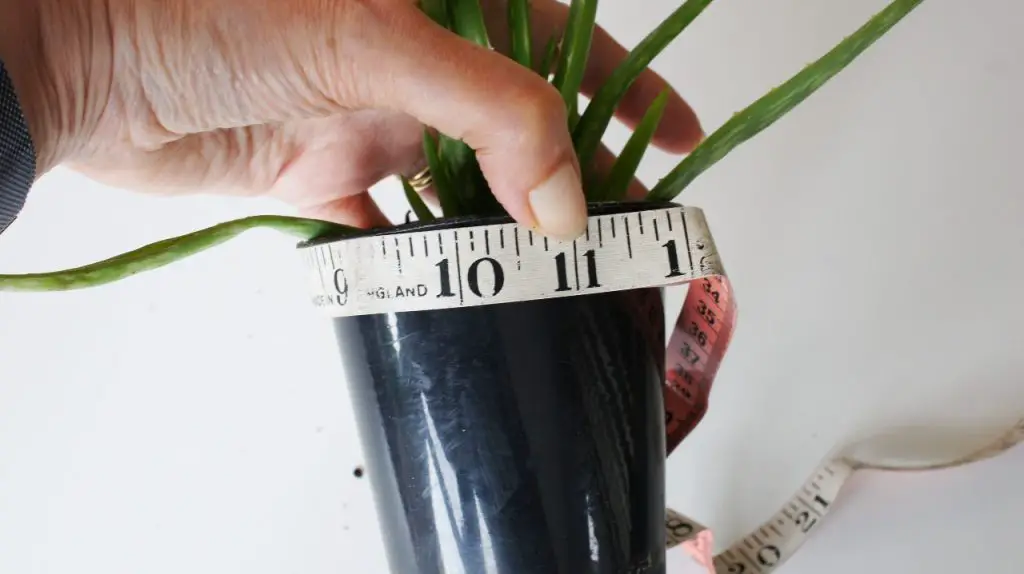
Measure your Plant Pot
The first thing to do is measure the height of your pot. You can use Imperial or Metric measures, just be consistent. I will use Imperial measures here. My pot is 3.5″ tall.
Measure around the widest part of your pot. In my case that is the top of the pot. Mine measures 11″.
Cut out the Fabric
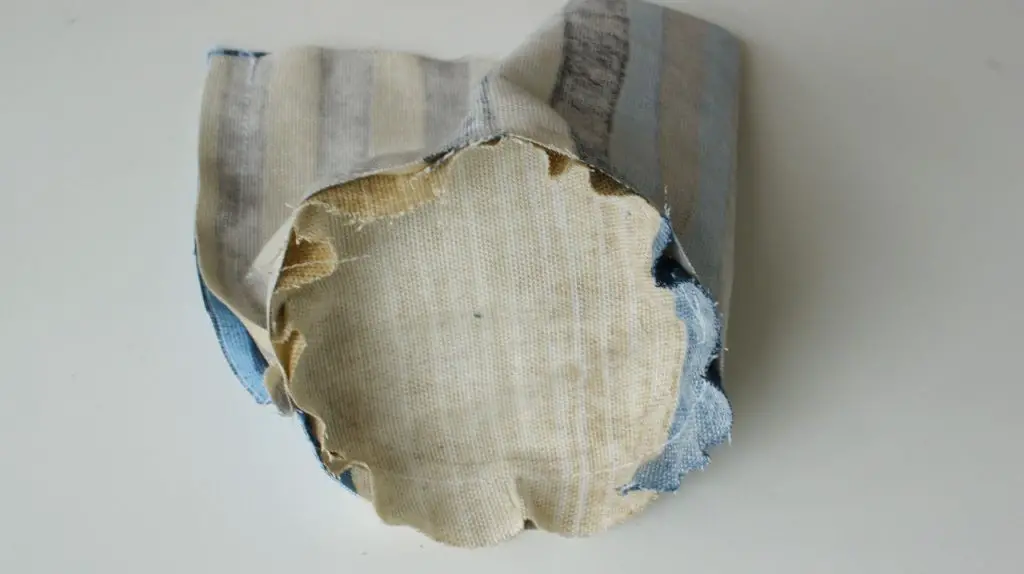
The easiest way to cut out your circular base for your cover is to place the pot onto the wrong side of your fabric and draw around it. Then measure 0.75″ away from it all around and draw a new larger circle at those measurements.
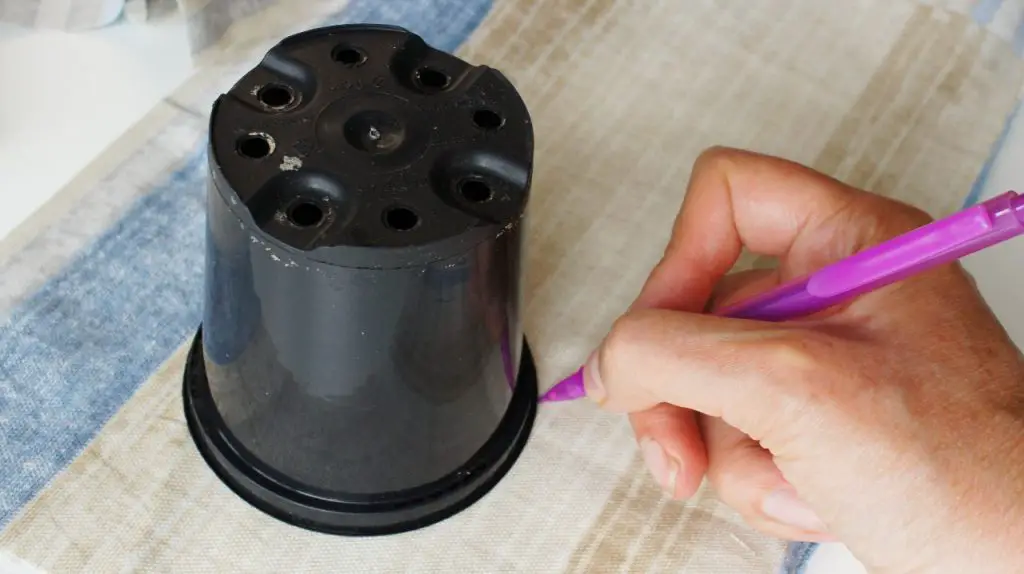

Cut out around the larger circle. This will give you your seam allowance.
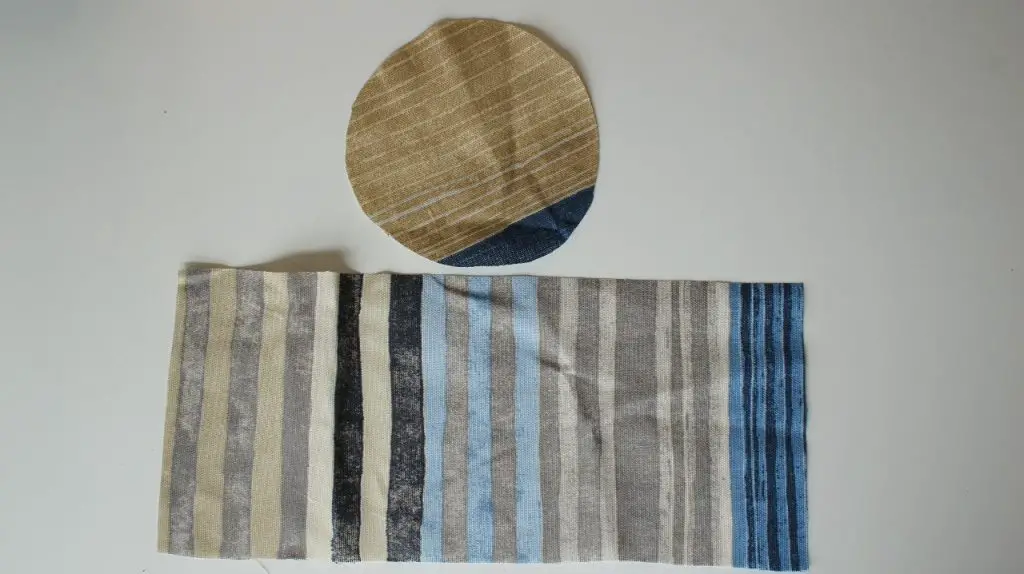
Next you need to cut out a rectangle of fabric to form the side of your plant pot cover. Simply cut out a rectangle that is the distance around your pot plus 1.5″ by the height of your pot plus 2″.
In my case this means that I cut out a rectangle that was 12.5″ wide by 5.5″ tall.
Sew your Plant Pot Cover
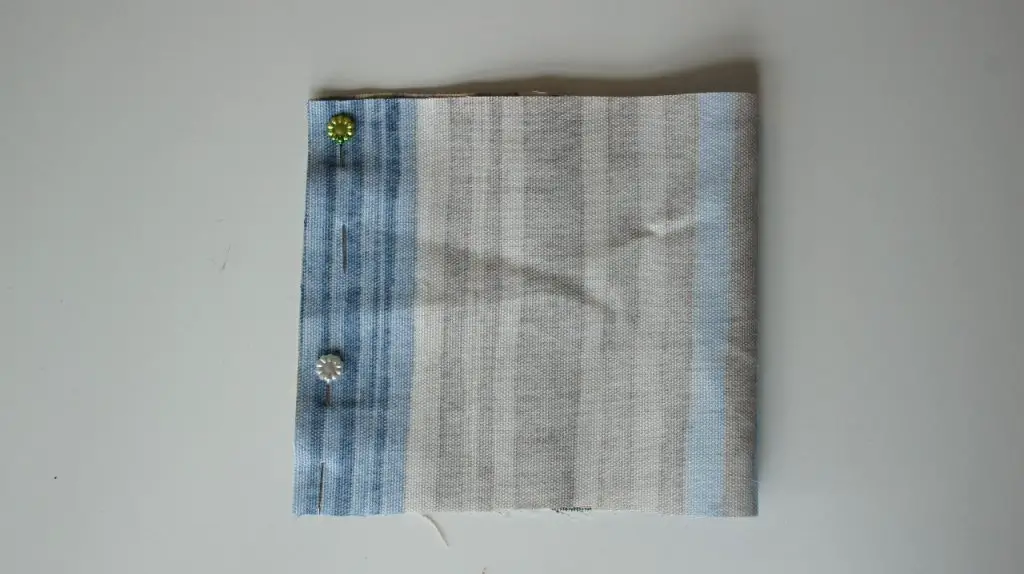
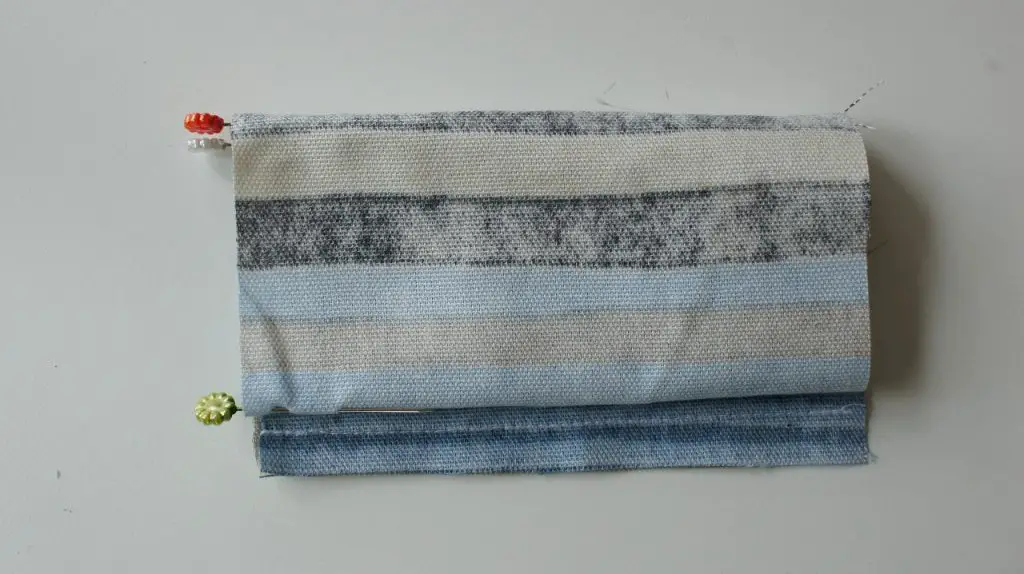
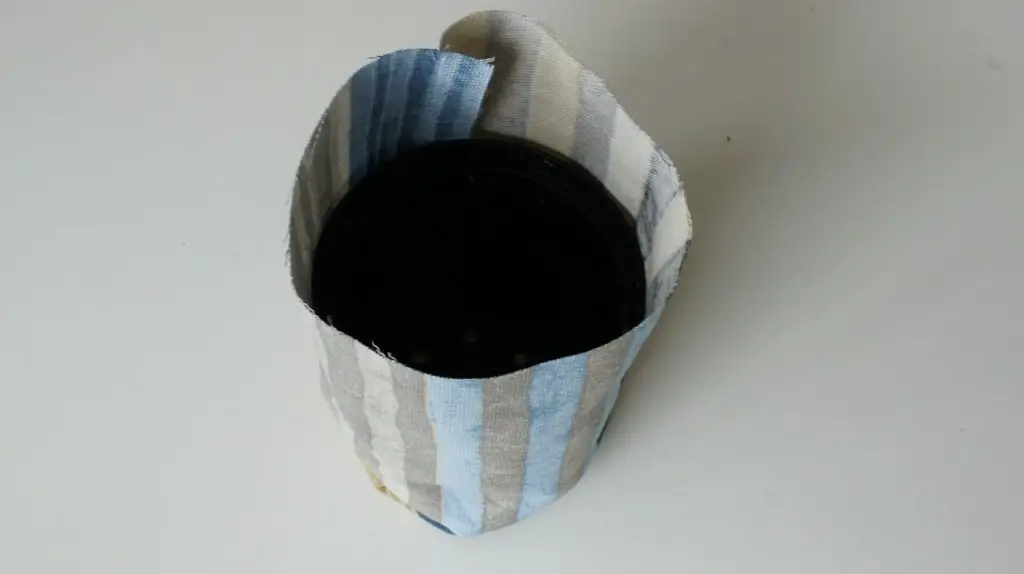
Firstly take your rectangle of fabric and fold it in half with right sides facing so that the shortest sides meet. Now pin or clip along that short edge to hold the two pieces together. Sew along that seam remembering that you have a 0.75″ seam allowance. Sew 0.75″ from the edge (or a little less) or your pot may not fit into the cover.
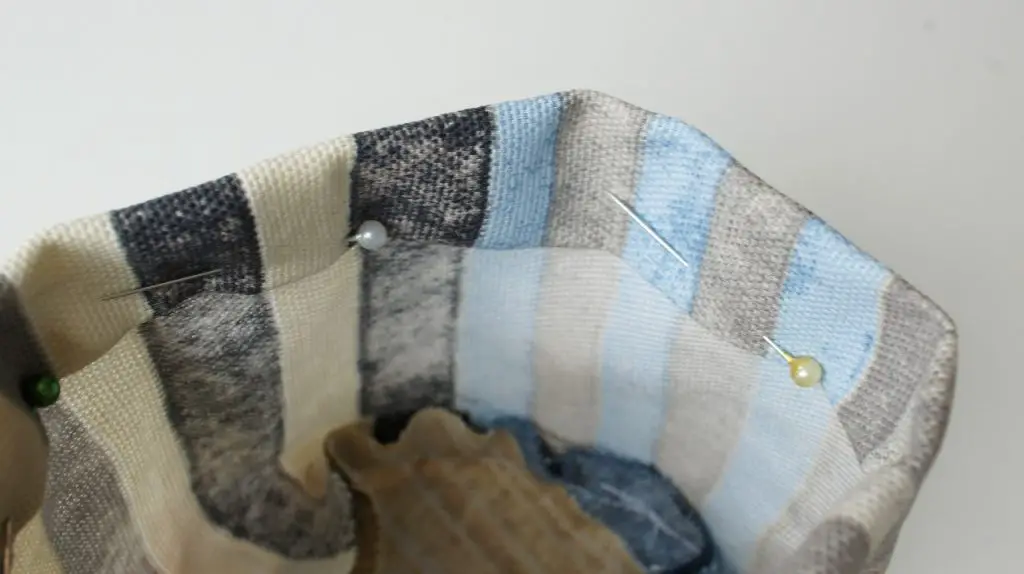
Now fold your tube that you have made into quarters remembering that you need to line up with the stitching line not the edge of the fabric. Mark each of the folds so that when you open it out you have marked the end of your tube into quarters. I have used pins but you can use a pencil or pen as this bit of fabric will not show on the outside of the finished cover. Just make sure your marks are right at the edge of the fabric,
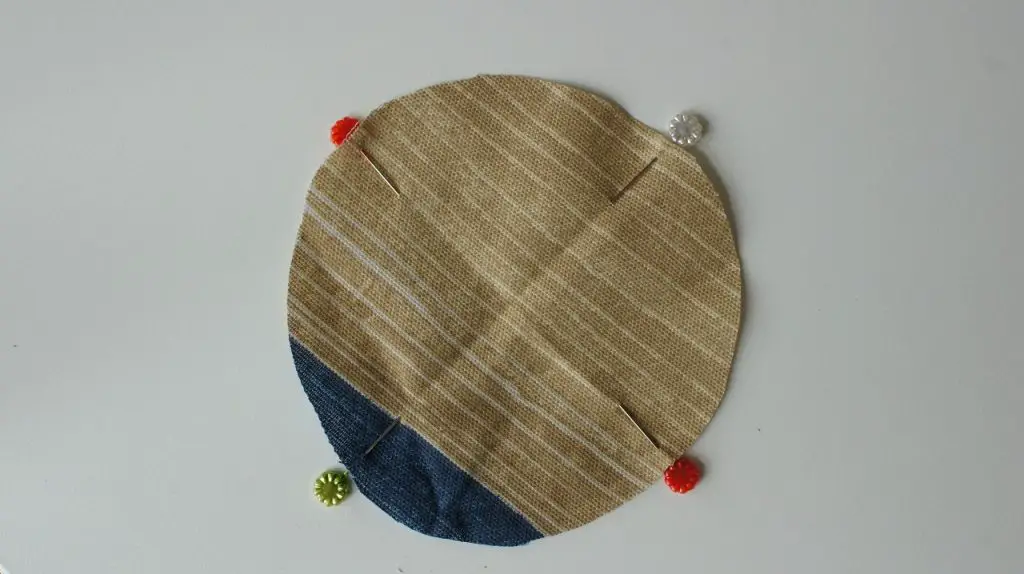
Now take your circle of fabric and mark that into quarters. You can do this by folding it in half and then in half again so that it is in quarters. Mark each of the folds so that when you open it out it is split into quarters.

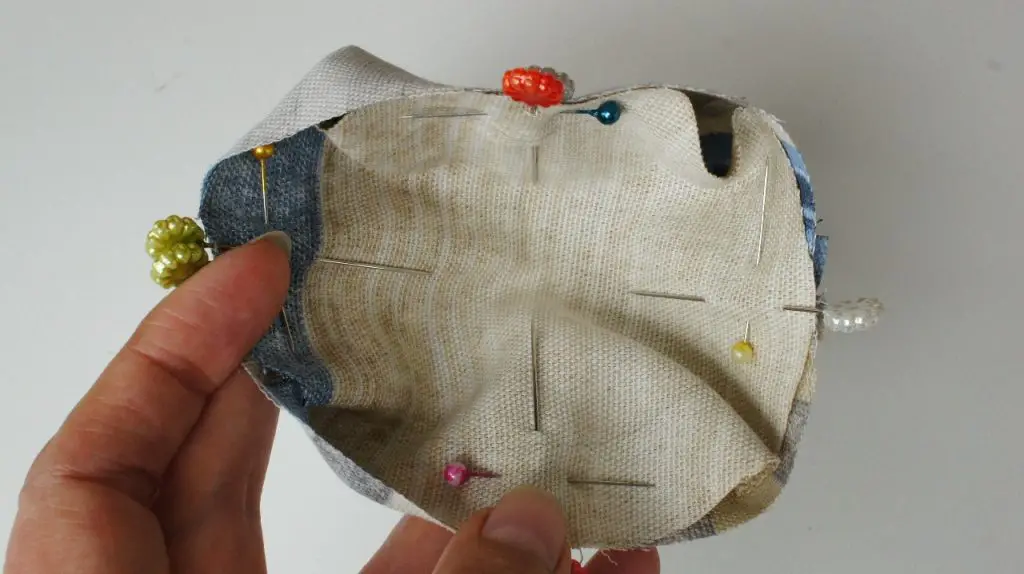
Use the marks you have made to line up the circular base with the bottom of your ‘tube’. Simply match the marks on each in turn and pin the two edges together with the right sides facing.
Then continue to pin the two edges together between the marks. If you are making a small plant pot cover then this will be very quick but if it is a large cover you may have a few pins to add in.
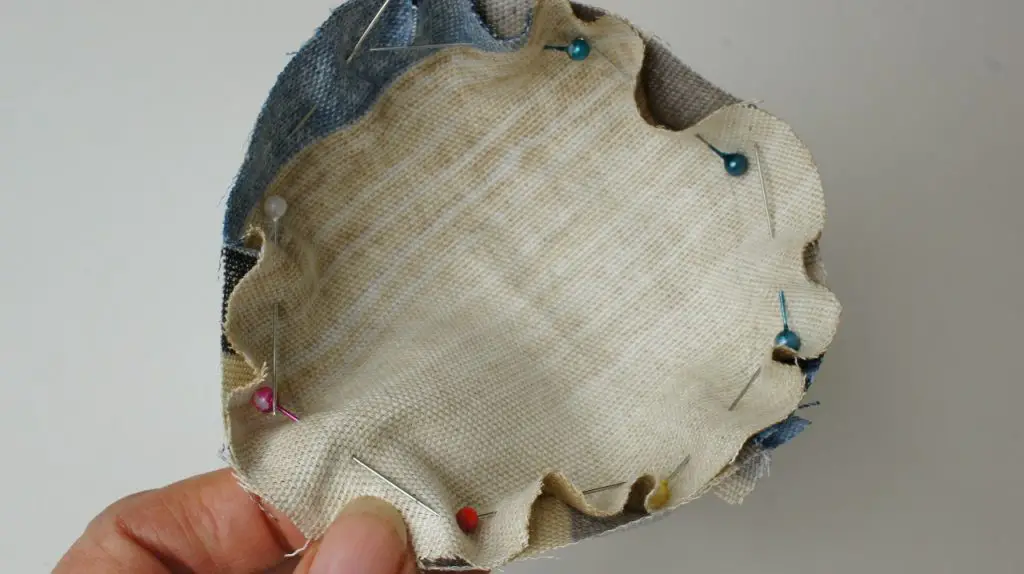
Once you are happy that your edges are in place then sew around the circle. Remember that your seam allowance is 0.75″. It can be a bit tricky sewing around a curve so just take your time and keep easing the fabric around.
Once you have sewn this seam turn your cover the right way out and check that your plant pot fits into it.
Complete your Plant Pot Cover
You now have a cover for your plant pot but it has a very untidy top edge. All that is left is to tidy it up by sewing a hem.
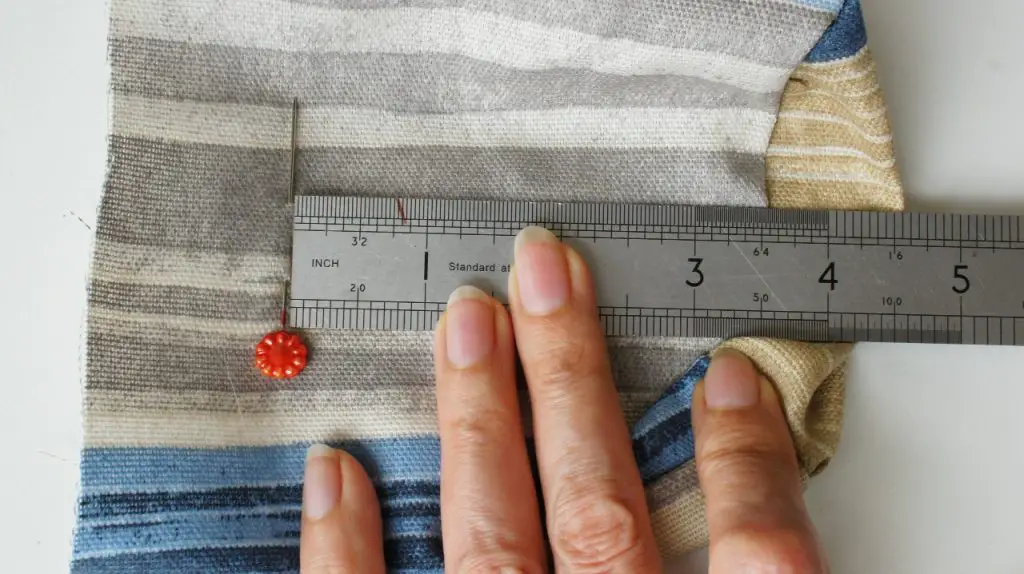
Start by measuring the height of your plant pot (in my case 3.5″) up from the seam at the bottom of the cover. Mark it with pins and then fold the fabric in to the cover along that line.
If you want your cover to be a bit taller just allow a bit more or if you want it to be a bit shorter take a bit off your measurement.

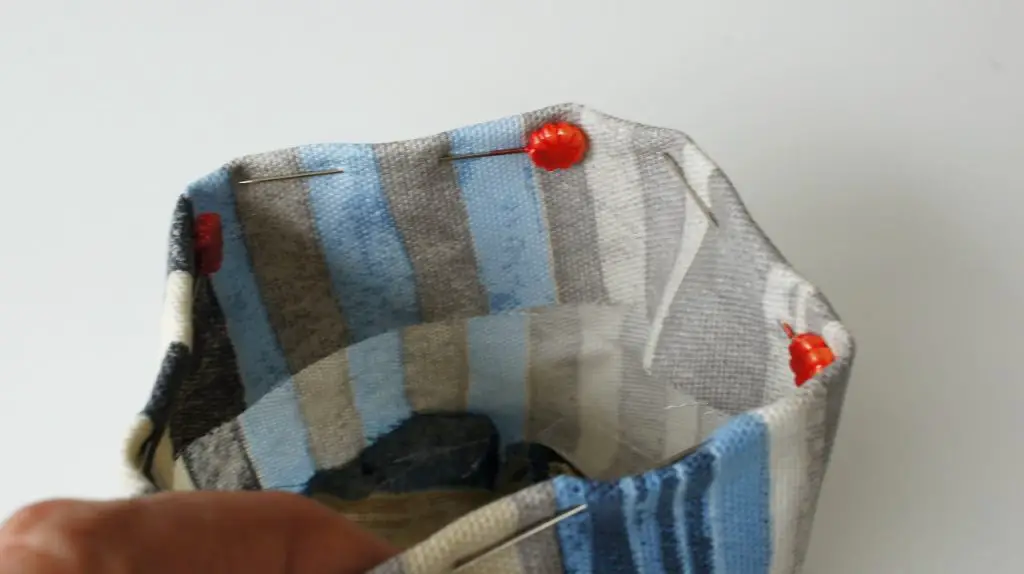
Pin the fold over close to the folded edge. Then fold the raw edge under to form a double hem. This way your pot will look tidy inside the top edge. Work all the way around pinning it in place and then sew it.
Video Tutorial for Plant Pot Cover
Well Done for Completing your Plant Pot Cover
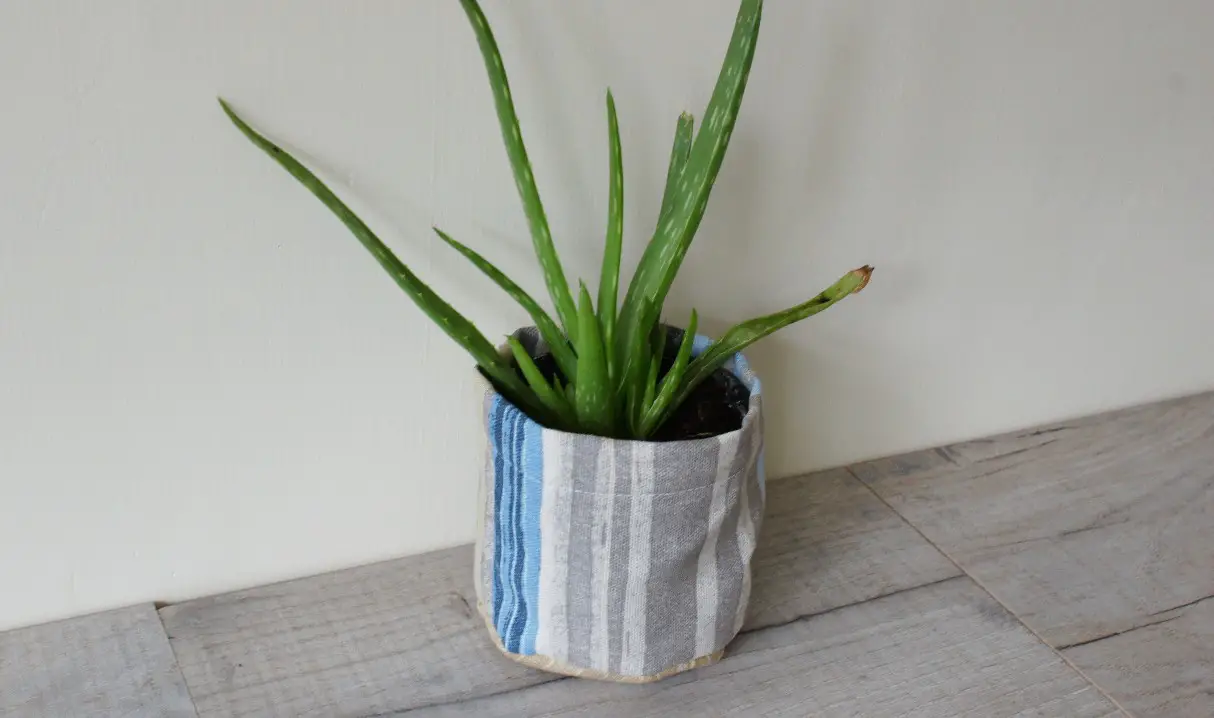
Congratulations you have completed your super simple plant pot cover and it didn’t take long, did it? Now just place your plant pot into its cover and enjoy it whether it is inside or outside. Clearly if your cover is outside it will not last too long as it will be wet but if you made it from old clothes or curtains it does not matter as it was free anyway. Simply enjoy it while it lasts!
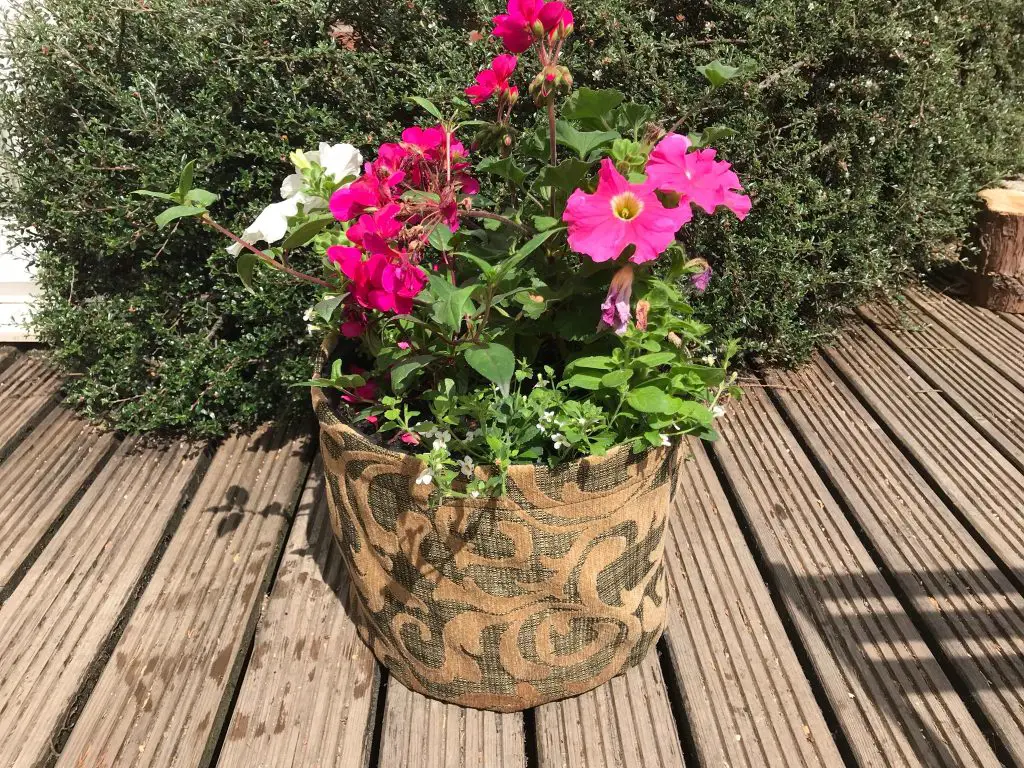
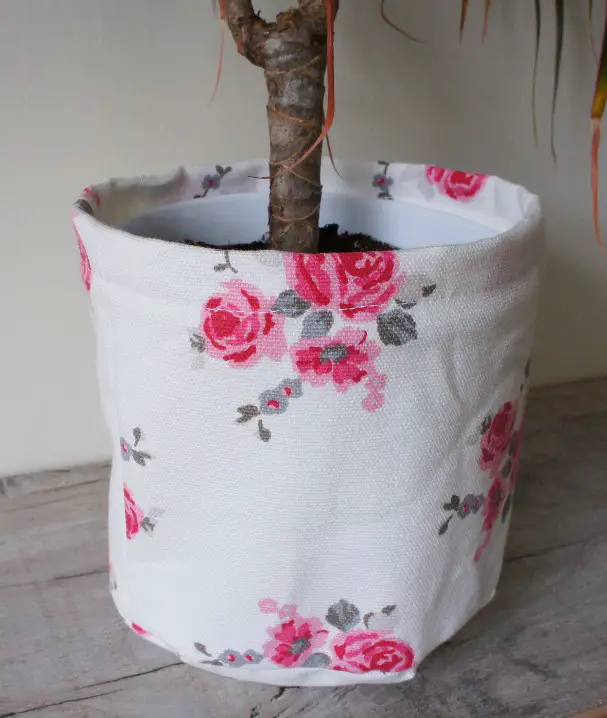
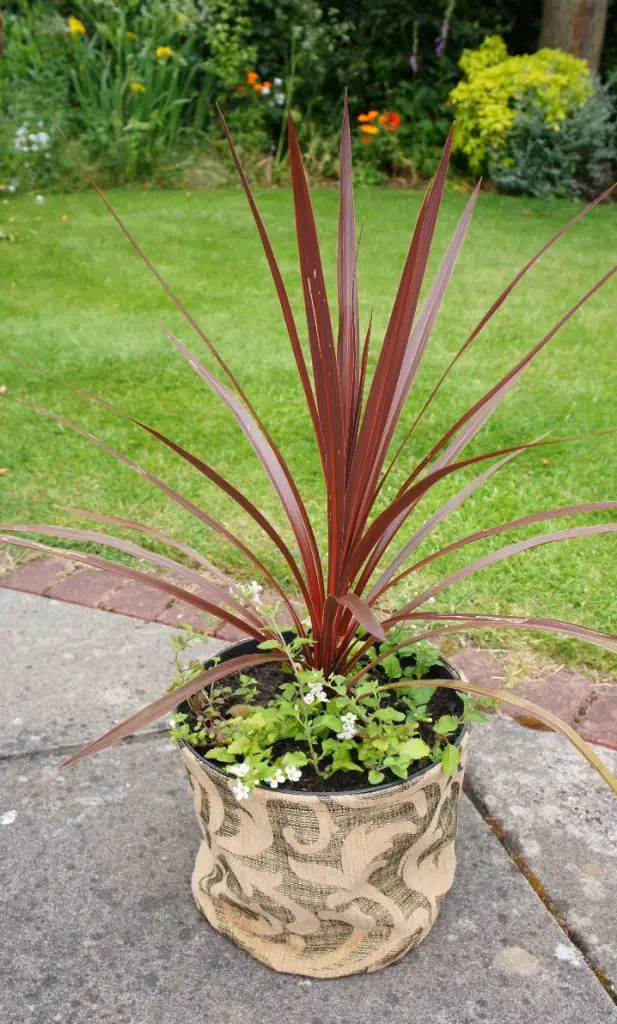
Here are a few I have made and you can see what a difference they make. I love them as I can use boring black plant pots in the garden and they look interesting!
If you are feeling inspired to carry on sewing then take a look at a few other projects on the blog:
Enjoy your plant pot cover and let me know in the comments below how you get on.