Diamond Painting – an Introduction
As an Amazon Associate I earn from qualifying purchases
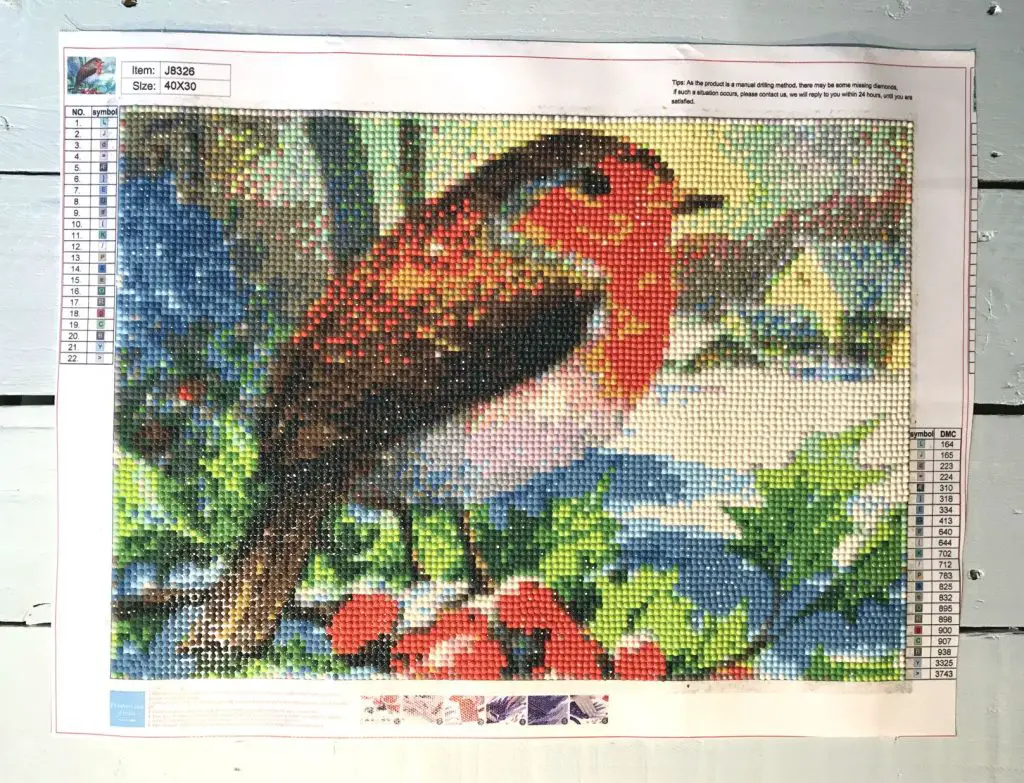
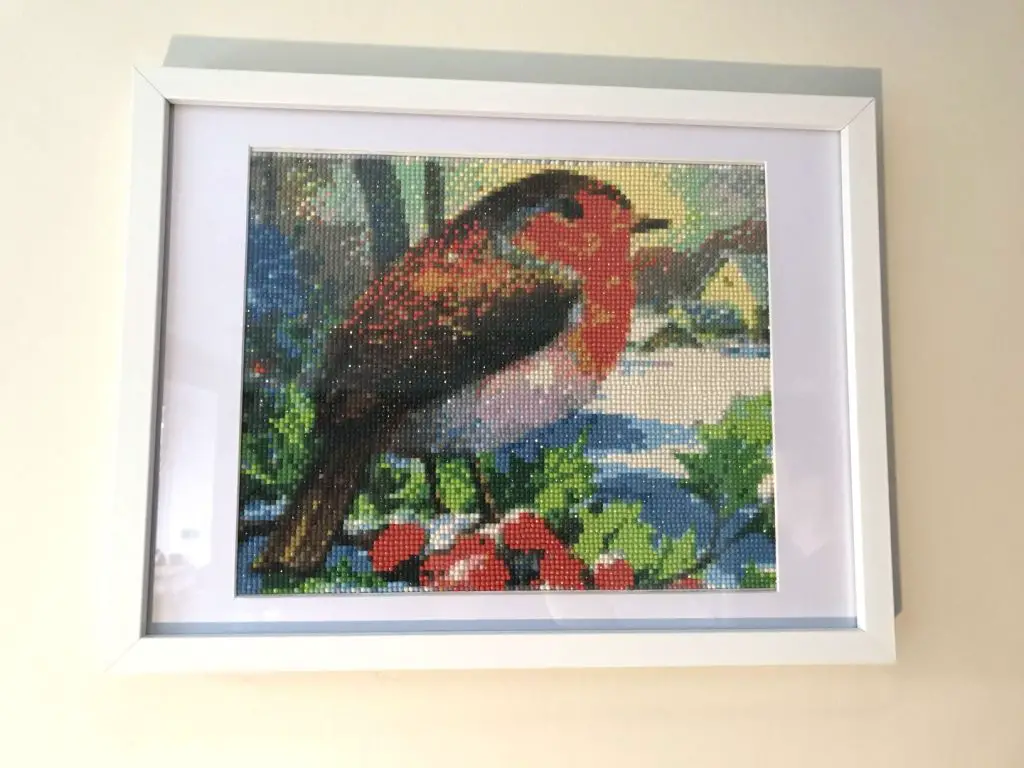
What is diamond painting? How do I get started? Is it for me? Do you need great artistic talent? All great questions that you may be asking yourself. In this article I am going to try and help you answer these questions and introduce you to diamond painting. I will use a recent picture I have done to show you what is involved so that you can make an informed decision on whether to try it for yourself.
Diamond painting has proved to be incredibly relaxing and enjoyable! In these days where we talk about mindfulness I would say that diamond painting is an excellent tool for switching off and getting absorbed in the task. I am not a painter and I do not claim to be artistic but I was really pleased with the result.
I have also tried out a custom made diamond painting kit from Amazon and you will find a section on that further down this article.
This page contains affiliate links meaning I earn a small commission if you use those links at no cost to you. I only recommend brands I use and trust.
What is diamond painting?
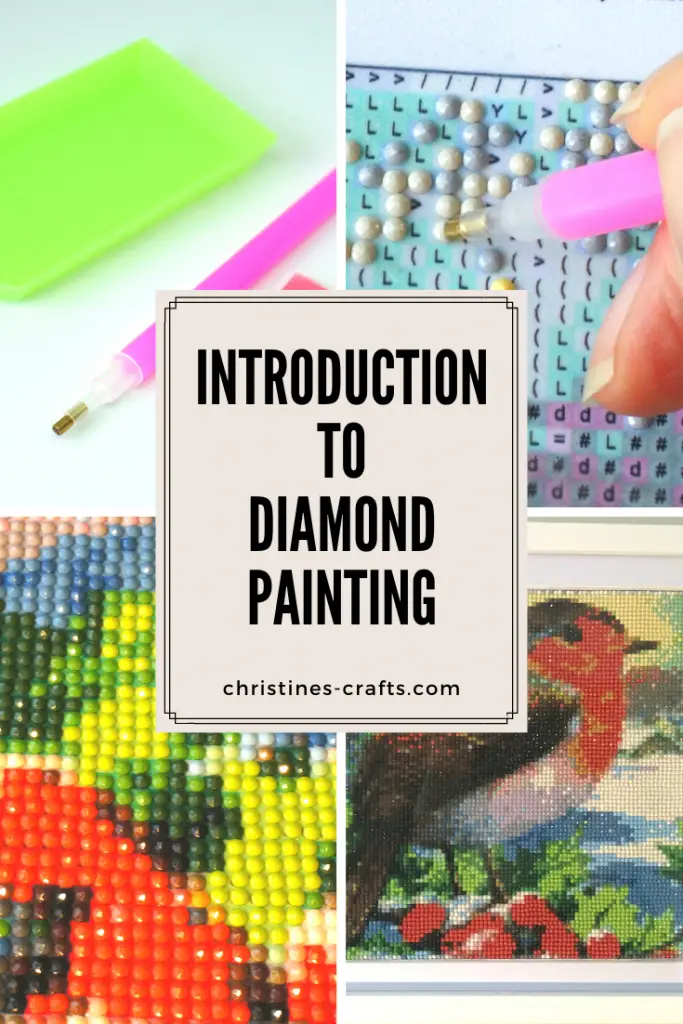
Diamond painting is an art form where you apply small acrylic ‘diamonds’ to a printed canvas sheet. There are thousands of designs to choose from and they suit every pocket. It is a budget friendly way of producing gorgeous pictures. They are also great for involving older kids. You can select a cheap and cheerful picture to have a go or splash out and produce a work of art. The beauty of diamond painting is that you can start with an inexpensive small kit and see what you think. If you love it invest in a more expensive kit and you will see a difference.
If you would like to see me completing my kit then scroll down to the bottom of this article to watch a video of progress.
Do I need artistic talent?
Absolutely not! The canvas is pre-printed and you simply follow the instructions. The picture has already been drawn for you and you are covering it with ‘diamonds’ for the sparkly effect.
Is diamond painting for me?
You will only answer this one by having a go. If you are unsure choose an inexpensive kit that is not too big and have a go. I believe that you will love it and soon be searching for a large kit to keep you busy!
3D or 5D?
Well, that is a question. It all depends on the effect you are after, Generally a 5D kit will be more sparkly. The number simply refers to the number of facets each diamond has. The more facets a diamond has the more likely it is to catch the light. It really is a personal preference.
Round or square diamonds?
This is also matter of personal preference. However, the square diamonds cover the canvas completely and therefore offer a more complete picture and it does not matter if the printed canvas is a slightly different colour to the diamonds. The round diamonds leave some of the canvas showing through so the quality of the canvas colours matters more. Generally round diamonds are easier to pick up too.
This article will show you a picture done with round diamonds. The custom kit is done with square diamonds.
Where will I get a diamond painting kit?
Any art and craft shop will probably have them but I got mine from Amazon. They have a massive selection to suit all pockets. My only advice is to check delivery as some have long delivery times.
Amazon diamond painting kits here


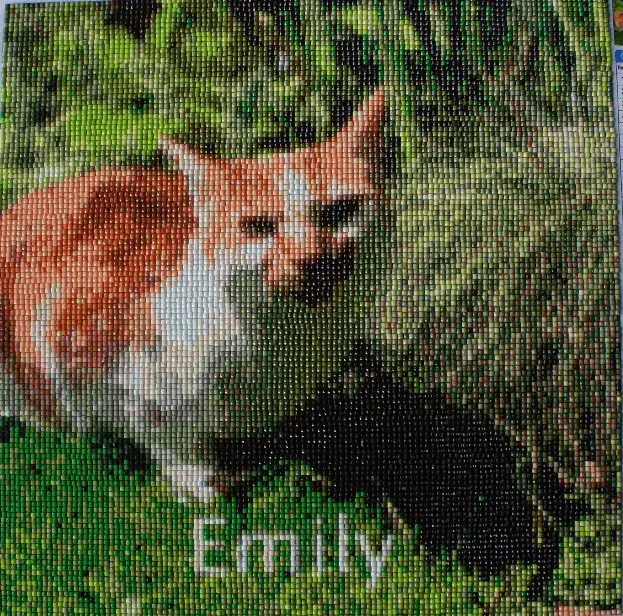
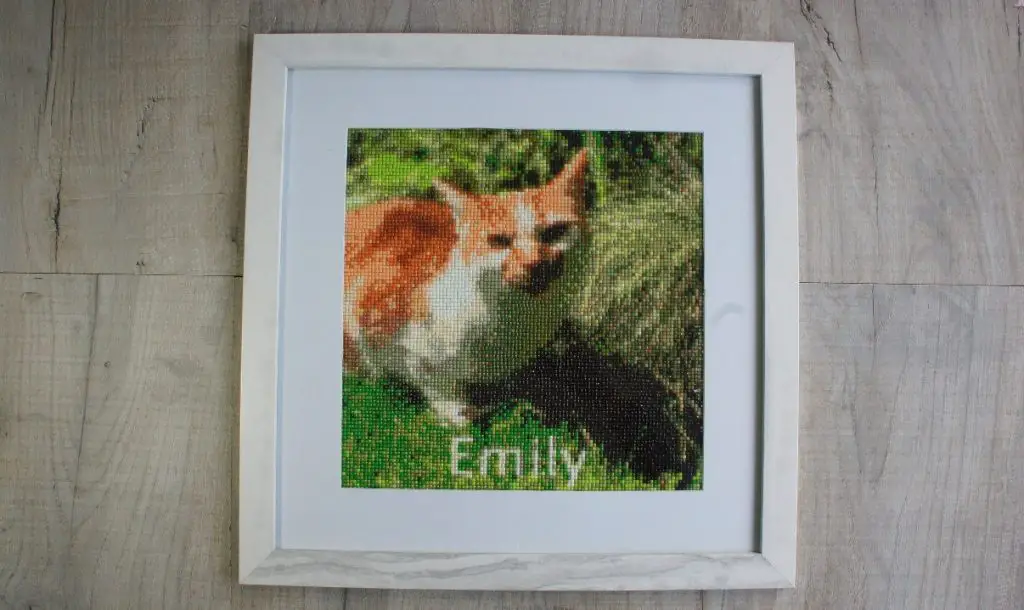
I have also done this custom made kit from a photograph of my cat. You can order one too from Amazon here.
What will I get in a diamond painting kit?
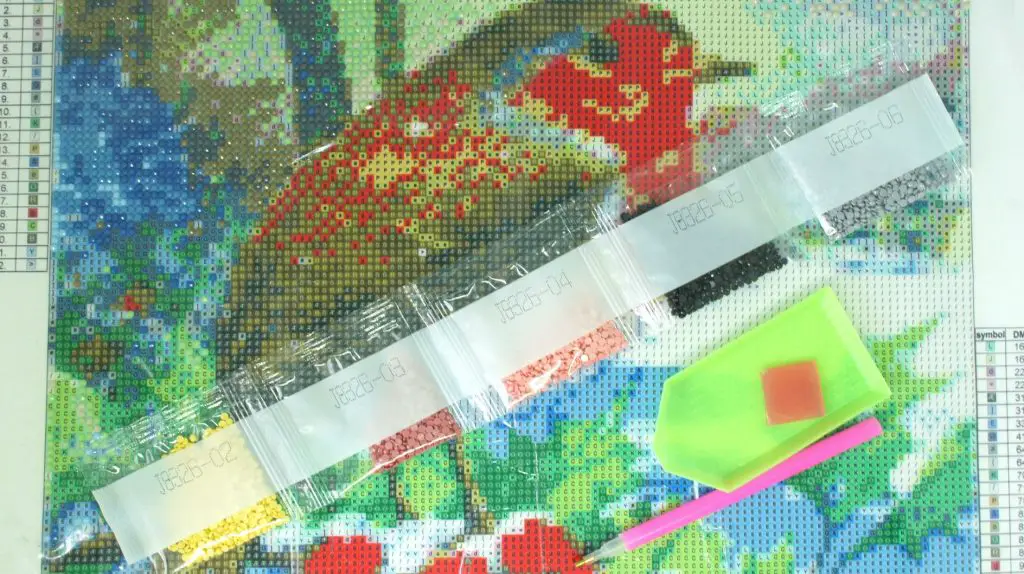
You will get everything you need to complete your picture. Your kit should include:
printed canvas
acrylic diamonds
diamond applicator tool
adhesive wax
plastic tray (optional)
Do I need any further materials or tools?
Strictly no you do not, but I do recommend that you purchase some small containers to hold your diamonds. They arrive in small plastic bags and once opened they do not keep your diamonds safe. You do not want them getting mixed up. Your kit may well contain some small sealable bags to put them in but in my experience not enough.
I bought these containers from Amazon to hold mine and they worked great. They are compact and easy to handle. It also made it easy when I only wanted one diamond of a particular colour.
How do I do diamond painting?
Preparation:
Firstly you may need to flatten your canvas if it has any folds in it or is tightly rolled. Place it under a large book on a flat surface or even under your mattress.
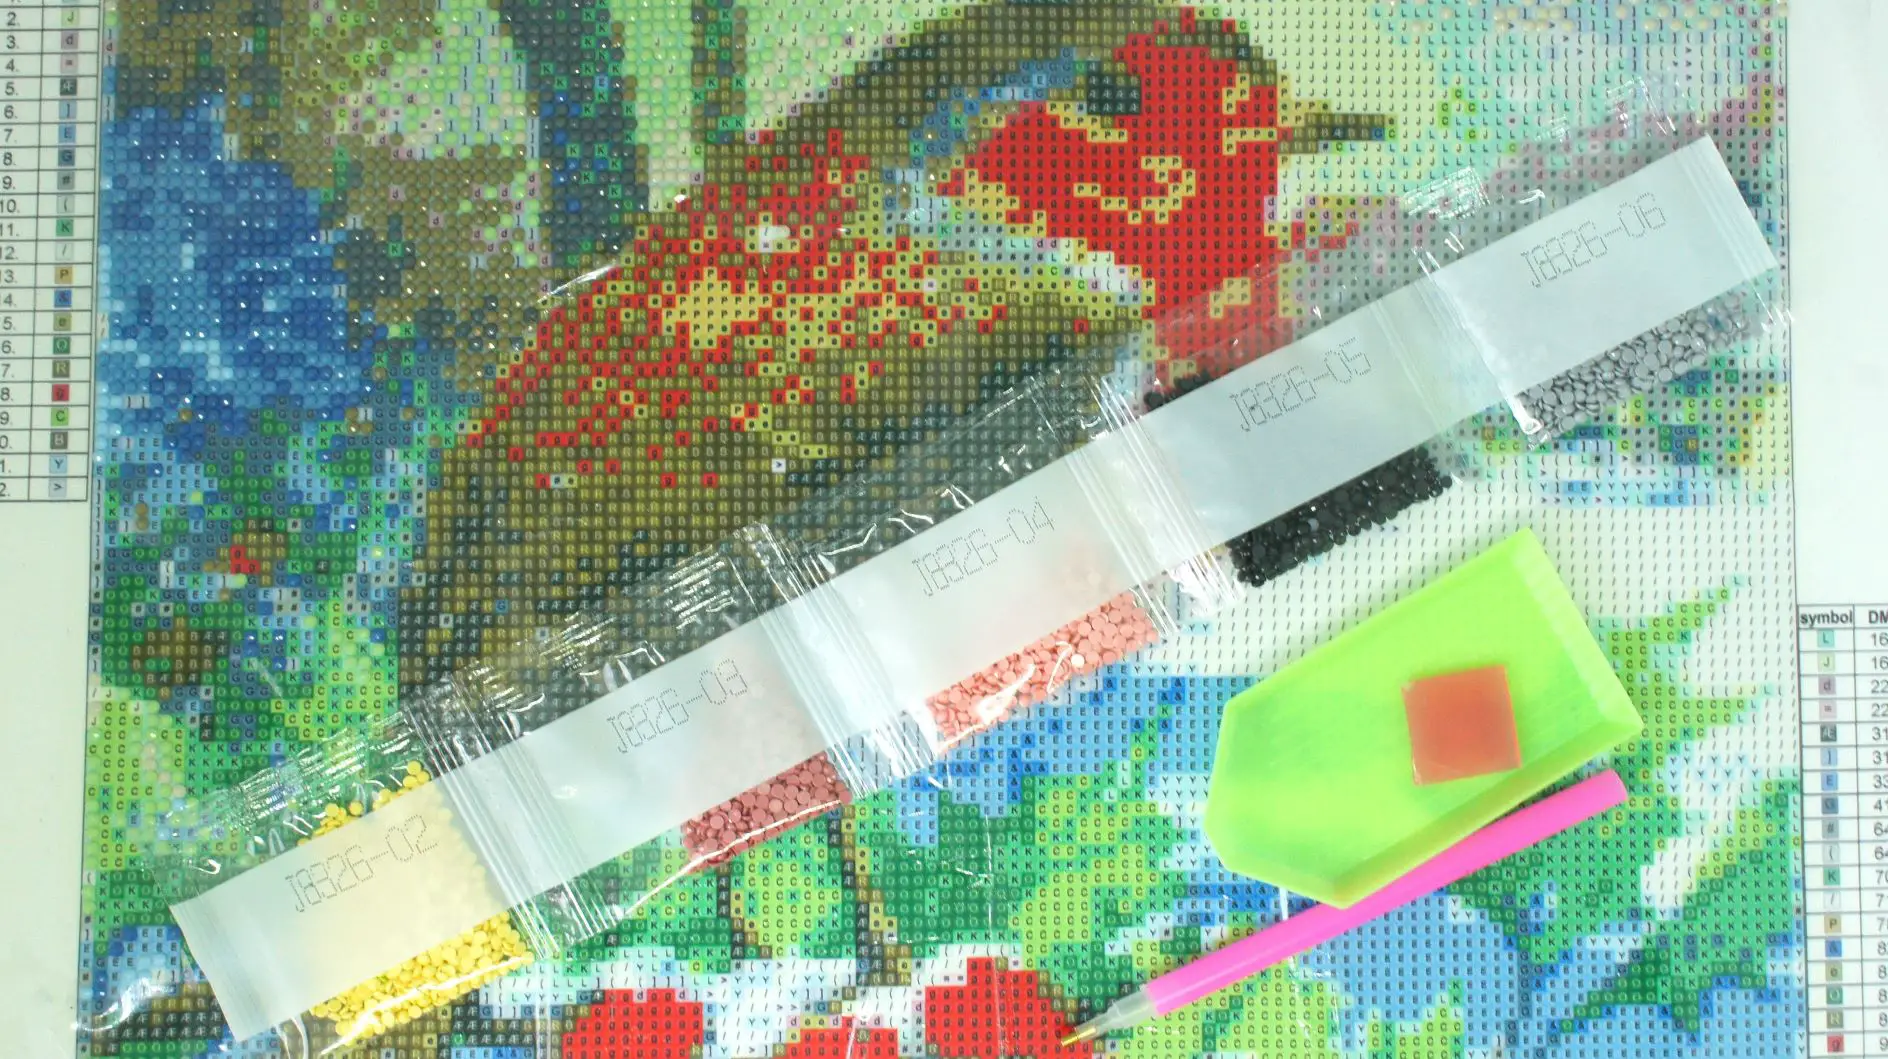
Once your canvas is flat select a colour that you want to start with and open that bag of diamonds. The numbers on the bags correspond to the key on the side of the canvas. If you want to you can open all the bags and attach one diamond of each colour next to its corresponding number. This also raises the point about what to do with all those small diamonds. You will need to store them carefully so that they do not get mixed up. You can use small sealable plastic bags or containers. The only thing that matters is that you keep them separate somehow and know which diamonds correspond to which number.
Which colour to start with? Obviously it is entirely up to you. Some people like to start with a large area of the same colour but other people prefer to do all the odd bits and pieces of colour first. Personally I worked largely from the top left of the picture doing many of the same colour and then swapping before I got fed up with that colour. It really does not matter.
Your canvas is sticky and your diamonds will stick to it really well. So will your hand, cat fur, etc! I recommend that you keep the protective plastic sheet on the canvas and only peel back the section that you are working on. If any sections lose some of their sticky you can clean them using a baby wipe.
Getting Started:
Once you have selected your diamonds tip some into your plastic tray.
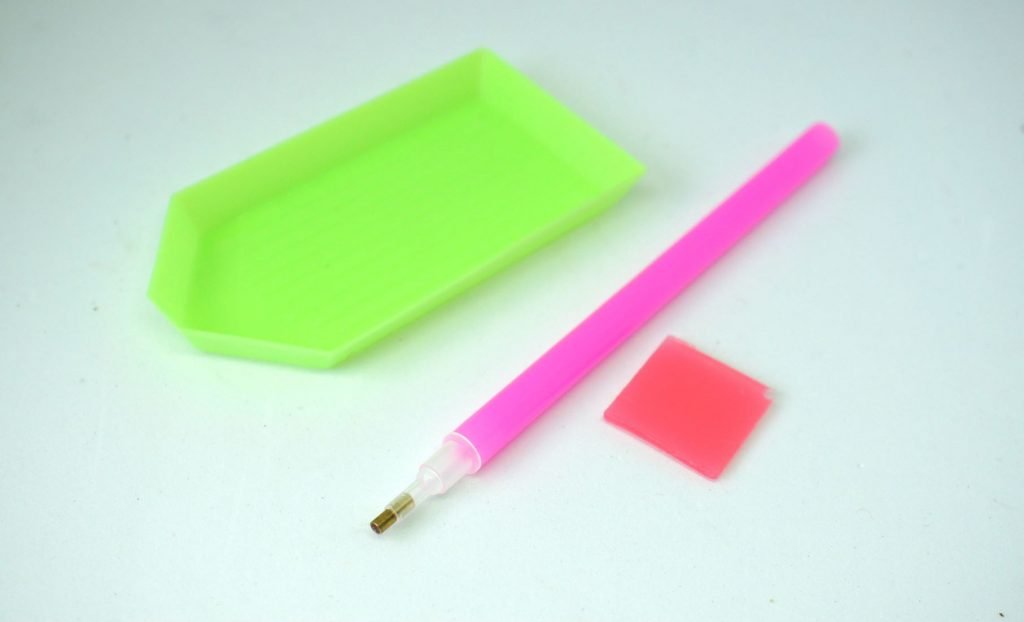
Mine is green and has ridges running along it. These help to separate the diamonds when you shake it to shuffle them to turn them over.
Next take your diamond applicator tool and push the end of it into the adhesive wax (the orange/pink stuff). You are now ready to start.
Push your applicator tool onto a diamond that is flat side down (the curved side is picked up inside the tool).
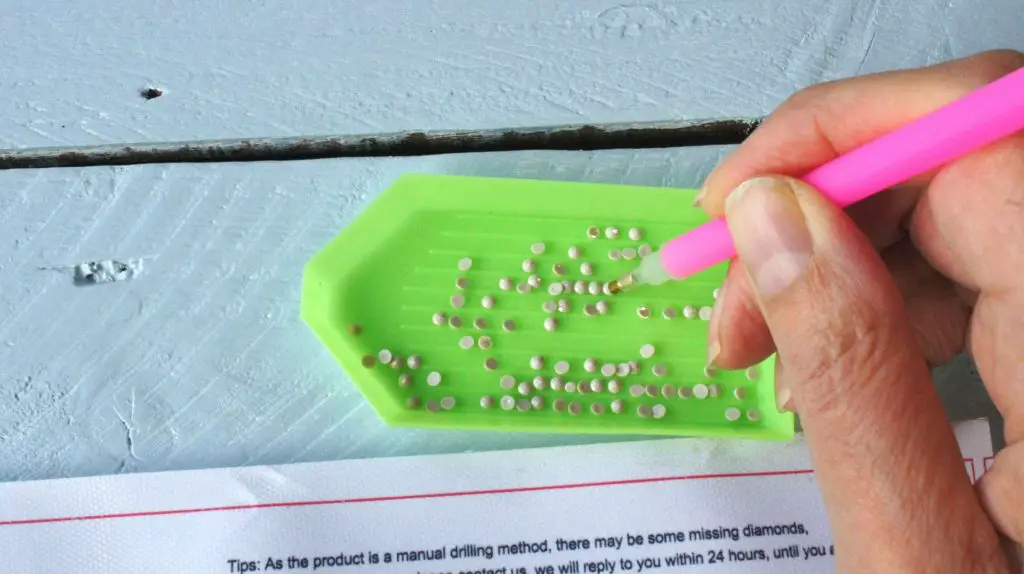
Now place the diamond over the square that has the correct number printed on it. It will stick down easily.
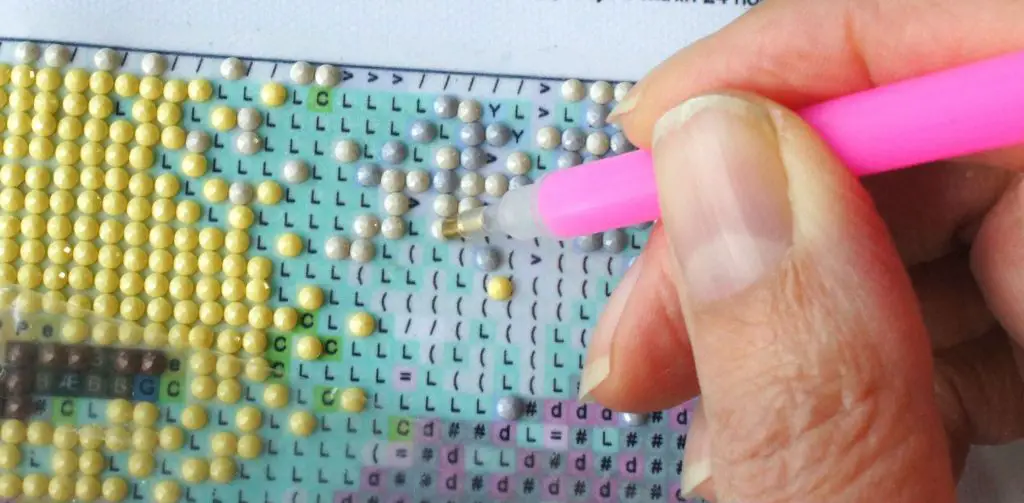
Completing the picture:
Now simply keep going! If you start to have trouble picking up the diamonds then simply push the applicator tool into the adhesive wax again and it should start picking up again.
Keep going until you have covered all the squares. Note: some kits cover the whole canvas some only partially cover it. Look out for this when you are selecting your picture.
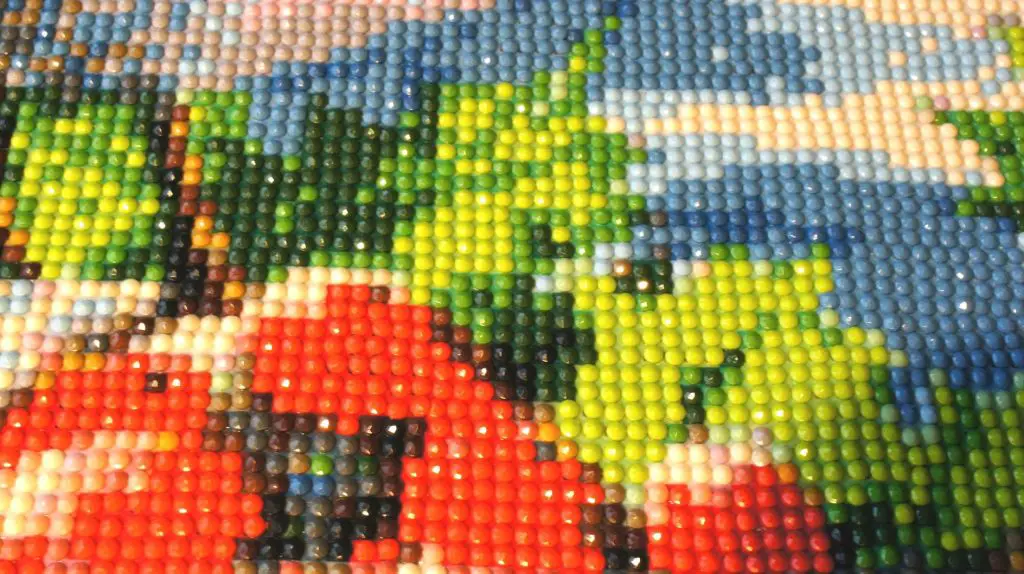
Completed Diamond Painting Picture
Once you have completed your picture you can display it however you like. I chose to frame mine with a mount around it. It is advantageous to have a mount as it allows any diamonds on the edge to sit tidily behind the mount. You can trim the edge of the picture down but I left most of it on to secure it behind the mount.
When choosing your kit it is worth considering the size of the finished picture and how easily you will be able to frame it and hang it. Some standard sizes are much easier to find frames and mounts for!
Custom Diamond Painting Kits
I decided to do a custom painting by numbers kit to get an interesting picture of my cat and because I enjoyed doing the robin picture so much. I simply chose the picture I liked and got a 12″ by 12″ picture made up.
I love it and I honestly really enjoyed doing it. As a result of my experience do I have any tips. Oh yes!
- If your picture has a lot of detail consider going for a larger picture as the resulting diamond picture will keep more of that detail.
- You may also find that there are more places on the canvas where you only need one diamond in a location of a particular colour which can make it harder to do (or more enjoyable depending on your point of view).
- It may well also use more colours so be prepared for that when you are considering storage for your diamonds.
Video of Diamond Painting
If you would like to see my custom picture taking shape then please watch this video.
This video is also available on my YouTube channel.
Summary
So select your kit and have a go. I am sure that you will enjoy it and love the result!
If you like creating items to decorate your home take a look at some of my other articles:
- Painting By Numbers – Winnies Picks
- Acrylic Pour Painting – an Introduction
- DIY Button Art
- Gorgeous Flowers from old Magazines
- Introduction to Iris Paper Folding
- DIY Geometric Abstract Art
Remember to pin this article on Pinterest so that you can find it later. You can follow me on there for even more great ideas