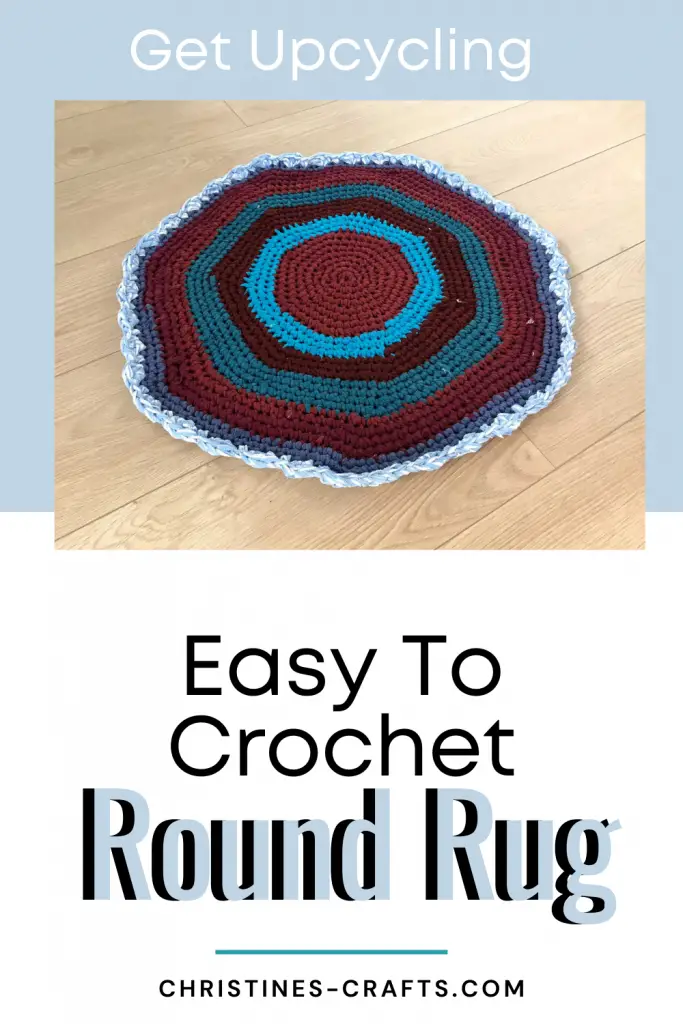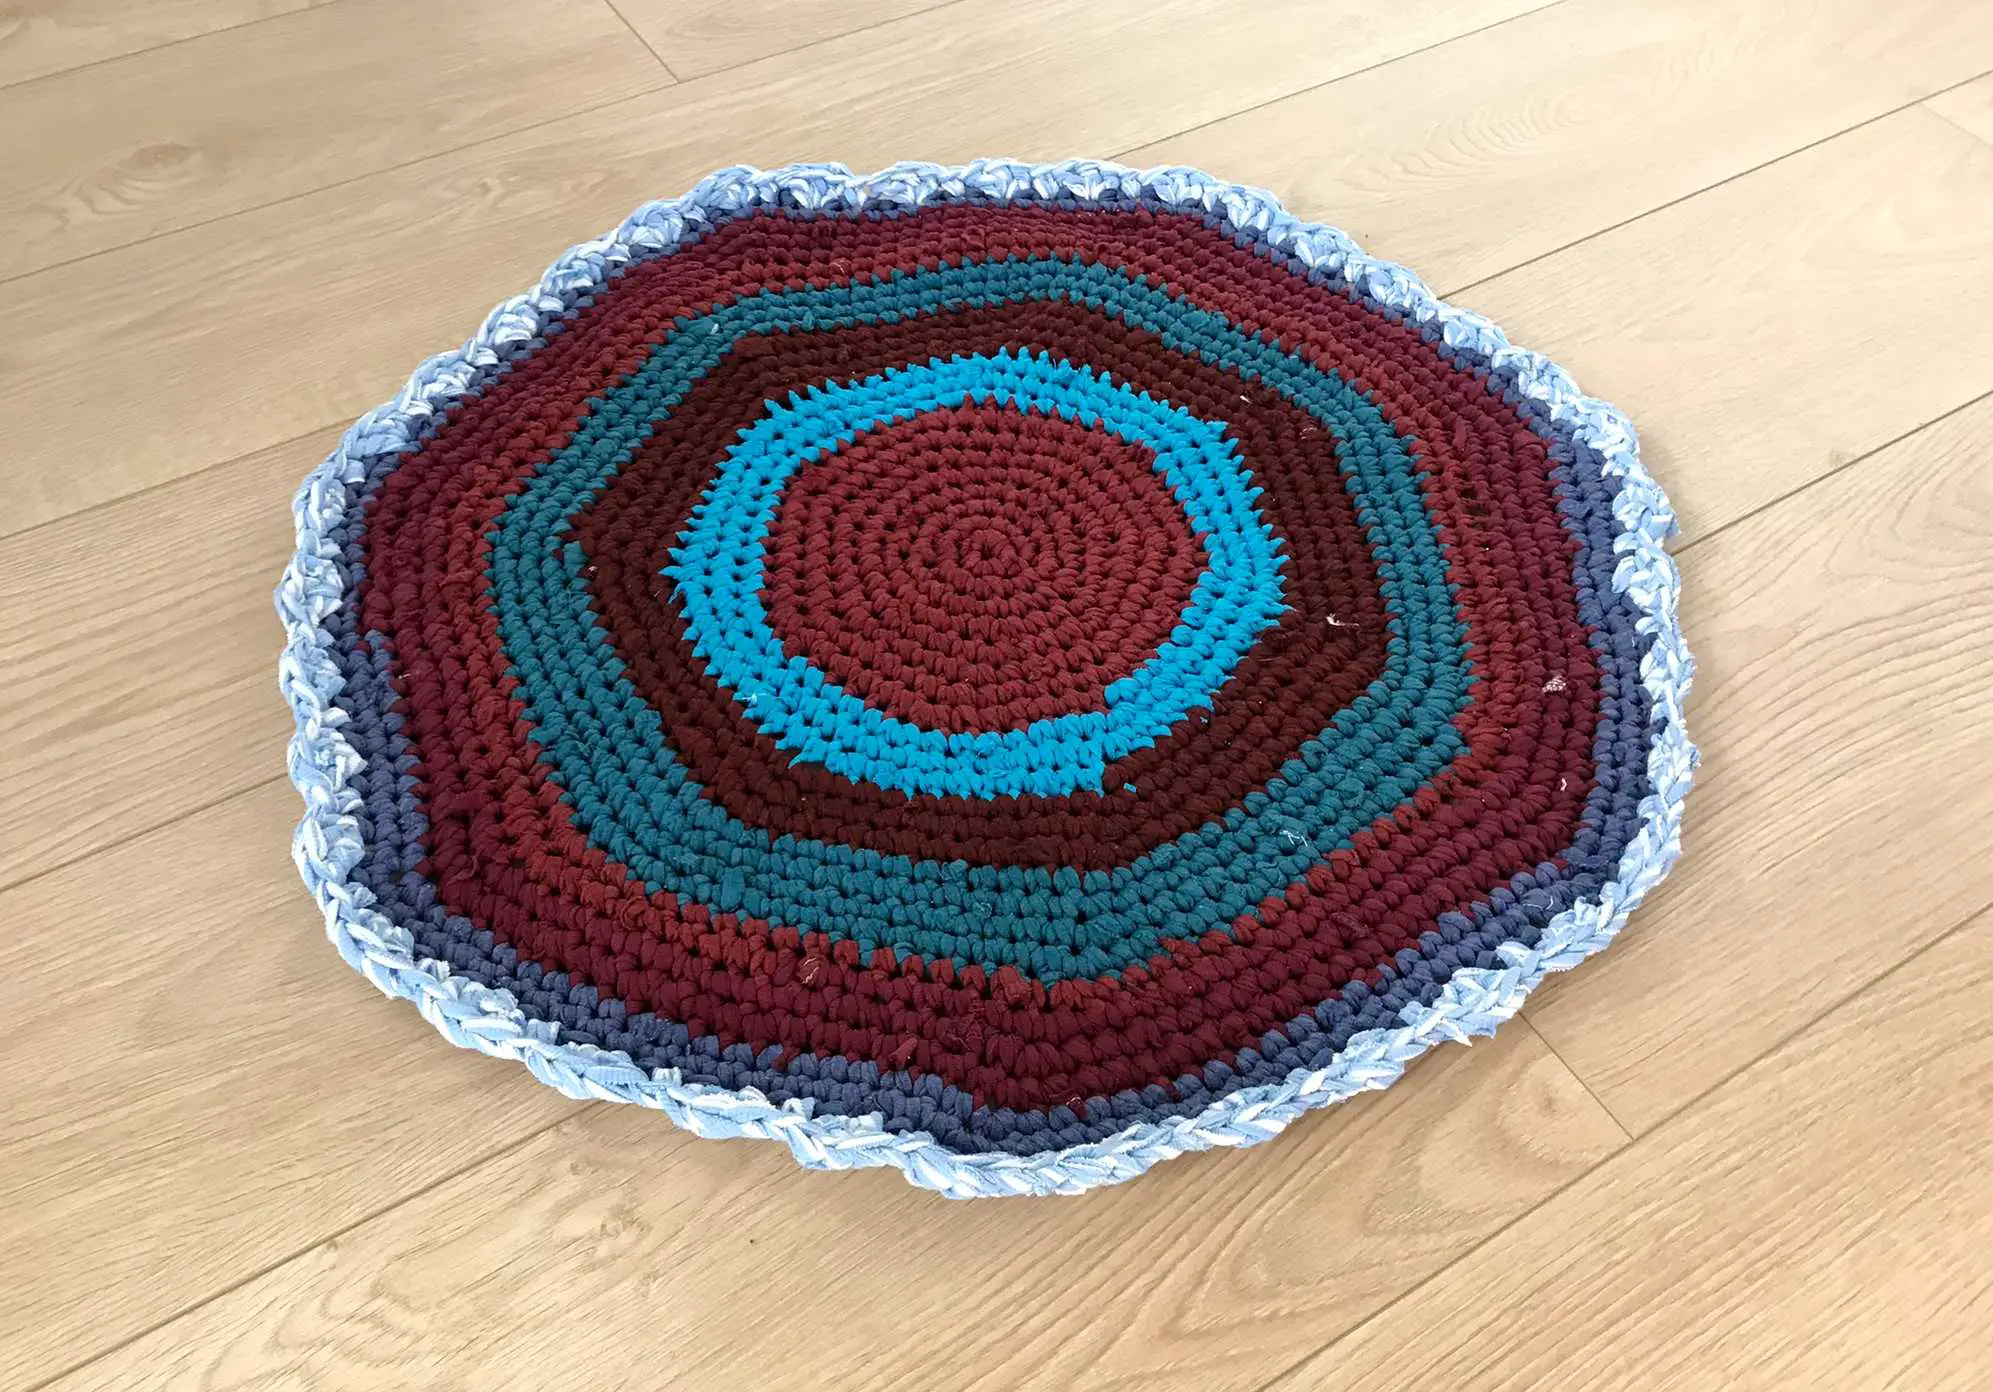
Crochet a Free Round T-Shirt Yarn Rug the Easy Way
As an Amazon Associate I earn from qualifying purchases
Do you look online and scroll through Pinterest admiring those crocheted rugs but think that you could never do that or afford that? Well, think again because in this crochet rug tutorial you will see how to crochet a rug from t-shirt yarn that you can make from old t-shirts even if you have never crocheted before.
This round rug is super quick and easy to make and this one cost me absolutely nothing! Yes, completely free!
This page contains affiliate links meaning I earn a little commission if you use those links at no cost to you. I only recommend brands I use and trust.
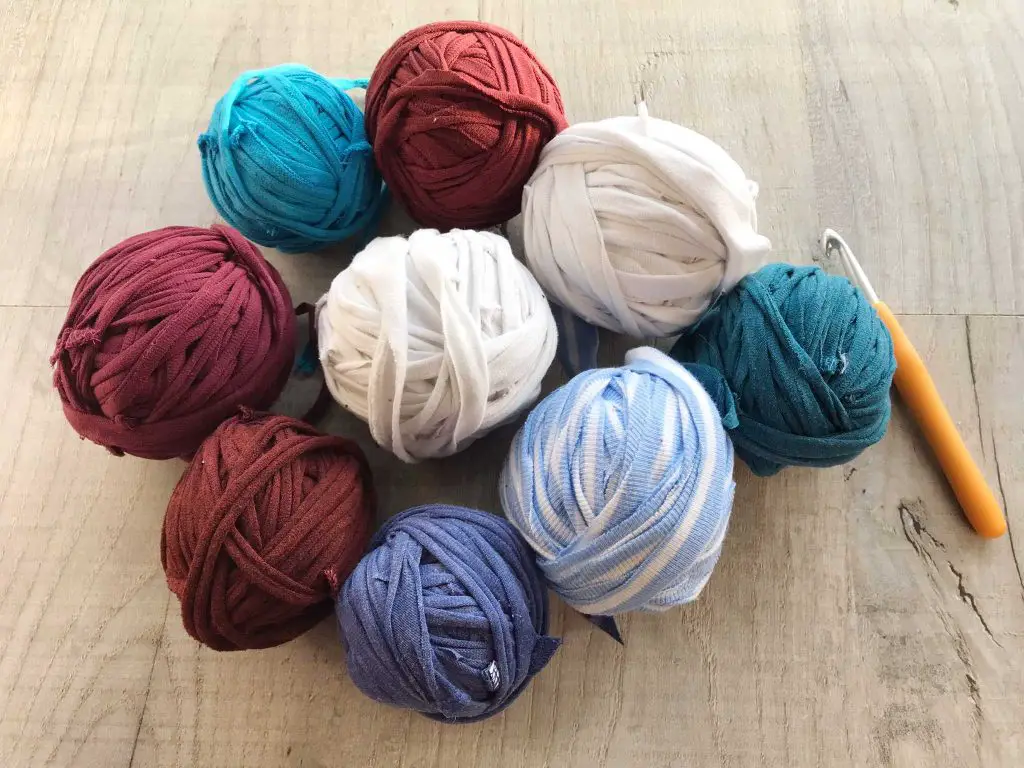
You will need:
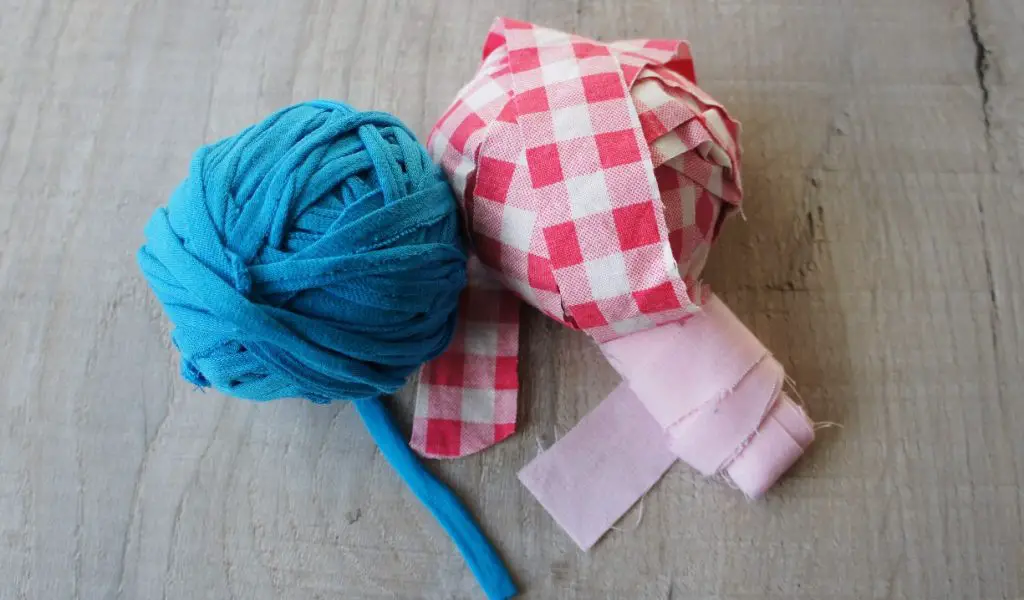
If you would like to make your own t-shirt yarn or other fabric yarn then simply gather up your old t-shirts or fabric and check out this tutorial on making your own fabric yarn.


This pattern is available for free in both US and UK terms in my subscriber resource area. To access this please simply sign up here to receive regular updates from me and access to all my freebies (patterns, tutorials, planners, etc).
There are also tutorials to teach you how to crochet on this site. The library is building slowly to cover many aspects of crochet. If you are struggling with any stitches or techniques take a look.
If you have more general questions about crochet then check out the most asked questions (and answers) here.
Crochet Rug Video Tutorial
This video is also available on my YouTube channel.
Crochet a Rug Pattern
Stitches Used in this Pattern (US Terms)
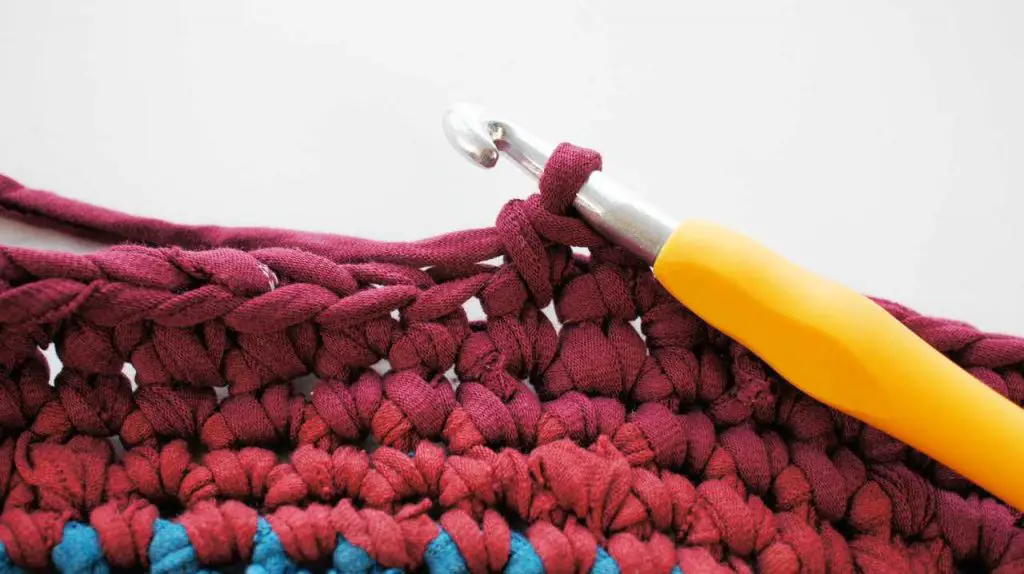
Single Crochet (sc)
Double Crochet (dc)
Chain (ch)
Slip Stitch (ss)
Increase by working 2 single crochets in one stitch (inc)
Total number of stitches in a round ( )
Gauge
Gauge is not important for this project. Work with the tension that you like, just be consistent. Try to make sure all your stitches are as tight as each other.
Top Tips for Crocheting your Rug
- Mark the first stitch in each row so that you always know when you start a new row. Use a stitch marker or safety pin.
- Keep a record of your number of rows using a row counter or pen and paper
- Use similar sized yarn for the whole rug.
- Rest frequently. Your rug will get heavy as you progress.
- Use an ergonomic crochet hook to reduce fatigue in your hand and wrist.
- If you have more yarn of some colours than others then use the yarn you have least of in the centre. Join new colours wherever you like but you get a better finish if you always do it at the start of a round.
Round Crochet Rug Pattern
Round 1: With central colour 6 sc in a magic ring (6)
Round 2: inc in each stitch (12)
Round 3: [inc, sc] x 6 (18)
Round 4: [inc, 2sc] x 6 (24)
Round 5: [inc, 3sc] x6 (30)
Round 6: [inc, 4sc] x6 (36)
Round 7: [inc, 5sc] x 6 (42)
Round 8: [inc, 6sc] x 6 (48)
Round 9: [inc, 7sc] x 6 (56)
Continue in this way until your rug is the size you would like it to be.
Then scroll down to see how to crochet a simple border.
NOTE: Your number of stitches is increasing by 6 in each round. This should make a nice flat rug. However depending on your yarn and tension you may get your rug curling up or rippling.
CHECK your rug lies flat every 2 or 3 rounds so that you can pick up any problems swiftly.
Potential Rug Problems
Through no fault of your own you may encounter these problems with your rug. It can depend on your tension and the yarn you use so do not feel bad if you have problems.
The more often you check your rug the less likely you are to have to pull any of it back.
If your rug curls up at the edges
If your rug curls up and seems to be forming a bowl then you do not have enough stitches in your last round. See if you can make it go flat using your hands and if so you are probably okay but check it again after your next round.
If you can’t then you need to do more increases. You can try to add twice as many increases into the next round. That means that if you have 6 increase stitches now you should try 12. If it now lies flat you are good to carry on as you were before with 6 increases in each round.
If you prefer (or if your rug is very curled up) take a row back (frog it) and do a double increase in that row instead. If that does not fix it you may need to pull another row back and try a double increase there.
Once you are happy carry on as per the pattern.
If your rug is rippling
If your rig is rippling then the final row has too many stitches in it. If you can almost flatten your rug with your hand then simply do ONE ROUND without increasing your stitches and then continue as before.
However, if your rug is very rippled then you may need to take a row back and do that row again but with no increases. Then continue as before.
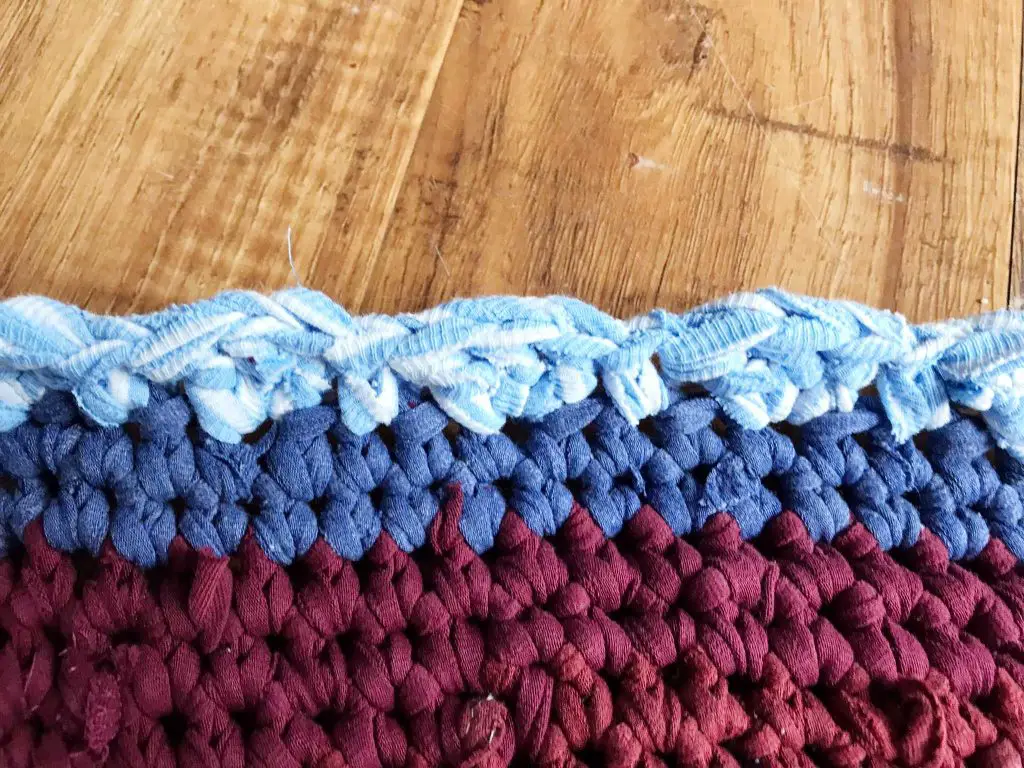
Crochet a Scalloped Border
You can just finish your rug as it is or you can add a border like I have done. The scalloped border I have added is really simple but just finishes the rug off.
Make sure you have completed your last round and then:
Final round: ss, ch, skip 1 stitch, 3 dc in next stitch, skip 1 stitch, sc, skip 1 stitch, 3dc in next stitch, skip 1 stitch, sc, skip 1 stitch, etc until you complete 1 round. ss into first stitch and fasten off your thread.
NOTE: you can do this scalloped border with more double crochets in the stitch to make it more dramatic. Try 4 or 5! You can even try using a treble crochet!
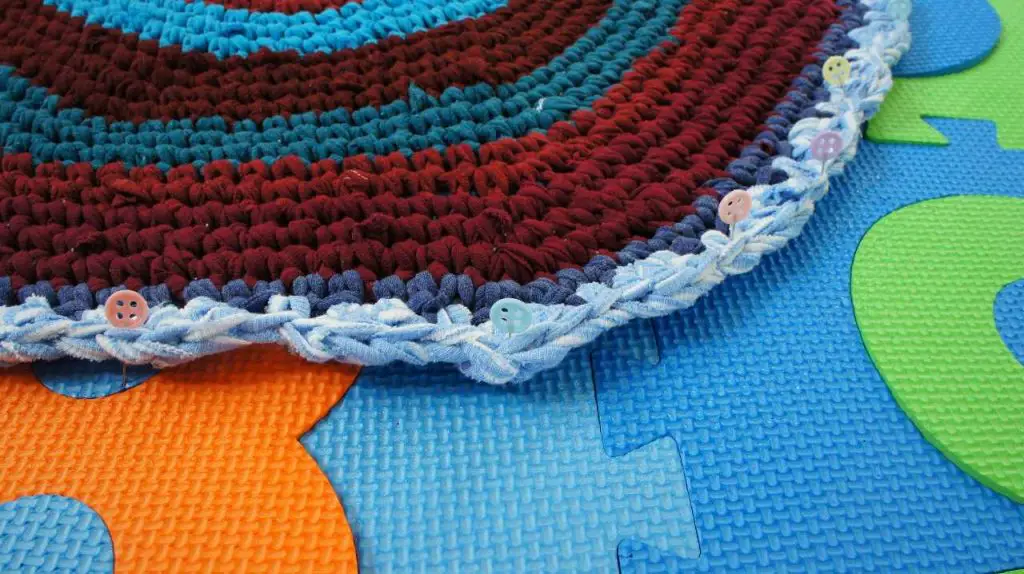
Blocking Your Rug
If your rug is lying flat and you are happy with it you do not have to block it. There are no rules! If, however you think your rug is not quite flat then block it.
What do I mean by blocking? It is simply the act of flattening your crocheted work and making sure it stays that way.
My rug was made with t-shirt yarn and I blocked it using water rather than steam.
So, take your rug and pin it down flat. You can use special blocks for this or you can simply pin the rug down to your carpet. I use some old children’s foam blocks. All that matters is that your rug is sitting flat and looks how you want it to look. Then spray it with water and leave it to dry. It may take a day or 2 to dry.
Once it is dry remove the pins and your rug is ready for use.
In Summary
Congratulations on completing your crocheted rug. I hope that you have enjoyed it and will continue to crochet items for your home and to wear. It is a very relaxing yarn craft and you really can create so many wonderful items. If you are looking for more inspiration I recommend Ravelry.com for free and paid patterns. You will need to set up an account but it is free.
If you are looking for more great craft ideas for your home then take a look at:
- Transform a plant pot by sewing a super simple cover
- Create Abstract Geometric Art
- Makeover a Stool
- Create your own Button Art
- DIY Fall / Autumn Leaf Basket
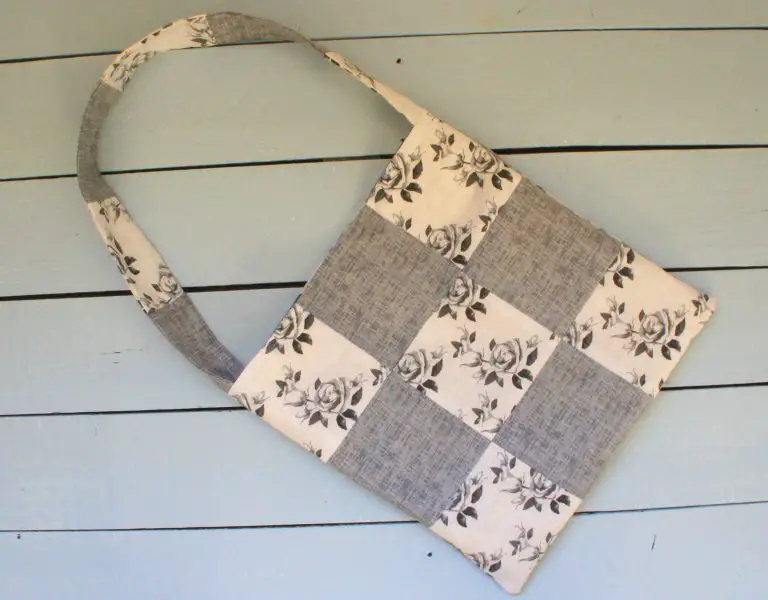
- No Sew T Shirt Bag
- How to crochet a granny square
- Crochet a granny square bag
Please let me know in the comments below how you get on with your crocheted t shirt yarn rug.