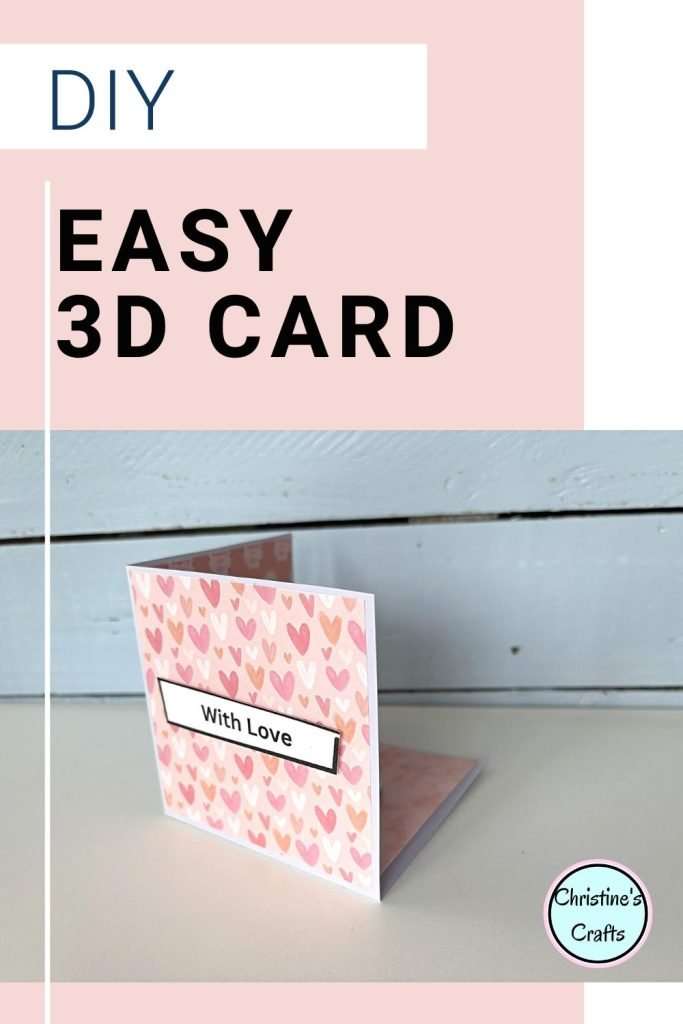
Mixed Media Card 11 – 3D Pink Square Card
As an Amazon Associate I earn from qualifying purchases
This is the eleventh part in a 30 part series showing you different mixed media cards that I have made. These will all include video tutorials and I am hoping that you will get some great ideas and make your own mixed media cards for all occasions.
The intention is that you can make your cards using the craft supplies that you already have at home. Take my ideas and adapt them to what you have right now.
So, let’s get started.
This page contains affiliate links meaning I earn a little commission if you use those links at no cost to you. I only recommend brands I use and trust.
You will need:
- Square of card (mine is 8″ by 8″)
- Pretty Paper Scraps
- Glue (simple gluestick is sufficient)
- Printable Greeting (free below)


Simple Instructions – edit
- Fold your square of card in half, open it up and fold it in half the other way. Open it up and you will have divided your square of paper into 4 squares.
- Score a line from the centre of the paper to one corner. Repeat for another corner (next to the first one.
- Cut along the fold line between those two score marks to the centre of the card.
- Fold both squares in half to the back , forming triangles. Open the folds back up.
- Apply double sided tape or glue to the top of one of the squares that you folded. Bring the other square that you folded over it and fix it in place. The folds should line up perfectly.
- You have now made your cube card. You should be able to fold the base up inside the other 2 squares using the folds that you made earlier.
- Decide on 2 squares of pretty paper and glue them to the sides of the squares ‘inside’ the card. Play around with full size squares and smaller ones.
- When it comes to the base BE CAREFUL! Only stick this card to half the base on one triangle so that it can fold up inside the card.
- Create your pop up element. Circular elements work really well.
- Make a tab to hold your embellishment in place. Mine is 3″ by 1.5″ but make one to fit your card.
- Fold it in half and fix half of it to the back of your embellishment.
- Then glue the other half to the card you added to the base. BEFORE gluing make sure it works when the card is open and closed.
- Decorate the front of the card – I used a square of paper and then added one of my free printable greetings.
- Add any further embellishments like a greeting from my free printable greetings.

Access Free Printables
To gain access to the free printable used in this card and many other great resources simply complete this form and you will receive emails showing you how to access them.
As a bonus you will also receive my regular newsletter with great crafting ideas and money off coupons.
Video Tutorial for this Square 3D Card
This video is also available on my YouTube channel.
What’s next?
I hope that you are feeling inspired to use up some of your crafting supplies and start creating some mixed media cards for all your occasions.
Card 2 in this series is a decoupaged retirement card. Take a look and adapt it for your needs.
Card 3 is a flower card and card 4 is made with a pretty paper. Card 6 also uses up your pretty papers but also adds in some stamping.
You can find all the cards in this series here.
Why not also check out using up those fabric scraps to sew some greeting cards. Full instructions and video tutorial for fabric cards here.
Remember to pin this on your favourite Pinterest board so that you can find it later. You could save all 30 for ideas!