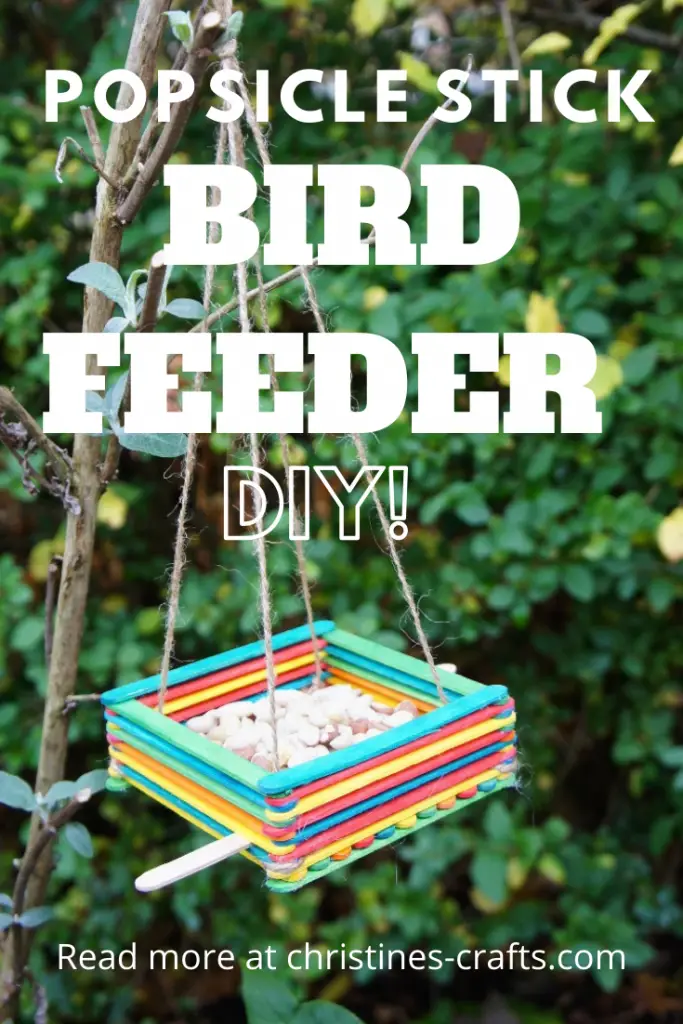
DIY Bird Feeder – Made from Popsicle Sticks
As an Amazon Associate I earn from qualifying purchases
This cute bird feeder is made from popsicle sticks or depending where you live in the world craft sticks or lolly sticks. Whatever you call them they are great for making loads of items. This bird feeder is quick and easy to make and is a great craft project to make with kids.
In winter, birds need a little help to cope with the extreme cold and a bird feeder will encourage them into your garden where you can enjoy watching them fly about. It is a great way to encourage kids to be interested too.
This page contains affiliate links meaning I earn a commission if you use those links at no cost to you. I only recommend brands I use and trust.
You will need:
String or twine
Scissors
Glue (hot melt glue or waterproof wood glue)
Varnish or sealant (recommended)
If you like watching video instructions then scroll down to the bottom of this article to see a video showing how I made my bird feeder. If you like a written tutorial then follow along.
Assemble the base of the Bird Feeder
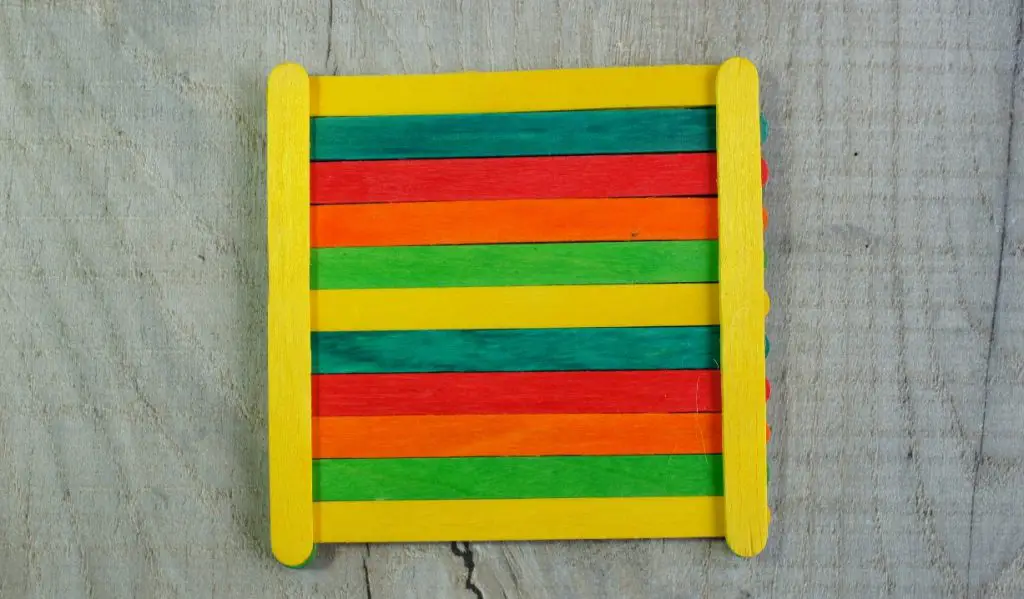
Take a handful of sticks and line them up against a straight edge. Use another stick to identify how many sticks you need to form the square base.
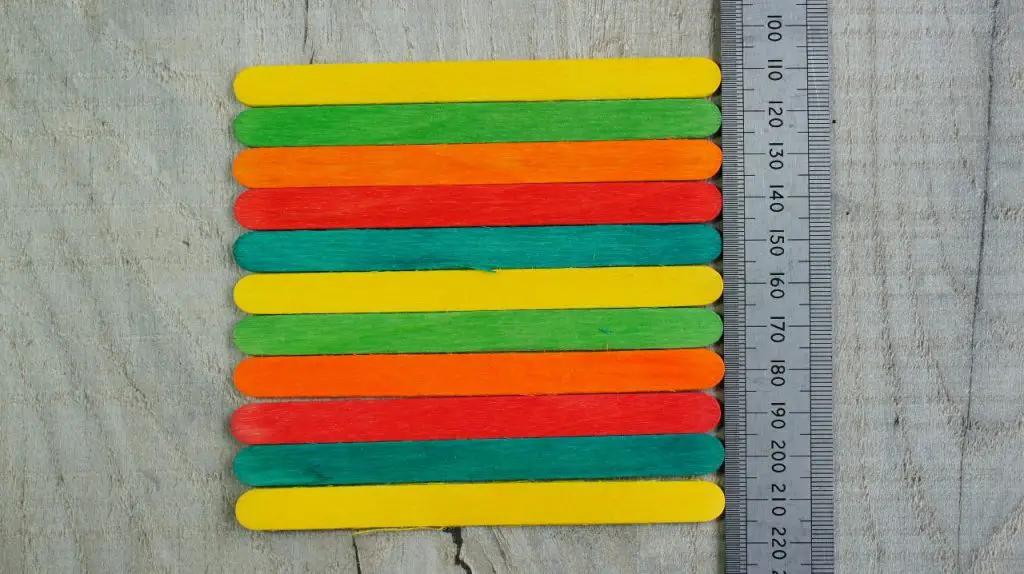
Now you need 2 sticks to join them all together. It is also advisable to have some more in between so that they stabilise the base. This is how I laid mine out.
Once you are happy with the layout apply glue to each of the sticks that you have arranged on your base in turn and glue them to the base sticks. This can be a bit tricky and the sticks can move about but persevere. If you are using hot melt glue it will dry immediately but if you are using wood glue you will now need to leave it to dry.
Build up Sides of Bird Feeder
Once your glue is dry turn the base over and you are ready to start building up the walls around your feeder that will hold the bird food in place.
Start by gluing 2 sticks directly onto either side of the base exactly as you did underneath it. Cover the whole of one side of each stick in glue.
Then add 2 further sticks along the other 2 edges of the base. Note that you will only need glue on the ends of the sticks as they will stick onto the 2 sticks you just attached.
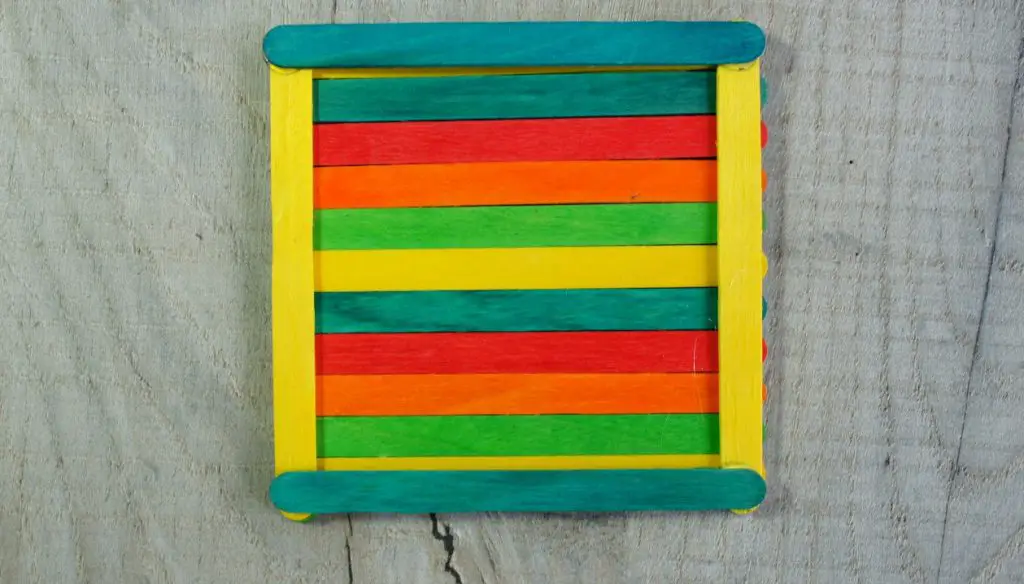
You have now formed the basic pattern that you are going to follow.
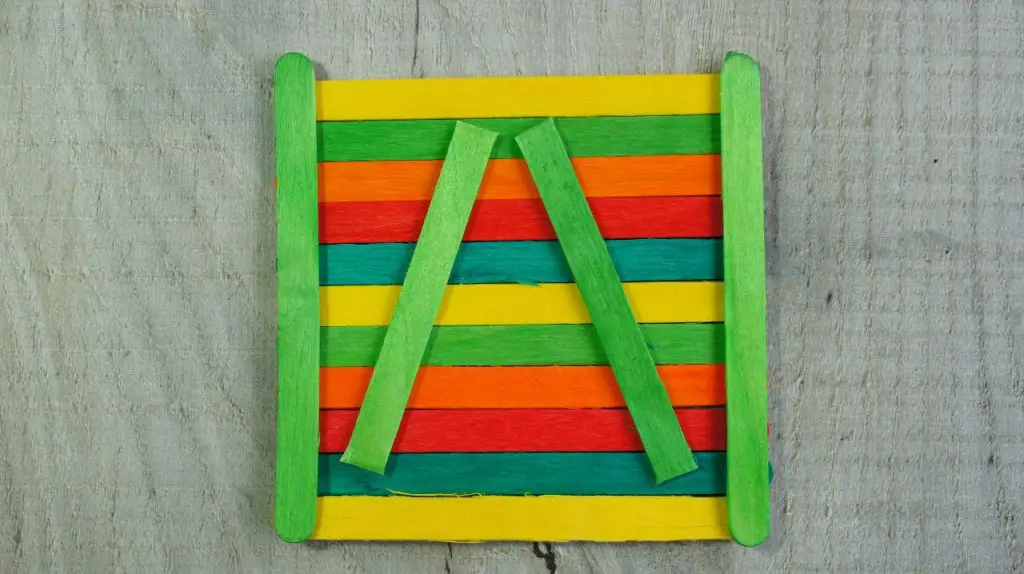
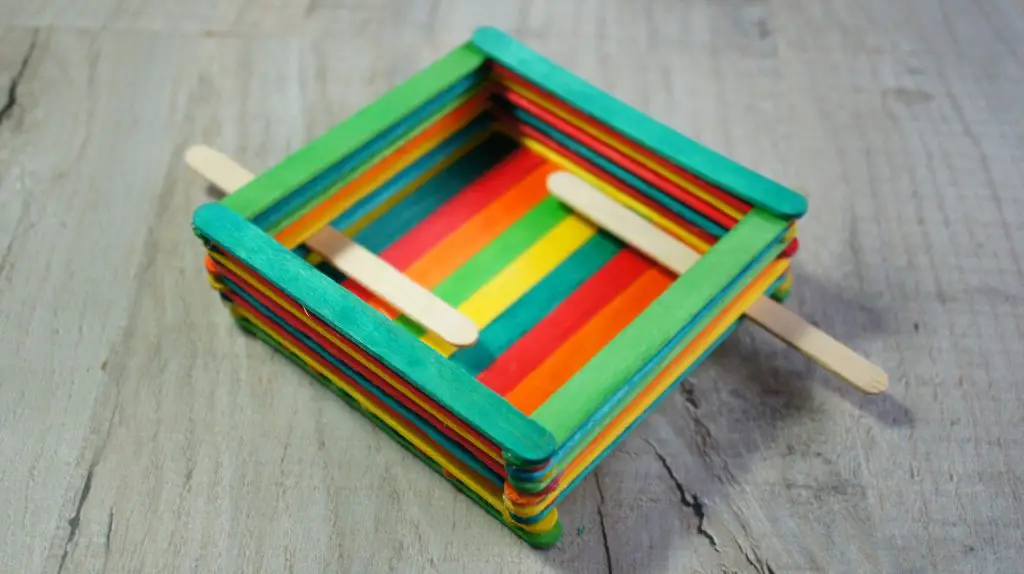
Optional: Perches for Birds
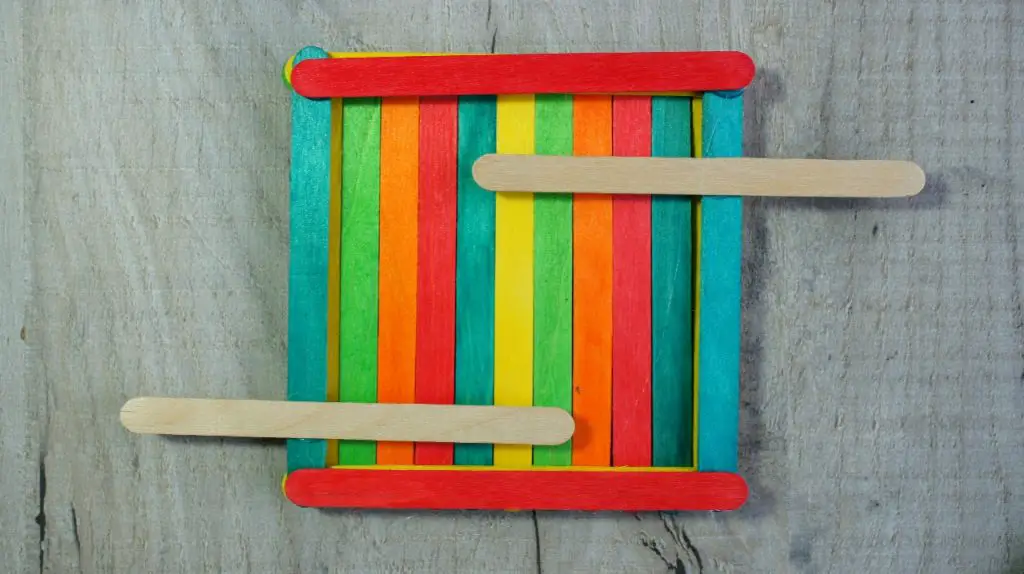
If you would like to add some perches for the birds then now is the time. Either use shorter sticks or cut one in half or glue full length sticks in place. Glue the cut end or half way along your long sticks onto the sticks that you first attached to the base as shown below. Note: that they are at opposite corners for balance.
Complete Sides of Bird Feeder
Now regardless of whether you have added perches or not continue building up the sides of your bird feeder until they are the depth you like. They do not have to be very deep. They are just holding some bird food in place and you do not want it too heavy.
It should look like this.
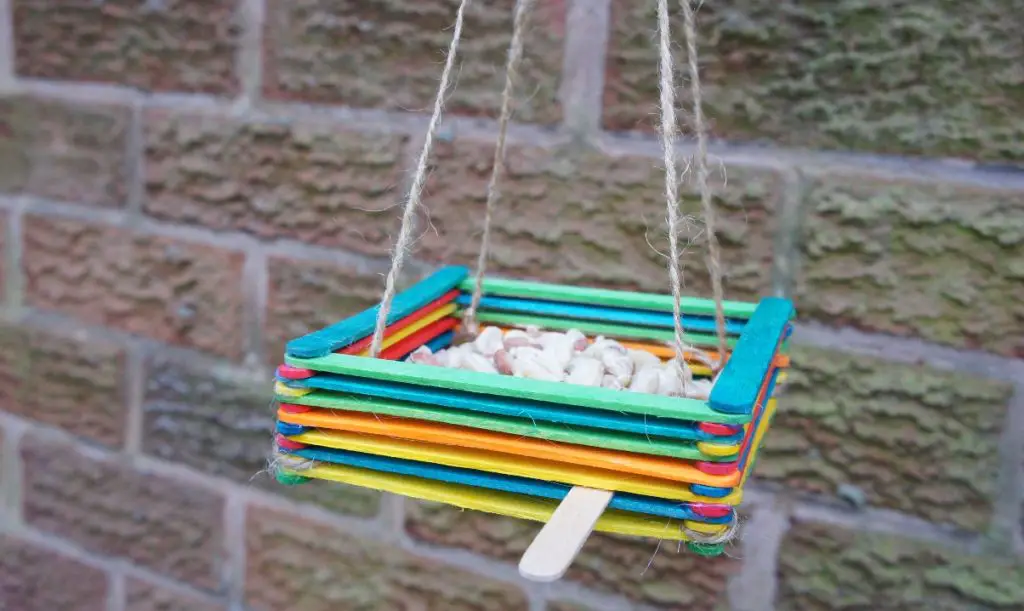
If you want to treat your bird feeder so that it lasts a little longer then now is the time to do it. I do recommend treating them as they are quite delicate. I also recommend hanging them somewhere sheltered. For example you could hang it on a porch or under an existing bird table.
Attach Twine
Now you just need to attach some string or twine to hang the feeder. Take 2 lengths of twine twice as long as you want your hanger to be. Take one of these and tie it around one corner of your feeder near the bottom.
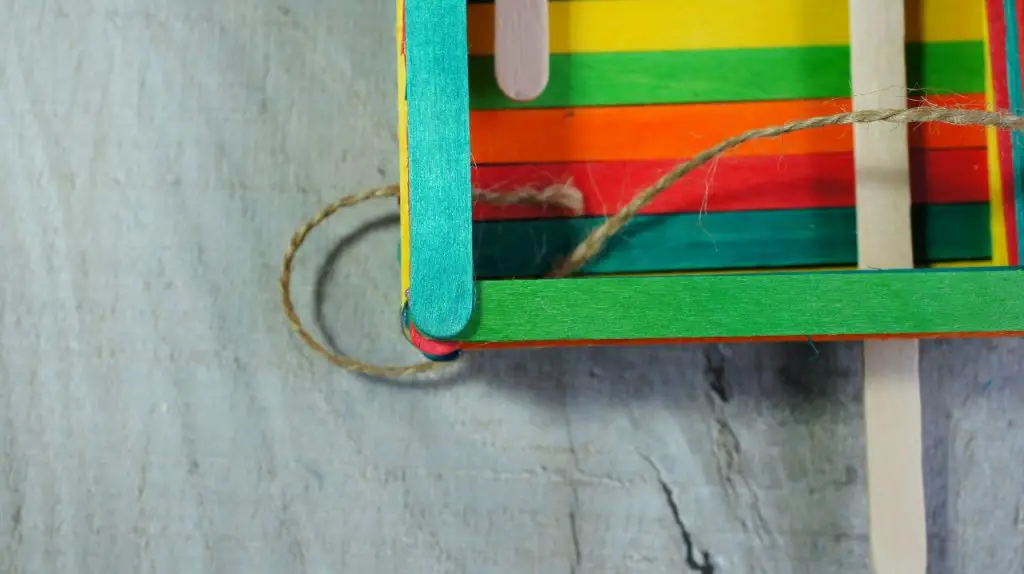
Repeat with the other end to the diagonally opposite corner.
Now repeat this whole process with the other length of twine and the other 2 corners.
Once you are happy with them knot them together to form a hanging loop at the top.
Congratulations you have now completed your DIY bird feeder. Decide where to hang it, fill it with food and watch the birds enjoy your work. It is up to you what you place in your feeder but I used a mixture of suet, mealworms, seeds and nuts. That way it attracts lots of different birds.
Video Instructions
If you prefer to watch me making the bird feeder then here is a video tutorial.
If you enjoy making your own crafts then check out some of my other tutorials:
Make a Paper Organiser from an old Cereal Box
If you want to be the first to hear when I post a new tutorial then sign up to my newsletter and also access my free resource library full of tutorials and planners.
Feel free to drop me a comment below about this craft or anything on the blog. I read them all and reply!