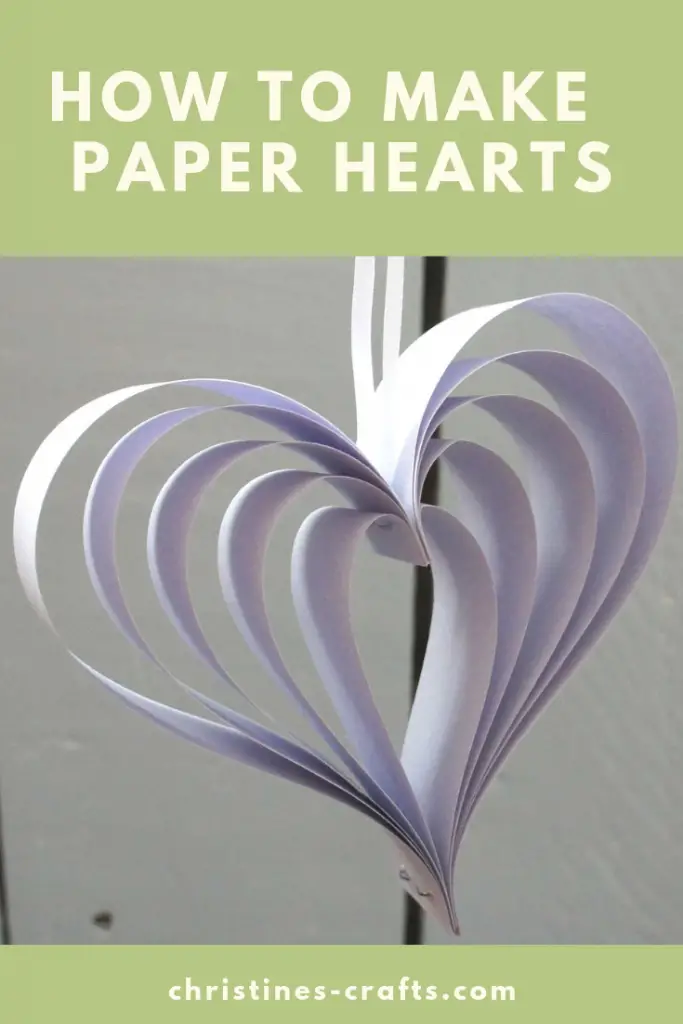
Hanging Hearts made from Paper
As an Amazon Associate I earn from qualifying purchases
This page contains affiliate links meaning I earn a small commission if you use those links at no cost to you. I only recommend brands I use and trust.
You will need:
Paper (I recommend the normal printer paper thickness)
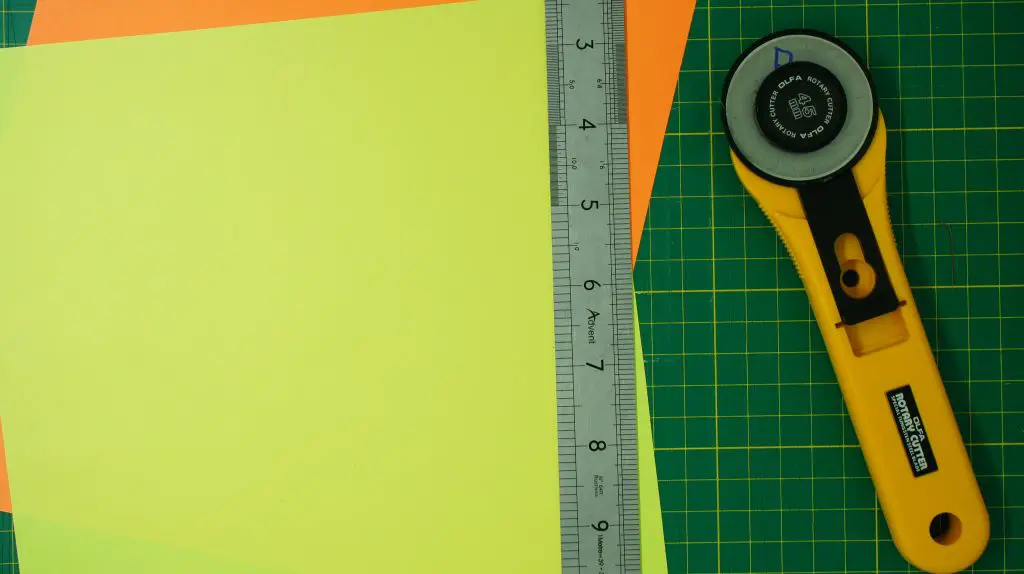
Scissors (or cutting board and rotary cutter)
Video Tutorial
This video is also available on my YouTube channel.
Step 1: Cut your paper strips
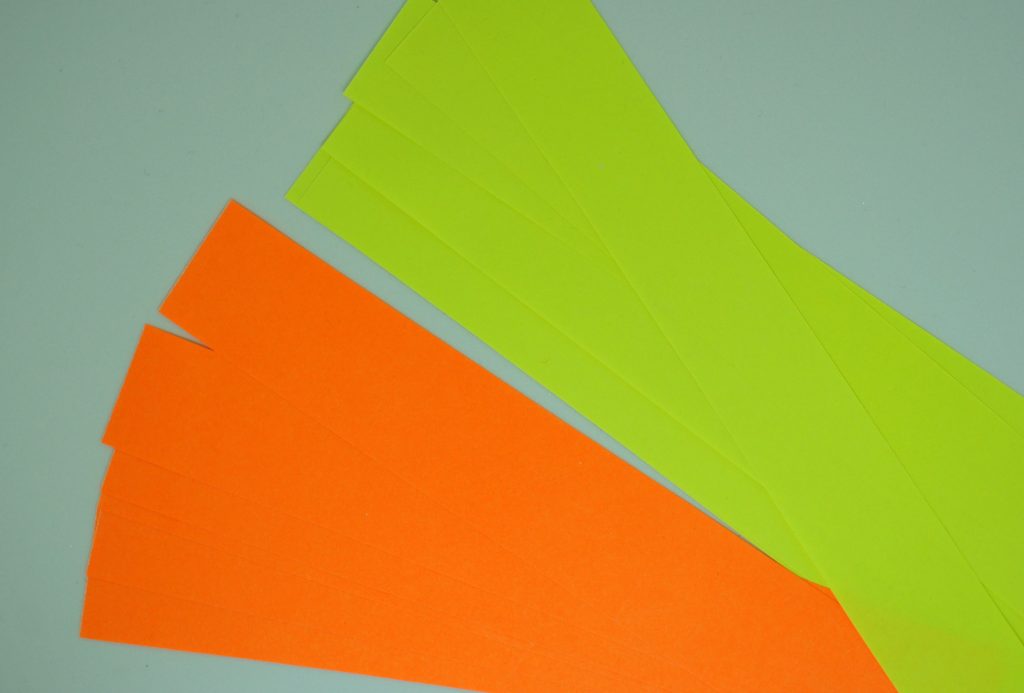
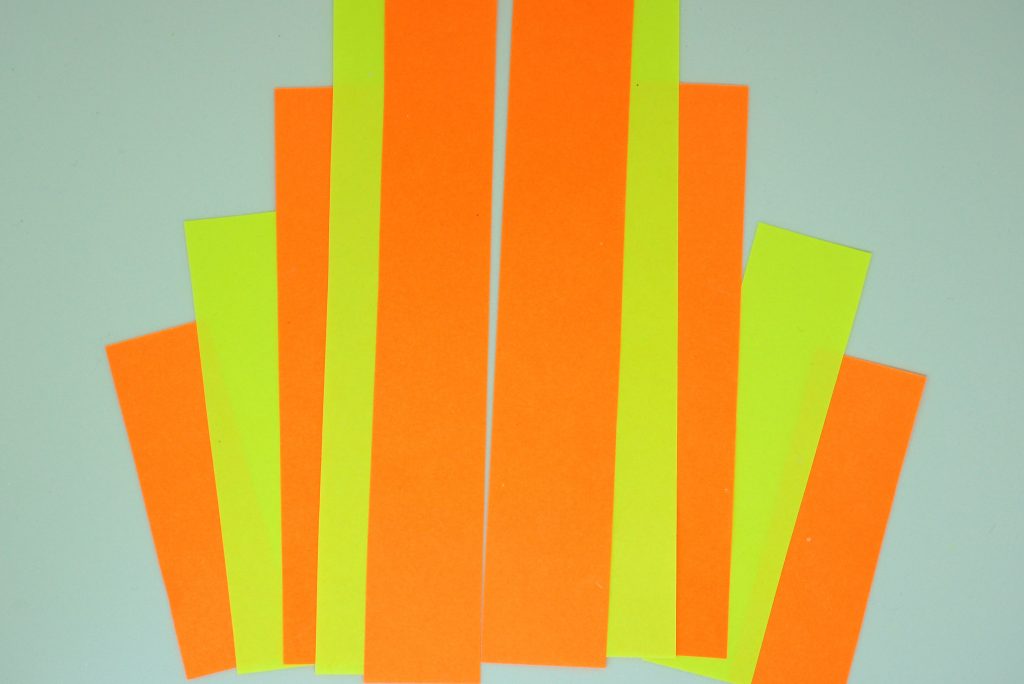
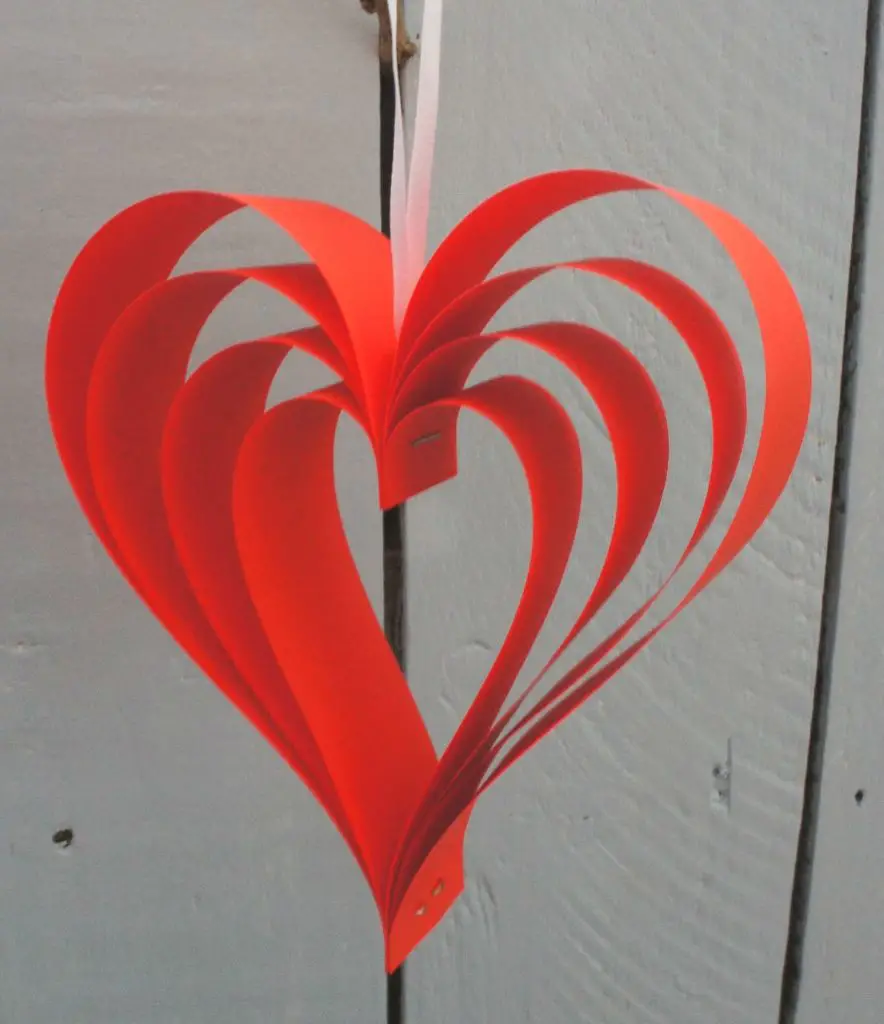
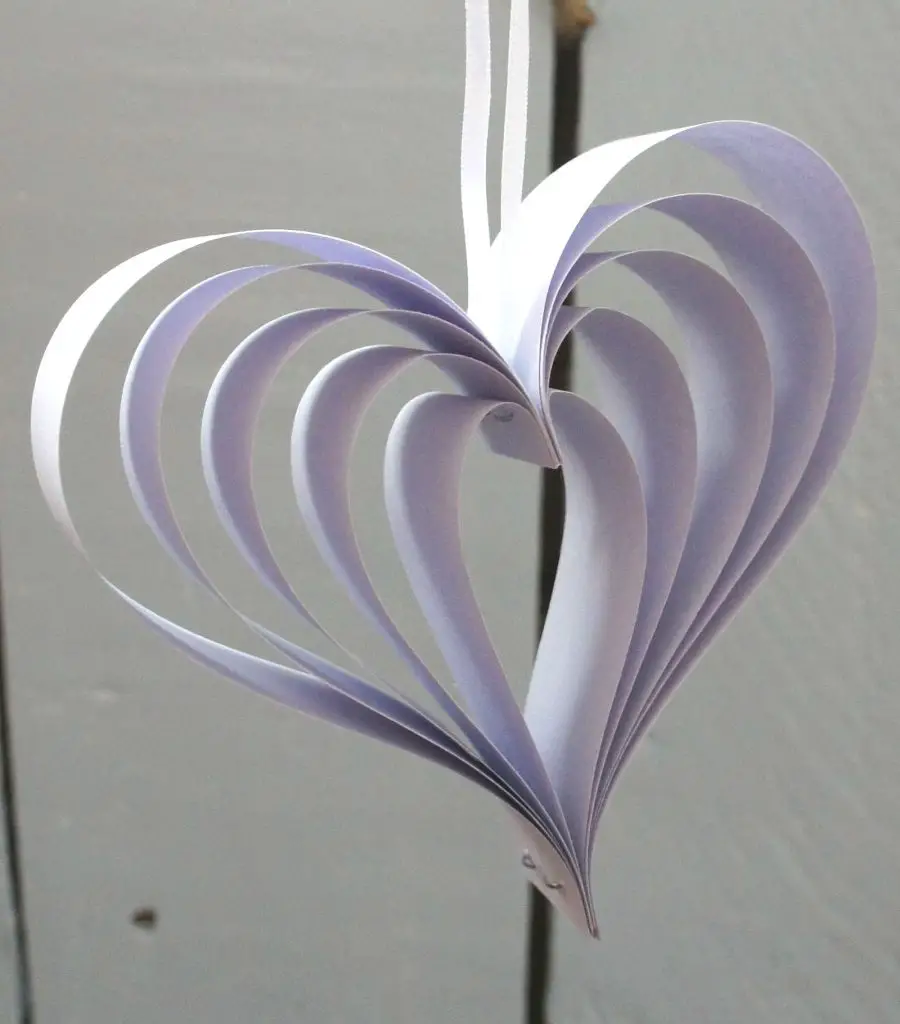
I have used two contrasting papers for the tutorial but you can use one colour (see pictures later).
Get your paper and cut the following:
All strips are 30mm or 1 1/8″ wide, cut 2 of each
200mm or 8″ in orange
170mm or 7″ in yellow
140mm or 5.5″ in orange
110mm or 4.25″ in yellow
80mm or 3″ in orange
This will give me a heart with alternating colours.
Once you have made one heart you may decide to play about with these dimensions and make larger and smaller hearts.
Step 2: Staple strips together
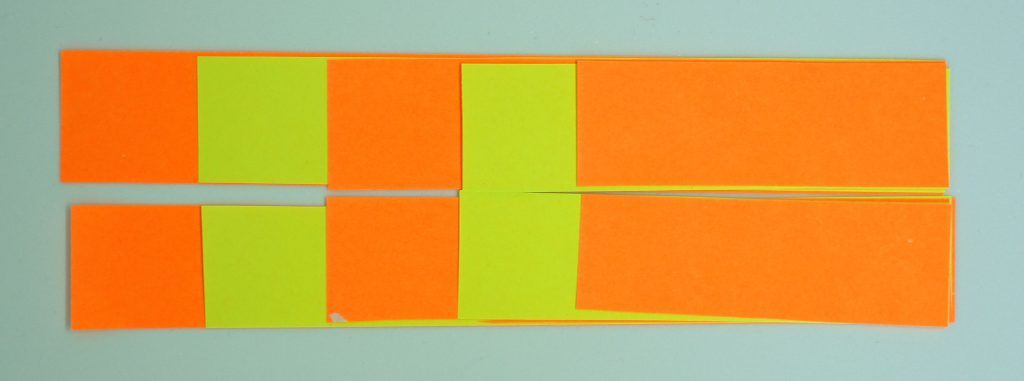
Lay the strips out in order of size in two piles. Each pile should have one strip of each size in it.
Then take each pile of strips and place one pile on top of the other so that the longest strips are together. The smallest strips should be on the top and the bottom of the pile.
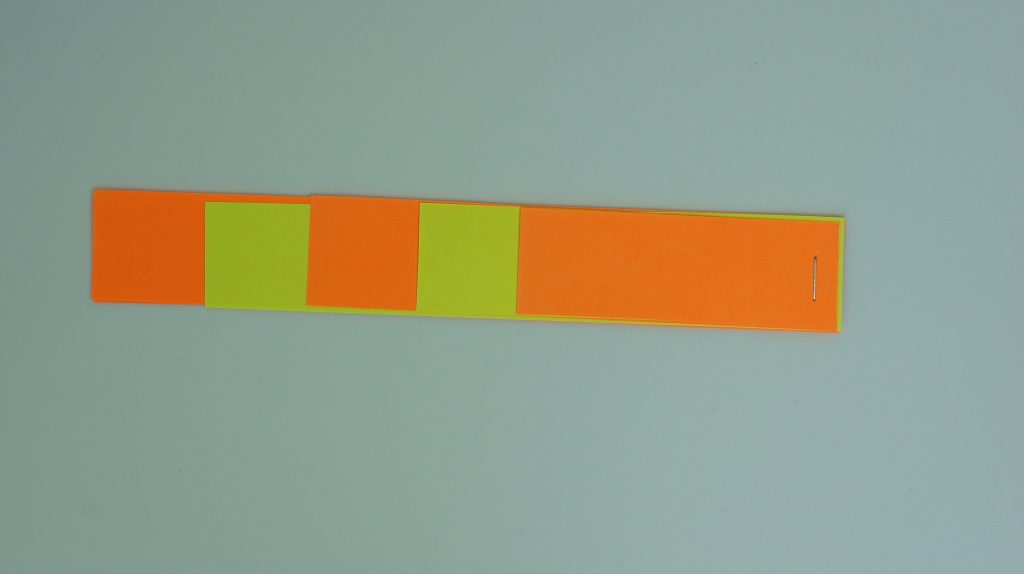
Staple all the strips together at one end of the strips. Make sure they are all lined up perfectly.
Step 3: Form hearts
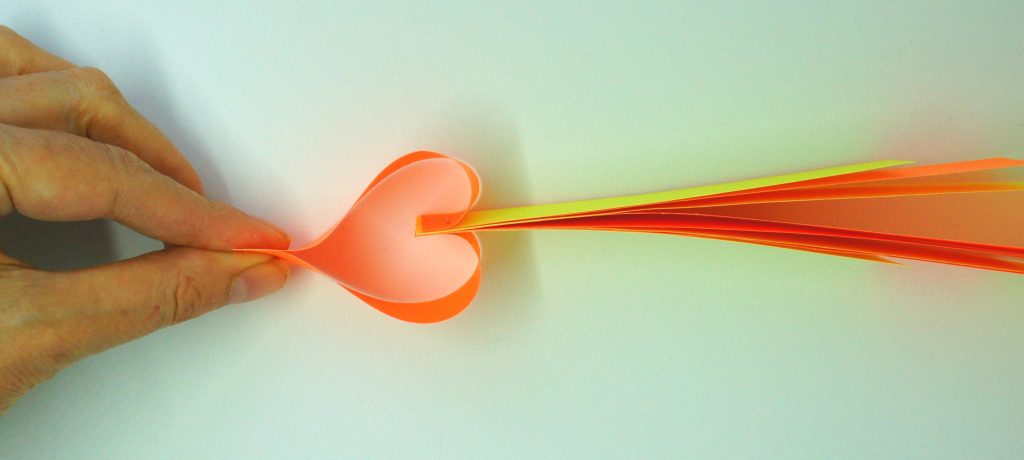
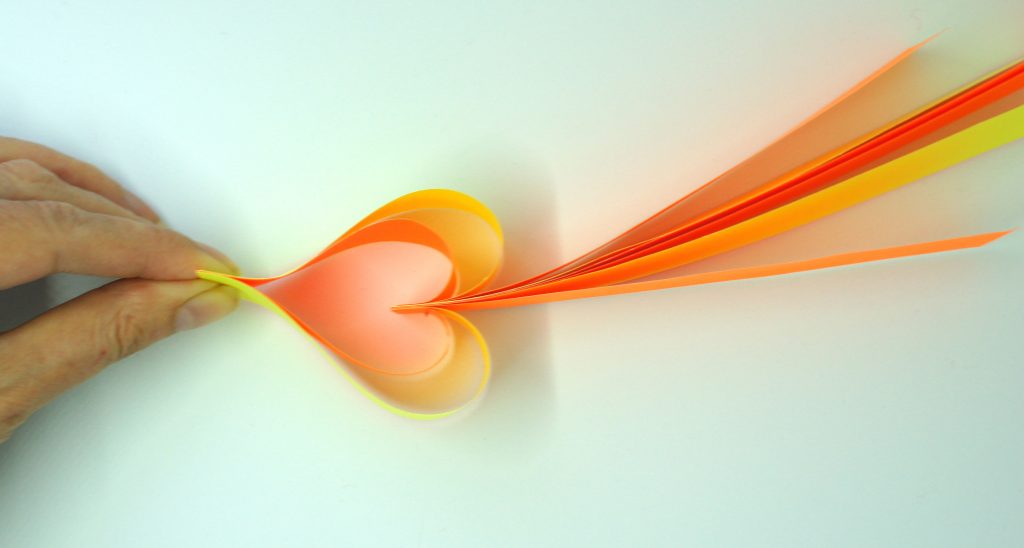
Now form the smallest heart by taking hold of the strips at the staple and gently folding the shortest strips back around the stapled ends. Once they are lined up hold them together to prevent them moving.
Now turn the next pair of strips to form a slightly larger heart. Keep all the ends of the strips together.
Repeat with the next pair.
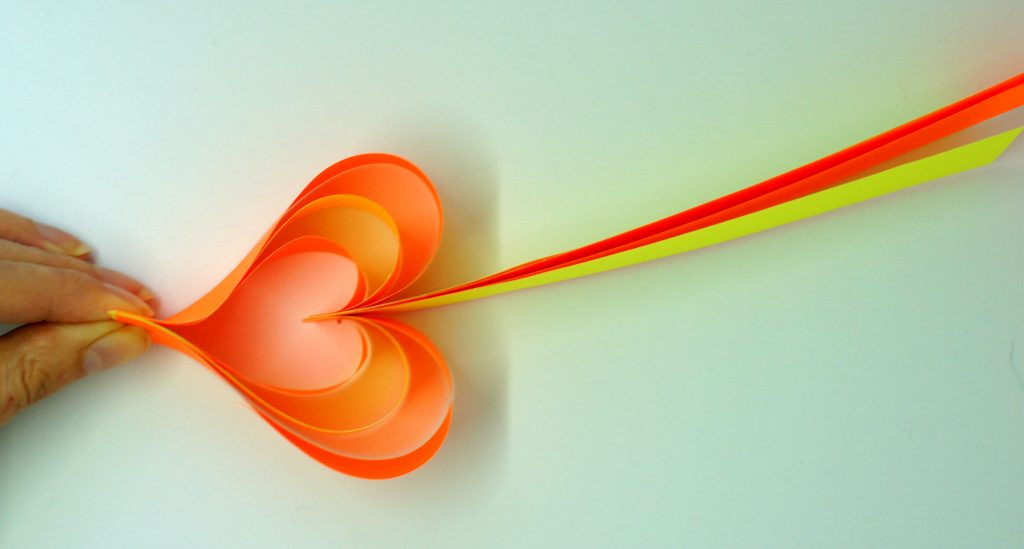
Repeat with the next pair.
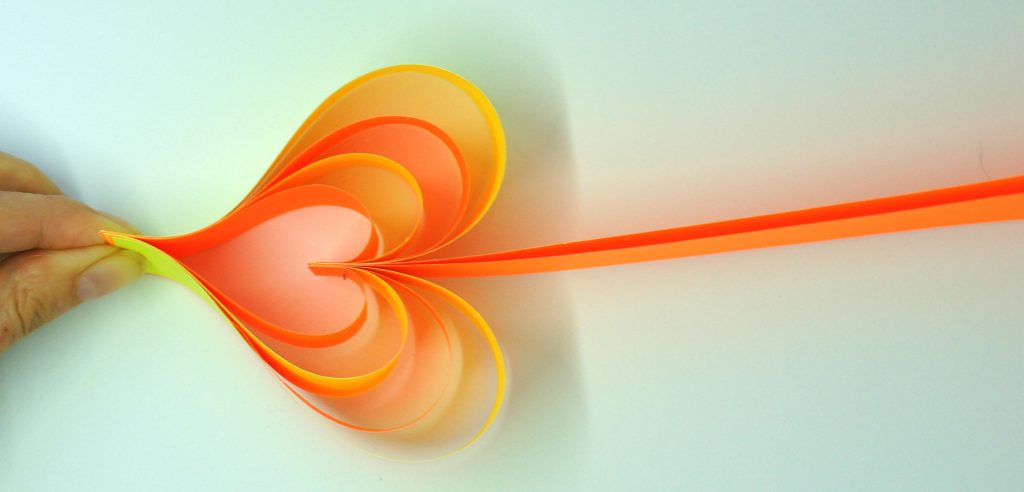
Finally, repeat with the last pair of strips and making sure all the edges line up staple the strips together.

You now have a completed paper hanging heart.
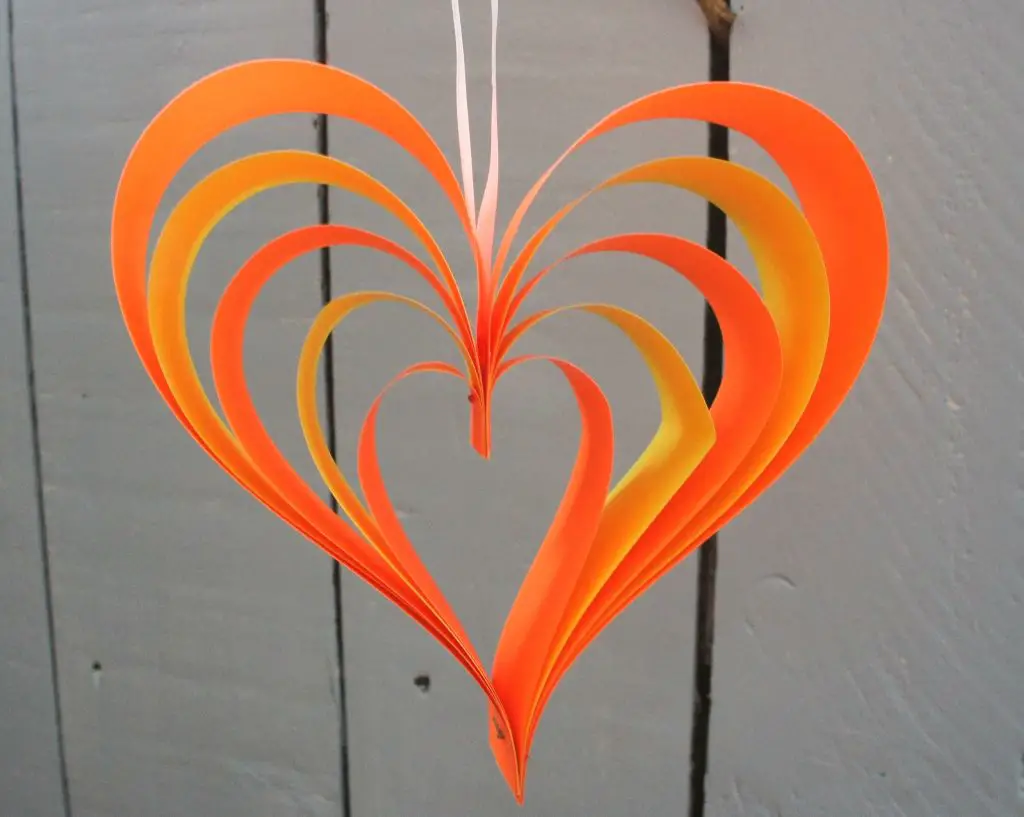
Step 4: Hang your heart
You can now hang it up however you like. I attached ribbons to mine with a small dot of cold melt glue but you could attach yours to string or invisible thread or indeed a garland.
Tips and Next
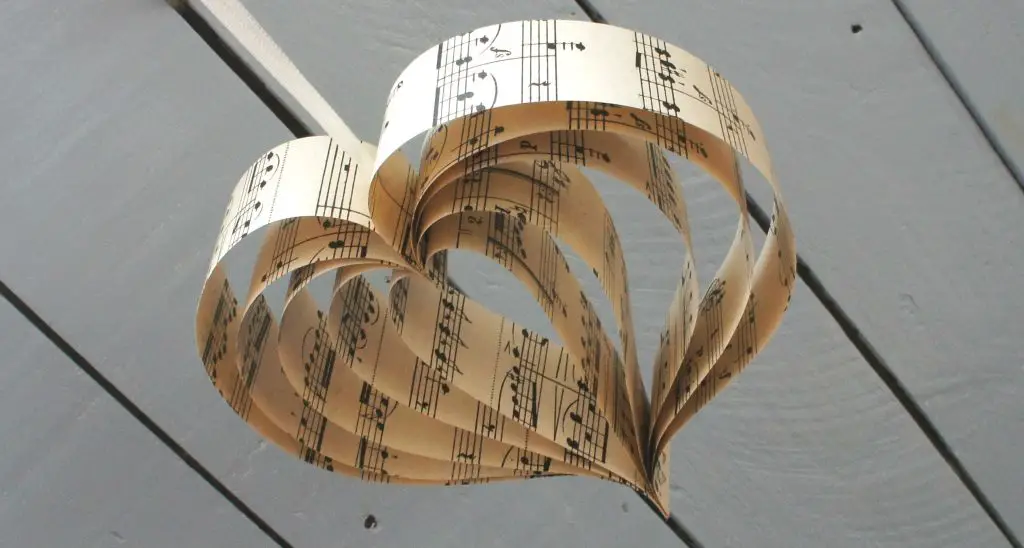
I made several hanging hearts from different papers and got interesting results. They all worked really well until I tried to use old music and make a larger heart. It looked great but when I came back to it a couple of days later it had flopped. I discovered that the larger the heart the stiffer the paper needs to be or it flops under its own weight losing the heart shape. The sizes I used above hold their shape really well with standard printer paper (as I used) or thicker paper I am sure.
Please contact me in the comments section below and let me know how your hanging hearts go or if you have any creative ideas for papers to use.
If you enjoy this tutorial check out some of my other papercraft tutorials:
- Iris Paper Folding to produce cards and works of art
- Folded Book Christmas Tree
- How to make seed paper
- A collection of tried and tested paper flower tutorials
- Woven Paper Heart Baskets
Remember to pin this article on Pinterest so that you can find it later!