Woven Heart Baskets – How to Make
As an Amazon Associate I earn from qualifying purchases
Hearts are great at any time of year but how about these beautiful woven heart baskets that are so easy to make. You do not need to do any sewing (but I did a little) and you can make one in about 15 minutes! You can use any material you like but I recommend felt or paper. Felt works really well and makes a more robust basket but paper is really inexpensive if you want to do this craft with a group (eg Brownies or Guides).
This page contains affiliate links meaning I earn a small commission if you use those links at no cost to you. I only recommend brands I use and trust.
You will need:
Felt or paper(2 different colours if you want contrasting weaves)
Scissors
Needle and matching thread / fabric glue
Air-erasing marker pen (optional)
Pattern – click here to download the pdf
Video Tutorial
This video is also available on my YouTube channel.
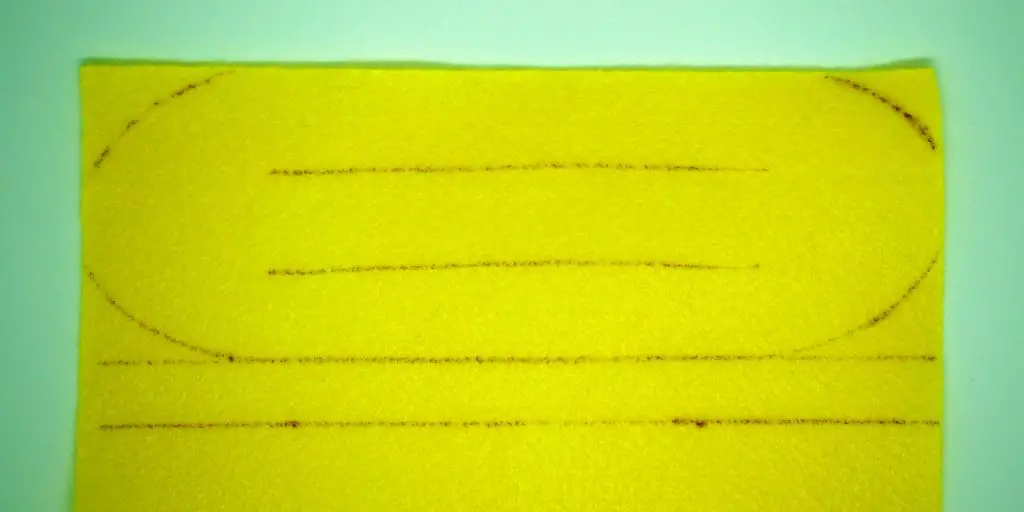
Step 1: Cut out your pieces
Throughout this tutorial I will be using felt but it is just the same process if you are using paper. Select your two colours and cut out your basket pieces. You need one basket piece from each colour and one handle from the colour of your choice. I use an air erasing marker pen to draw round the pattern but you can simply hold it in place and cut around it.
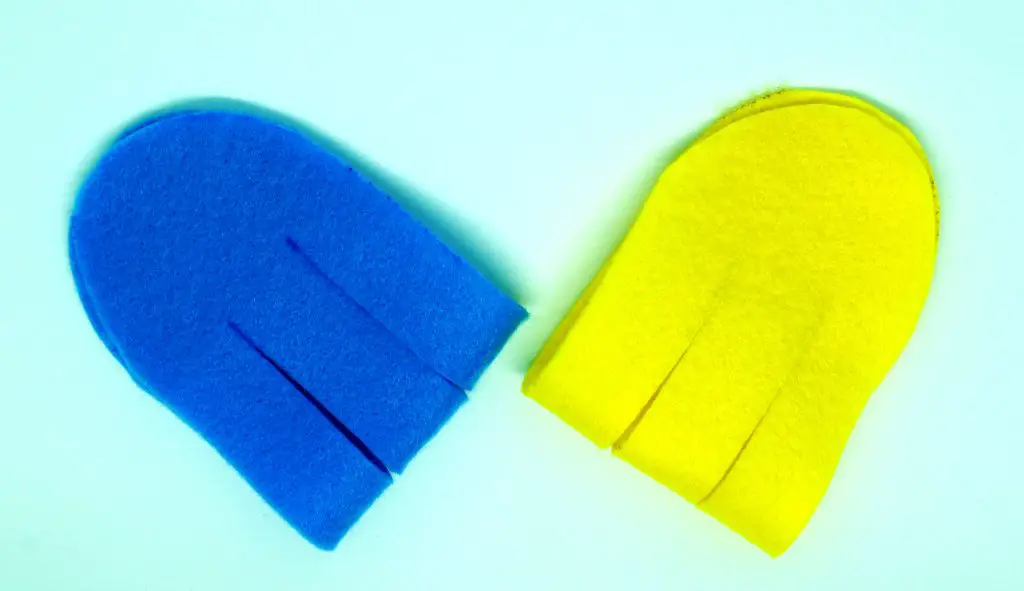
Step 2: Weave the strips
Take your two basket pieces and fold them in half. You are now ready to weave them.
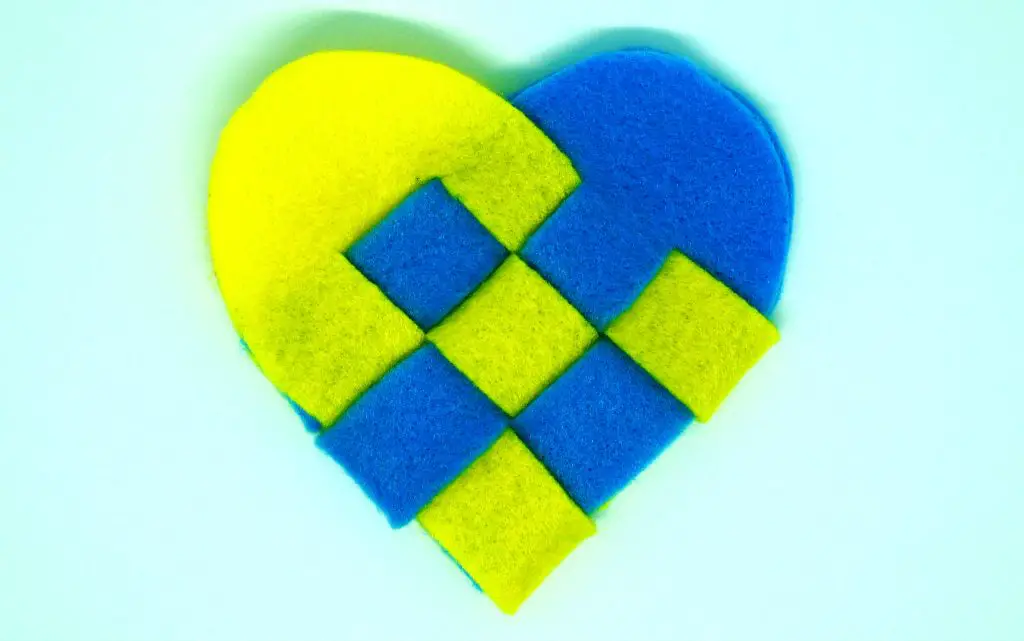
Take the first strip of the yellow felt and weave it through the strips of blue felt. Place the yellow strip through the first blue strip and then place the second blue strip through the first yellow strip. Then place the yellow strip through the third blue strip.
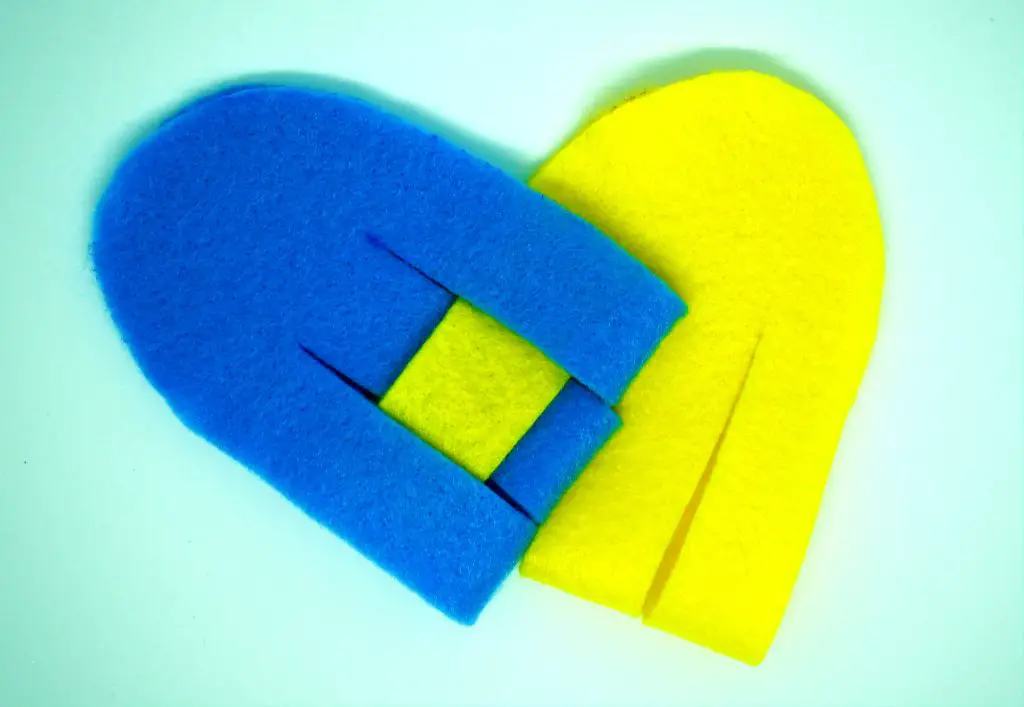
Then take the second strip of the yellow felt and place the first strip of the blue felt through it. Then place the second strip of blue through the yellow strip. Finally place the third strip of blue through the yellow strip. Very confusingly, I seem to have flipped the basket over for the following photographs – sorry. Hopefully, you are getting the idea.
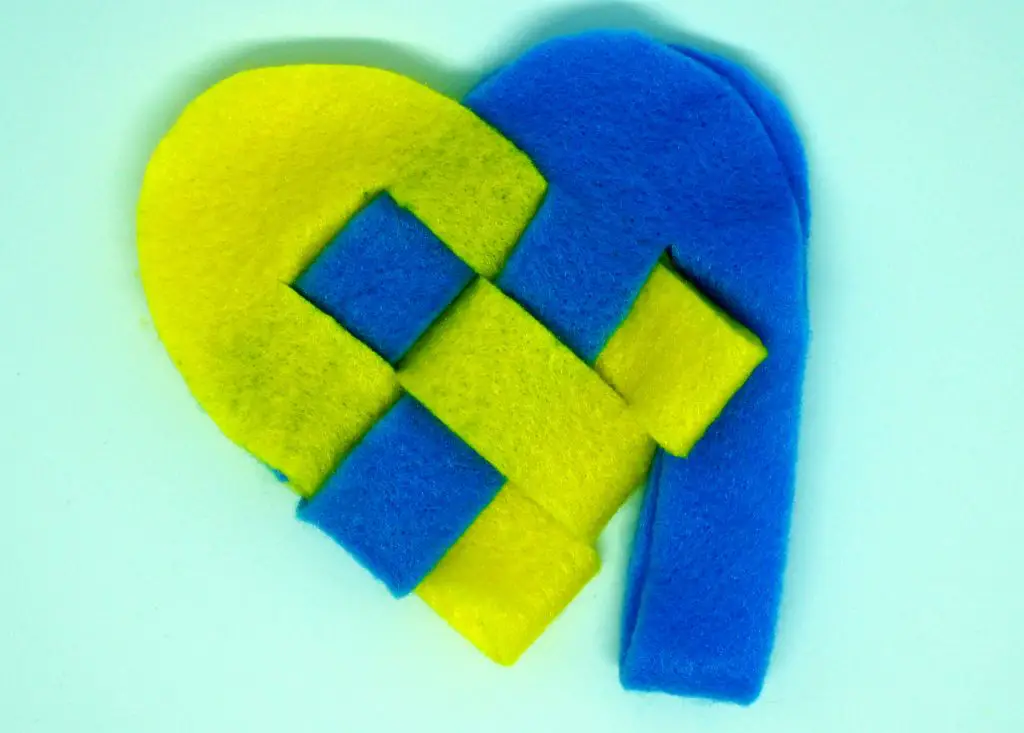
Complete the basket by taking the third strip of yellow felt and placing it through the first strip of blue. Then place the second strip of blue through the third strip of yellow. Finally place the third strip of yellow through the third strip of blue. You should now have a basket and once you have tidied it up a bit and flattened it it should look like the one below. If any of your ‘squares’ are rectangular you simply missed one of the weaves. Just undo your work and redo it until it looks right on both sides.
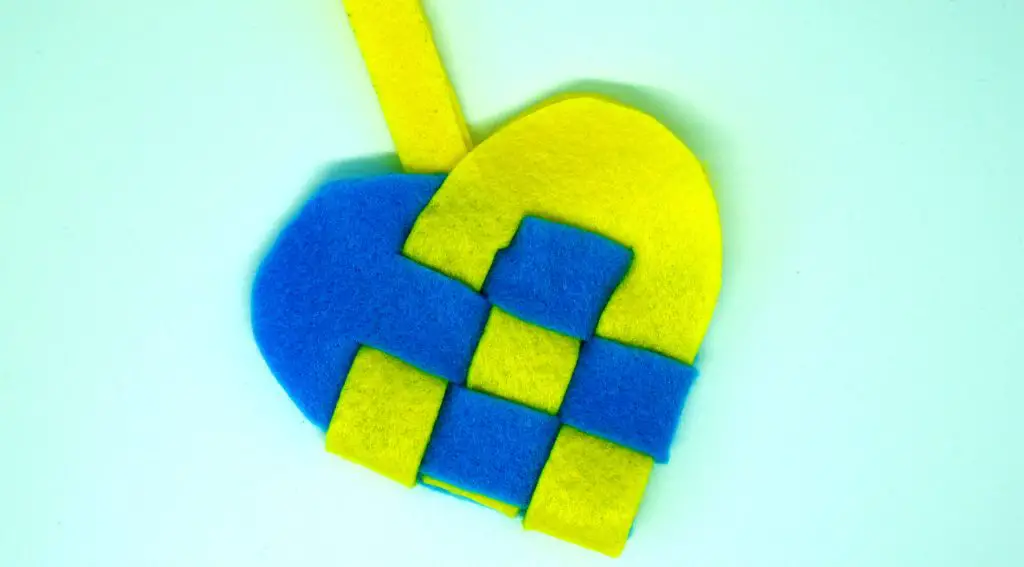
Step 3: Attach the handle
Take the handle and fold it in half. Place it inside the basket on one side and either sew it to the basket using small stitches or affix it using fabric glue. Then repeat on the other side of the basket.
Step 4: Glue edges of basket
You will now have a basket but I find that it is a little too open. If you want to place items in the basket it is worth gluing the edges of the basket together above the weaving to close the opening a little.
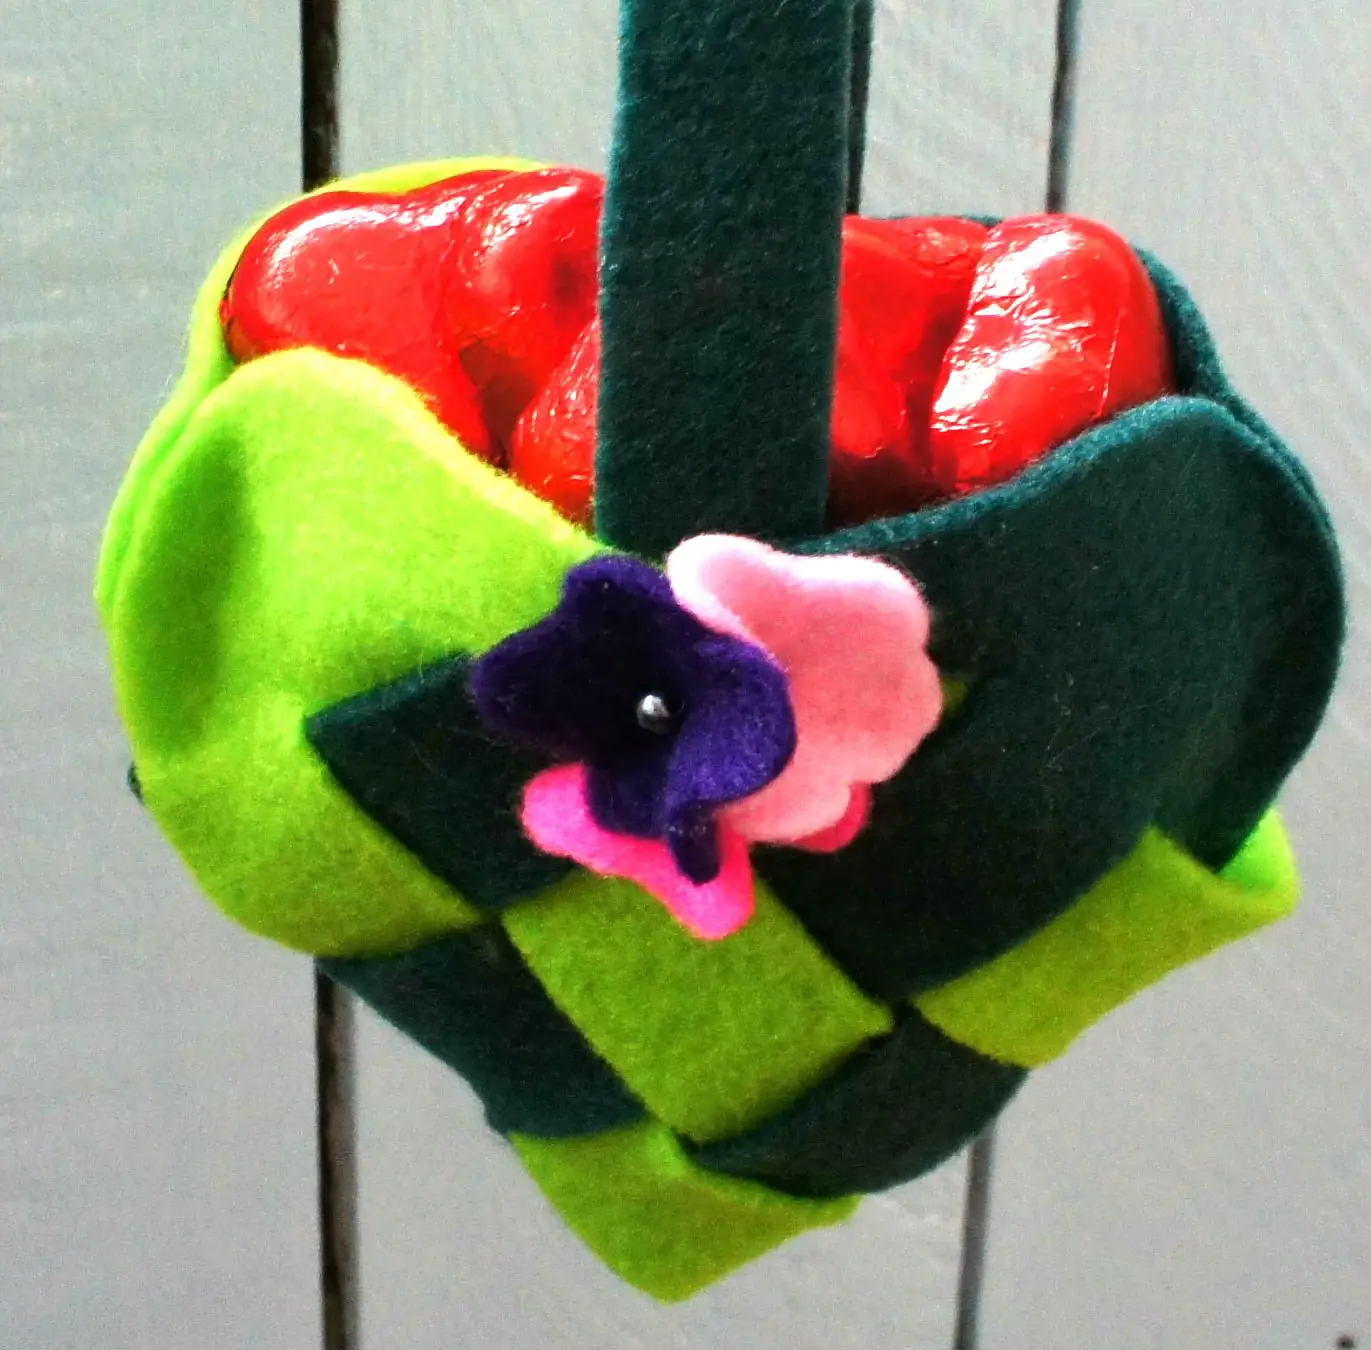
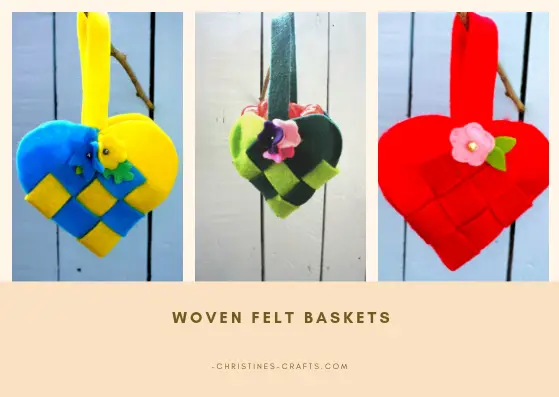
You can also now decorate the basket if you like. I used small felt flowers and leaves. The templates are included in the pattern you can download. These are the ones I made.
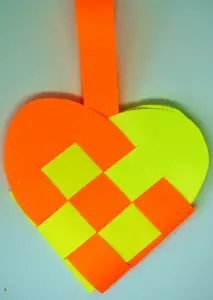
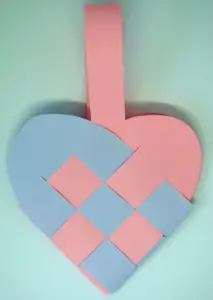
You can also make these woven heart baskets using paper like the ones below:
So, hopefully you feel inspired to make some woven heart baskets. They are so quick to make and you do not need to sew if that is not your thing. Please let me know in the comments below how you get on and if you make them for any special occasion or person.
If you enjoyed making your hearts perhaps you would like some of my other tutorials:
- Iris paper folding for cards or works of art
- Fabric hexagons that you can sew or glue
- Simple bag to sew including pattern
- How to make your own seed paper
- Simple hanging paper heart decorations
Remember to pin this article on Pinterest so that you can find it later.