Miniature Notebook from ONE Piece of Copier Paper – Easy Tutorial
As an Amazon Associate I earn from qualifying purchases
Welcome to this quick and easy craft tutorial where I will show you how to make a miniature notebook using just one piece of copier paper!
This is a great little project that anyone can try, whether you are a complete beginner or already love crafting. Like many of my projects, it uses simple materials that you probably already have at home, keeping it nice and budget-friendly while still being really satisfying to make.
These tiny notebooks are perfect for jotting down notes, making mini journals, or even creating cute handmade gifts for friends and family. I first started making these when I wanted something small and practical, and I was surprised just how quick and fun they are to put together.
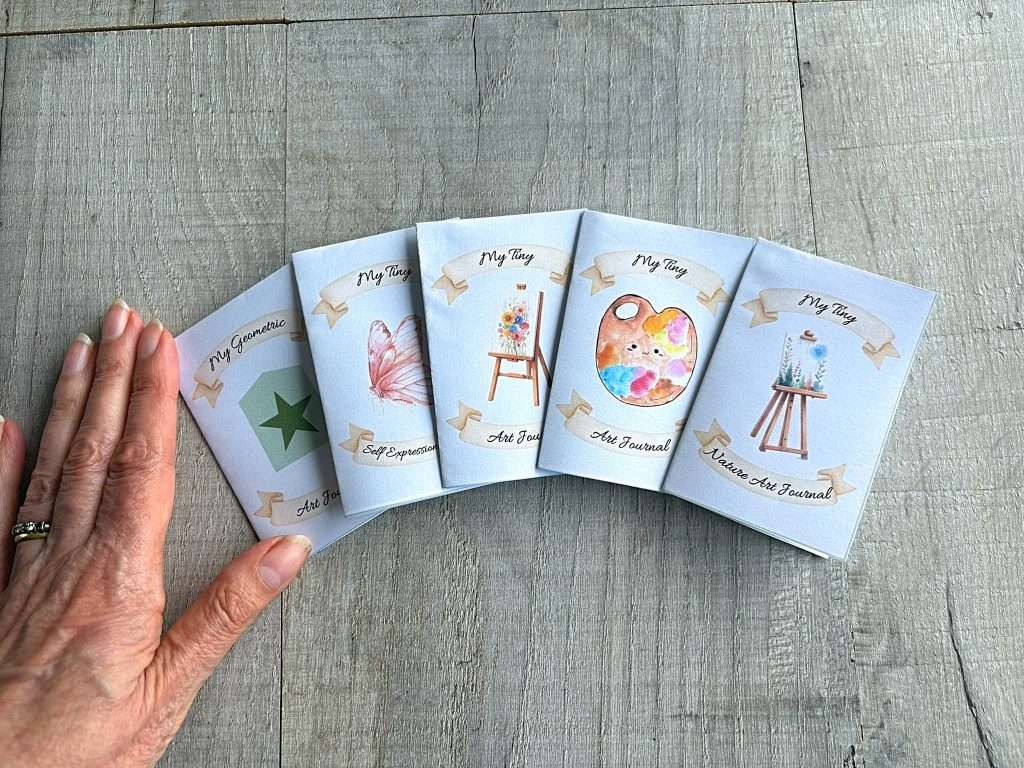
If you would like some pre-printed miniature notebooks to make, then check these out in my Etsy shop.
So, if you are ready to get creative and make something useful in just a few minutes, let’s get started!
This page contains affiliate links meaning I earn a little commission if you use those links at no cost to you. I only recommend brands I use and trust.
You will need:
- Copier paper (A4 or letter) or try thicker paper for art journals
- Any pretty paper for cover (create your own from copier paper if you like)
- Scissors
- Glue
- OPTIONAL – something to close the notebook (eg hairband, elastic, ribbon)


Video Tutorial for Miniature Notebooks
This video is also available on my YouTube channel.
Prepare the Notebook Pages
Take your piece of copier paper and fold it in half lengthwise (in a landscape direction) and then fold it again in the same way. Then open it up so that it is flat again.
For all folds make sure that you get a good crease by running a bone folder or your fingernail along the creases as you make them.
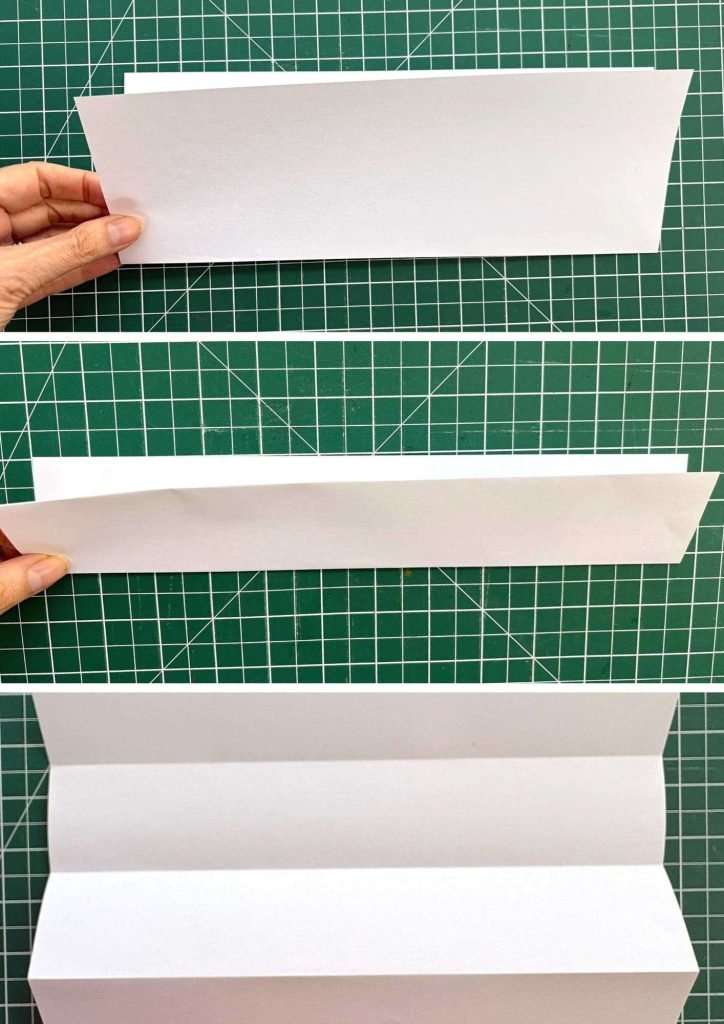
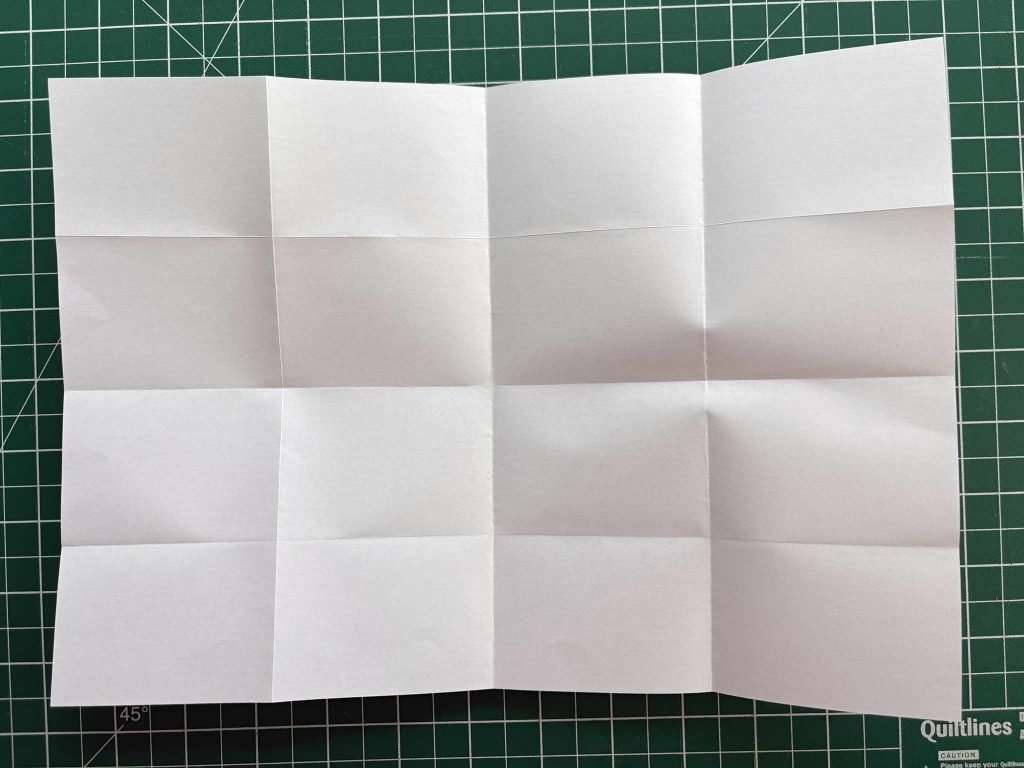
Turn the paper through ninety degrees and then fold the paper in the same way again. This time you have the paper in a portrait direction. Open it up again.
Now your paper should have 16 rectangles folded into it.
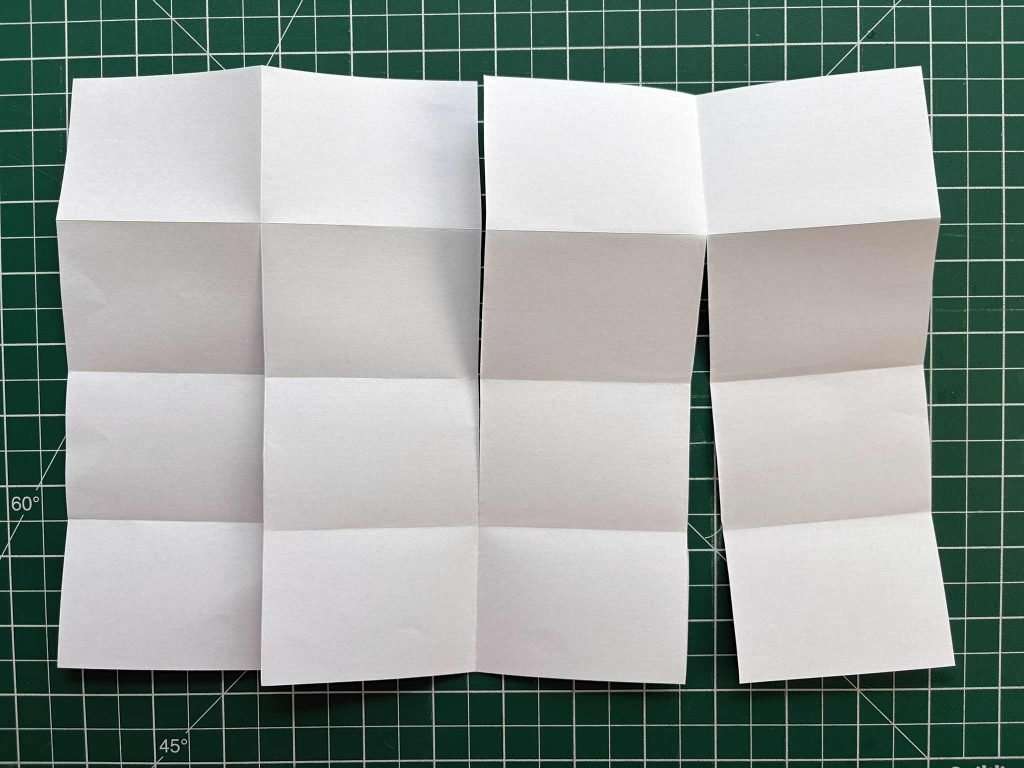
You now need to make some cuts into the paper. With the paper in a landscape direction, cut up the right hand fold along 3 rectangles only. Repeat for the left hand fold.
TURN THE PAPER ROUND (through 180°)! Then cut up the centre fold along 3 rectangles. It should now look like this.
Turn the paper to the portrait orientation. Fold the top right rectangle to the front of the paper. Then fold this pair of rectangles to the back. Then fold them to the front and then the back. Repeat this until you have folded all the rectangles into a little notebook.
As you get to the end of each row of rectangles simply carry on with your forwards, backwards pattern.
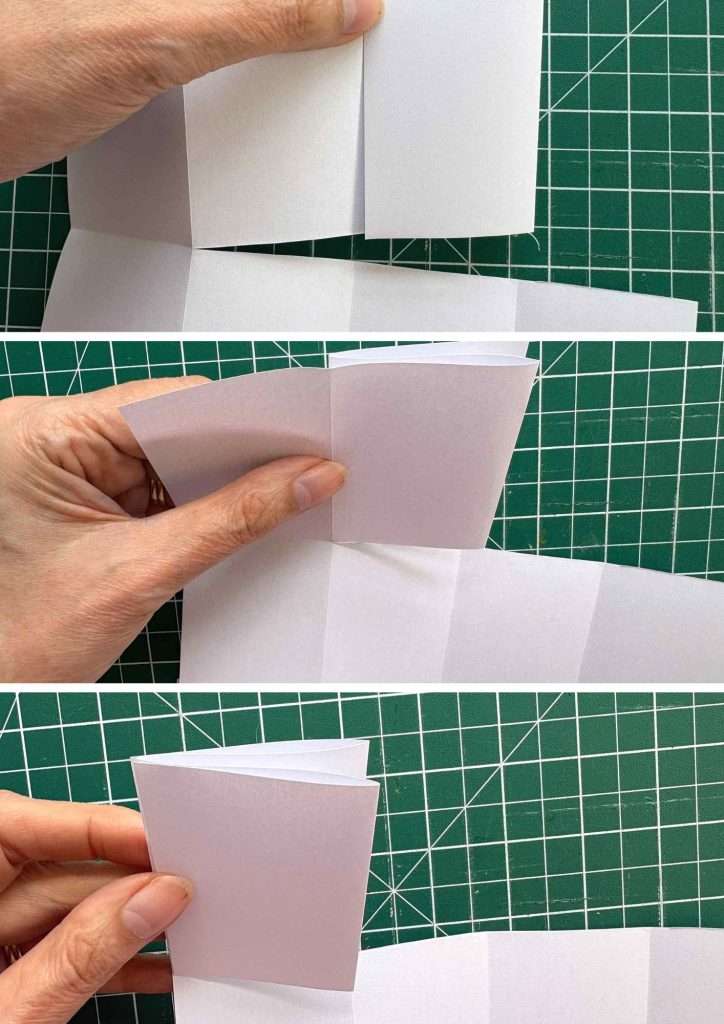
You should now have a little notebook and if you hold it so that the edge two pages point to the front you have your notebook ready for a cover.
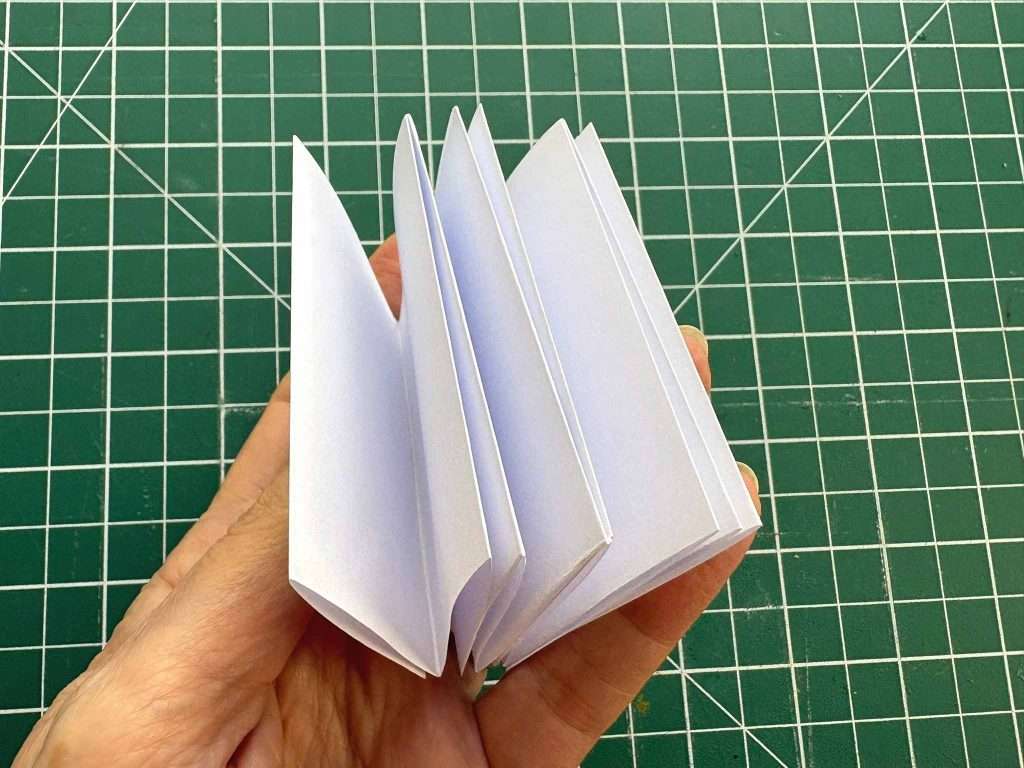
Add your Miniature Notebook Cover
Take a piece of pretty paper (or create your own) that is at least as large as your pages opened out, like an open book plus 0.5″ top and bottom and on either side. I actually recommend a little more as you can see in my pictures.
Place your pages in the centre of the paper and mark where to fold at the top and bottom of the pages. I recommend going slightly larger than the pages so that they definitely fit inside and get protected.
Remove the pages and fold the top and bottom down to size.
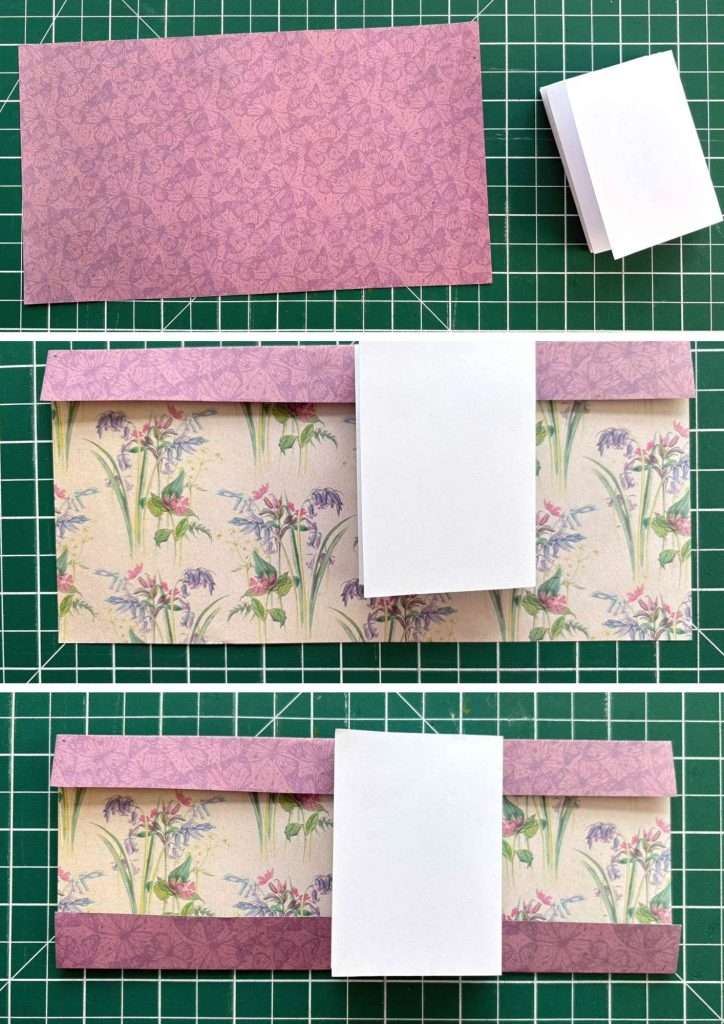
Fold the cover in half and place the pages inside the cover. Mark where you need to fold the cover over to glue to the pages to hold it in place.
Then make those folds. Carefully position the pages inside the cover and glue the folded over section of the cover to the first and last pages. You can also glue the spine of your pages in place if you want to make sure your pages can’t ‘spring out’. NOTE: You need the pages the correct way around to be able to do this, If you can’t do it simply turn the pages until they are correct.
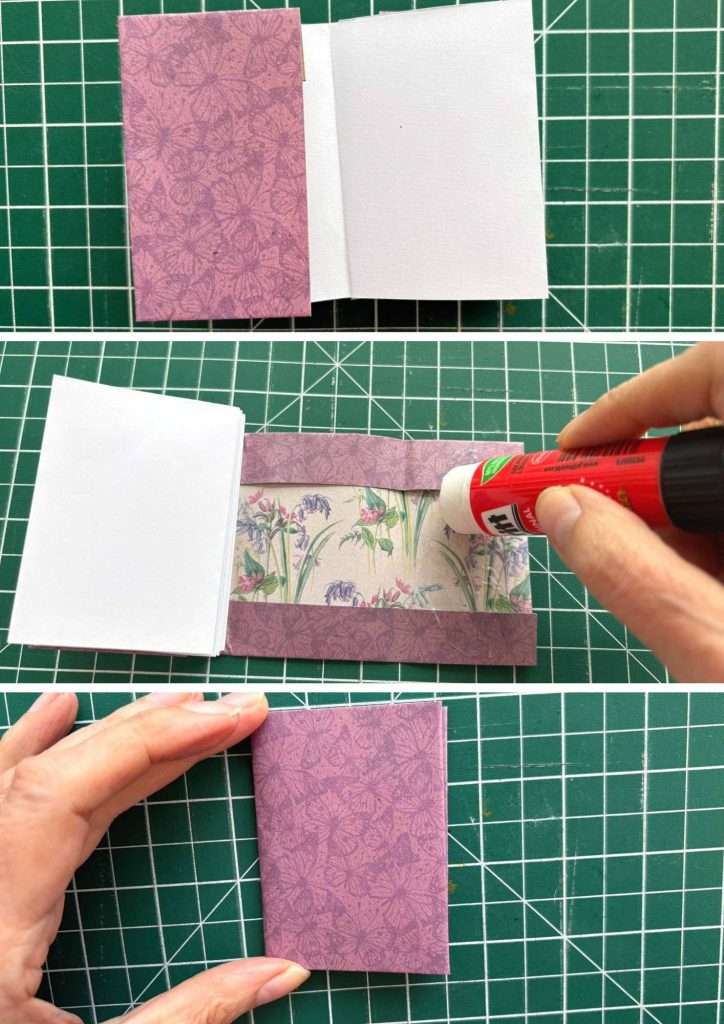
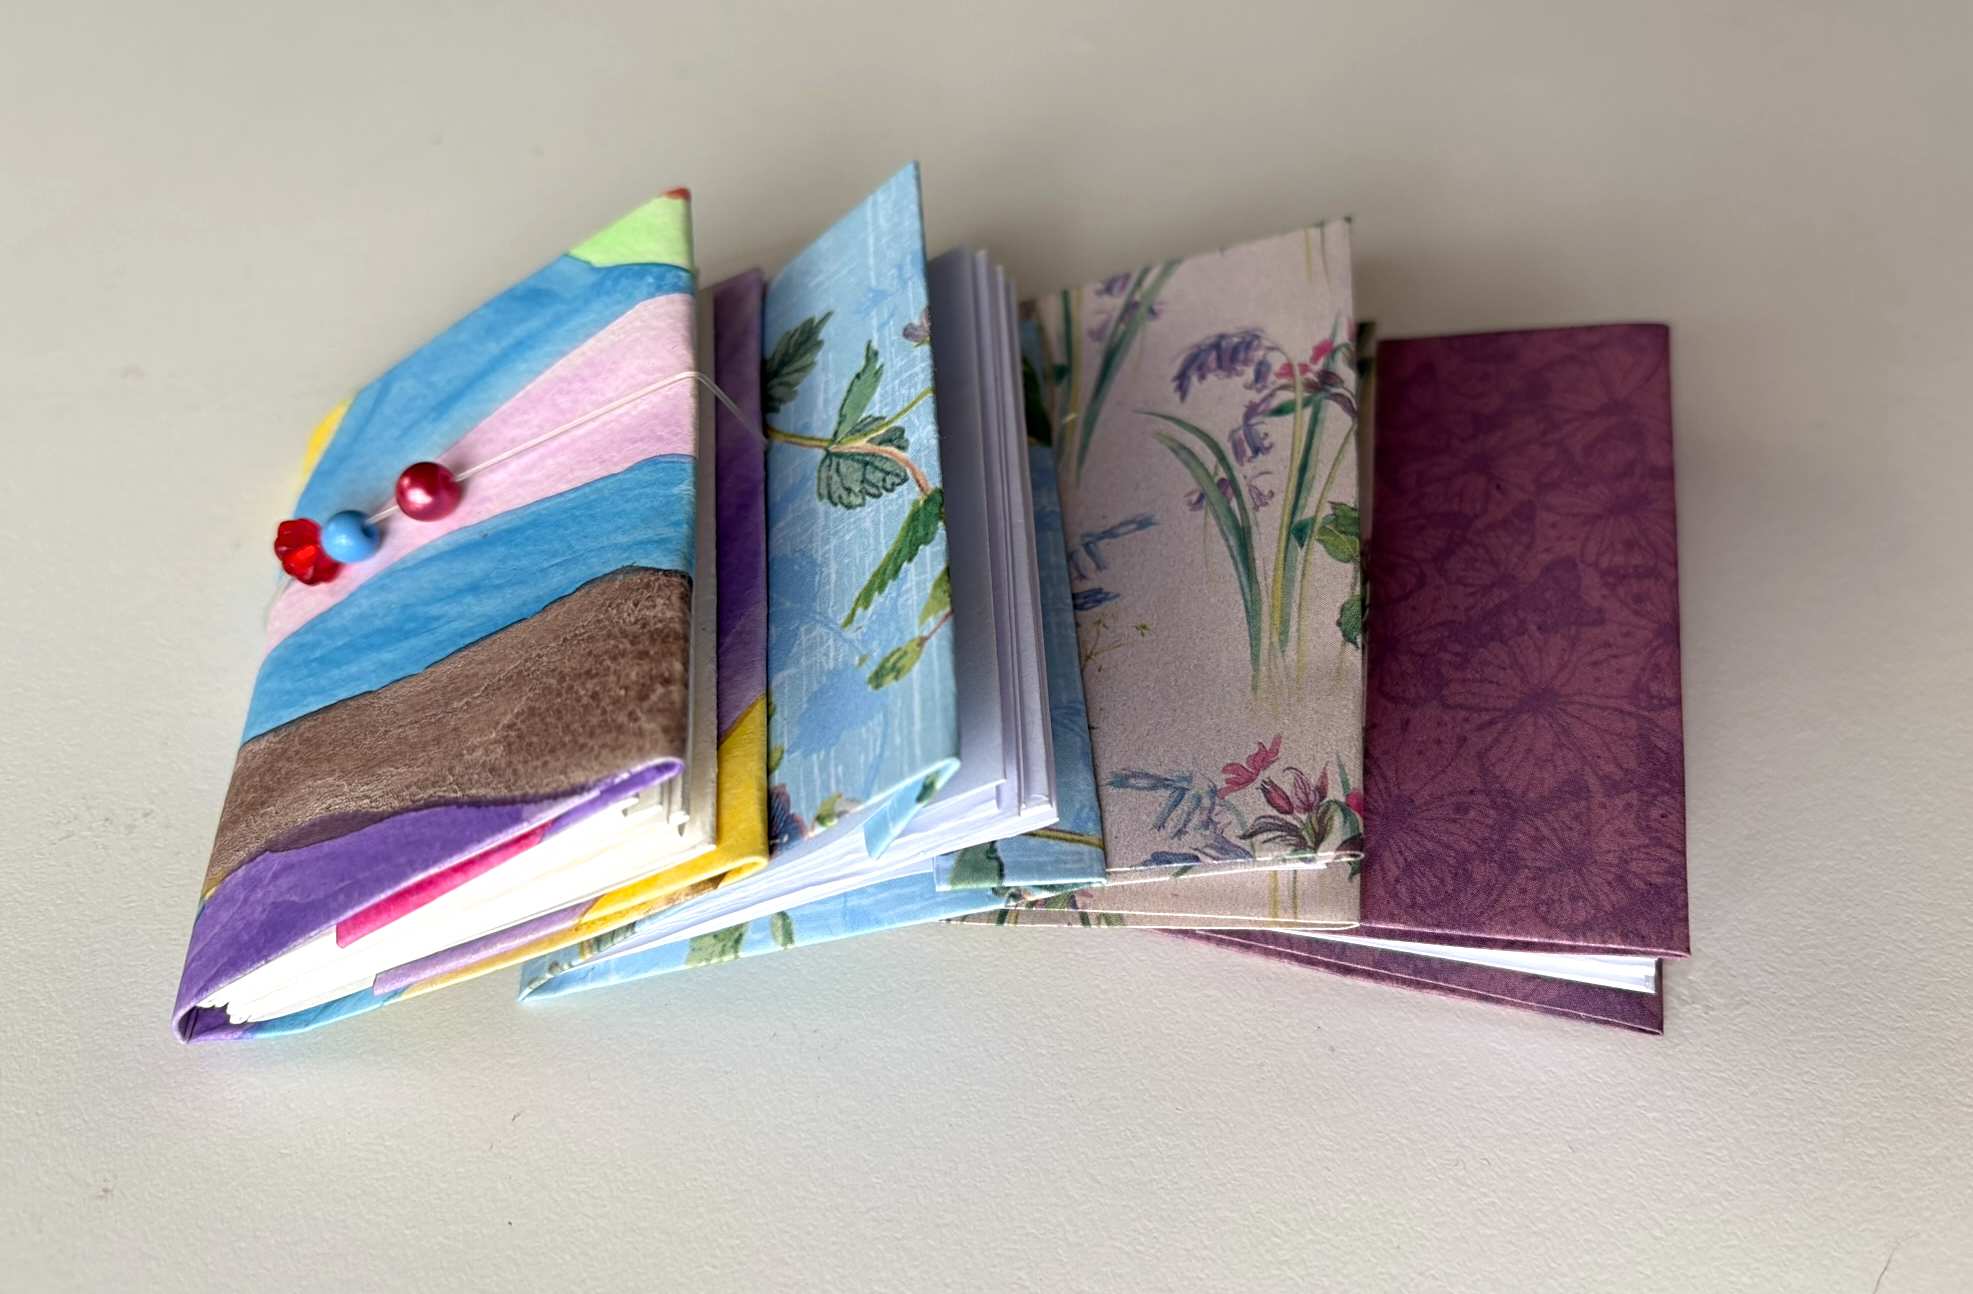
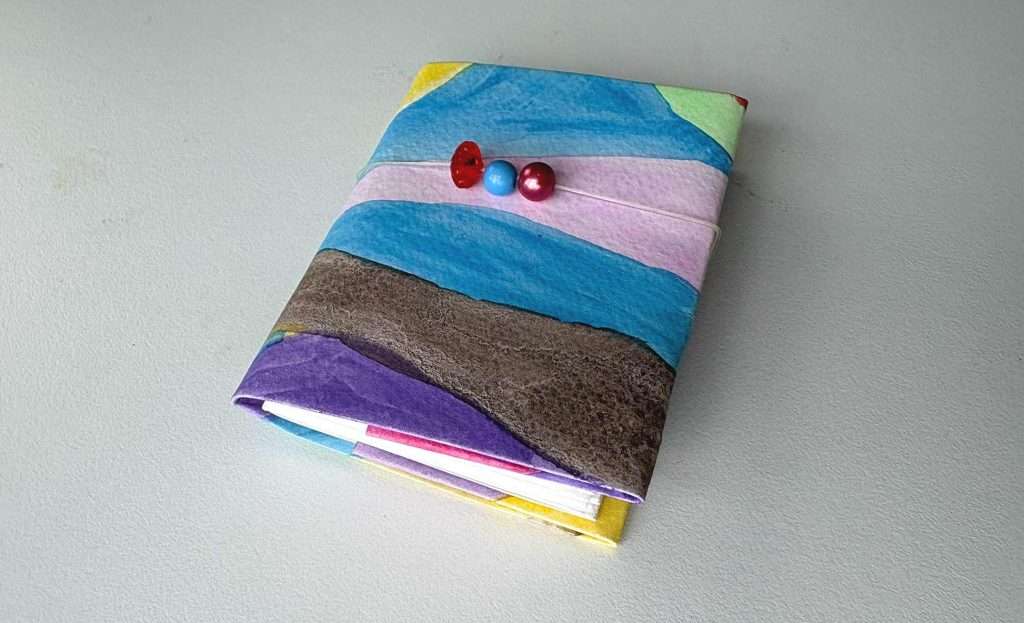
You now have a completed miniature notebook. Well done! How about making one from watercolour paper and using it as an art journal? My multi-coloured covered notebook has been made from watercolour paper. The cover is simply watercolour paper that I painted.
Ideas for Miniature Notebook Fastenings
Even though your notebook is complete you may want to fasten it closed. If so, consider simply using a hairband or an elastic band. Super quick and easy!
Or you could thread some beads onto some elastic and tie a knot in it. This is the same idea but a little prettier.
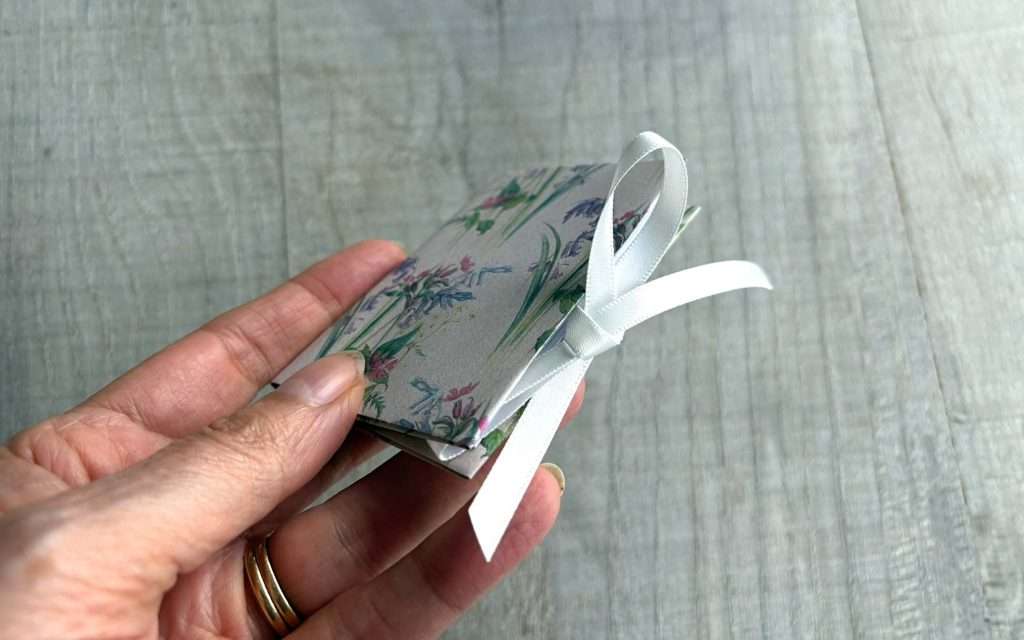
Alternatively you could use ribbon. I simply cut 2 lengths of ribbon, placed one inside the front cover in the middle and one in the back cover in the middle. I held them in place by gluing another sheet of pretty paper over them. Then I tied the 2 ribbons together to close the notebook.
What other methods can you think of to hold these miniature notebooks closed?
And next …
So what could you make next? How about a more elaborate art journal that you sew the cover onto? This would be great for travel and you could make it larger.
Or perhaps you would like to turn old book pages into paper roses or investigate Origami to develop your paper crafting skills.
Remember you could always make some pre-printed one page notebooks too!
Whatever you create I hope that you enjoy it. How about saving this tutorial to your favourite Pinterest board so that you can find it again later?