Mastering the Art of Cathedral Window Patchwork: A Step-by-Step Guide
As an Amazon Associate I earn from qualifying purchases
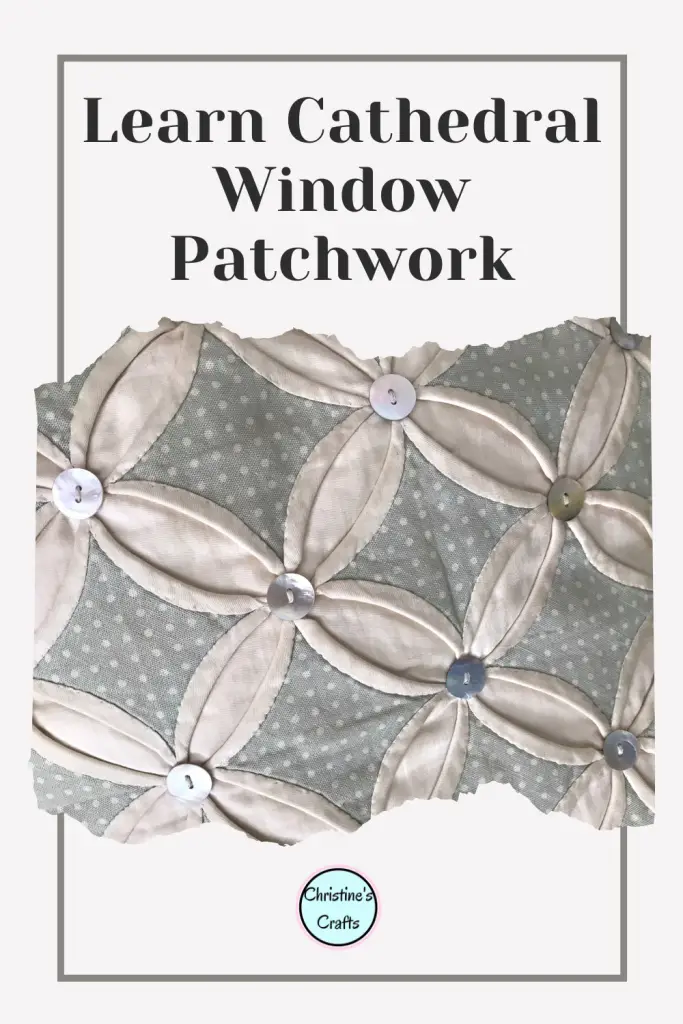
Unleash the magic of handcrafted treasures with the captivating art of cathedral window patchwork! This introductory tutorial, designed with beginners in mind, will be your guide to mastering this stunning yet deceptively simple technique.
Imagine transforming simple squares of fabric into mesmerizing geometric patterns that resemble stained-glass windows. Breathe life into cozy quilts, stylish tote bags, or plush cushions – the possibilities are truly endless! This tutorial will dispel any myths of complexity, breaking down the process into easy-to-follow steps that will have you crafting stunning patchwork creations in no time.
In this tutorial I will be showing you how to achieve stunning results quickly using your sewing machine but it is also worth noting that this technique works really well hand sewing so makes a great portable slow sewing activity.
This page contains affiliate links meaning I earn a little commission if you use those links at no cost to you. I only recommend brands I use and trust.
For each block you will need:
- 4 squares of background fabric
- 5 squares of printed fabric
- sewing supplies


Video Tutorial for Cathedral Window Patchwork
This video is also available on my YouTube channel.
Preparation
You can attempt this patchwork using any fabric you like and I encourage you to use up what you have. Throughout this tutorial I have used cotton squares that are 5″ by 5″ and the blocks I made are 9.5″ by 9.5″. The cushions that I have made used 4″ by 4″ squares and to be honest I much prefer that size for small projects like cushions. However these 5″ square cushions are perfect for quilts and large bags!
Above, I link to pre-cut squares that you can buy to make life easier but I always cut my own. My only advice is to cut them carefully as you want true squares that are all the same size.
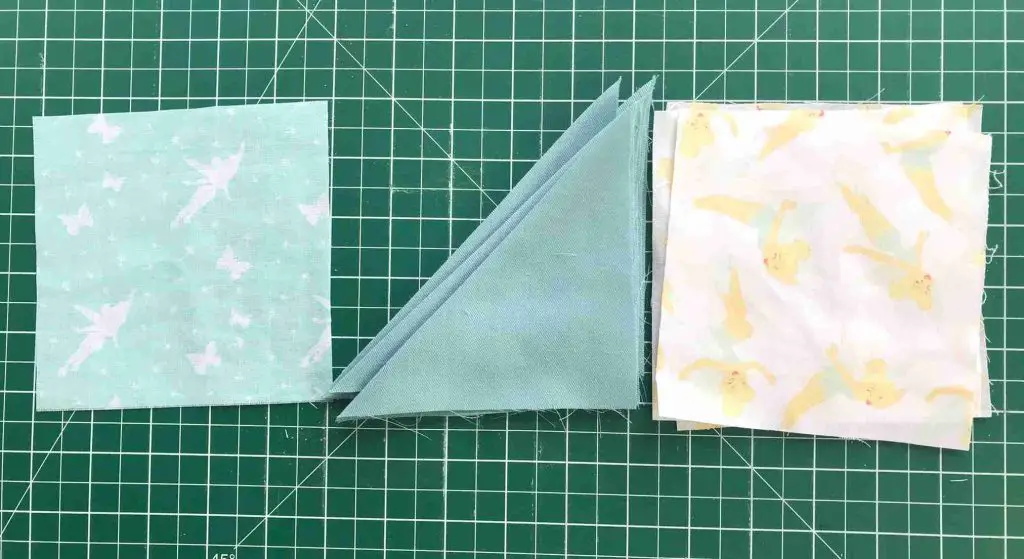
Take your 4 background squares and fold each one in half along the diagonal and press.
Notice that I am using 4 identical printed squares and then a different one for the centre. You can use all the same or even the same for background and 4 of your ‘printed’ ones and simply have one outstanding print like I have done on my cushions. You will see how this works as we move through the tutorial.
Sew your first Cathedral Window Patchwork Block
Take one printed square and place it face up. Take 2 background squares and place them on the printed square as shown below. Finally add another printed square on top that is face down. You have used printed squares to make a sandwich of the background squares ( which you pressed into triangles).
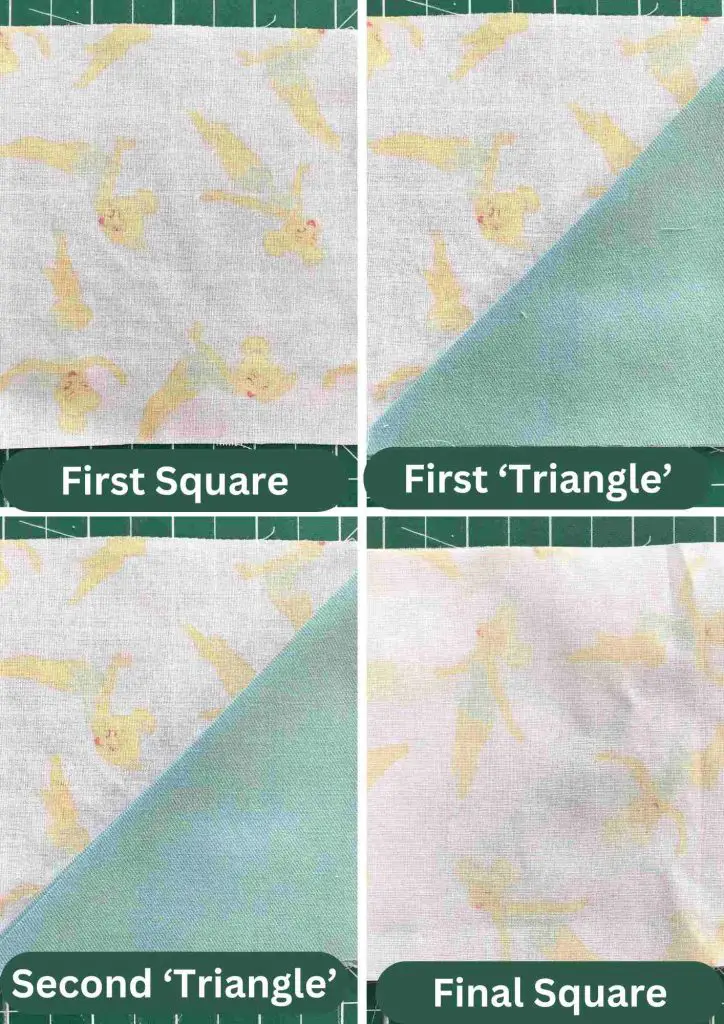
Pin and sew along one edge that traps all the layers together. As you look at my squares I pin and sew along the right hand edge. I use a seam allowance of 0.25″ but it is not critical. What really matters is consistency so whatever you choose stick with it throughout.
Repeat this with the other squares you have so that you have two identical pieces. Press the seams that you sewed open.
Place one of your pieces on top of the other with right sides facing and pin them together as shown below. I have pinned the pieces and then opened it up to show you how it should look. It is really hard to show you once they are pinned! Basically you are forming a large square in the centre of your block using the background triangles you made.
Make sure that you line up the pieces so that the seams meet up perfectly and that all the layers are caught in perfectly. I say perfectly but just do your best – imperfections are what make it special!
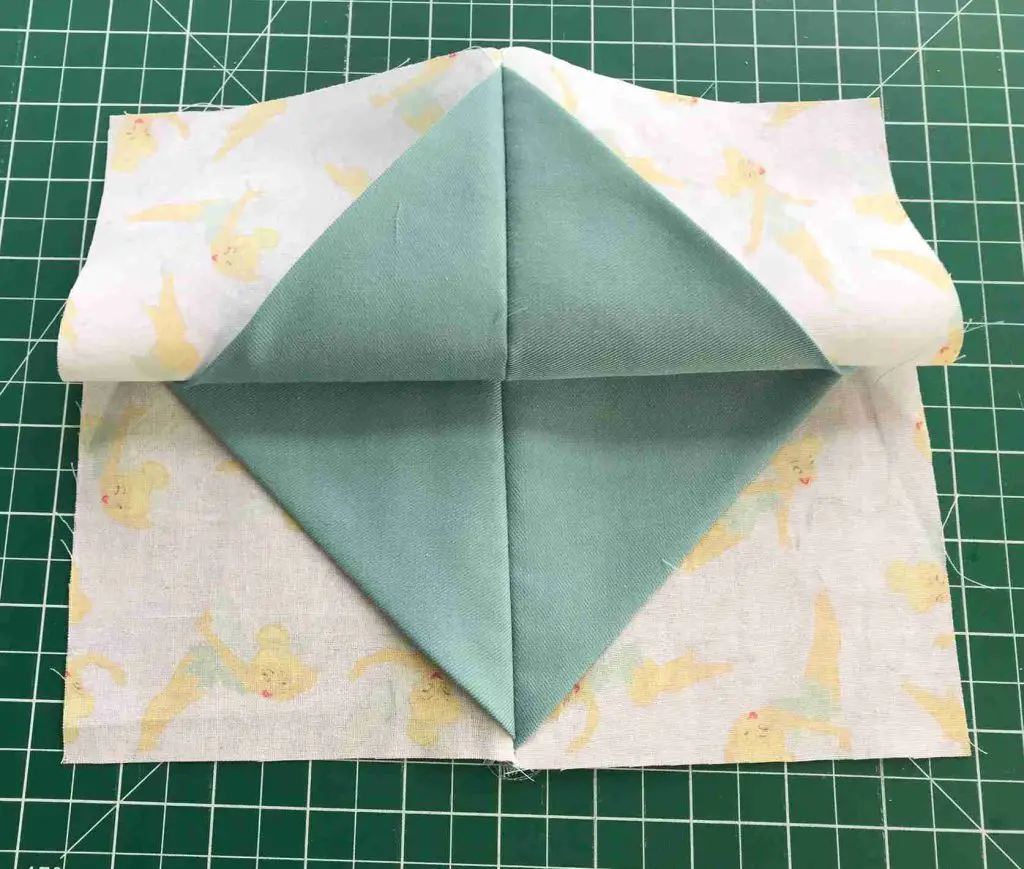
Now sew that seam and press it open. You now have a block ready to add your central printed square. Place the final printed square on top of your ‘background’ square and make sure it is central. Then, in turn, take each background triangle and wrap it back around the printed square and pin it in place. This will form a curved edge that covers the raw edge of the printed square.

Once you have pinned all four edges in place and you are happy with them simply sew along them all close to the edge. You should no longer have any raw edges showing from your central printed square.
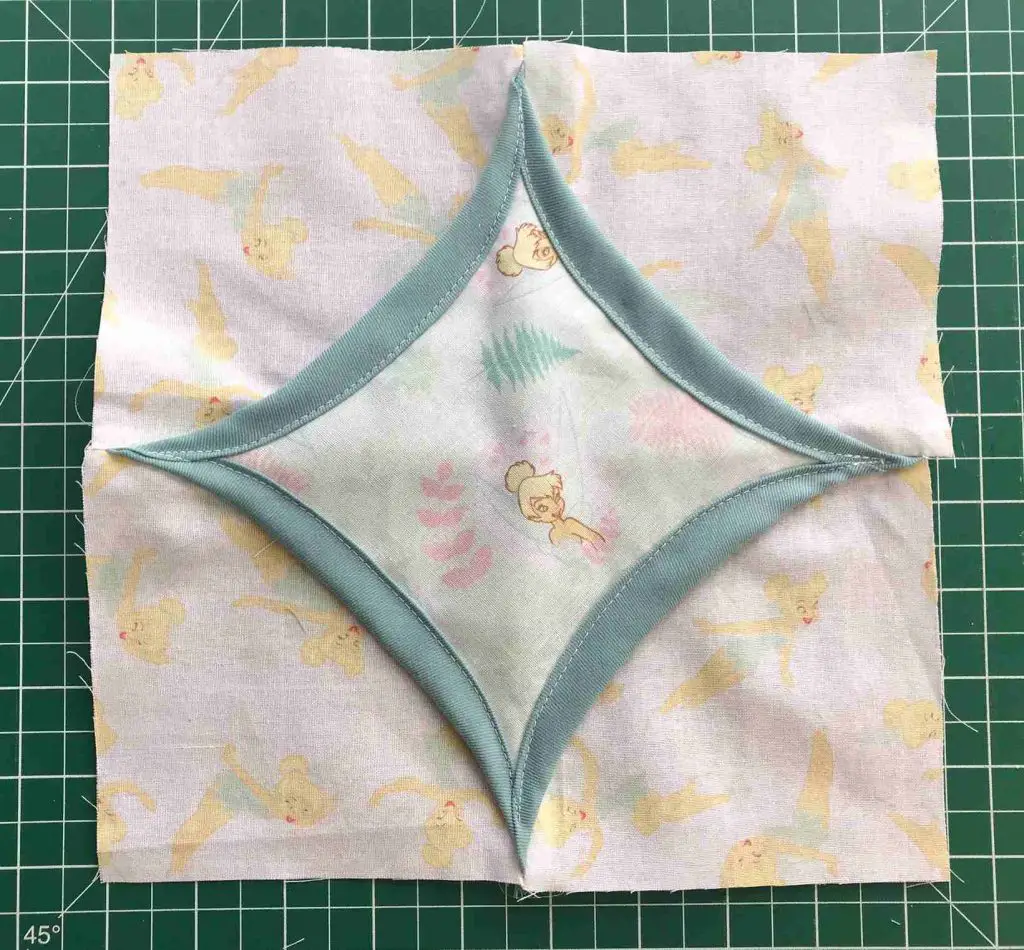
Congratulations, you have completed your first cathedral window patchwork block.
And next …
So, now you can make one block you can make as many as you like for your chosen project. Now you know what you are doing it is a great idea to batch work (make a few blocks at a time). It allows you to focus on one part of the process at a time.
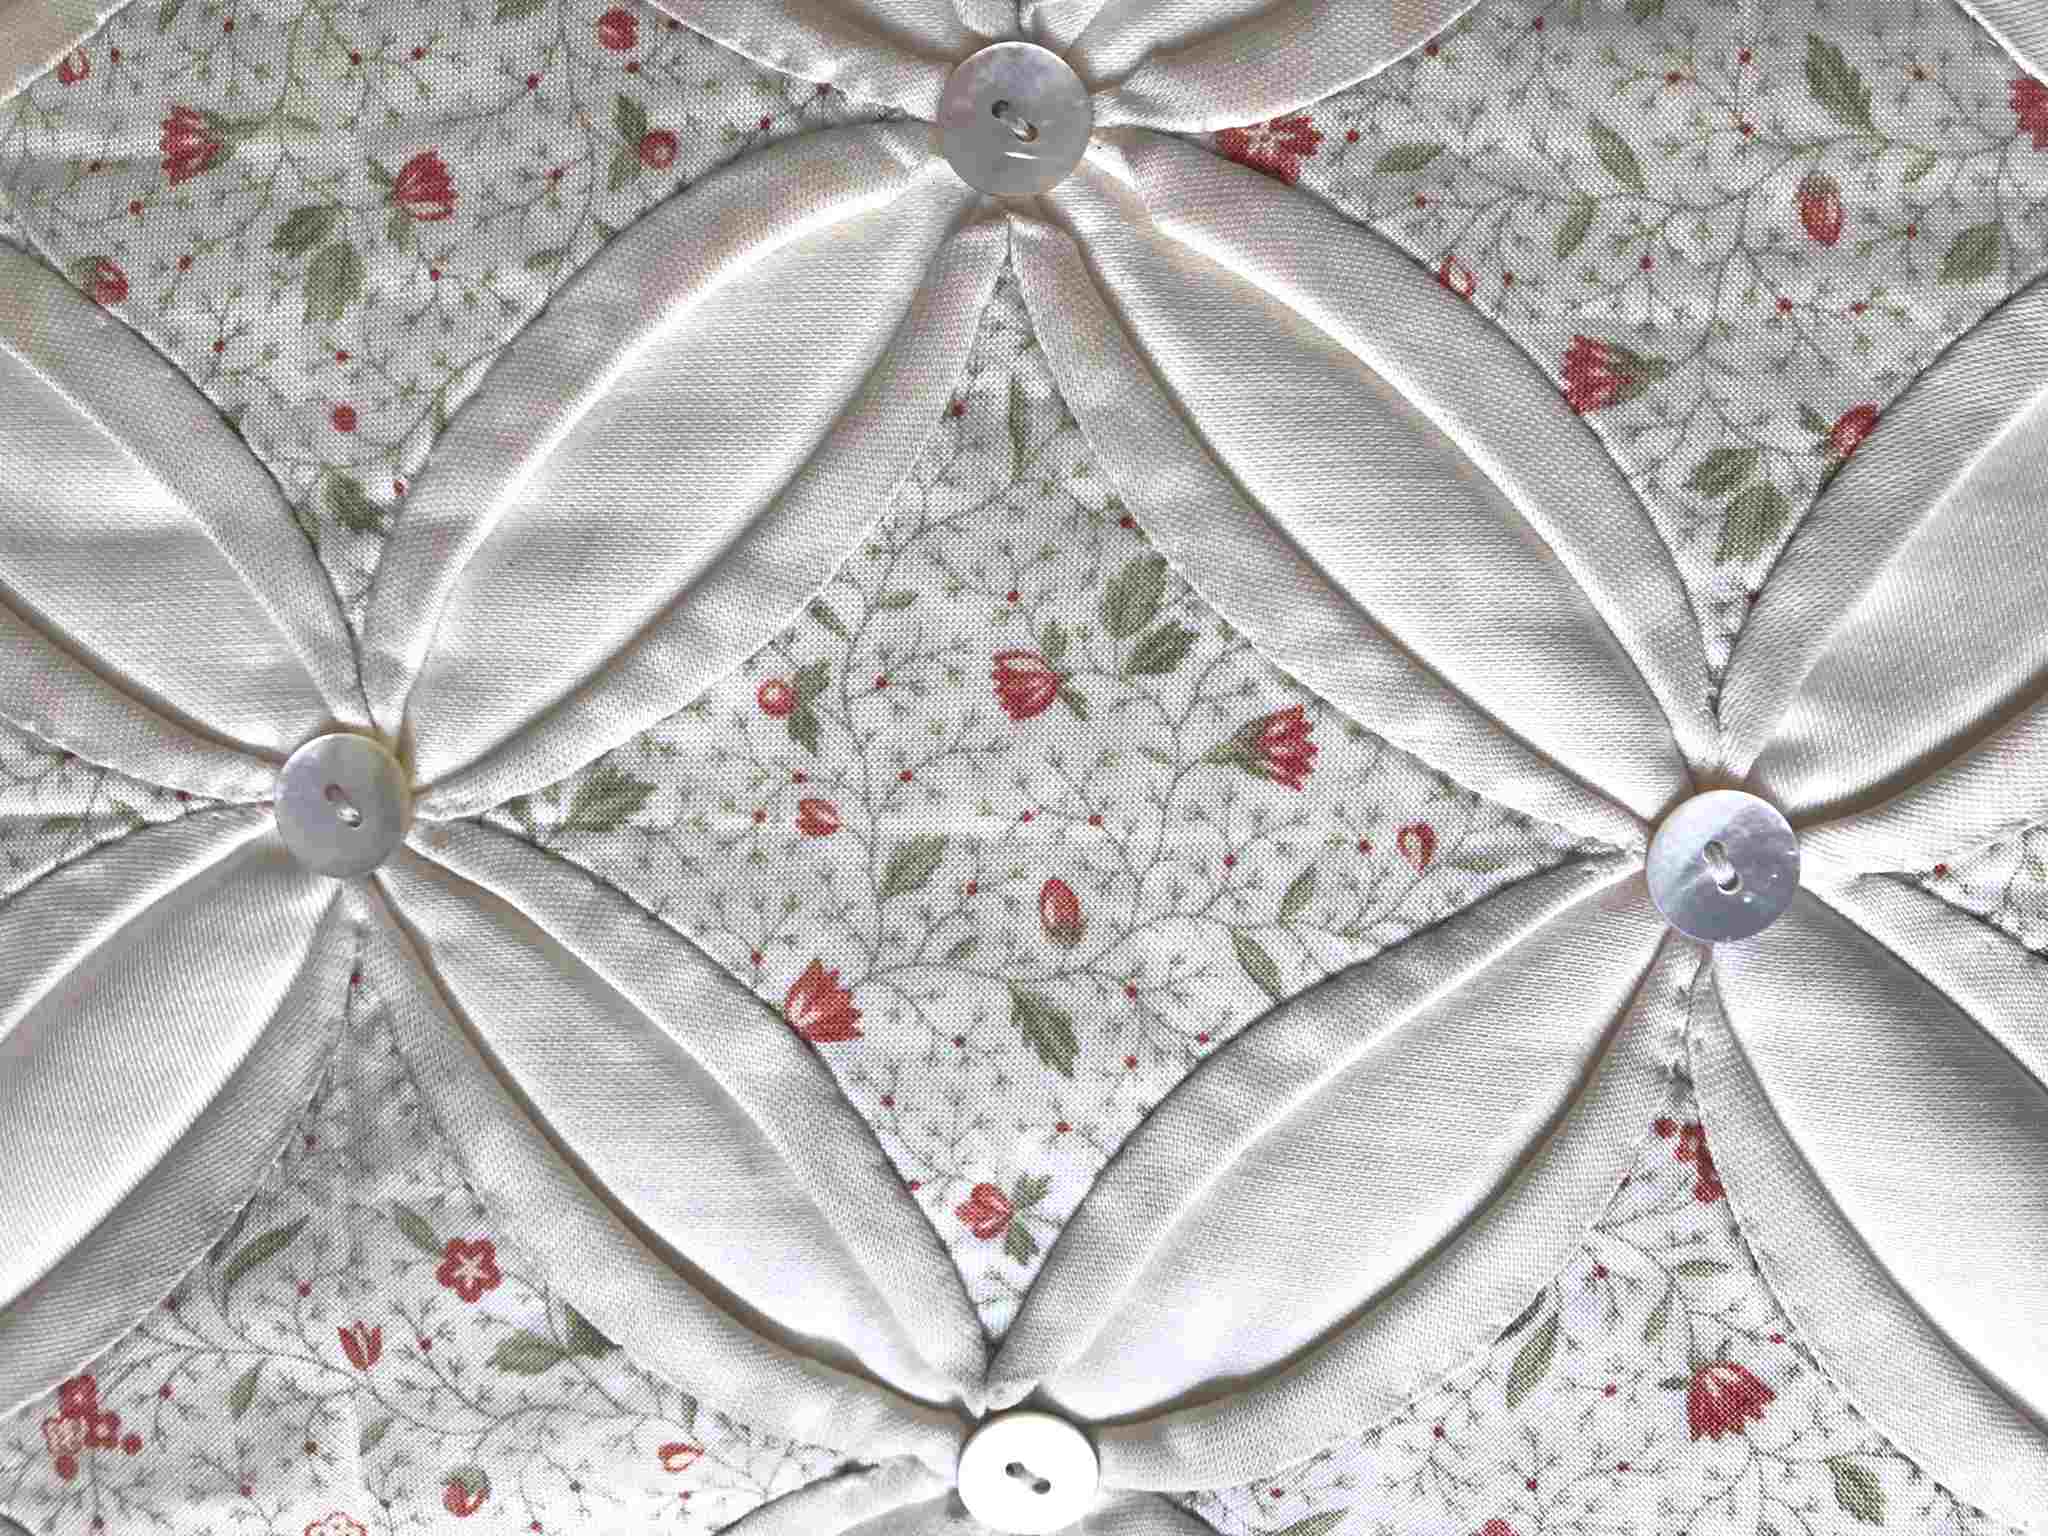
If you would like some unique buttons to add detail to your cathedral window patchwork then how about making some Dorset buttons?
If you would like to see some other patchwork projects how about this super simple patchwork bag that you can make with really basic patchwork skills.
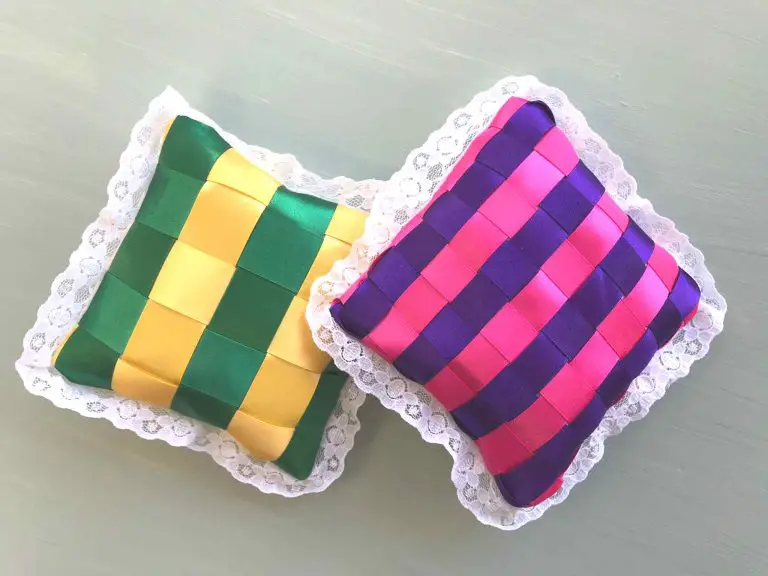
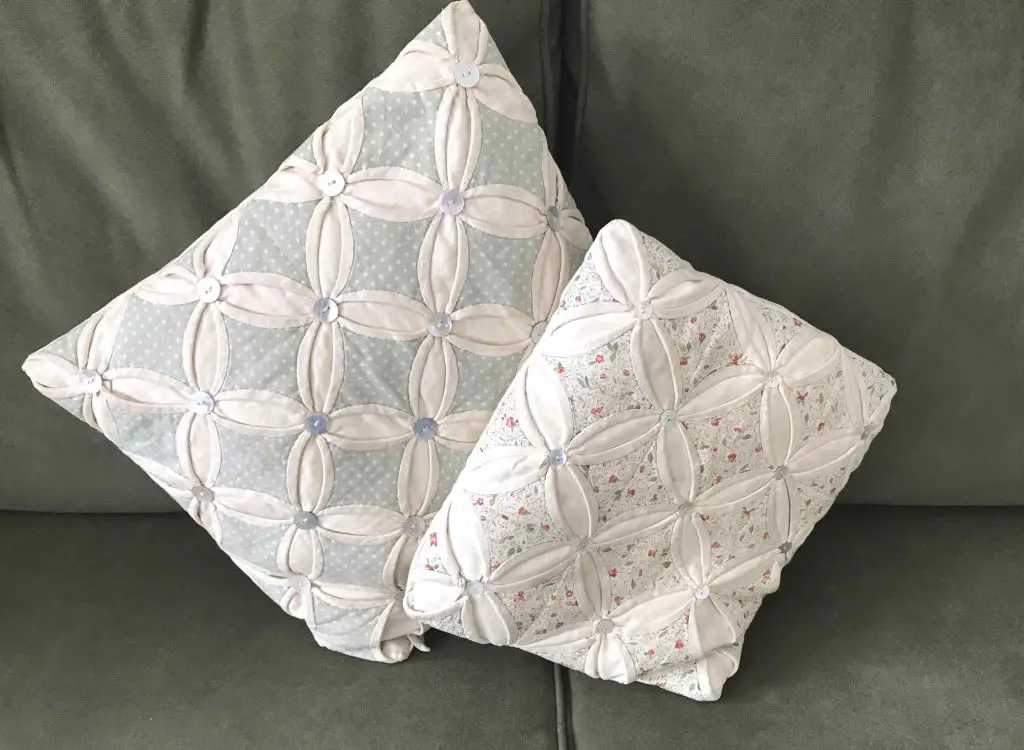
I love using the cathedral window patchwork for cushions and as I said I hand stitched them. It is a great way to enjoy slow stitching and work mindfully for relaxation. These simply use one printed square per block and all the rest are plain.
I use this simple envelope technique to turn them into cushions so no zips or popper fasteners!
Whatever you decide to make with your cathedral window patchwork enjoy it and do share with us in the comments section below what you make with it.