How to Paint a Wooden Stool
As an Amazon Associate I earn from qualifying purchases
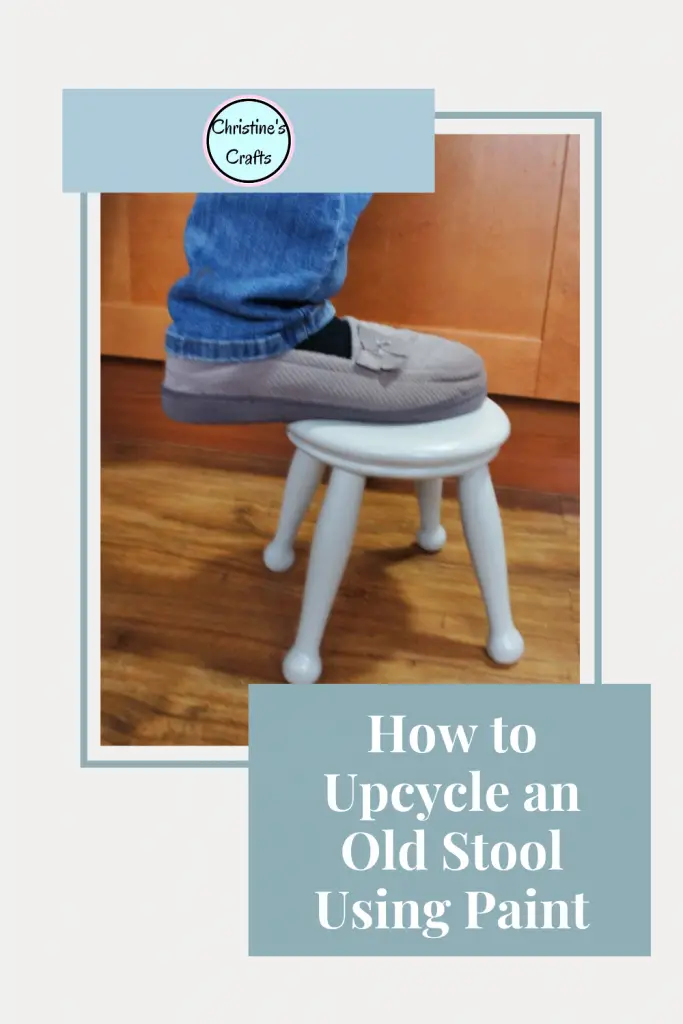
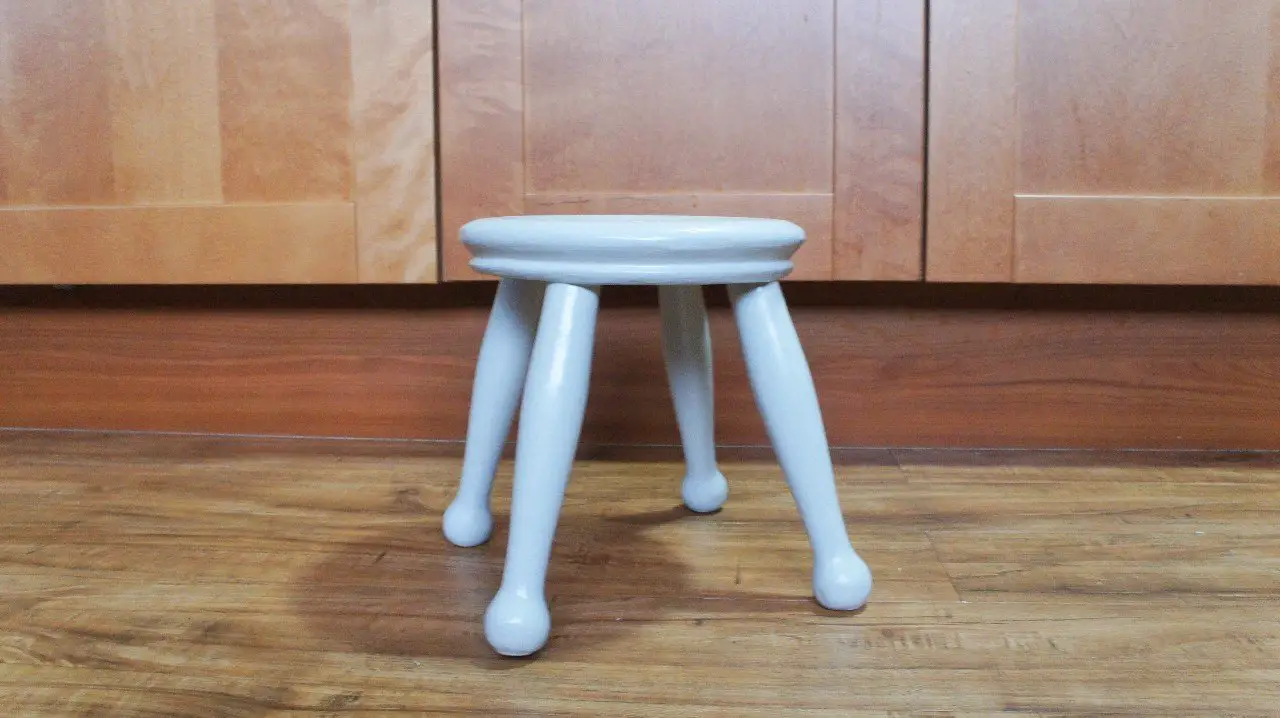
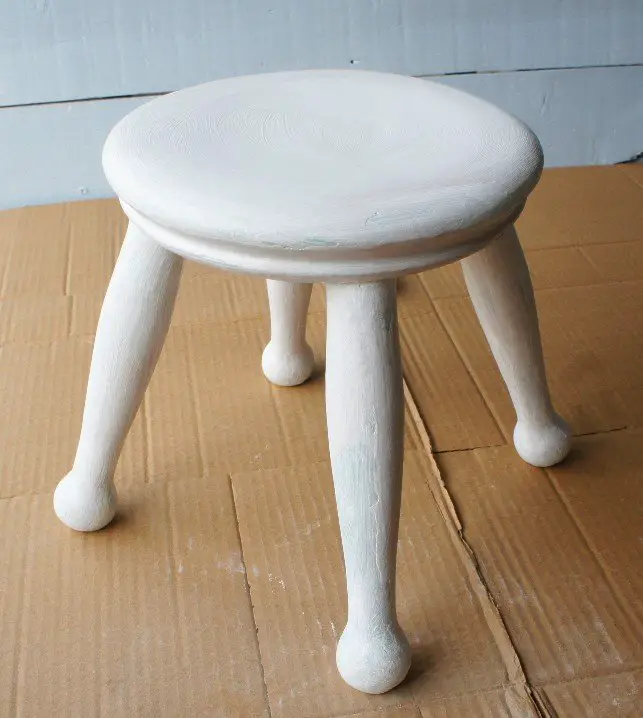
In this tutorial I am going to show you how I gave this cute wooden stool a makeover. It was old and tired but the perfect size to stand on and reach into those high up cupboards. Now, I am tall but not everyone else is so it will get a lot more use.
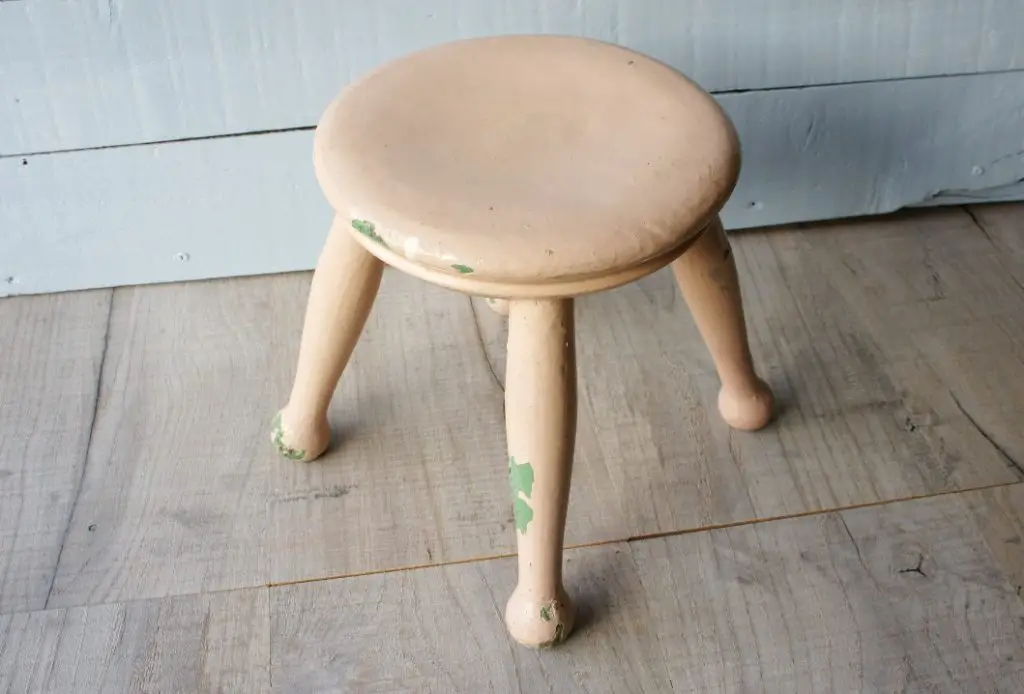
I was given the stool recently because of it’s size. It is small and therefore easy to store. It is a wooden painted stool that has become chipped and the original paint colour is not my taste. While I am updating a stool you can use these techniques on any wooden furniture. I recommend that you only paint wooden furniture that you know is not valuable and that you definitely will not want to remove the paint from. So, if you have any old wooden furniture that you would like to update by painting it then read on.
This page contains affiliate links meaning I earn a little commission if you use those links at no cost to you. I only recommend brands I use and trust.
You will need:
Old wooden stool (or similar)
Paint you like – I am using a Farrow and Ball eggshell finish paint colour Pavilion Gray as it was leftover from painting our bedroom furniture and it is hardwearing.
Primer paint – I used some we already had but here is some in Amazon
Paintbrush – quite small
Sandpaper – Variety of grits
Washing up liquid (dish soap) and cloth – Any brand
Sand the Stool (Your Piece of Wooden Furniture)
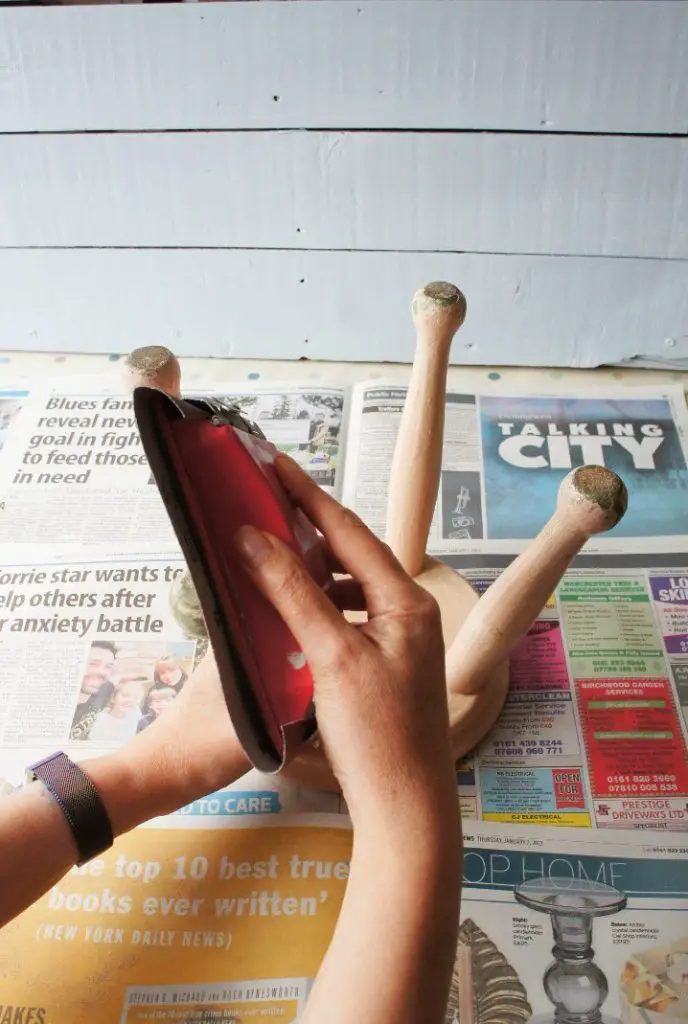
The first thing to do with your stool is to sand it thoroughly with your sandpaper. Start with quite a rough paper and then move through to a fine finish depending on your stool.
As my stool had flaking paint I started quite aggressively until I had removed all the flaking paint. I used a pad as you can see but then I moved onto just using the paper to access all the surfaces and round off the legs and feet. I then moved to a finer grade sandpaper to ensure all the surfaces were smooth and there were no rough edges.
If your stool is already quite smooth then you might only need to do a bit of light sanding to get a surface suitable for painting.
However much sanding you do you should end up with a stool that feels smooth to the touch so that you will get a nice smooth finish on your paint.
Clean your Stool
Once you are happy that your stool is smooth you must clean it. There are specialist cleaners available to prepare wood for painting but I have always used washing up liquid (dish soap). Simply mix it in some warm water and rub your stool with a cloth dipped into the water until you are happy you have got it clean.
Leave it to dry thoroughly.
Prime your Stool
The next step is to apply a coat of primer to your stool. This will act as an undercoat to your final paint. There are 2 really good reasons for doing this. One is that it provides a perfect surface for your paint to adhere to and the other is that it allows you to cover any old paint colours thoroughly without using many coats of your more expensive top coat of paint.
Read your tin of paint and follow any instructions you read there regarding stirring, ventilation, etc.
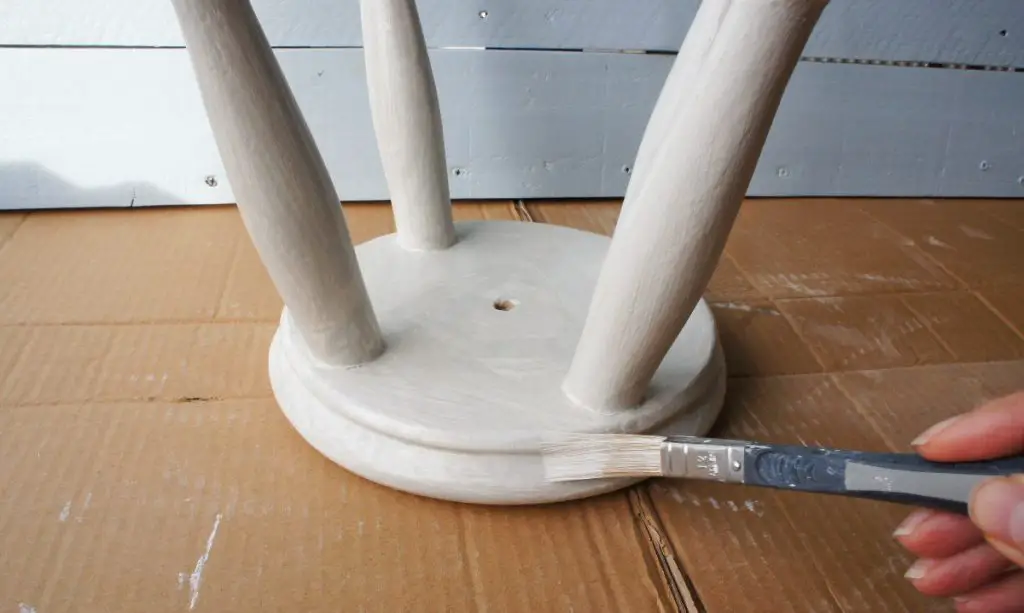
Before you start, consider how you are going to move it around as you paint it. I recommend turning the stool upside down and painting the underside of the stool and the legs first. You will notice that I am painting on a flattened cardboard box to protect my dining table.

Leave one leg not fully painted so that you can hold it to turn your stool over. Once you have painted the rest turn over the stool and paint the rest of that leg and the top. Leave it to dry. Clean up your paintbrush.
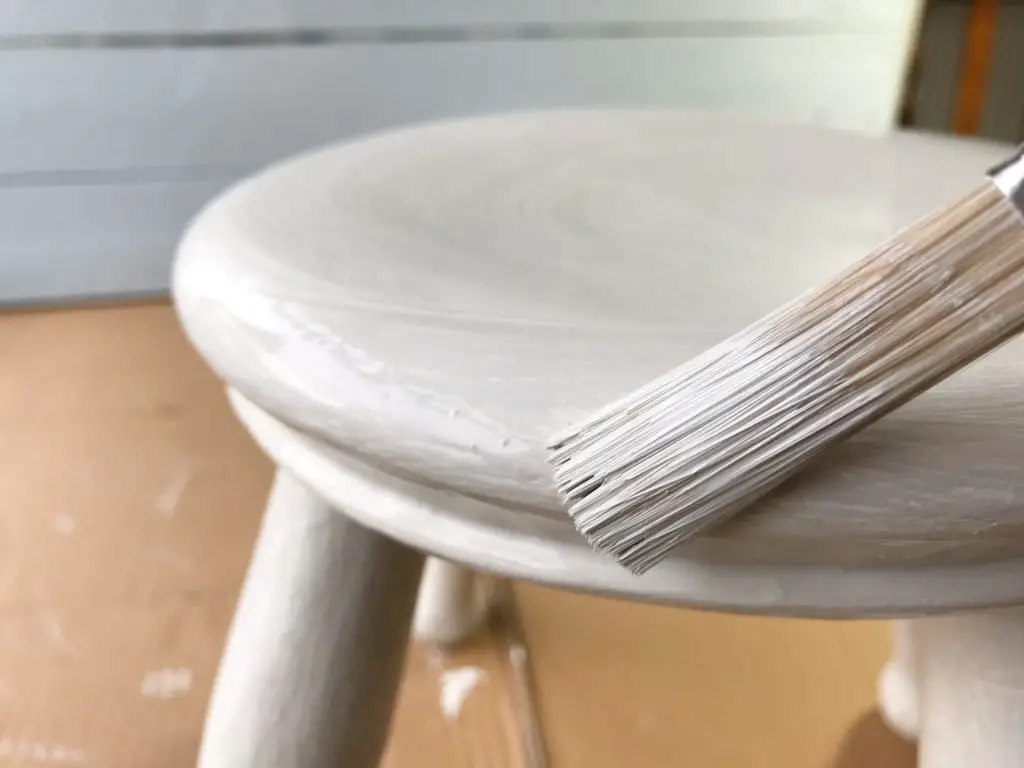
Your stool will not look finished yet but remember this is just an undercoat. Once it is dry look at your stool and feel how smooth it is (or is not). If you feel that it needs more sanding then just repeat this whole step again. I did as I was not happy with a couple of the legs. On this picture you can see that the leg closest to you is not smooth.
Once you are happy with the undercoat and it is dry move on.
Paint your Stool
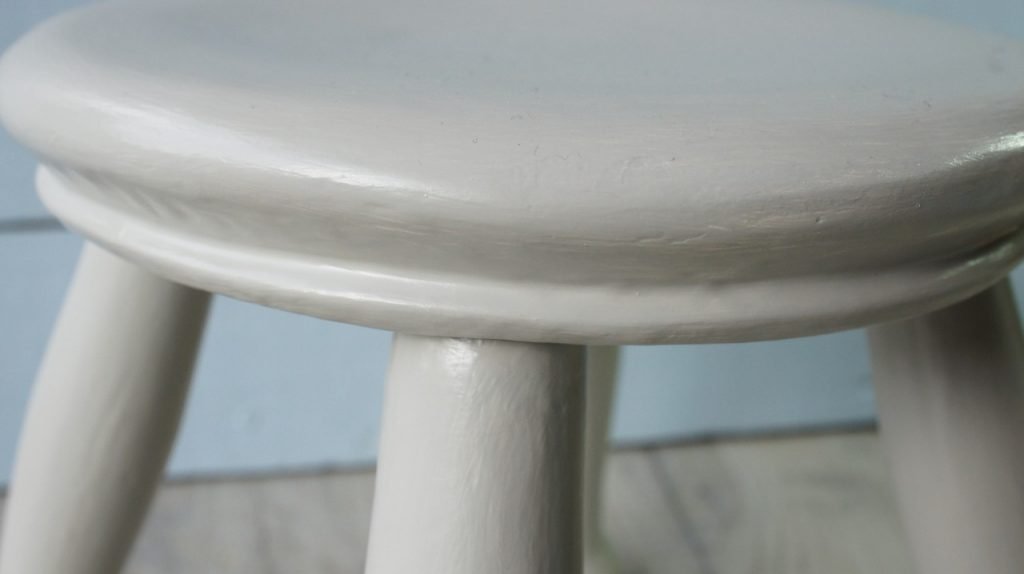
Now it is time to get your chosen final paint and apply it to the stool. Paint the stool in exactly the same way as you applied the undercoat above. Take care to leave nice brushstrokes and a smooth finish.
Once you are happy that the whole stool is covered leave it to dry.
If when it is dry you are not happy with the finish then apply another coat of paint. I used 2 coats of paint on this stool.
Notes
Well done, you have completed your wooden stool. If you are concerned about how hardwearing your paint finish will be then you can always add a sealant coat or a wax coat. I know my paint is quite hardwearing so I have left it.
If you are painting furniture you can always spray paint it too if you prefer. You can buy spray paint or use a compressor with an attachment to spray ordinary paint onto furniture. It all depends on what equipment and paint you have available.
So, if you are given some wooden furniture that is not to your taste then simply paint it to match your decor. Or, if you love that second hand find but want it in a different colour then paint it. This is a very inexpensive way of adding new furniture to your home that co-ordinates.
If you like upcycling in your home then check out these other tutorials:
How to make Fabric Covered Boxes
Simple Applique to Decorate Homewares
Re-cover a Lampshade to Match your Decor
Please leave me a comment below to let me know how your stool makeover goes or to ask any questions you may have.