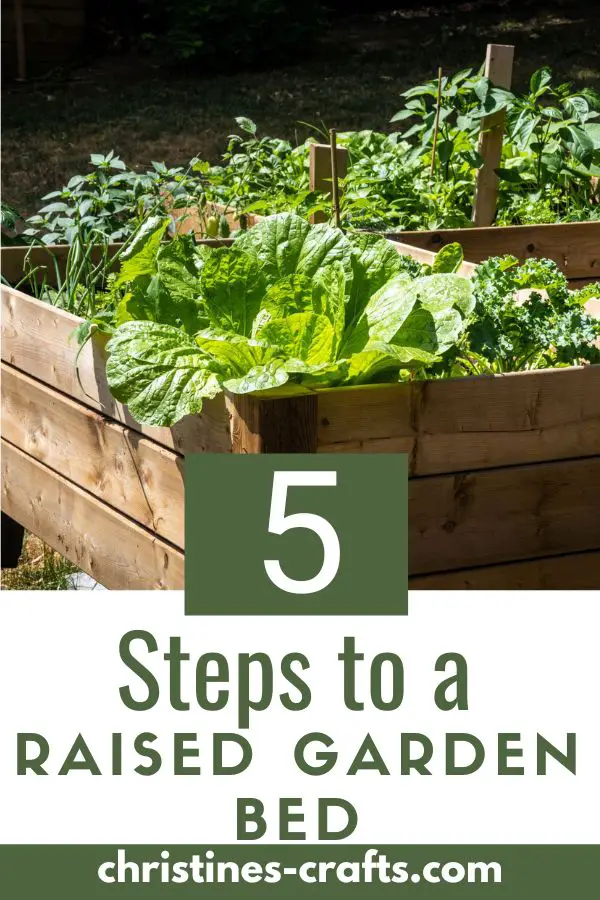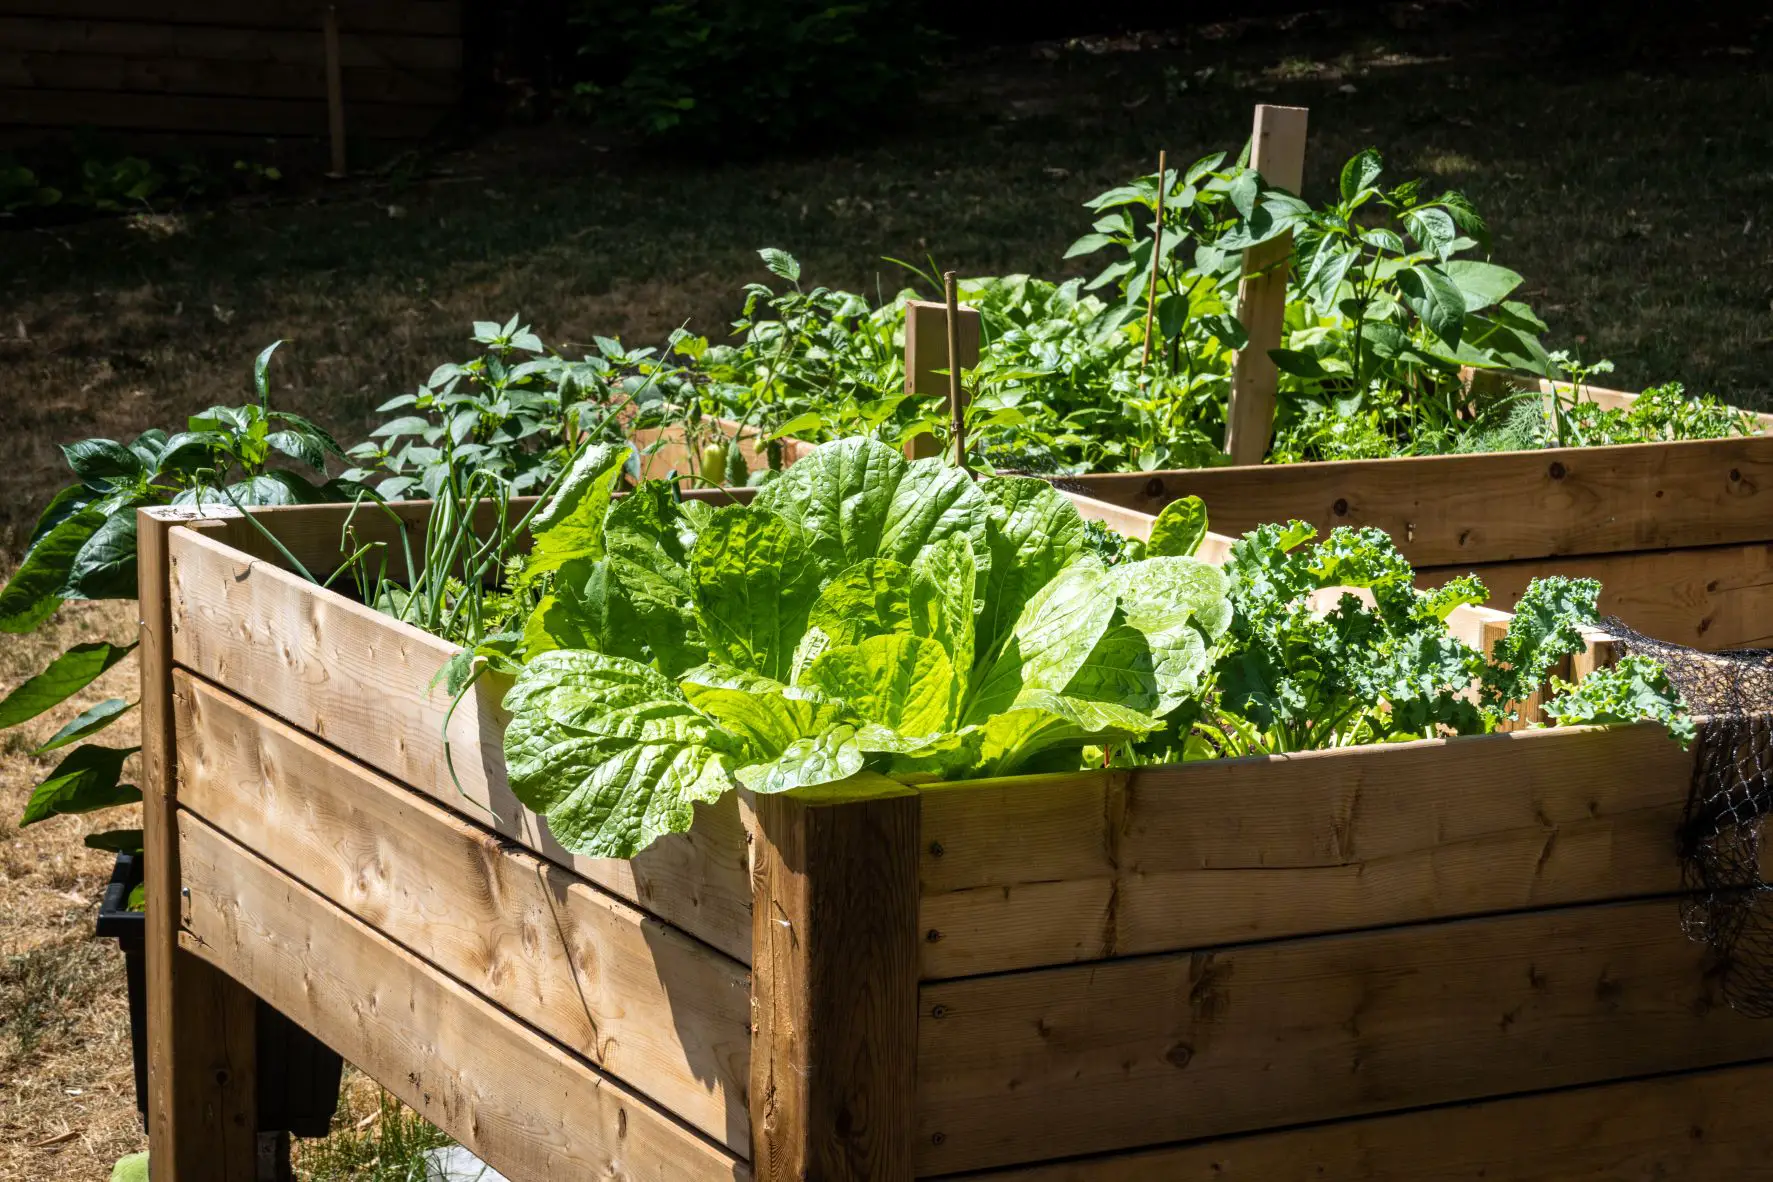
How To Build a Raised Garden Bed with Legs – A Complete Guide
As an Amazon Associate I earn from qualifying purchases
A raised garden bed, also called a raised bed, is a freestanding frame or box filled with soil to plant flowers and herbs. It’s made of wood (typically cedar) and it keeps the gardening surface above ground level. As we are all about sustainability and gardening on a budget you can actually use any wood including reclaimed. It is just a good idea to treat it first.
Most raised garden beds, used in residential gardens, are about three to six feet long and six to twelve inches deep. They’re easy to work with and you can use them to plant radishes, leeks, onions, spinach, salad greens, thyme, mint, and so on. In fact most plants will thrive in a raised bed.
Raised garden beds are a great way of bringing plants up nearer to people with limited mobility. This is great for enabling people to continue gardening and enjoy the texture and fragrance of plants.
In this article, I will share a detailed guide to help to build a DIY raised garden bed at home effectively. If you want to you can build the bed without the legs and simply have it raised but on the ground. A lot of people use this style in allotments.
How To Build a Raised Garden Bed with Legs- Detailed Guide
If you’re a gardening enthusiast and planning to make a raised garden bed for your outdoor area, consider using the steps listed below.
Step 1: Gather Supplies
The first step is to gather all the materials and tools that you’ll need to complete the process. Here’s a list of required materials. Remember that you can use any wood but it will not last as long if it is not pressure treated. The measurements are also suggestions and you could make one any size you like. Perhaps a slightly deeper one for larger plants.
Pressure Treated Lumber
- 1 x 10-inch six feet long cedar: 2 boards
- 1 x 10-inch three feet long cedar: 2 boards (with drainage holes drilled)
- 1 x 8-inch (34-inch) long cedar): 8 boards
- 1 x 2-inch six feet long cedar: 2 pieces
- 1 x 3-inch 4 feet long cedar: 8 pieces
Other Supplies and Tools
- 1.5-inch-long self-tapping deck screws: 16 to 20
- 1.5-inch-long corrugated metal nails: 16 to 20
- Drill
- Wood glue (for outdoors)
- Nail gun (or hammer and nails)
- Weed barrier/landscaping fabric/mesh hardware cloth
- Measuring tape
- Scissors
Step 2: Build Main Structure
If you already have extra cedar, you don’t need to buy more. You can cut the wood using a miter saw or hand saw to make all the boards and pieces according to the dimensions listed above. After that, you can use the following steps to build the main structure.
- Attach one 1 x 2-inch six feet piece to one of the faces of a 1 x 10-inch six feet board using 4 or 5 self-tapping deck screws and the drill. Make sure that you join them horizontally and attach the 1 x 2-inch piece to the bottom of the other board’s face.
- Repeat the same steps to join the remaining 1 x 10-inch six feet piece and 1 x 2-inch six feet board. The 1 x 2-inch pieces will work as ledges and help you build the bottom of the raised gardening bed conveniently.
- Now Grab one 1 x 10-inch six feet board with the ledge and one 1 x 10-inch three feet board and attach them together so that they make an L shape.
- You’ll need to use two 1.5-inch-long self-tapping deck screws and drill for this purpose. Make sure that you join the two pieces in a way so that the edge of the 1 x 10-inch six feet board touches the end of the 1 x 10-inch three feet board’s face.
- Repeat the same steps using the remaining 1 x 10-inch six feet board with the ledge and one 1 x 10-inch three feet board to make another L-shaped piece.
- Join the two L shape pieces together with deck screws to make a rectangular shape. Make sure that the two ledges face each other and are at the bottom side of the rectangle.
If you are leaving your bed on the ground and do not want a base then well done, you have a bed ready to fill. Jump to step 5!
Step 3: Create Bed’s Bottom
Apply wood glue to the top side of both of the ledges and start placing 1 x 8-inch (34-inch-long) boards on them. Make sure that you leave a distance of about one inch between each board.
Once you have placed all the boards, secure them using 1.5-inch-long nails and the nail gun. Now you’ll have a rectangular structure with the bottom where you’ll need to add soil. You can stop building at this point and use it as a raised bed on the ground or you can carry on and add legs.
It’s important to note that ledges and 1 x 8-inch (34-inch-long) boards will reduce the depth of the garden bed by about three inches. However, the garden bed will still have a depth of about seven inches which is enough for plants and herbs.
Step 4: Add Legs
After creating the base structure, the next step is to add legs to it. You’ll need to use 1 x 3-inch 4 feet boards and attach two of them to each of the corners of the base structure.
First, attach two 1 x 3-inch 4 feet boards to both ends of the outer side of the 1 x 10-inch six feet board. Repeat the same step for the other 1 x 10-inch six feet board as well as the 1 x 10-inch three feet board.
It’ll allow you to create sturdy, strong, and stable L-shaped legs. Make sure that you attach these boards securely using self-tapping deck screws and the drill. They’ll work as legs to raise the garden bed from the ground.

Step 5: Add Weed Barrier and Soil
Measure the inside of the bed garden using the measuring tape. It’ll be about 3 x 6 feet in dimensions. Use this measurement to cut the weed barrier or landscape fabric using a pair of scissors and place it inside the garden bed.
It’ll prevent soil from coming out of the garden bed’s bottom. You’ll also need to make some drainage holes in the weed barrier at several places. Make sure that you make these holes in a way so that they’re on top of the drainage holes drilled in the bottom slats. However, you won’t need any drainage holes if you’re using mesh hardware cloth
Once the weed barrier is in place, use soil specially designed for raised beds to fill it. Ideally, you should use a mixture of 10 percent potting soil (containing vermiculite, perlite, and peat moss), 30 percent compost, and 60 percent topsoil. If you have your own garden compost that is a great addition. Do not worry about all this too much – use what you have available!
Make sure that you place the garden bed on the desired spot before adding soil to it. Otherwise, it’ll become very heavy and you won’t be able to move it conveniently. Once everything is ready, you can start planting flowers and herbs of your choice.
FAQs About
What Type of Wood Should You Use to Make a Raised Garden Bed?
Cedar and redwood are the best wood types that you can use to make an elevated garden bed. They’re affordable, readily available, and rot-resistant and can serve you for years to come. Whatever wood you are using it is beneficial to treat it before you start assembling your raised bed.
What’s the Ideal Height for a Raised Garden Bed?
The ideal height for a residential raised planter box is six to eight inches. It’s enough to plant different types of herbs and plants conveniently but not so heavy that it collapses!
Final Words
Building a raised garden bed doesn’t have to be a difficult task. You just need to use the right materials and steps to complete the entire process. We hope this guide will help you understand how to build a raised garden bed at home effectively.
If you are looking for more great gardening guidance then take a look at:
- How to Grow Potatoes in Containers Successfully
- Create a Soothing Solar Water Feature
- Grow an Apothecary Garden
- Plant a Lasagna Bulb Pot for Spring Colour
- Grow a Lavender Hedge from Seed