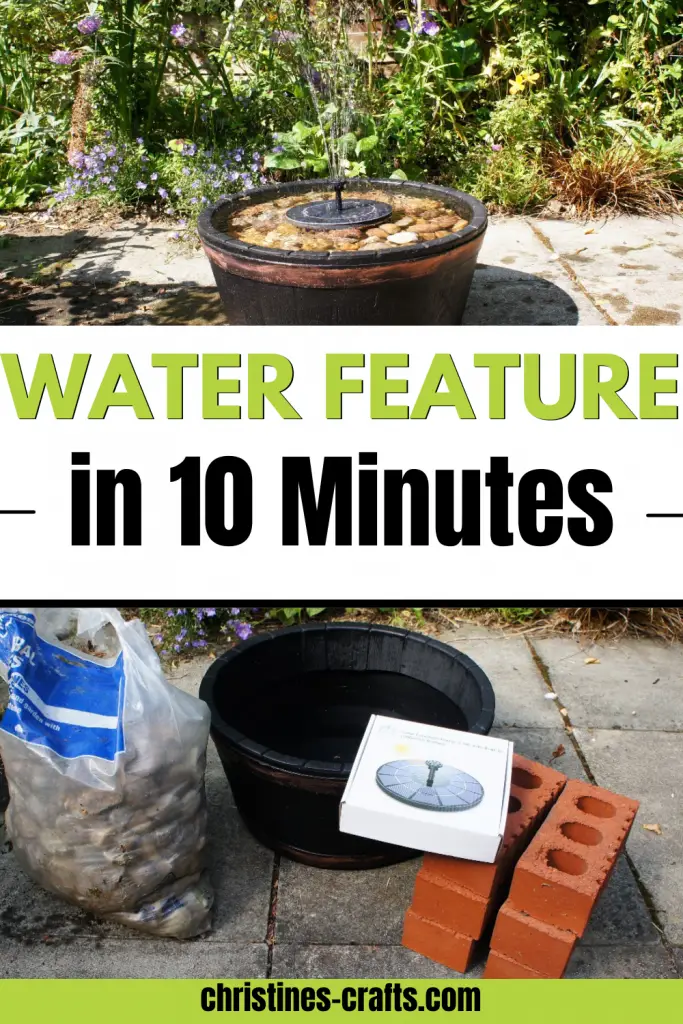
How to Make a Soothing Solar Powered DIY Water Feature in 10 Minutes
As an Amazon Associate I earn from qualifying purchases
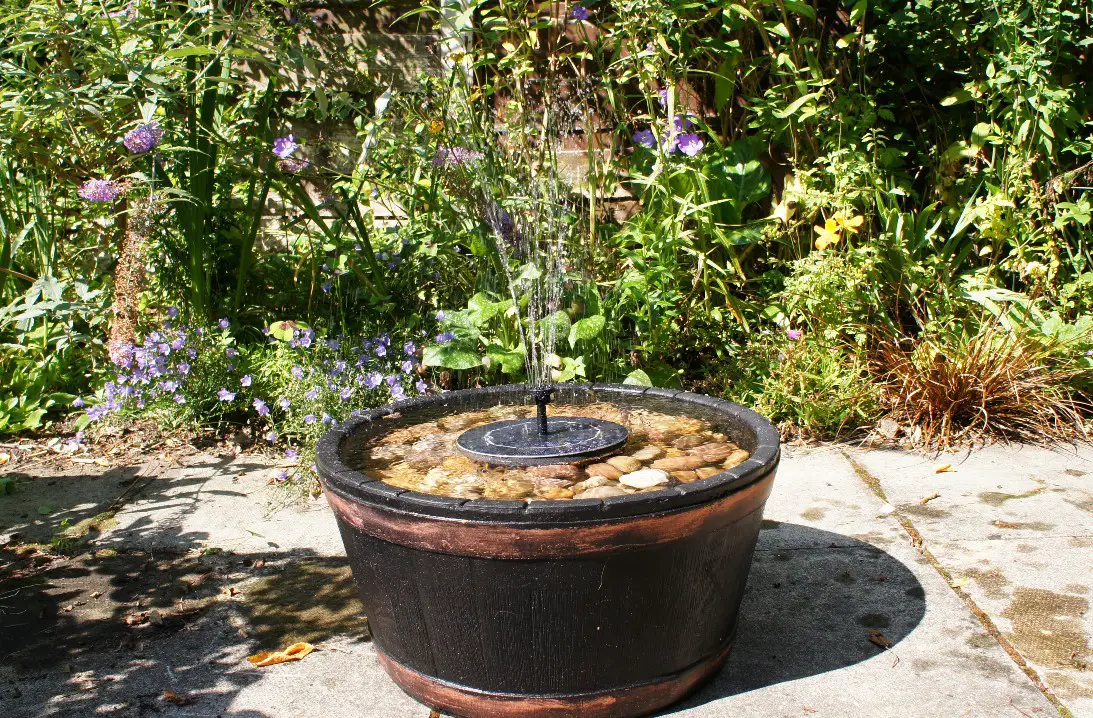
Create your own DIY water feature for your garden or backyard in 10 minutes today! That is what I did and you can see exactly how I did it here. You do not need many supplies and the result is a beautiful and soothing water feature that would look great in many gardens, backyards and patios.
There is nothing quite like the soothing sound of water trickling while you sit out enjoying your garden. It adds a whole new level of relaxation to the experience. So, let’s get started so that you can start enjoying your relaxation!
This page contains affiliate links meaning I earn a small commission if you use those links at no cost to you. I only recommend brands I use and trust.
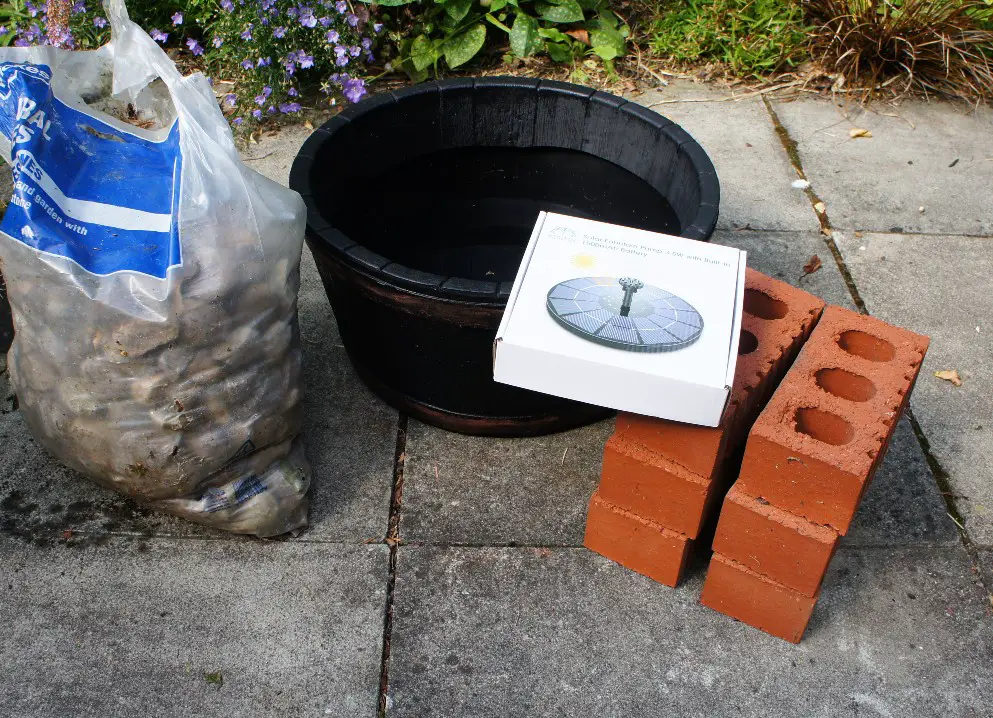
You will need:
- A water tight container. I used a plastic half barrel 19″ diameter. If you use the same pump as me I recommend a container that is at least that big so that the water does not spray out of the container (or at least not too much!).
- A Solar Fountain similar to this one from Amazon
- Decorative Stones / Pebbles. I recommend a mix of sizes but not too small. You could even add glow-in-the-dark pebbles for fun!
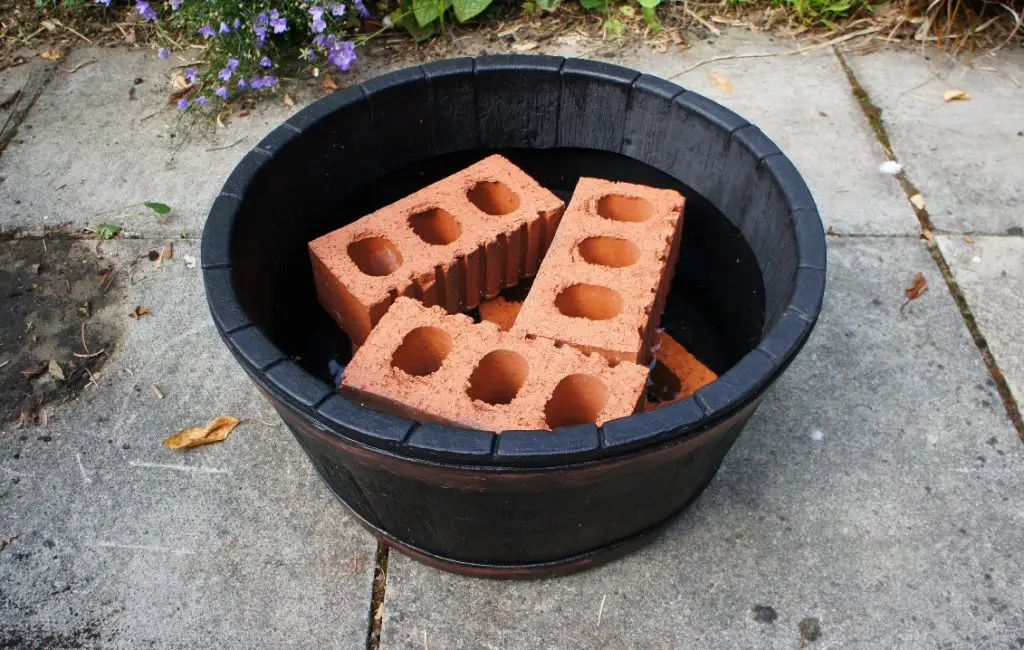
- Old bricks or similar to fill out the container inexpensively.
- Water

Fill your Container
If you want it to be a pebble water feature then you need to almost fill your container. If you just want water in your container then skip this step. I recommend using old bricks or similar to fill the bulk of your container. This is purely to keep the cost down. If you have loads of rocks and pebbles then simply use those.
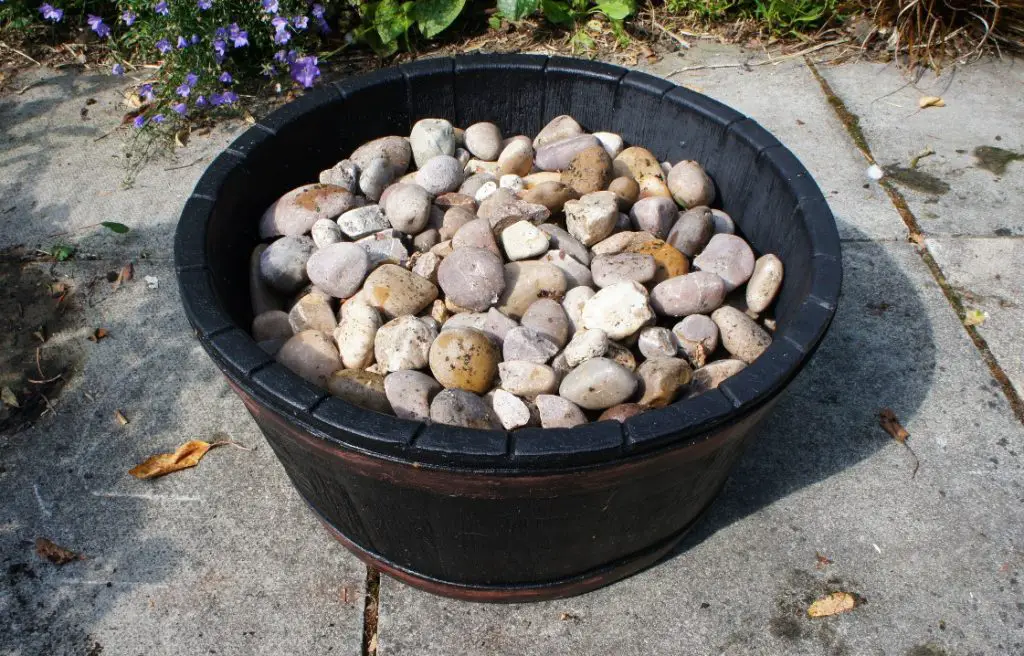
Once you have filled a lot of your container with bricks or similar then add in your pebbles. I recommend washing them first so that you do not fill your container with bits that could block up your fountain.
You really need to add a lot of pebbles so that they come nearly to the top of the container.
TOP TIP: Make a taller ring of pebbles around the centre to place your fountain inside and make the pebbles inside that ring lower. This will keep the fountain in the centre of the container and stop it blowing to the edge and spraying water all over your patio. I did not do it in these pictures but I changed them later (and got wet!).
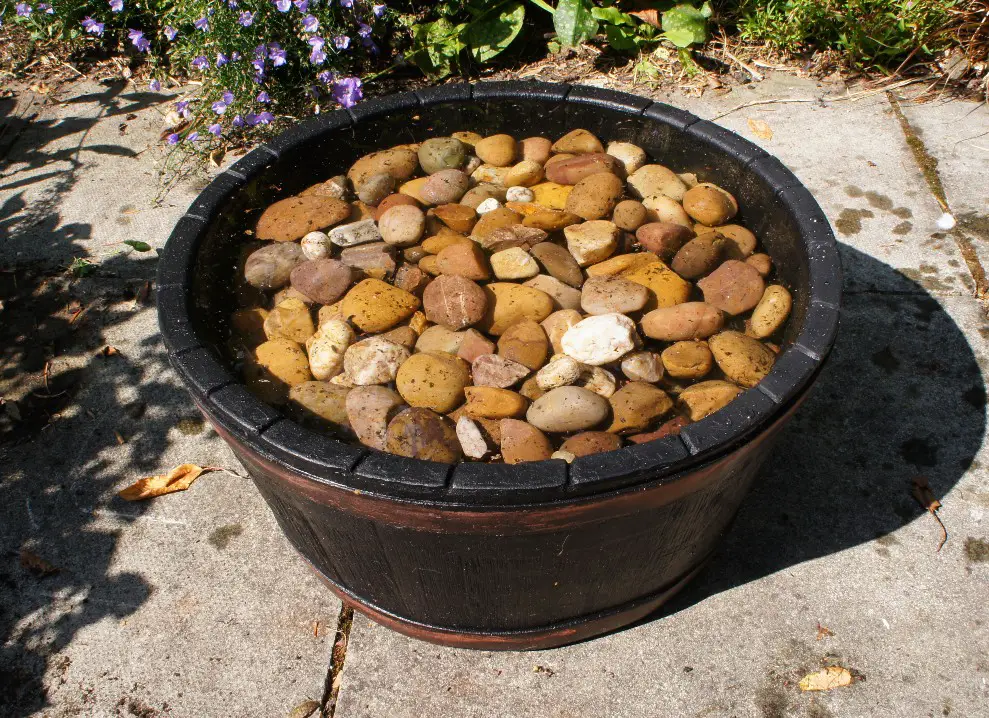
Now simply fill up your container right to the top with clean water.
Add in the Solar Powered Fountain
I have used the Aisitin Solar Fountain Pump 3.5W with Built-in 1500mAh Battery and if you want to know my thoughts on it then scroll down to my review of it.
Simply take your solar powered fountain and unpackage it. Place it onto the surface of your water in the centre. If you buy one like mine you will have a selection of nozzles. Simply try them until you get the one you like. Ideally you do not want the water spaying over the edge of the container as it will soon run out of water at the top of the container on the pebbles.
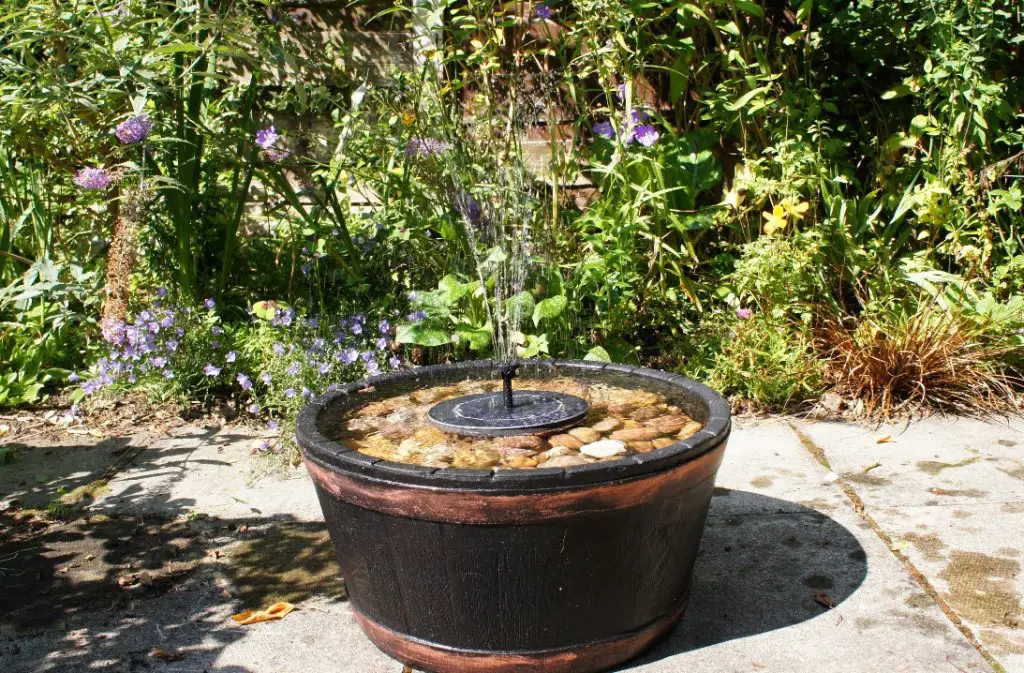
So now you can sit back and enjoy your DIY water feature with no concerns about electricity supply or ugly solar panels all over the place. It is completely self-contained.
Enjoy your DIY water feature however you decide to adapt this tutorial and let me know in the comments below how you change it so that we can all learn together.
Aisitin 3.5W Solar Fountain Pump Review
While this is not a full detailed review I wanted to share my thoughts with you. I did quite a bit of research before I purchased this floating fountain from Amazon and I was still a bit nervous that it might not work very well. I did not need to worry!
This fountain does exactly what it says. It is very easy to assemble. All you do is select your nozzle from the various choices and attach it. Then peel the protective film off the solar panel and you are ready to go. Place it in the water and it will immediately start working.
It works on shady days as well as in full sun which was my biggest concern. I will not be using it in winter so I am not bothered about very dark days. I will be storing it dry over winter.
Plus you can get very different effects using the different nozzle so do play around with it. It also just turns itself off if it is short of water and re-starts when the water level improves.
It has suctions cups underneath to fix it down but as I am floating it above pebbles I have no idea how good they are. They don’t look very promising but who knows!
Would I recommend one? Yes, if you are looking for a small fountain effect that is instant and requires no electrical connection.
I will have to let you know on longevity as I have only had mine a week so far! UPDATE! This solar fountain has now done 2 summers in my water feature. I did take it in for the winter and stored it dry and frost free.
Next Steps in your Garden
If you are improving your garden or backyard then how about trying some of my other tutorials:
Plant a Lasagna Pot for Spring Colour
Upcycle a Chair into a Succulent Planter
Enjoy your DIY water feature and the relaxation it brings you. I love sitting by mine reading a good book – bliss!