Flower Pounding on Paper – A complete Beginners Guide
As an Amazon Associate I earn from qualifying purchases
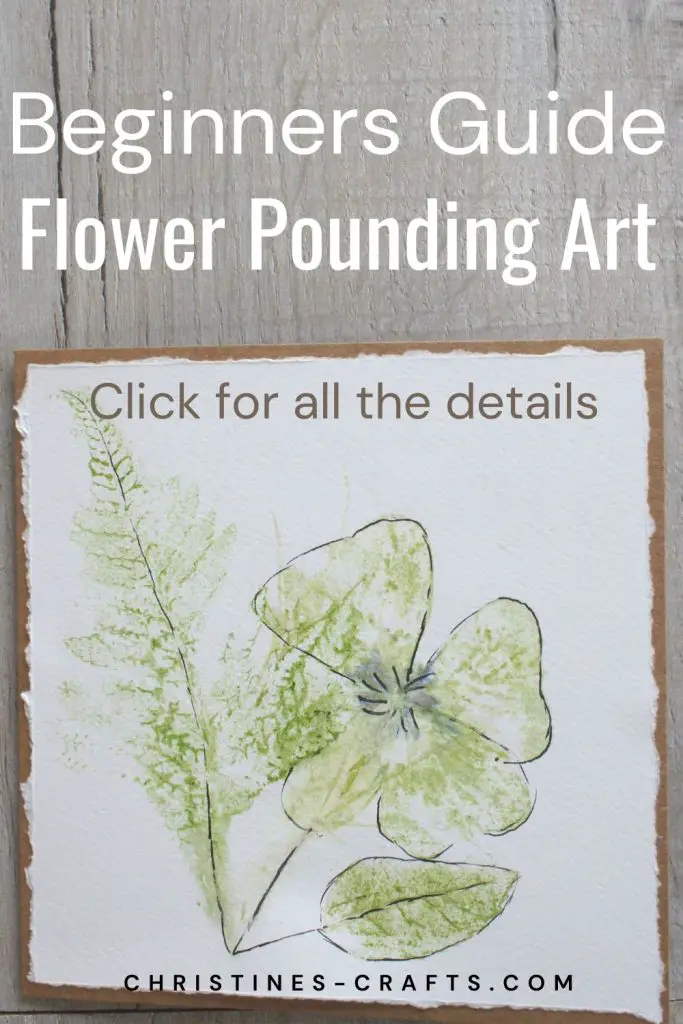
Either you were looking for this craft or you are intrigued. So, first of all let’s address, what is flower pounding on paper? It is the art of pounding flowers (or leaves) with a hammer and transferring the dye to the paper to form art. It originates in Japan but is now done all over the world.
This is a great way to make art and use the flowers from your garden or your travels. It allows you to work in a very sustainable way. This tutorial is part of the monthly Sustainable Craft Challenge and the theme this month is Nature. I am joined by so many talented crafters from all around the world to bring you some great inexpensive sustainable craft ideas. All of them are nature themed so will brighten your day and at the end of this tutorial you will see links to them all so take a look.
You can use your flower pounding art in so many ways. As you can see I have made art for the wall, cards and gift tags. You could even make your own wrapping paper if you had the patience! You can do flower pounding on fabric but we are not going to cover that here.
So, let’s get started.
This page contains affiliate links meaning I earn a little commission if you use those links at no cost to you. I only recommend brands I use and trust.
You will need:
- Watercolour paper (or similar)
- Flowers or Leaves or both
- Hammer
- Kitchen Paper Towel
- Washi tape (or any tape that lifts very easily without damaging the paper)
- Something to hammer onto


Top Tips:
- You can try different papers but ordinary copier paper does not work very well
- Test your tape first to make sure it peels off easily
- Leaves need more pounding than flowers
- Flat types of flowers (such as daisies) are the easiest to work with
- Start quite gently – you can always do more
- Experiment before starting a big project
- If you can, do your leaves separately to your flowers
- Flowers should be face down and leaves face up
Video Tutorial for Flower Pounding on Paper
You can also find this on my YouTube channel.
Prepare your Materials
Firstly, make sure you are all set up before you think about cutting flowers or leaves. This means having somewhere to pound your flowers. I used an old piece of wood that I had and was not bothered about. You can also use thick newspaper to protect your surface but remember you are hammering!
You also need your tape, watercolour paper and kitchen towel. These are what I found to be the best to use but feel free to experiment.
Once you are set up gather your flowers and / or leaves. I collect mine in a plastic bag to prevent them drying out too much before I get to use them. I am not sure this is necessary but I get easily distracted especially in the garden!
Flower Pounding on paper
Now, comes the exciting bit! Arrange your flowers and leaves to form your art. If you can, it is easier to do your leaves and flowers separately as leaves require a lot more pounding than your flowers. You could do your design, take a picture, then remove the flowers while you do the leaves first.
Consider how your design will look. How will your flowers flatten? I found it works best for transferring the dye if you place flowers face down onto the paper and leaves face up.
Once you are happy with it tape it in place to avoid it moving around as you hit it! I have drawn a square as I am making a picture to put on a card blank that I have.
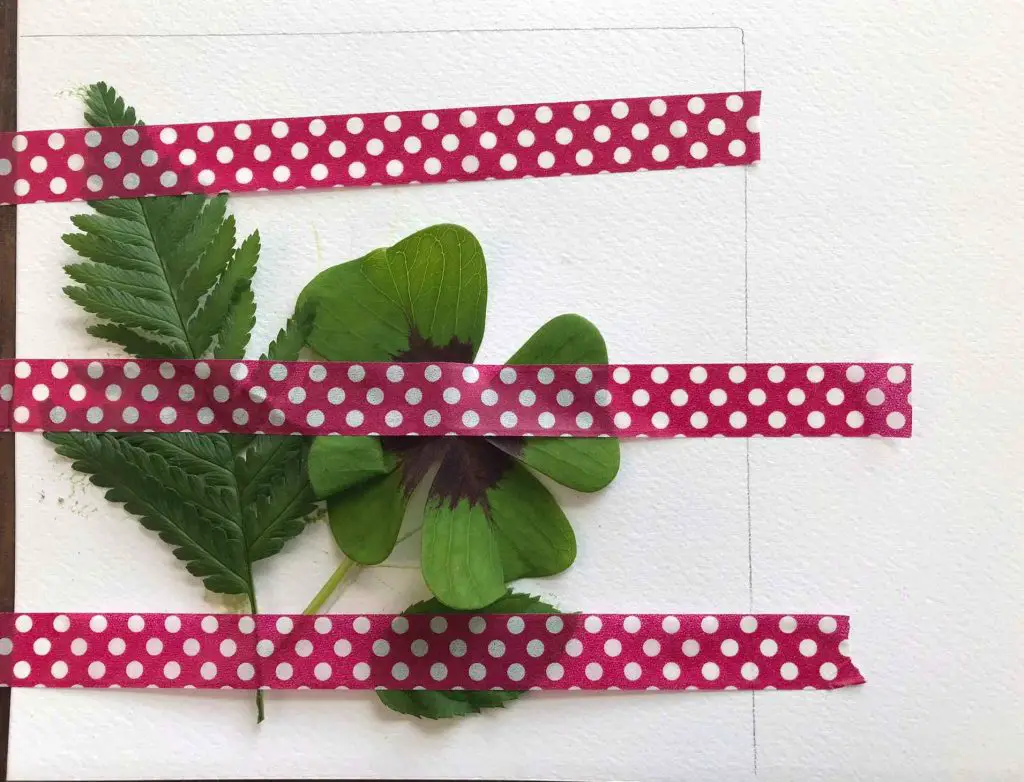
Then cover the whole design with a piece of your paper towel. Start hitting your design with your hammer. Now, how hard you hit it and how many times is something only you can experiment with. For leaves you can hit them quite hard as they are quite robust but flowers are delicate. If you hit them too hard you can end up squashing them into a mess. Trust me, I have done it and you probably will too!
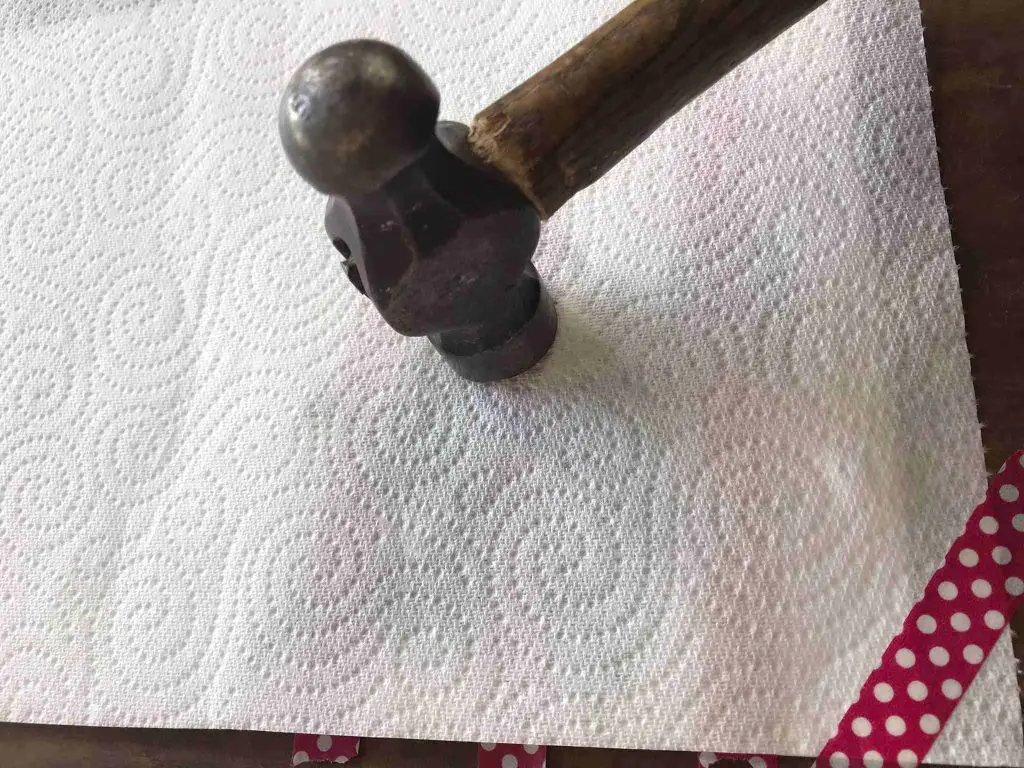
You will get a clue about your dye transfer by looking at your paper towel. It will be appearing on there too! When you think your dye will have transferred simply remove the paper towel and peel back some of the leaf (or flower). If you have a good image keep removing it. If not, simply place it back down and hit it a bit more!
Once you are happy with it carefully remove all the tape and the leaves / flowers. If some bits are really stuck simply leave them to dry and then remove them. This will avoid you damaging your picture.
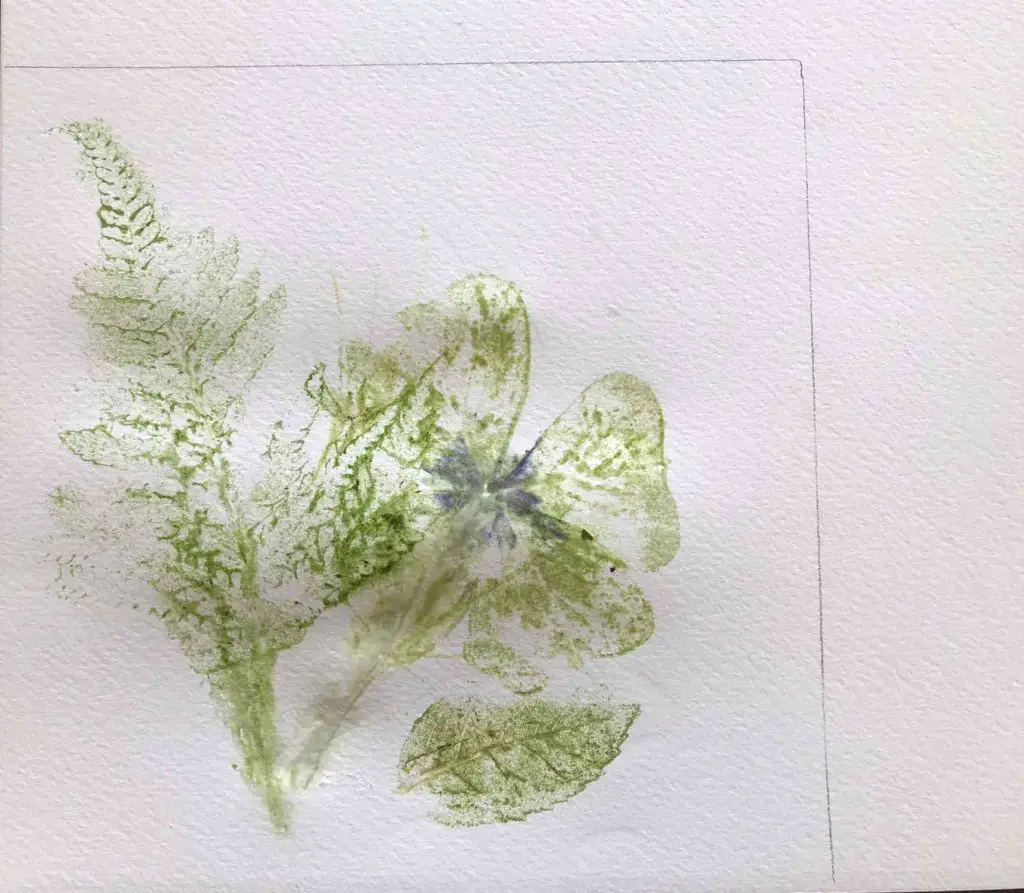
Once your picture is dry and you have done any extra layers you want you can decide how to proceed.
Embellishments and Uses for your Flower Art
If you are happy with your hammered flower art then you are done and can move onto using it. If you would like to add to it then consider options for embellishing it.
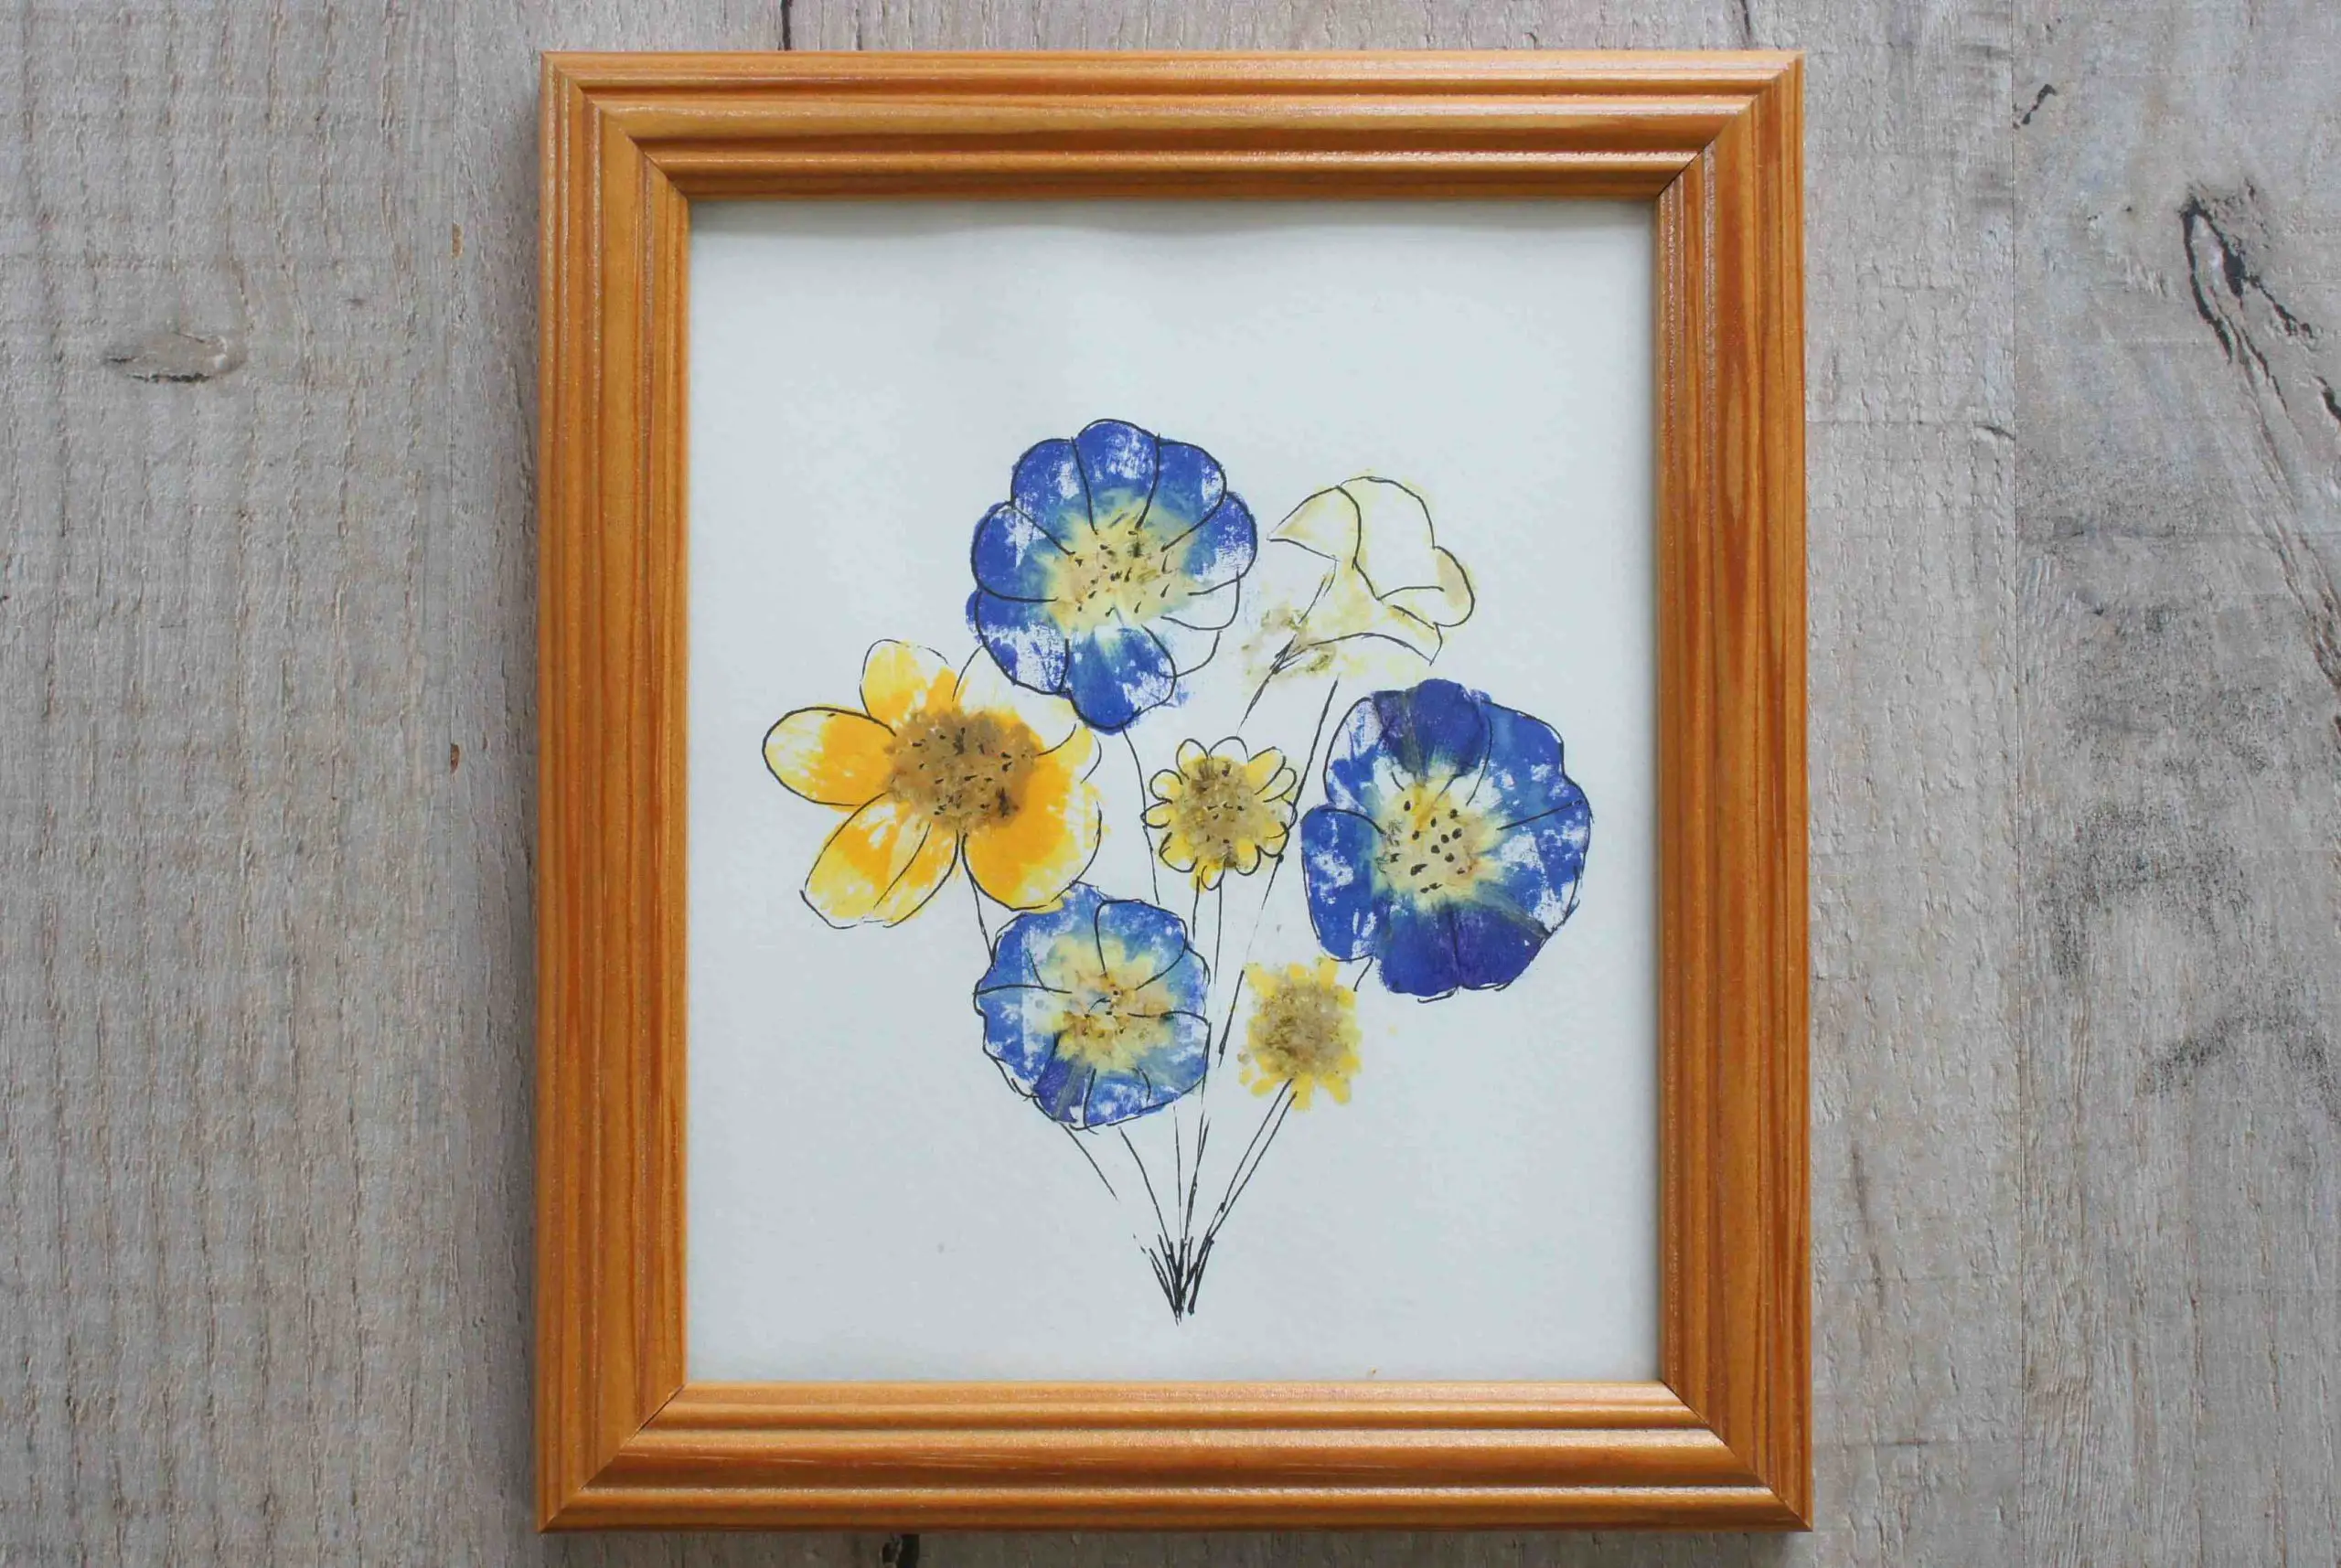
I have added some simple black outlining to mine just to make it ‘pop’. You could add detail in this way with any coloured marker pens. You could also add some actual painting if you prefer. How about adding stems and a vase to flowers? The options are only limited by our creativity. If you have any great ideas please add them in the comments section below so that we can all try them.
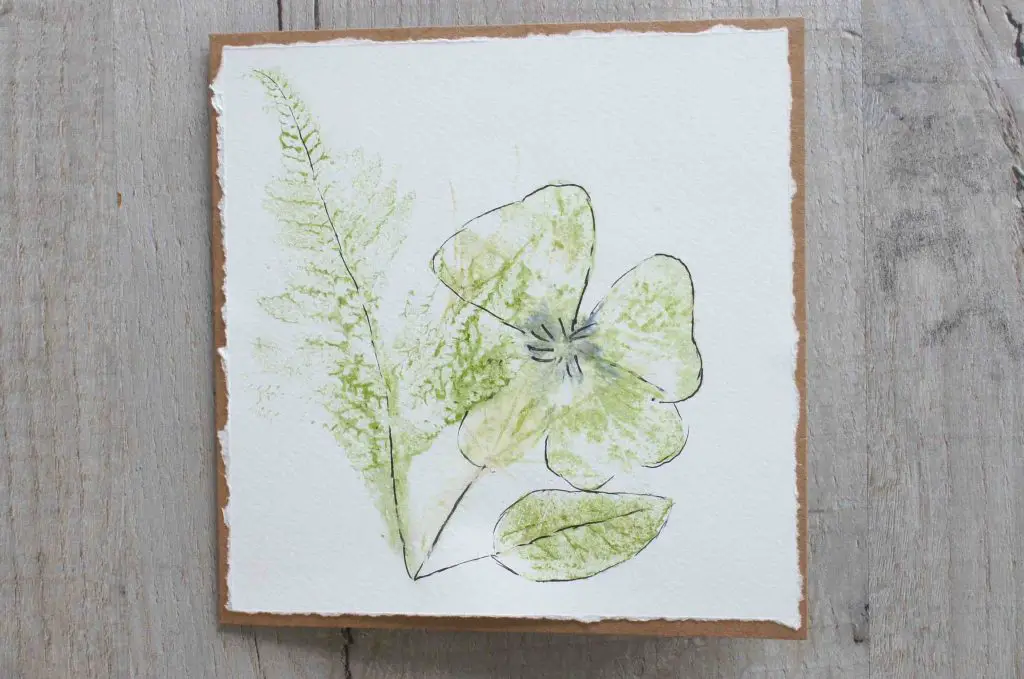
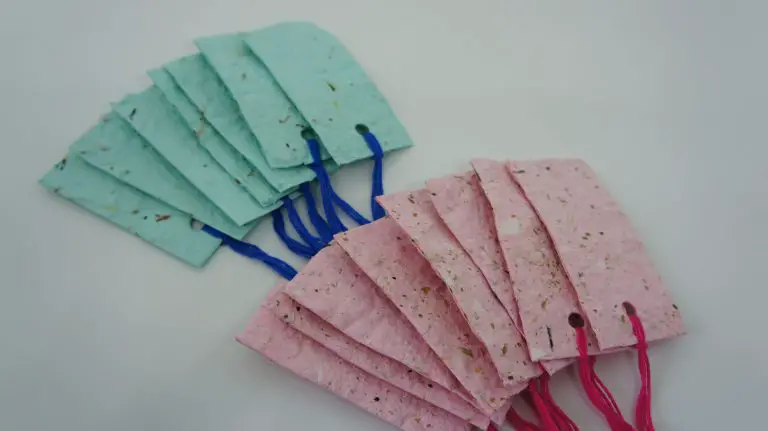
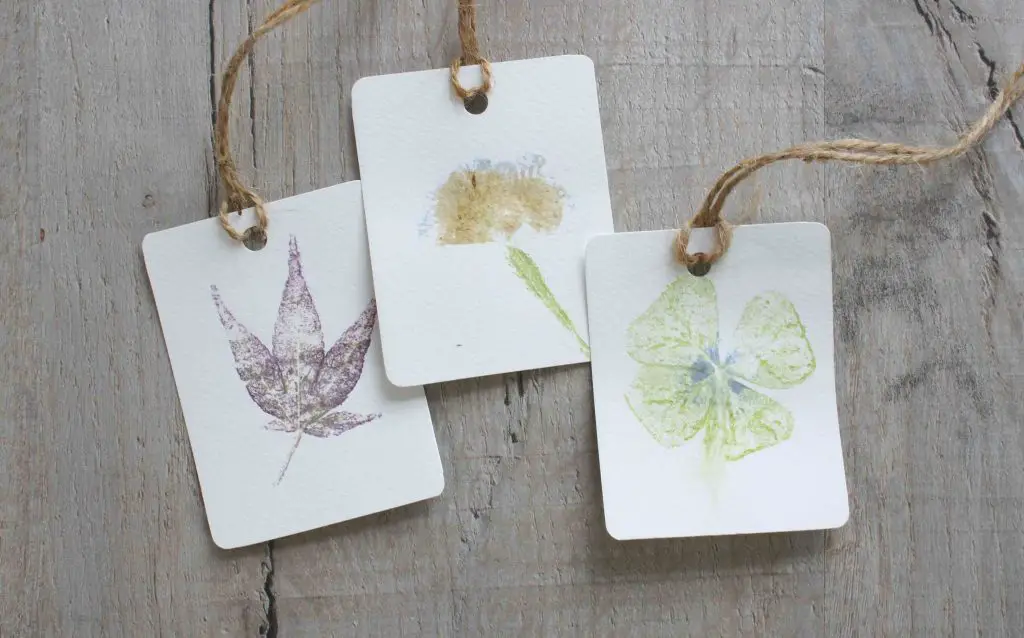
I have also made art, an example of which is at the top of this tutorial and gift tags like these ones here. They are so cute and easy to make as you do not need a difficult arrangement or indeed flowers. Individual leaves look great. How about trying some autumnal leaves?
What next?
If you are looking for some more flower crafts, besides flower pounding on paper, how about pressed flower art or indeed making your own flower press?
As promised, here are all the fabulous nature themed projects from the Monthly Sustainable Craft Challenge Blog Hop:
- Mini Vases Upcycled from Yogurt Bottles
- Eco Friendly Fall Decorative Wreath
- Three Strip Flower Scarf
- Pressed Flower Lantern
- Sea Glass Candle Holder
- DIY Fall Sign Gold Dried Leaves
- Upcycled Project Bag
- Cyanotype Art
Enjoy your crafting and remember to pin this tutorial on Pinterest so you can find your way back here!