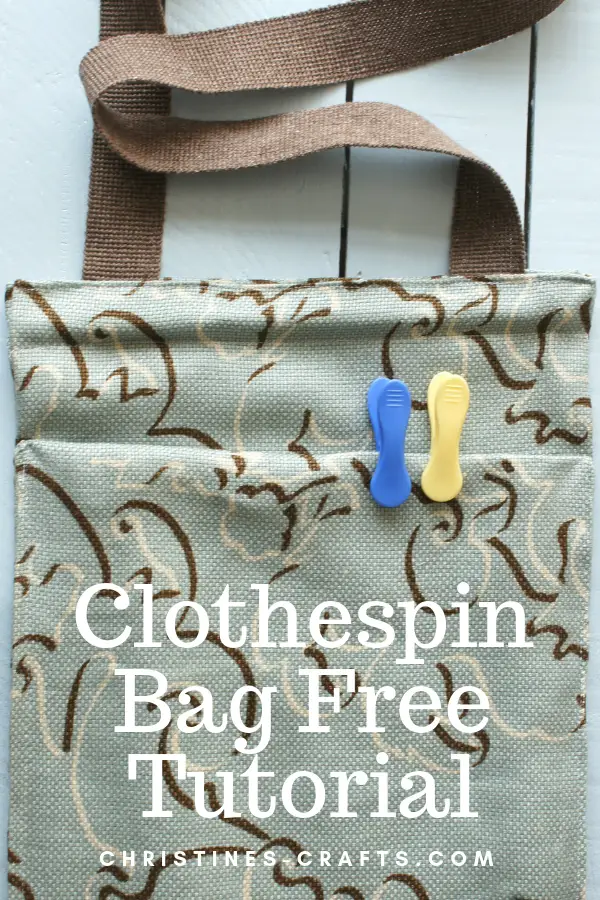
Clothespin / Peg Bag To Make
As an Amazon Associate I earn from qualifying purchases
This page contains affiliate links meaning I earn a commission if you use those links at no cost to you. I only recommend brands I use and trust.
You Will Need:
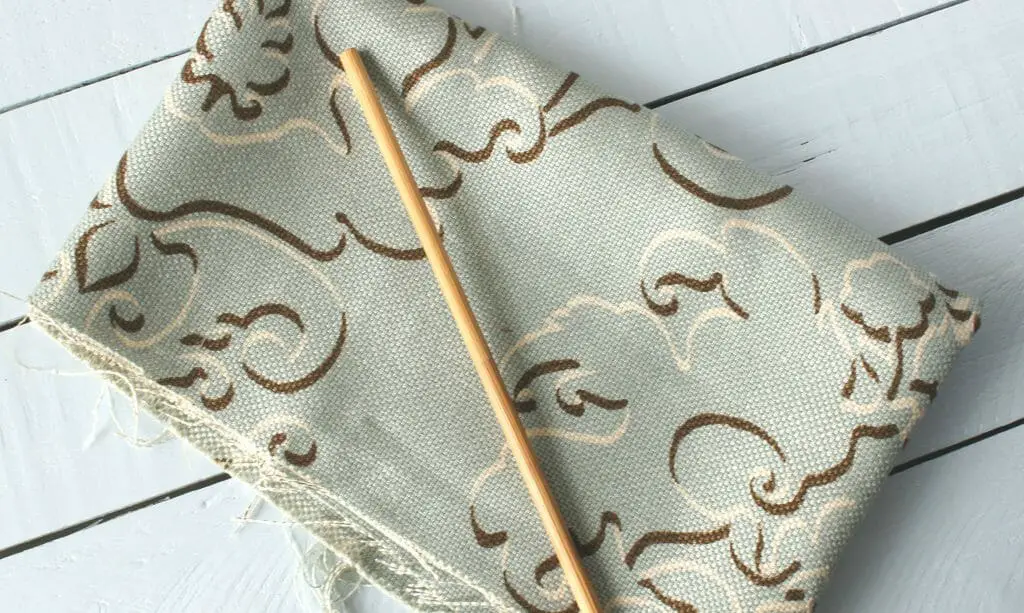
Material of a reasonable thickness. It must be robust enough to cope with regular use so perhaps a canvas or upholstery fabric – at least 135cm by 35cm (53″ by 14″).
Webbing for the handle (length depends on your height but my strap is 120cm (47″) long) My webbing is 4cm (1.5″) wide. Like this at Amazon
Wooden dowel 30cm (12″). Like these at Amazon
Thread and basic sewing supplies.
Video Tutorial
You can also find this video on my YouTube channel.
Step 1: Cut and sew side seams
If not already done cut the dowel to 30cm (12″) and the fabric to 135cm by 35cm (53″ by 14″).
Fold the fabric in half, right sides together, and pin along the sides as shown.
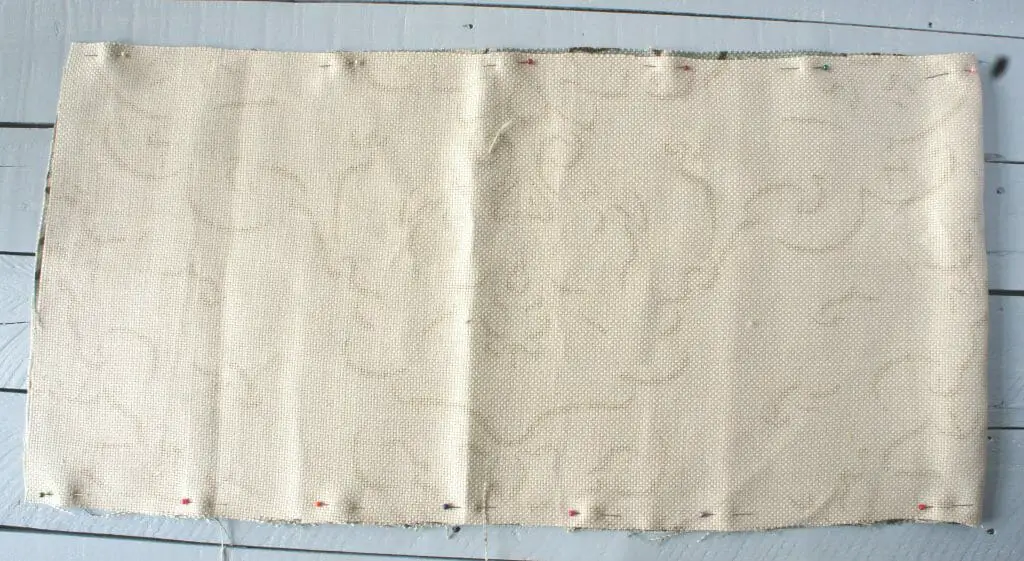
Sew these seams. Cut the corners to remove bulk and then turn the ‘bag’ the right way out. Press it flat.
Step 2: Form dowel pocket
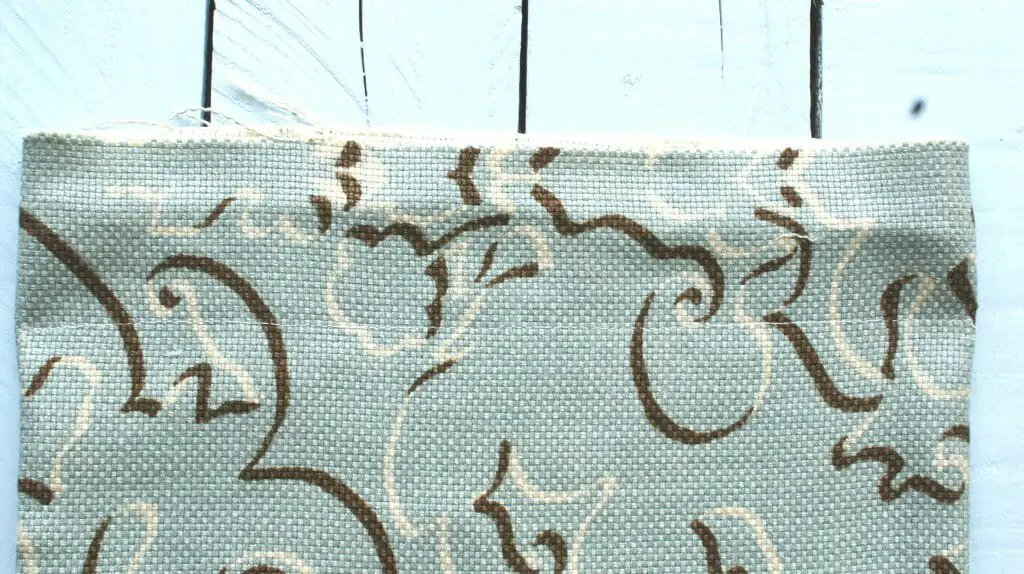
Measure 6cm (2.5″) down from the open end of your ‘bag’ and sew a seam across the bag at this position. Note: if your dowel is really thick you may need to increase this measurement.
Step 3: Insert dowel and secure it.
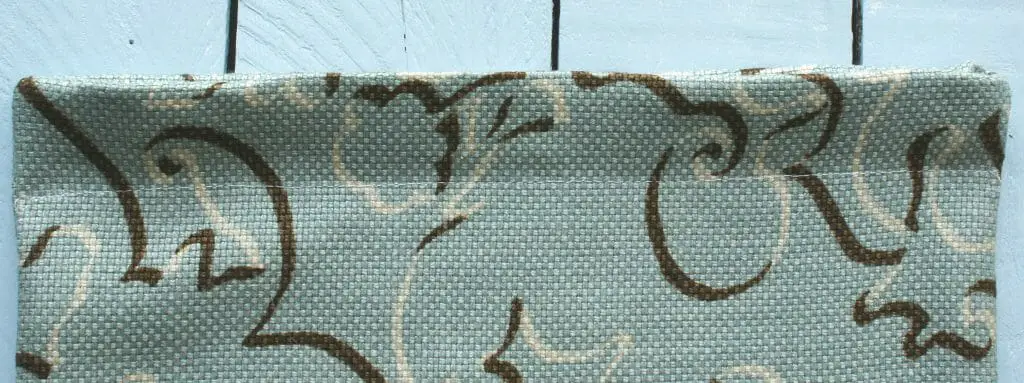
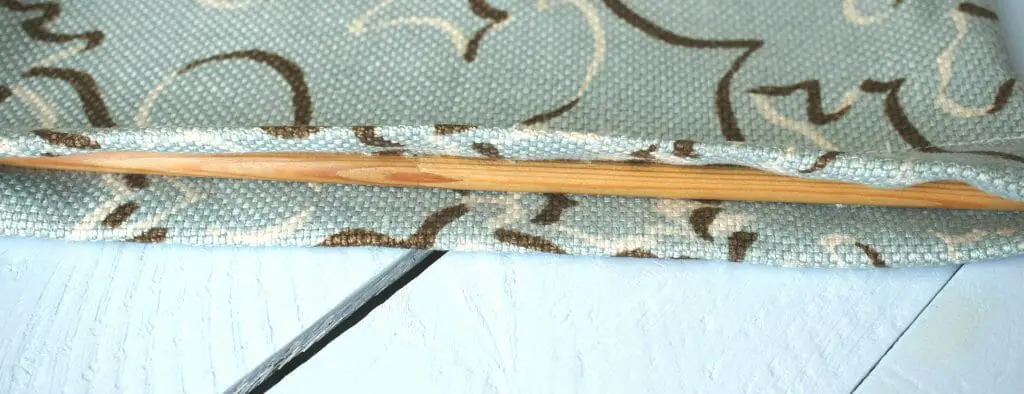
Turn and press a hem of 3cm (1.25″) all the way along the top of the ‘bag’. The hem should face inwards as shown in the pictures below.
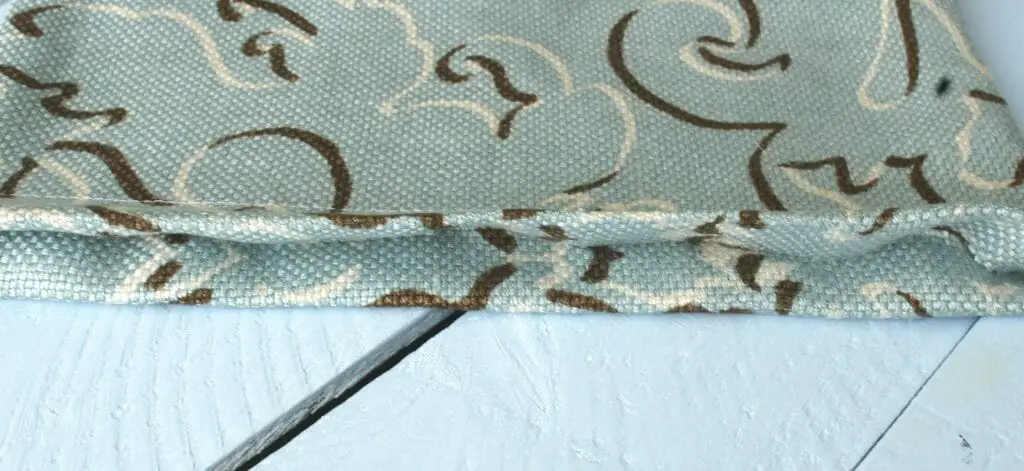
Place the dowel into the pocket that you have made.
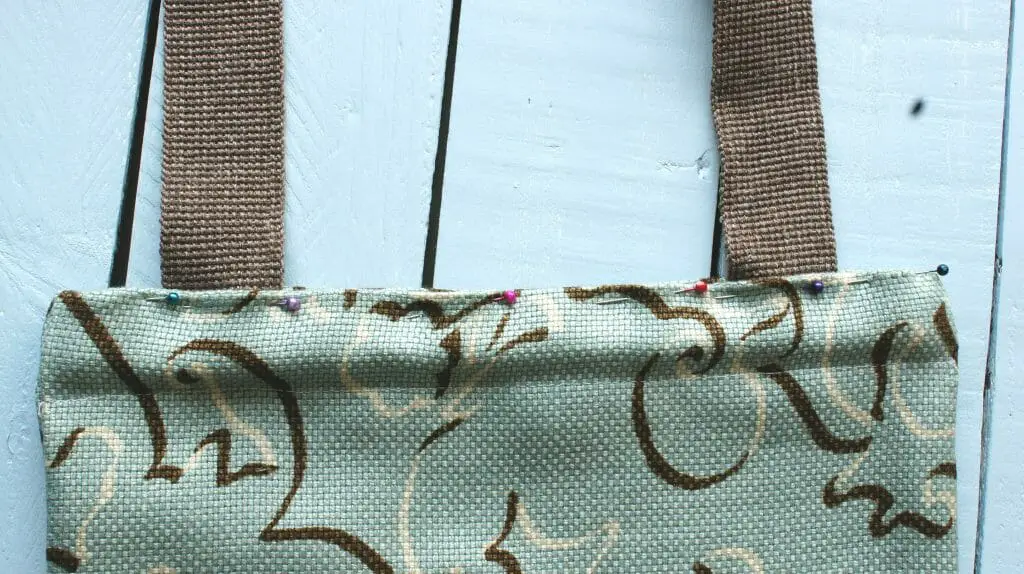
Place the ends of your strap into the pocket at equal distances from each end. I positioned mine 4cm (1.5″) from the edge of the bag. Ensure that they are well inserted so that they get caught in your stitching. Pin and then sew along the top of this pocket trapping the dowel inside. I also sewed over the straps again so that they were really secure.

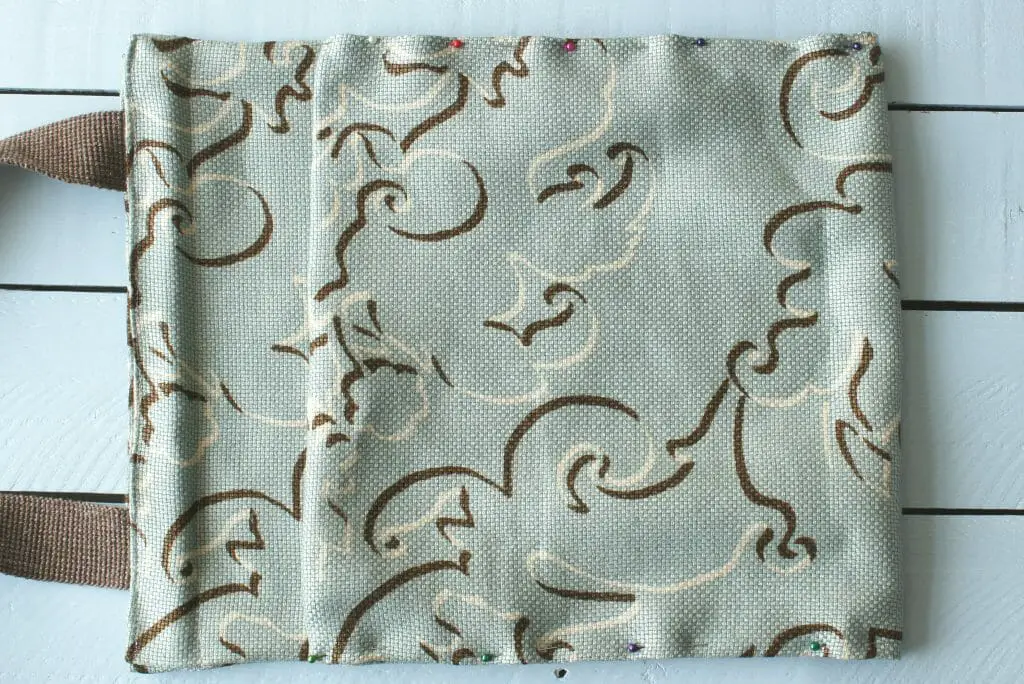
Step 4: Form the pocket
Now to form the bag. Fold the fabric up to form a 28cm (11″) pocket. Pin and sew along these side seams to form the pocket.
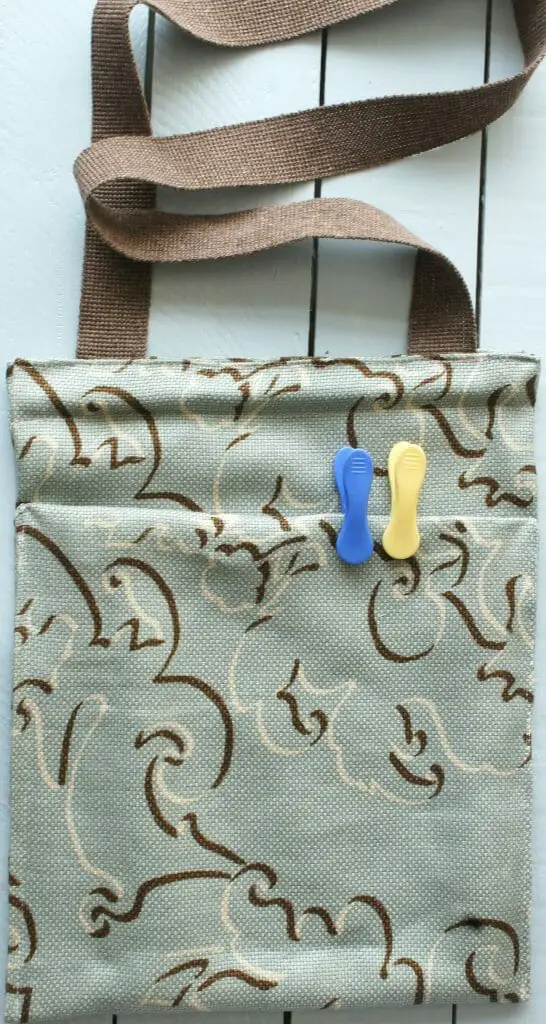
You now have a completed clothespin (or peg) bag. It should last you many years. I have just made this to replace the last one I made (I even used the same dowel) and that one had lasted about 5 years. I expect this one to last longer as the material is thicker.
If you love making items for your home then take a look at some of my other tutorials:
How to make fabric hexagons to decorate cushions, etc.
How to make a doorstop to coordinate with your room.
How to decoupage just about anything
Transform a plant pot using a sewn cover
I hope that you found this tutorial useful and I would love to read your comments below. I read them all and answer everything that I can.
You can follow me on Pinterest at Christine’s Crafts and on Instagram at @christinescraftsuk. Remember to pin this tutorial for later.