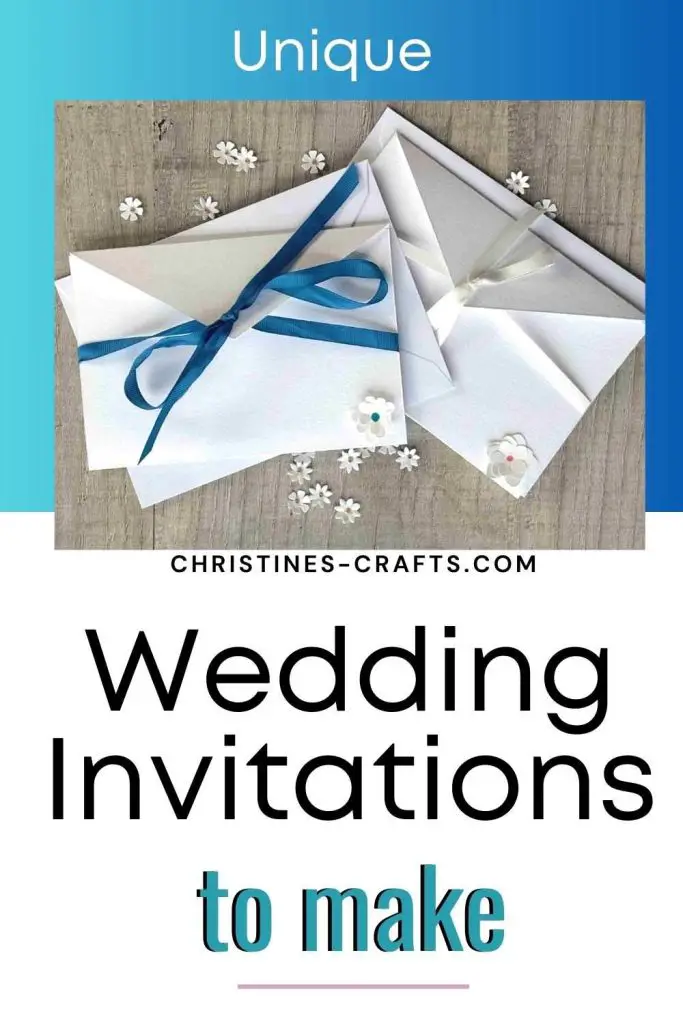
Create Gorgeous Unique DIY Wedding Invitations for your Special Day
As an Amazon Associate I earn from qualifying purchases
Introduction
You wedding is such an important day that starts for your guests with the receiving of their invitation. What could be more special than DIY wedding invitations unique to your wedding? DIY invitations are a great way to set the scene for your wedding and wow your guests. Plus they get to keep a lovely keepsake of your day. I know online invitations are a thing but a handmade invitation is so special.
Learn how to create your own beautiful wedding invitations with this tutorial. Making your own wedding invitations can be a fun and creative way to add a personal touch to your special day. With a few simple materials and some basic design skills, you can create stunning and unique invitations that reflect your personal style.
Going down the DIY route also allows you to achieve so much more while keeping the costs down. You can have truly affordable wedding invitations. If you have looked at professionally printed wedding invitations then you will know what I am talking about!
I will share with you the template that we used for my son’s wedding and show you exactly how to make it really special. You do not have to use the template to use this tutorial.
Planning your DIY Wedding Invitations
Determine your Style and Theme
Before making your invitations you need to have a good idea of the aesthetic and style of your wedding. Your invitations need to complement your big day.
Consider the venue you have chosen and what season it will be. Plus consider how much you want to personalise your invitations and reflect your own personalities.
You will need to consider your budget but as you will see further down, you really can make these invitations without spending very much at all!
One thing to consider with making wedding invitations DIY, is time. You must allow time to design, make and send your invitations in time for your big day.
At the end of the instructions I have included some ideas for developing these wedding invitations depending on how creative you want to get!
What you will need:
Materials
- Card for the invitation printing
- Card for the folder
- Ribbon
- Any decorations (eg paper flowers, sequins, beads, etc)
- Envelopes (the right size)
Equipment
- Ruler & Pencil
- Computer & Printer
- Card / paper trimmer (optional but speeds up the task if you have many to make)
- Glue (I used tacky glue but you could use spray mount adhesive, multi-purpose glue, etc)
- Template in Canva (if you want to use it)
- Hole Punch
Wedding Invitation Video Tutorial
This video is also available on my YouTube channel.
Designing your Wedding Invitations
If you choose to use the template I have included then I will give instructions on that further down.
However you design your invitations you need to consider some key things. Decide on your colour schemes and how you want to use them in your invitations. For example you may want a pink folder and white printed invitations inside.
Decide on the weight and finish of paper / card that you want. If you can, visit a shop that sells supplies and handle some. It will give you an idea what all the weights actually mean. Consider whether you want embossed card or simple matt card.
Think about the size of your invitations. The ones I made fit inside a 5″ by 7″ envelope which are readily available but you can make these any size you like. I will include all my dimensions but feel free to use your own. NOTE: I am working with A4 card here in the UK but you could easily use US letter or indeed any other size.
If you want to add embellishments just consider how large they are and how you will affix them. Plus, it all need to fit in the envelope when assembled.
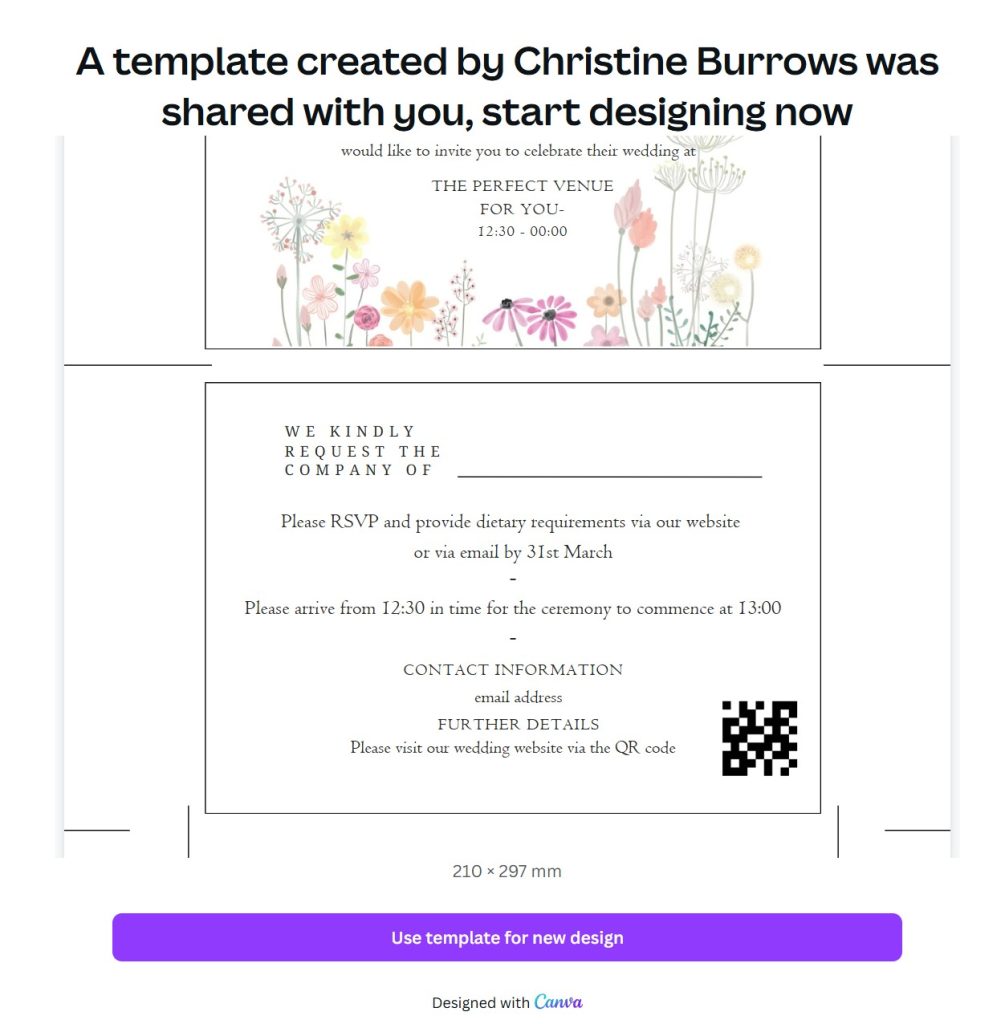
Using the Canva Wedding Invitation Template
Click on the template link above and it will take you to the template in Canva. If you do not have a Canva account you can create a free account. You will not need to share any payment information or anything to open an account.
You will see the option to use the template for a new design. Click on that and you now have your own copy that you can work on. You can change anything you like and simply use it as a base to start from rather than staring at a blank screen. Canva also has templates for wedding invitations DIY that you can use. Explore, have fun and get creative.
Read ahead and decide on all your sizes before you print them out. In fact, I recommend making one invitation and then tweaking your designs to look perfect.
If you are not using the template then design your own invitations and then move onto the next section where we will construct our 3d wedding invitations. Just remember to include all the vital information such as the times, venue, your names, etc.
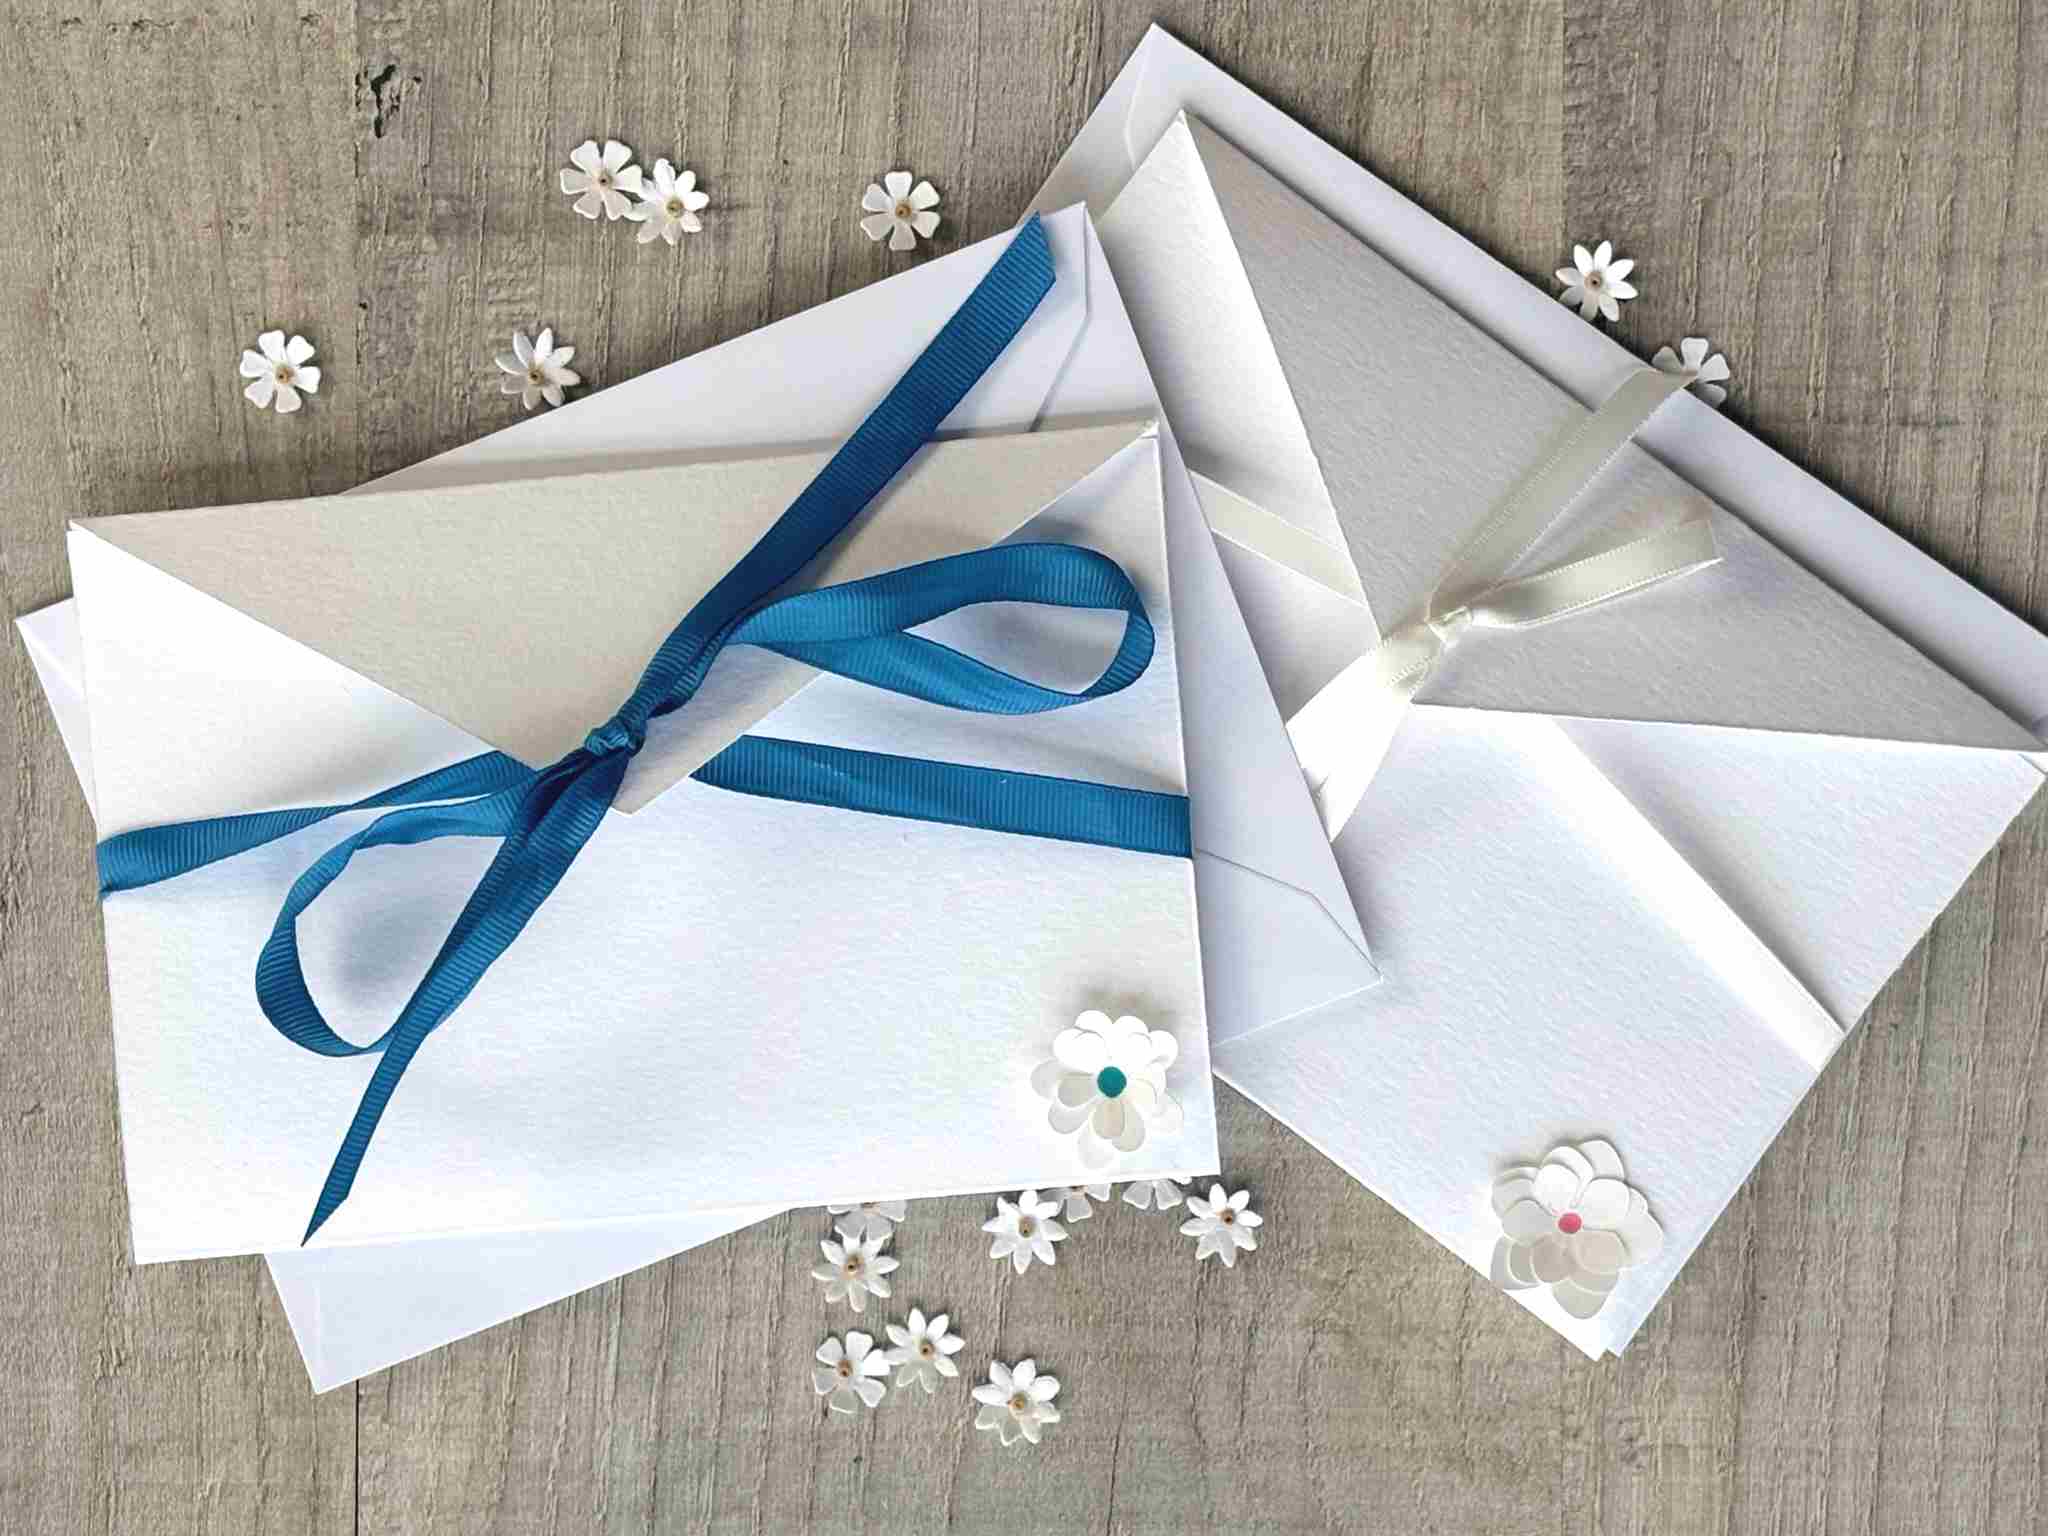
Assemble your DIY Wedding Invitations
These instructions are to make 1 invitation. Once you are happy with yours then you can make them all and start batching the tasks. It will really speed the process up. Do not worry if your first one takes ages!
Decide on your Sizes
As I said earlier I will include my sizes using A4 card and fitting the invitations into 5″ by 7″ envelopes but you can use any size you like.
Take your intended card for the folder and measure it up to make a template. I made a template out of thicker card so that it was easier to draw around. I decided the sizes based on the invitation fitting in the envelope and also the flap looking a good size. My measurements are shown on the picture below.
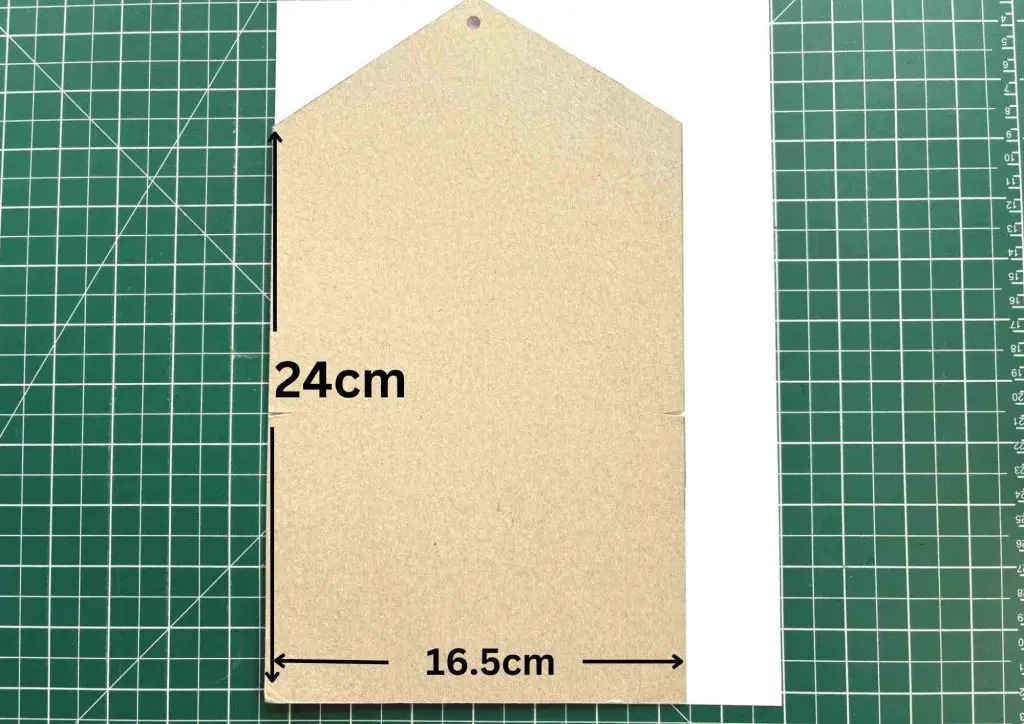
The top of the point of the flap is in the centre of the template. The hole is directly below that as far down as you want it to be.
You can adjust the size of your printed sections to fit your measurements if you are not using mine.
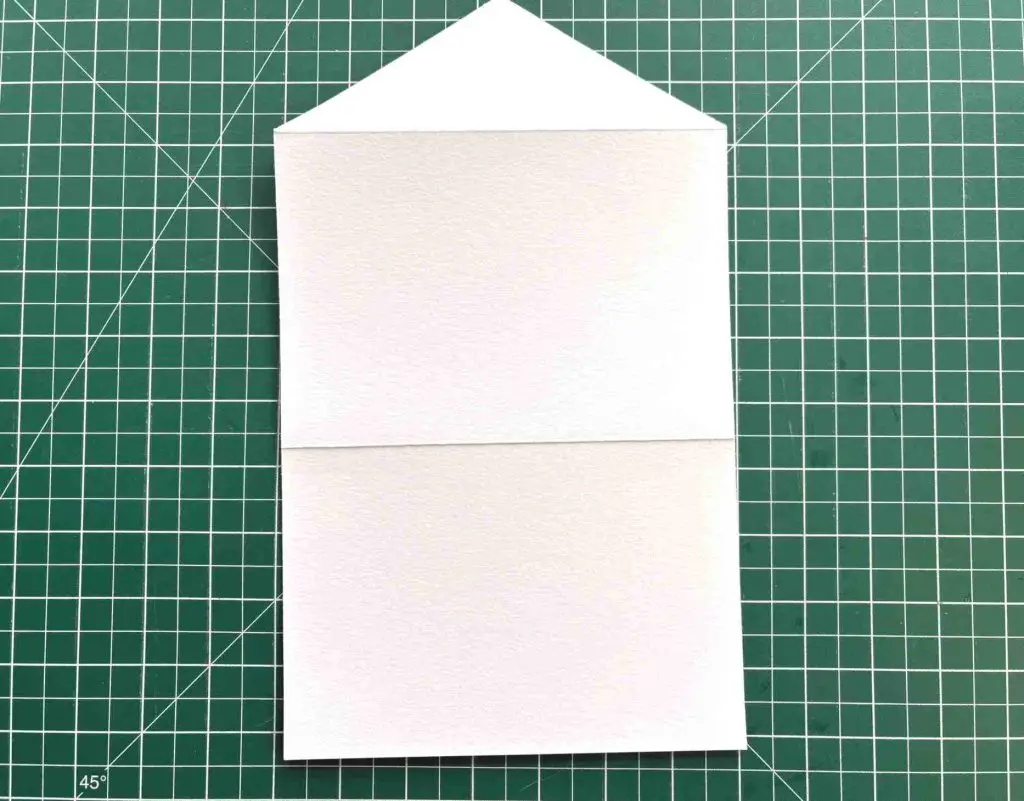
Create your Folder
Once you have a template draw around it onto the card that you chose for your folder. Cut it out and punch the hole. This is much easier if you have a single hole punch but if you don’t you can use a normal 2 hole punch and take care to line it up.
Now you need to score your fold lines. You can use a scoring board which makes this super quick and easy but if you don’t have one you can use a ruler and the back of your scissors.
Mark the card slightly at the edge with a light pencil mark to show where you will fold. As the height of the rectangular section is 24cm I folded it at 11.8cm up from the bottom. This allows the card to fold up and fit nicely under the flap. Obviously the other fold is at the base of the flap section.
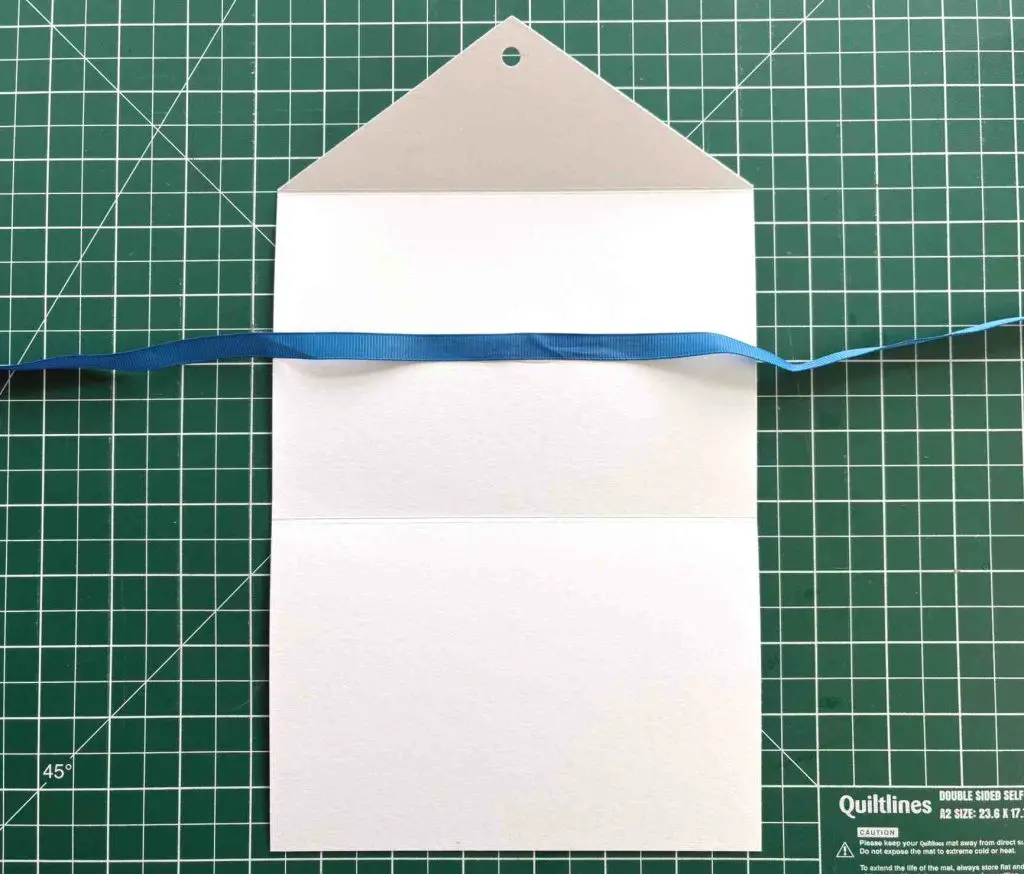
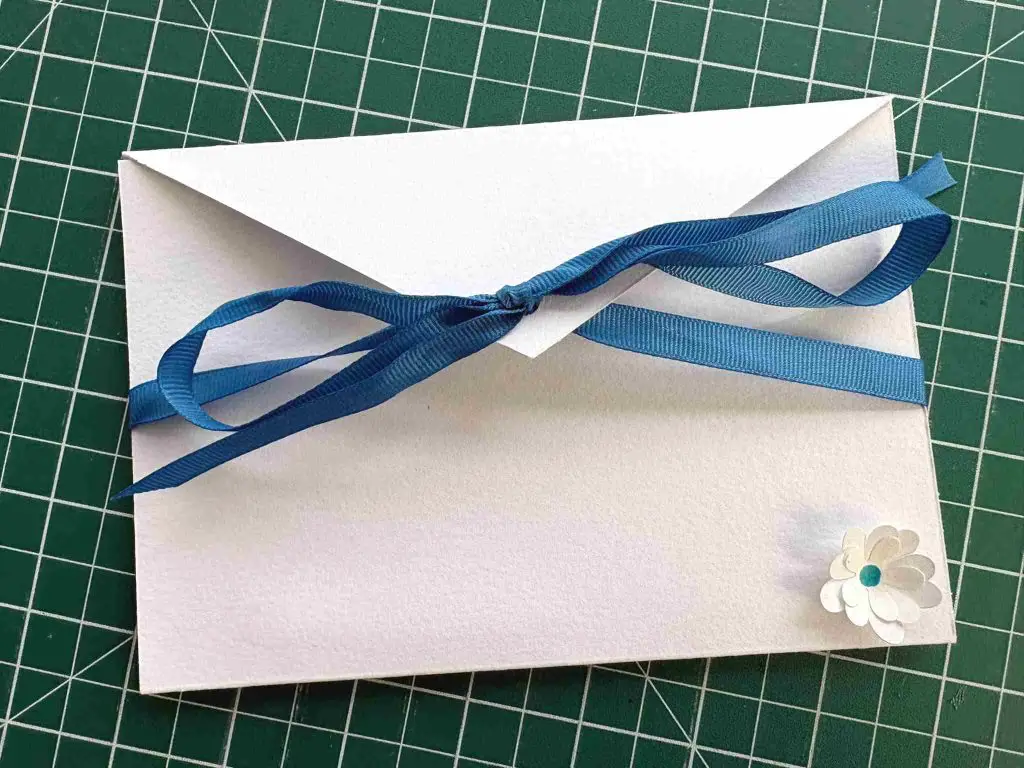
It is now time to attach the ribbon to the folder. Decide on the length of ribbon that will wrap around the flap and tie neatly. In my case, it is cut at 85cm. You will need more ribbon than you think!
Simply add a small amount of glue and place the centre of your ribbon along the centre of the top section of the folder. This should approximately line up with the hole in your flap. If it does not, move it so that it does!
Create your Invitation Section
Print out your invitations and cut them down to size. You can leave a border on them as I have done or cut them to the exact size. It is your choice.
Glue them in place on the 2 sections of the folder. Ideally centrally but I was always advised that if something is placed slightly nearer the top than the bottom then it will look good!!
Let the glue dry. It can be advantageous to place it under a heavy book (or similar) until it dries.
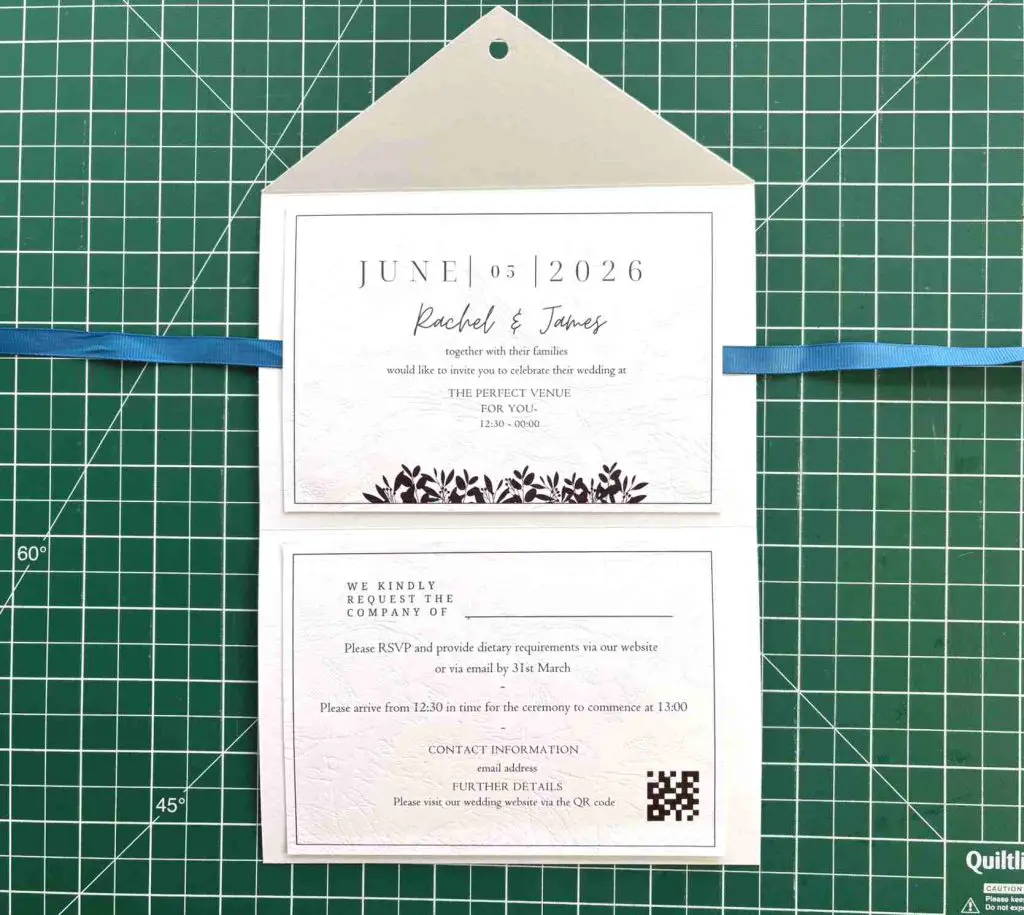
Embellishments
Now is the time to add any extra elements that you wish to add. Paper flowers that attach in the middle only can add a great 3d effect for minimal cost. You can add these inside and outside the invitation.
Then you are finished! Once you are happy with everything go ahead and produce as many as you need. Just a quick heads up to check it fits in the envelope before you make any more!
Ideas for Developing these Wedding Invitations
- Add wax seals to the envelopes
- Use a rubber stamp to add detail
- Use embossed card for either the invitations or the folder
- Get stickers or a rubber stamp with your initials on
- Get creative with the fonts
- Use a Cricut (or similar) to create elements.
- Use a QR code to link to a wedding website that you set up
- Use calligraphy to write the names on (and the envelopes)
- Print each invitation separately and include the names of who you are inviting
- Use coloured card for the folder
- Use an ink pad to colour the edge of the card as shown below

Whatever decisions you make you will create truly unique wedding invitations that your guests will treasure.
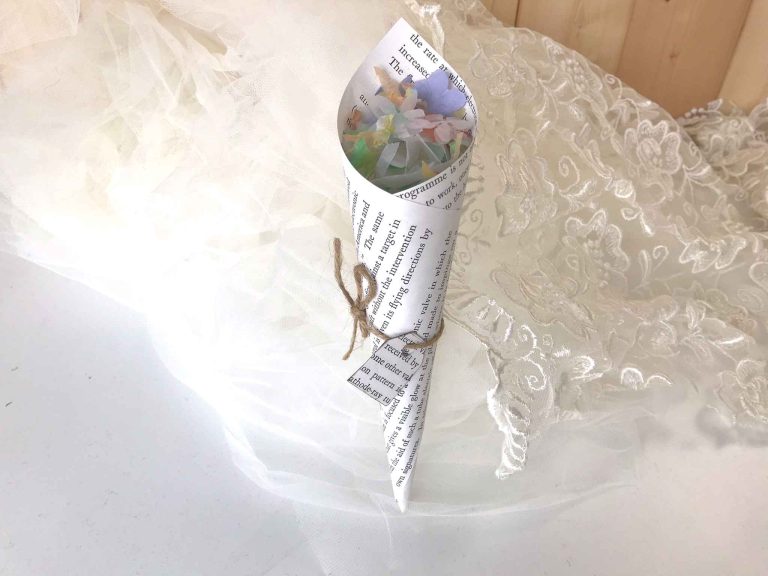
If you are looking for some more DIY wedding ideas then what about DIY paper flowers or perhaps some confetti cones? All are super easy and effective for your day.
I would love to hear about your invitations in the comments section below.
Remember to add this to your Pinterest Wedding board so that you can find it again.