DIY Paper Stained Glass: A Step-by-Step Guide to Paper Artistry
As an Amazon Associate I earn from qualifying purchases
Paper stained glass is not a new idea and can be done lots of different ways. It is a great craft for kids to do but I am going to focus on covering whole windows to make a beautiful display. It is really simple to do and you do not need to be an artist – trust me I am not!
Tissue paper stained glass is so easy to do that you can create new scenes whenever you want and simply replace the old ones. I love doing them for Christmas and leaving the light on in that room in an evening. Fabulous festive display!
At the end I will show you an alternative type of paper stained glass window that is also very effective!
So, let’s make your tissue paper stained glass window.
This page contains affiliate links meaning I earn a little commission if you use those links at no cost to you. I only recommend brands I use and trust.
You will need:
- Coloured tissue paper
- Black paper
- Scissors or craft knife and cutting mat
- Tape
- Pencil
- Simple image to use (unless you can draw well)
Choose your Image & Draw it
If you want to make a large stained glass picture like I have then you will probably have to stick your pieces of black paper together. You want a piece of black paper the size of your window. The smaller they are the more sticking you will have to do!
Select an image that you want to show on your window. My advice here is keep it simple. Firstly it is easier to do and secondly it is actually more effective. Tiny details get lost when people are looking at a whole window.
If you are an artist simply draw the picture you want the size you want on the black paper using your pencil.
I printed off the images I found online normal size and then I copied them up onto my black paper. There was nothing too technical about this but I did measure some items eg the full height and width of the Christmas stocking. Then I measured the size of my paper that I had printed onto and the paper that I was drawing onto and worked out the scale factor. This simply allowed me to keep the dimensions in proportion as I am not great at drawing.
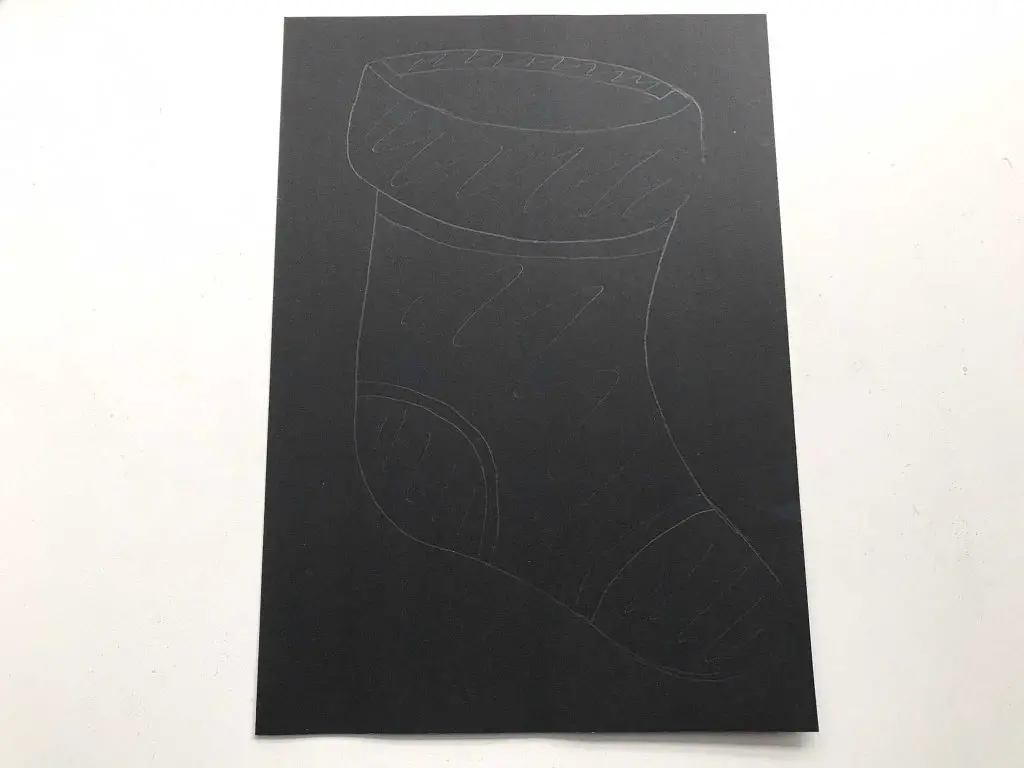
Identify which areas you want to cut out and scribble in them. Take your time doing this as it will really make or break your design. Make sure any sections you are keeping are not too narrow as you do not want them to tear. Also make sure that they are attached to the overall page – no orphaned areas as they will simply drop off. If you really want a black section not attached to anything else then I suggest you glue it back on later.
Cut out Your Image
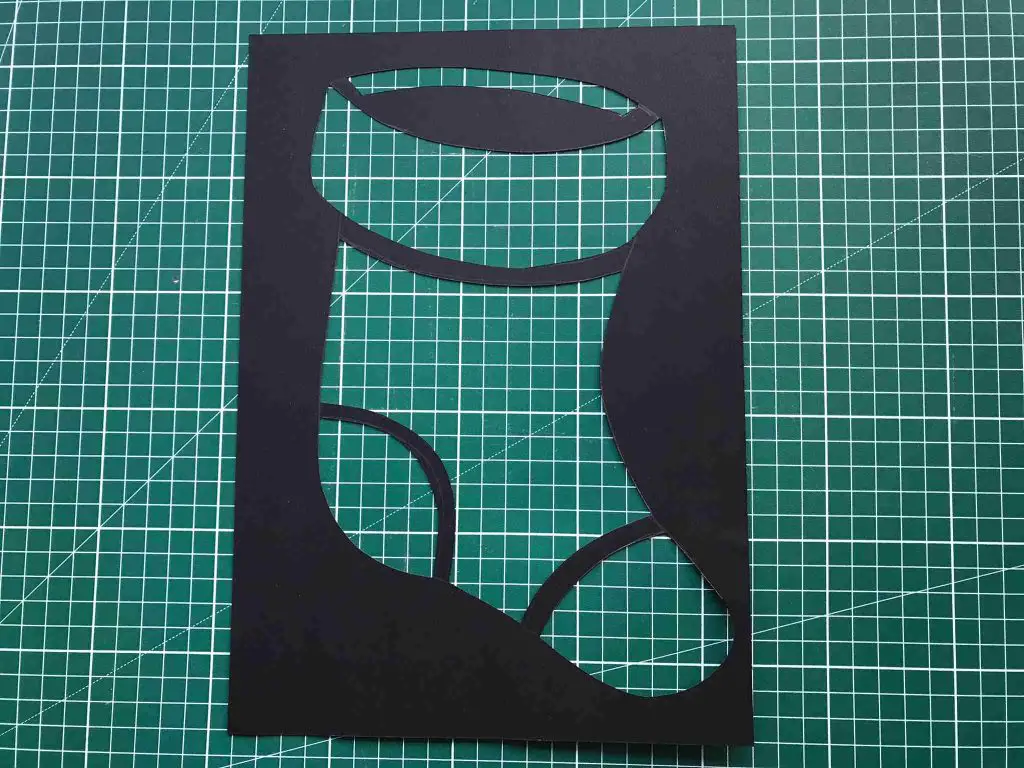
Now it is time to cut out your areas that will be tissue paper stained glass. It is easiest with a craft knife and cutting mat but if you do not have one do not worry. Use sharp pointed scissors and always start in the centre of the area you want to cut out.
However you are cutting out the areas take your time and make sure you only cut out the areas that you marked up. This is the most time consuming part of the project but well worthwhile.
Add the Tissue Paper
Now it is time to add your tissue paper pieces. Simply select the colour you want and place it over the back of your design. Draw around the area you want to cover adding a small amount extra all the way around. Then cut out that shape.
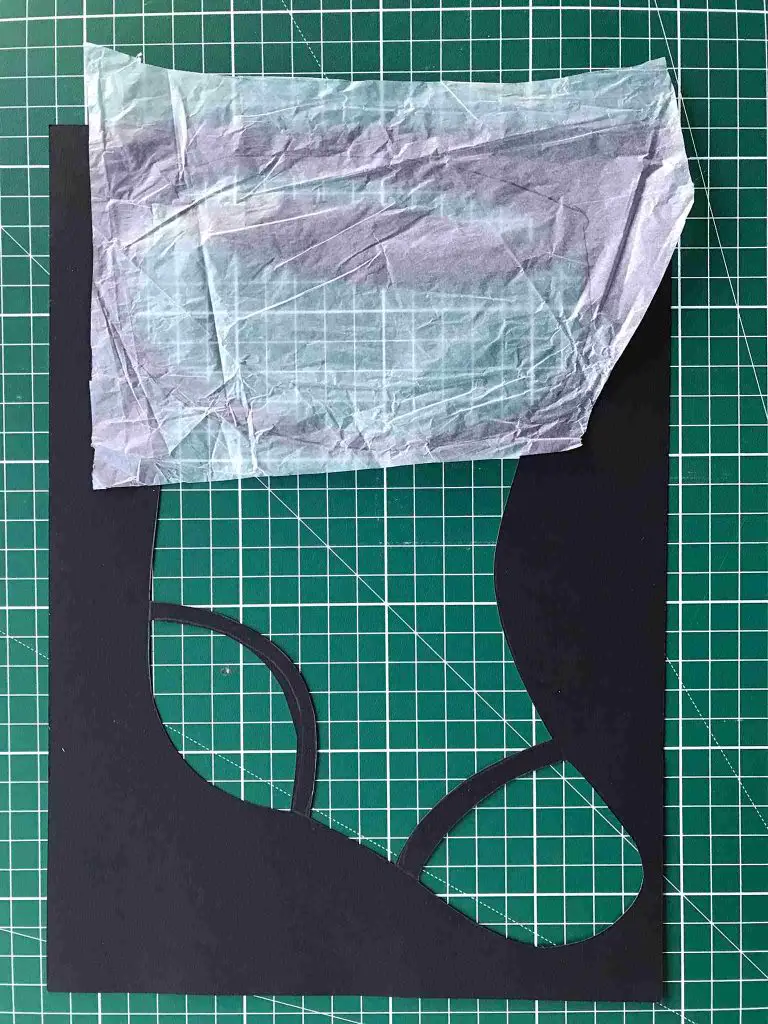
Simply place the shape onto the black paper in the correct place and tape it in place. Make sure you are working on the back of your image. You should now have covered the area you want to cover but it should not poke out into any of the other ‘holes’.
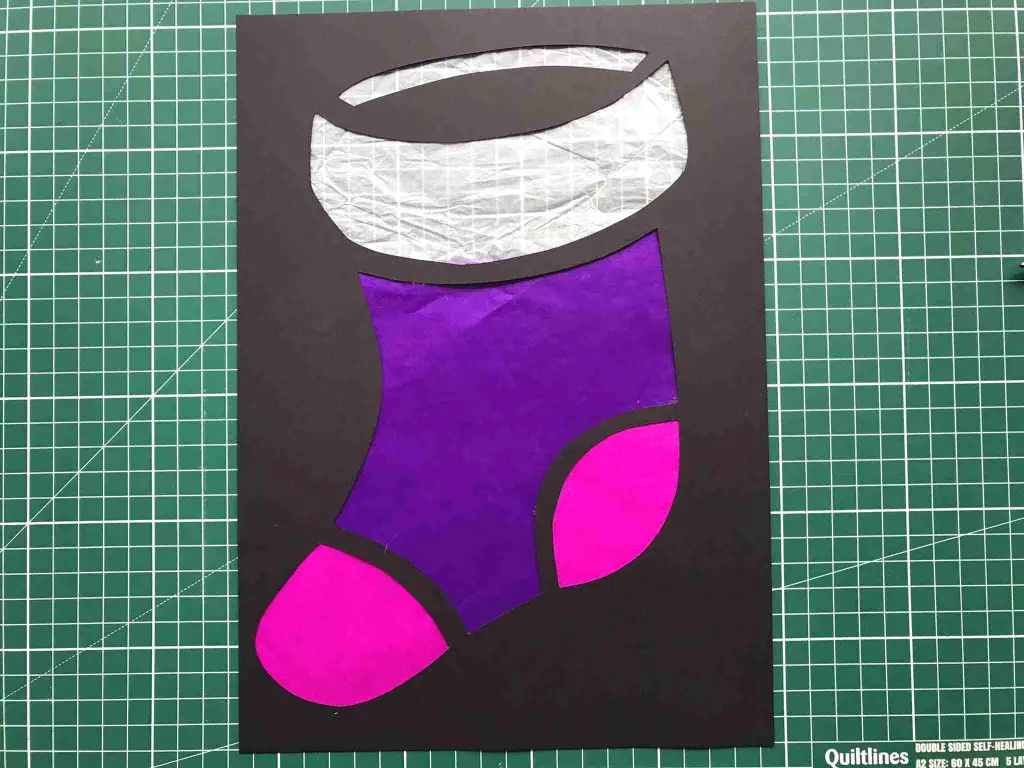
Continue in this way until you have covered all your design. Then turn it over and it should look amazing. I do recommend turning it over after each piece to check you are achieving the desired effect and then adapt your pieces as you go along.
Now all you have to do is tape it in your window, leave the light on and let everyone enjoy it!
Alternative Tissue Paper Stained Glass Windows
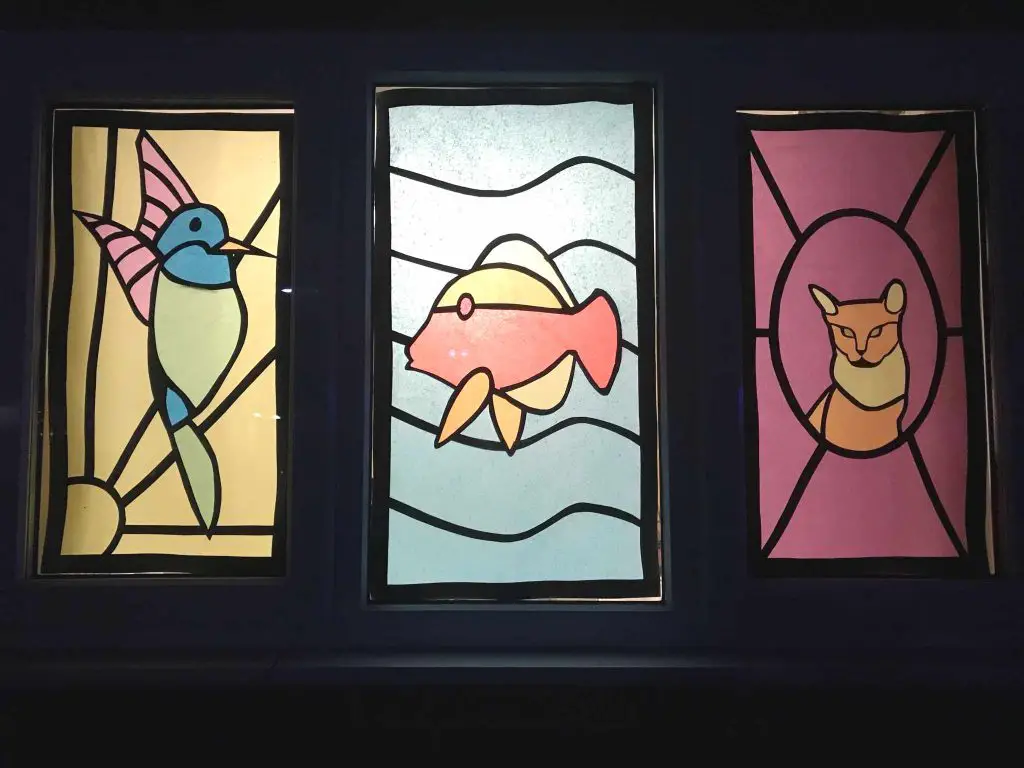
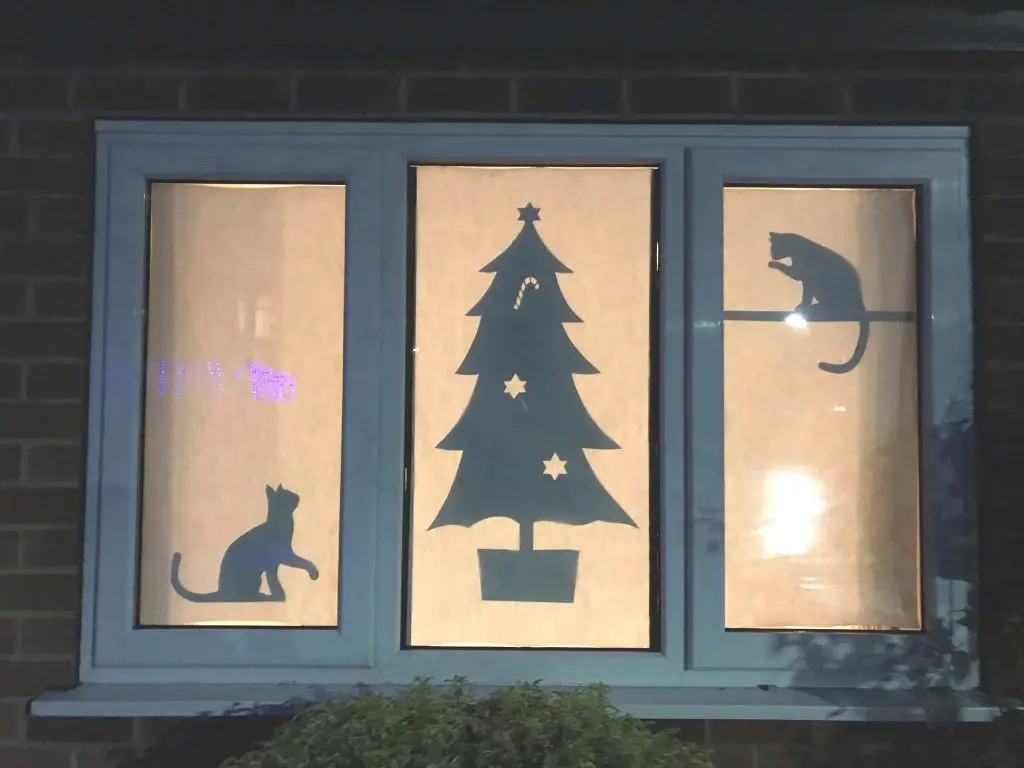
An alternative way to make tissue paper stained glass windows is to use a large sheet of tissue paper as the window and add black detailing. Here are 2 examples of me doing just that.
You can use bright coloured tissue papers as I have here for a similar effect to the one above. It is simply lighter which is much nicer in the room during the day.
Or you can go for a simple silhouette image like I did here. This can be very stylish and effective. It all depends what effect you are looking for.
Hints and Tips:
- Take your time choosing a suitable simple image
- Draw it carefully and try to keep the proportions
- Mark the areas to cut out clearly
- Take your time and enjoy the process
- Check each piece of tissue paper only covers the area you want before you tape it
And next …
I hope that I have given you some great ideas here and that you feel inspired to create your own tissue paper stained glass scenes.
If you are decorating for Christmas take a look at my Christmas section which is packed with loads of Christmas decorating ideas.
I would love to hear from you in the comments section below if you make your own stained glass windows and what themes you choose.
Remember you can pin this on Pinterest so that you can find it later to inspire you.


