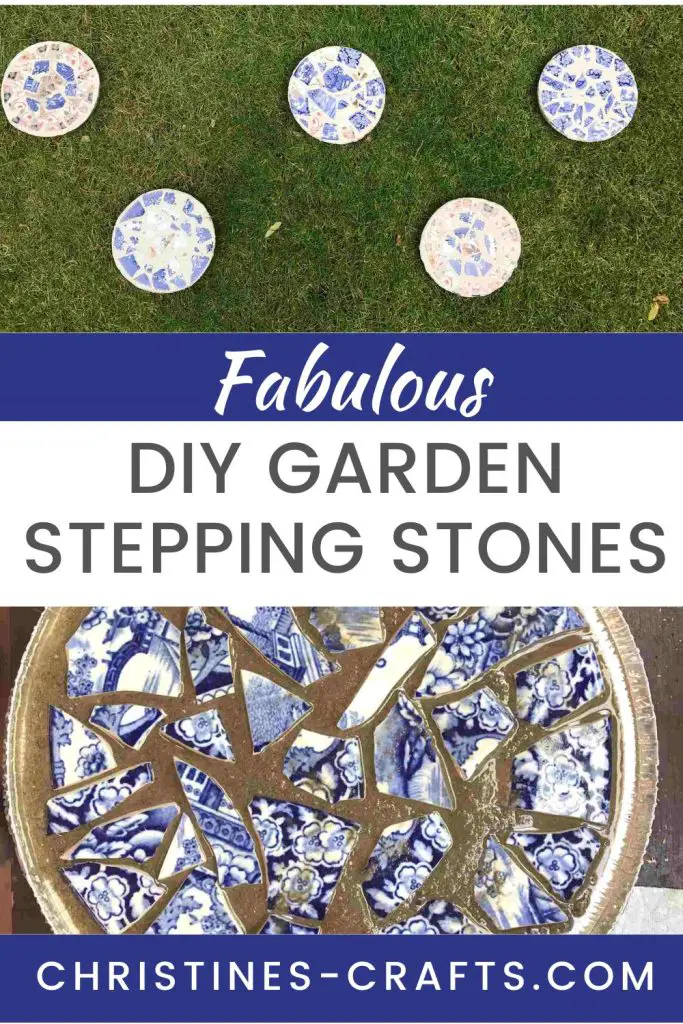
How to upcycle old crockery into fabulous DIY garden stepping stones
As an Amazon Associate I earn from qualifying purchases
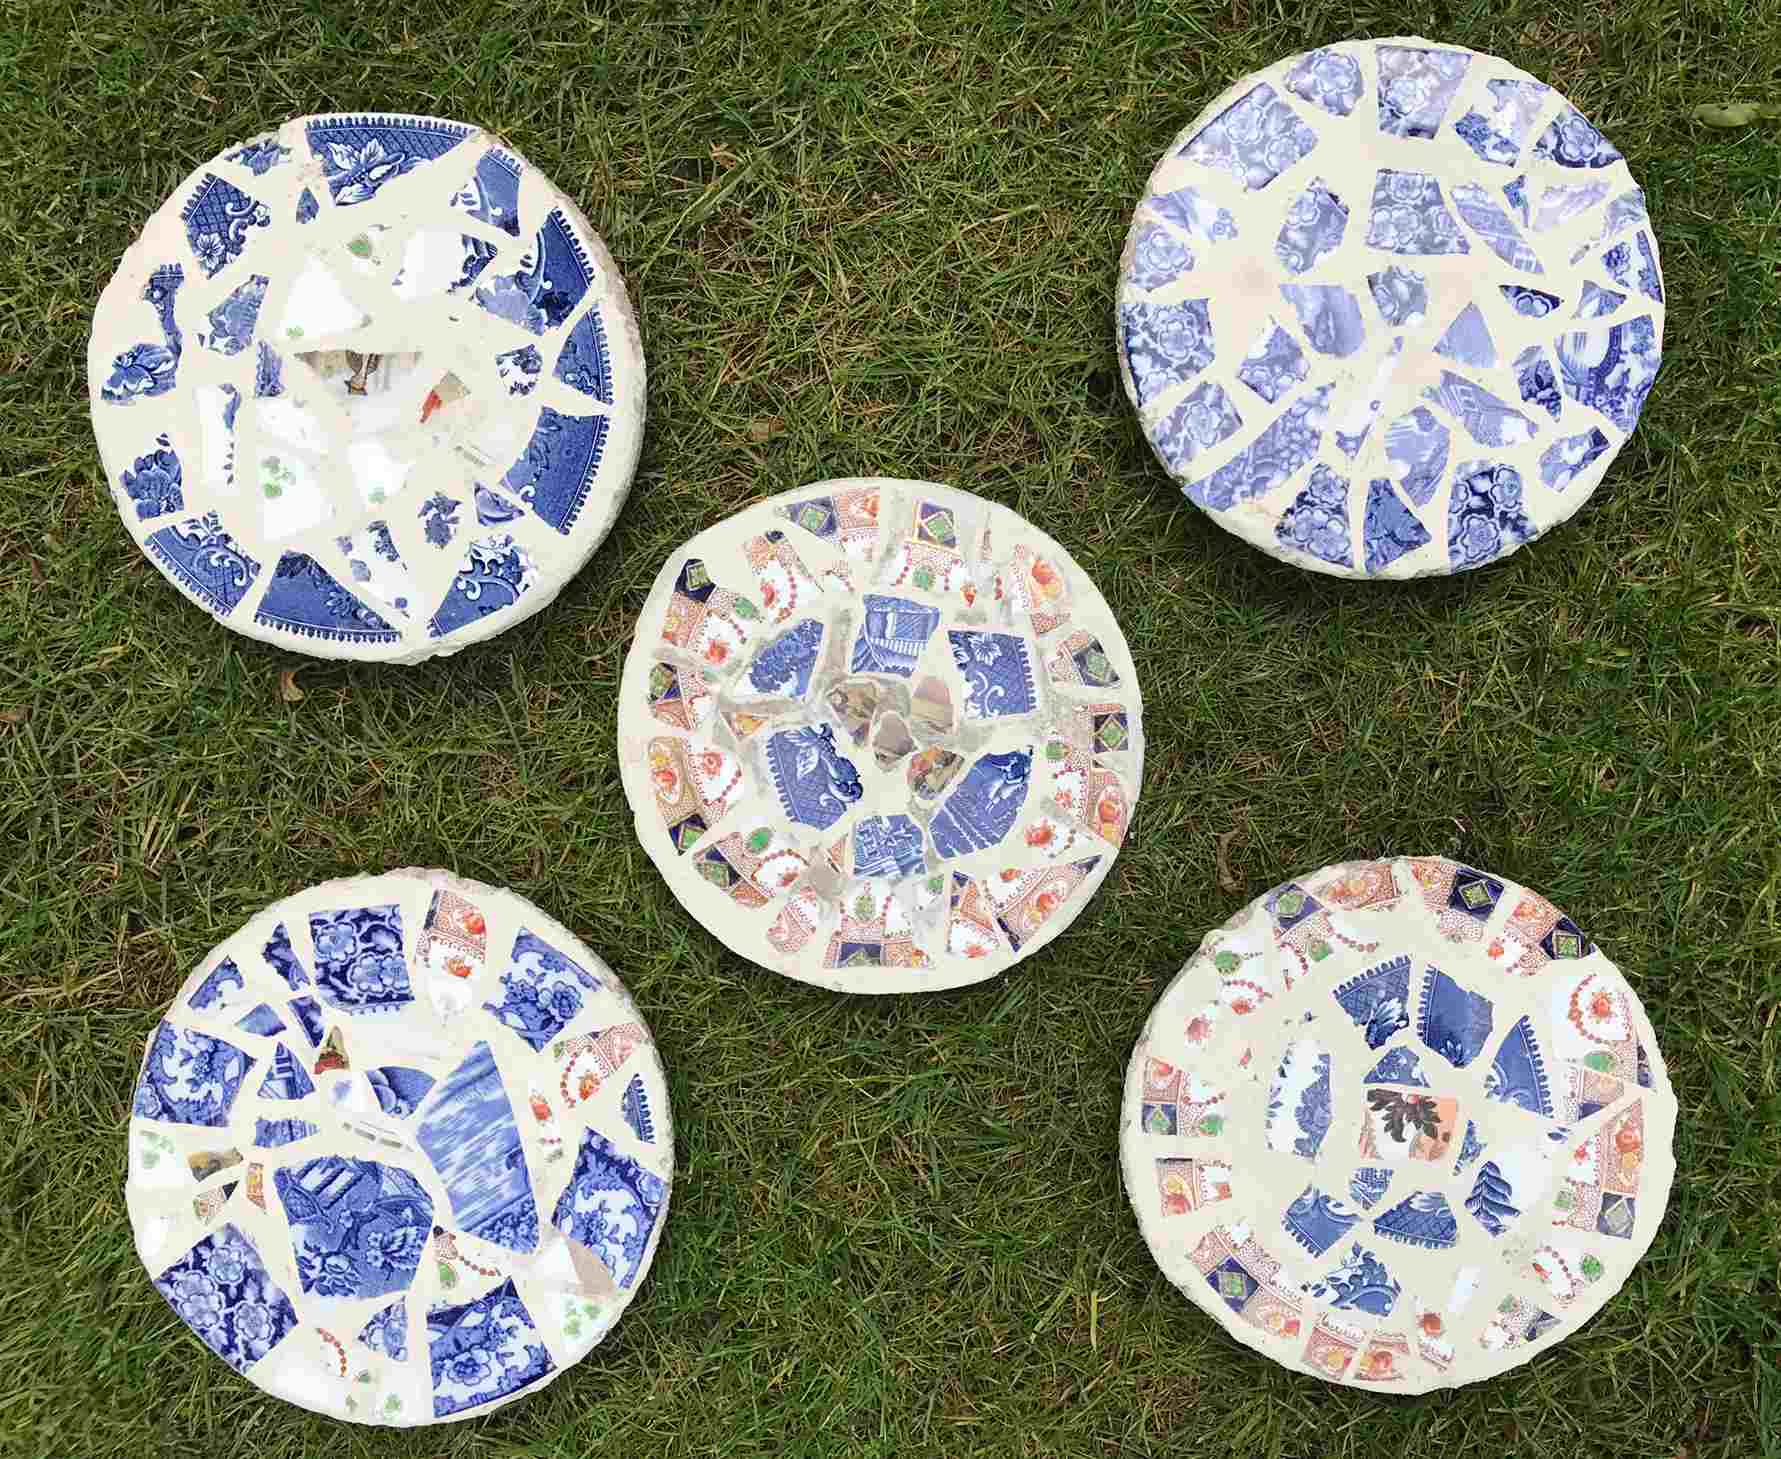
So, we all have old chipped crockery or maybe we inherit some old plates that we like but will never use. You can easily upcycle them into garden stepping stones no matter how badly damaged they may be. Whether you want grass stepping stones or pathways stepping stones these diy mosaic stepping stones are for you.
You can get incredibly creative and use any size crockery pieces that you like. These are your design! I used plates from my mum’s house so some of them have sentimental value and I am glad to see them live on in this project. So, if you want to know how to make stepping stones with cement and old crockery then read on.
Note: I was working in my garage throughout this project so the pictures reflect the rough and ready environment!
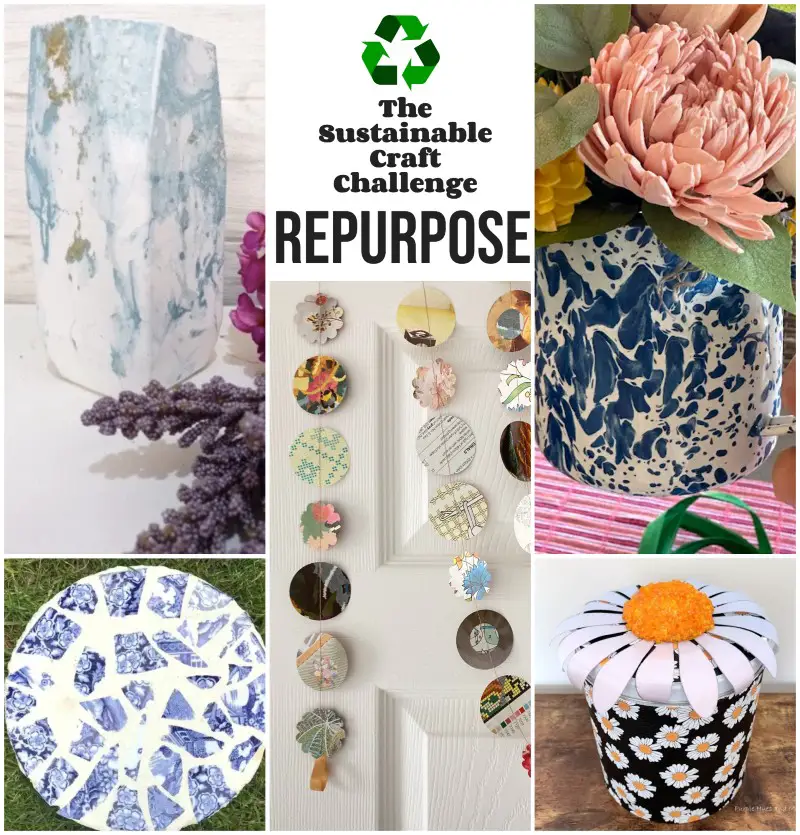
This tutorial is part of the Sustainable Craft Challenge Blog Hop for August. The theme for the challenge this month is ‘Repurpose’. I thought using crockery to make stepping stones fitted perfectly. At the end of the tutorial you will find all the other projects to try. I really recommend taking a look!
This page contains affiliate links meaning I earn a little commission if you use those links at no cost to you. I only recommend brands I use and trust.
You will need:
- Old crockery
- Cement
- Sand (sharp or builders sand or a combination, whatever you have)
- Water
- Grout (optional)
- Foil Pie Trays (to use as moulds)
NOTE: I have seen people try this with quick drying concrete as is often used for DIY posts but it dries too quickly and actually makes it hard to get a good finish.
Design your Stepping Stones
Your first step is to design your stepping stones and this will depend on what crockery you have available. Consider your design before you break your crockery. Then, you can aim for pieces as large or as small as you want. It may not work out like that but you can try.
Be very careful breaking up tour crockery. I placed mine inside a plastic bag, one piece at a time, and then hit the bag with a hammer. Then, I checked the size of the pieces and then hit it again if necessary. I must confess I had mixed feelings about this step. It felt so wrong but yet I really enjoyed it!
Once you have a selection of crockery pieces then arrange them into your chosen design. I used the lids of the foil trays to plan my designs. If yours do not have any simply draw round one and cut out to use as a guide.

Create your Outdoor Stepping Stones
You now need to mix your cement. It is a good idea to wear gloves when handling cement and take care not to breath it in. A dust mask is a great idea too! I used a 1 part cement to 4 parts sand mix which set really well but not too quickly. Add water until it is firm but you can press your crockery into it. There is no real measure that I can give you here! It is not a problem if it is a bit too wet so long as your crockery pieces do not sink too far.
If you want to grout your stepping stones then you need to keep the crockery proud of the surface of the concrete so that you can grout between the pieces. If you don’t want to grout then you will need to be able to press your crockery into the concrete far enough to get a reasonably flat surface. However you do not want it to sink!
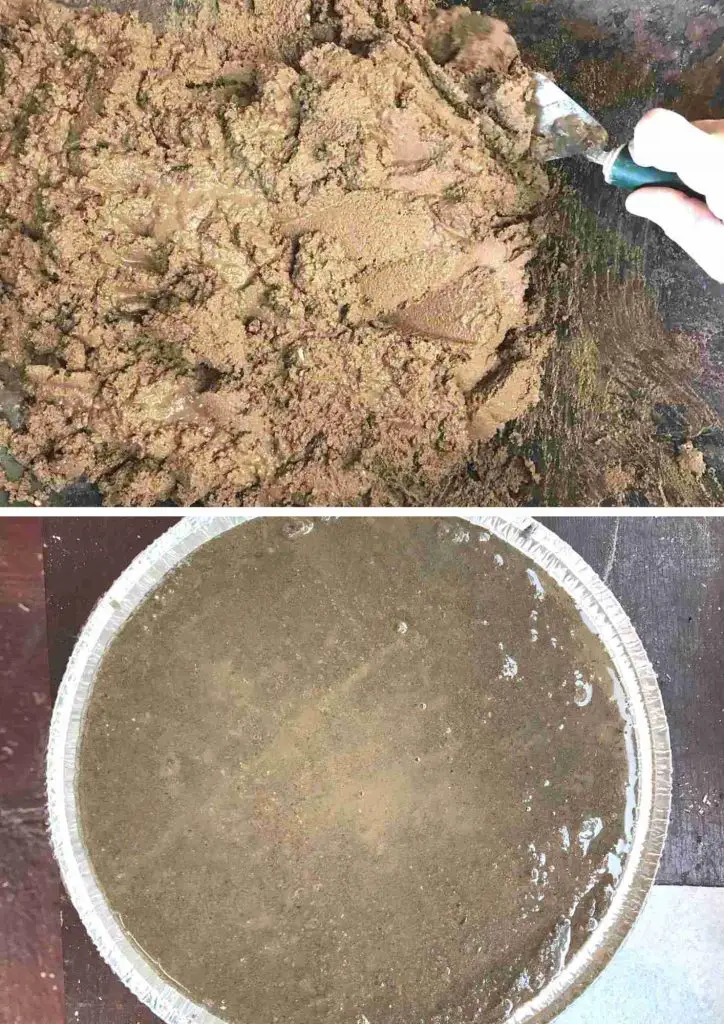
Once you are happy with your cement add some to each foil tray. How deep is up to you and depends on your trays. But you do need your stepping stones to be at least 1.5″ deep and ideally 2″ deep so that they are not too vulnerable to cracking.
Immediately add your crockery pieces using your design as a guide. You will find that you adjust it and change your mind but it really does help you to get a good result quickly. Remember that your cement is drying all the time. This is why quick drying cement is not a great idea!
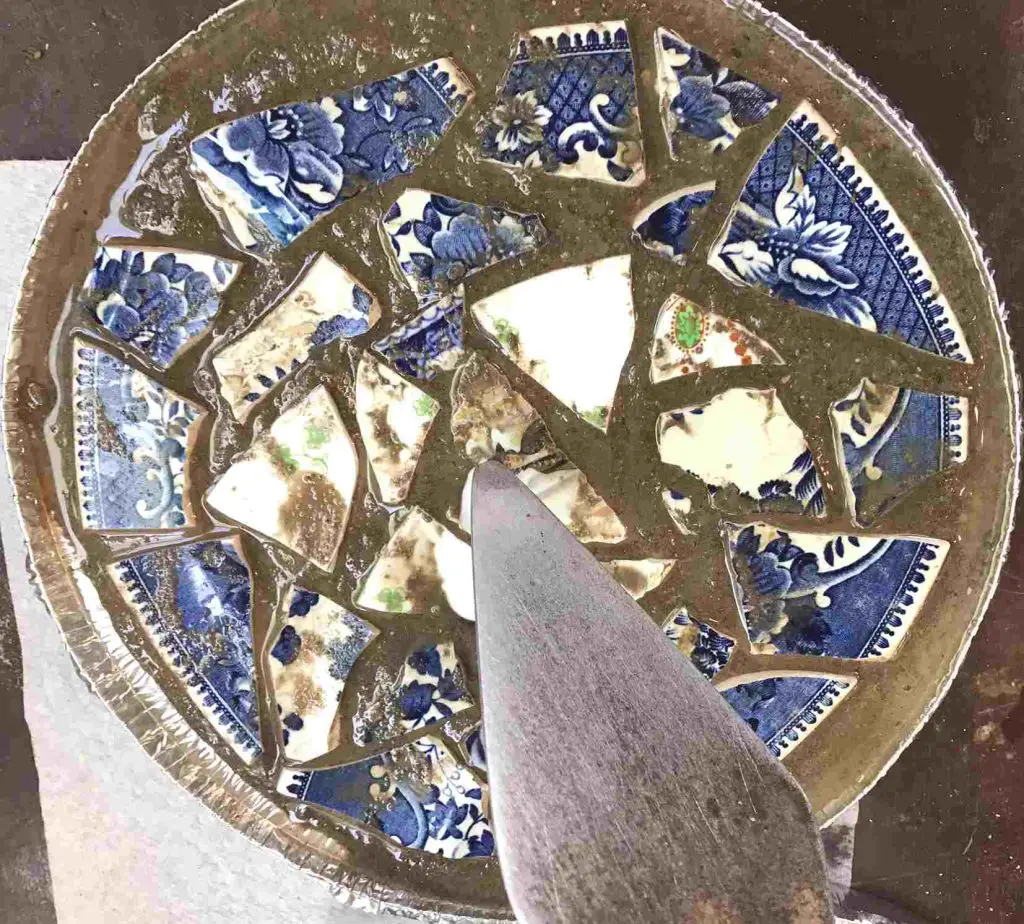
I found that after I had completed the design it was really helpful to use a metal tool to just push some pieces down a bit further to level them all up a bit. Nothing too precise here but just a little adjustment to make the grouting easier later.
Leave them to dry!
Complete your Stepping Stones
Once they are dry (I left mine a few days but I think they were dry overnight) remove them from the moulds. If, like me, the edges are a bit rough at the top simply file them off. A thin layer of cement will come off easily.
If you are not grouting you have now finished your stepping stones – enjoy!
If you are grouting now is the time. Simply open your grout (or mix it up if it is in powder form) and apply a thin layer to the top of your stepping stones in between the crockery pieces. Be as accurate as you can but do not worry if some is on top of the crockery pieces as you will be able to clean it off. You will find that you have to work quickly as the grout will dry quickly as it comes into contact with the cement.
Leave it to dry and then clean up the top surface using a wet cloth to reveal your gorgeous design.

Now decide where you want them and put them into your garden. You can place them in your lawn but remember to make sure that they are low enough for you to mow straight over them without damaging your lawn mower.
Or how about in a gravel path or a flower bed that you regularly step into to access a washing line, bird feeder or similar. Placement is up to you!
Fabulous Sustainable ‘Repurposed’ Crafts
As promised here are all the other great sustainable craft projects for you to make:
- Repurpose an old book into a paper garland
- Repurpose Plastic Bottle Into Marble Vase
- The Art of Repurposing: Cups and Mugs
- Restyle and Repurpose Pirouline Tin
And next …
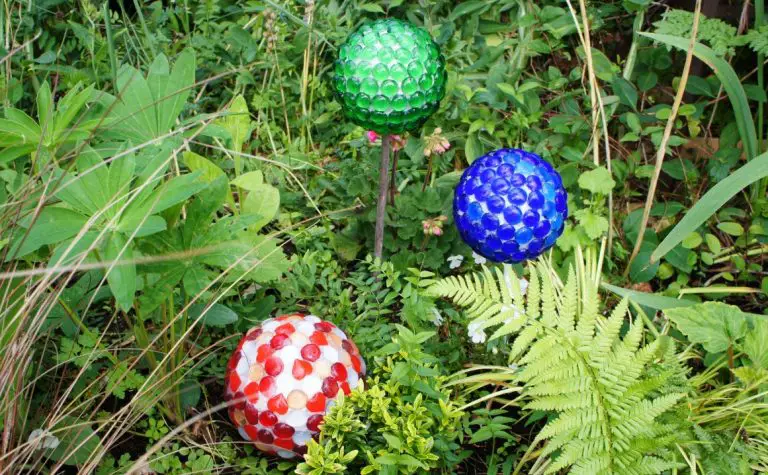
If you are looking for some more great garden projects then I recommend checking out my gardening section. In particular what about making some garden gazing globes to brighten up your borders? They are easy to make and so far mine have lasted 4 years and still look fabulous. I do bring them in for the worst of the winter weather.
Or how about making some ladybird (ladybug) houses to help these lovely creatures overwinter each year? They really are a gardener’s best friend.
Whatever you decide to do make sure you enjoy it and please let us know in the comments below any great ideas you have for DIY garden projects.