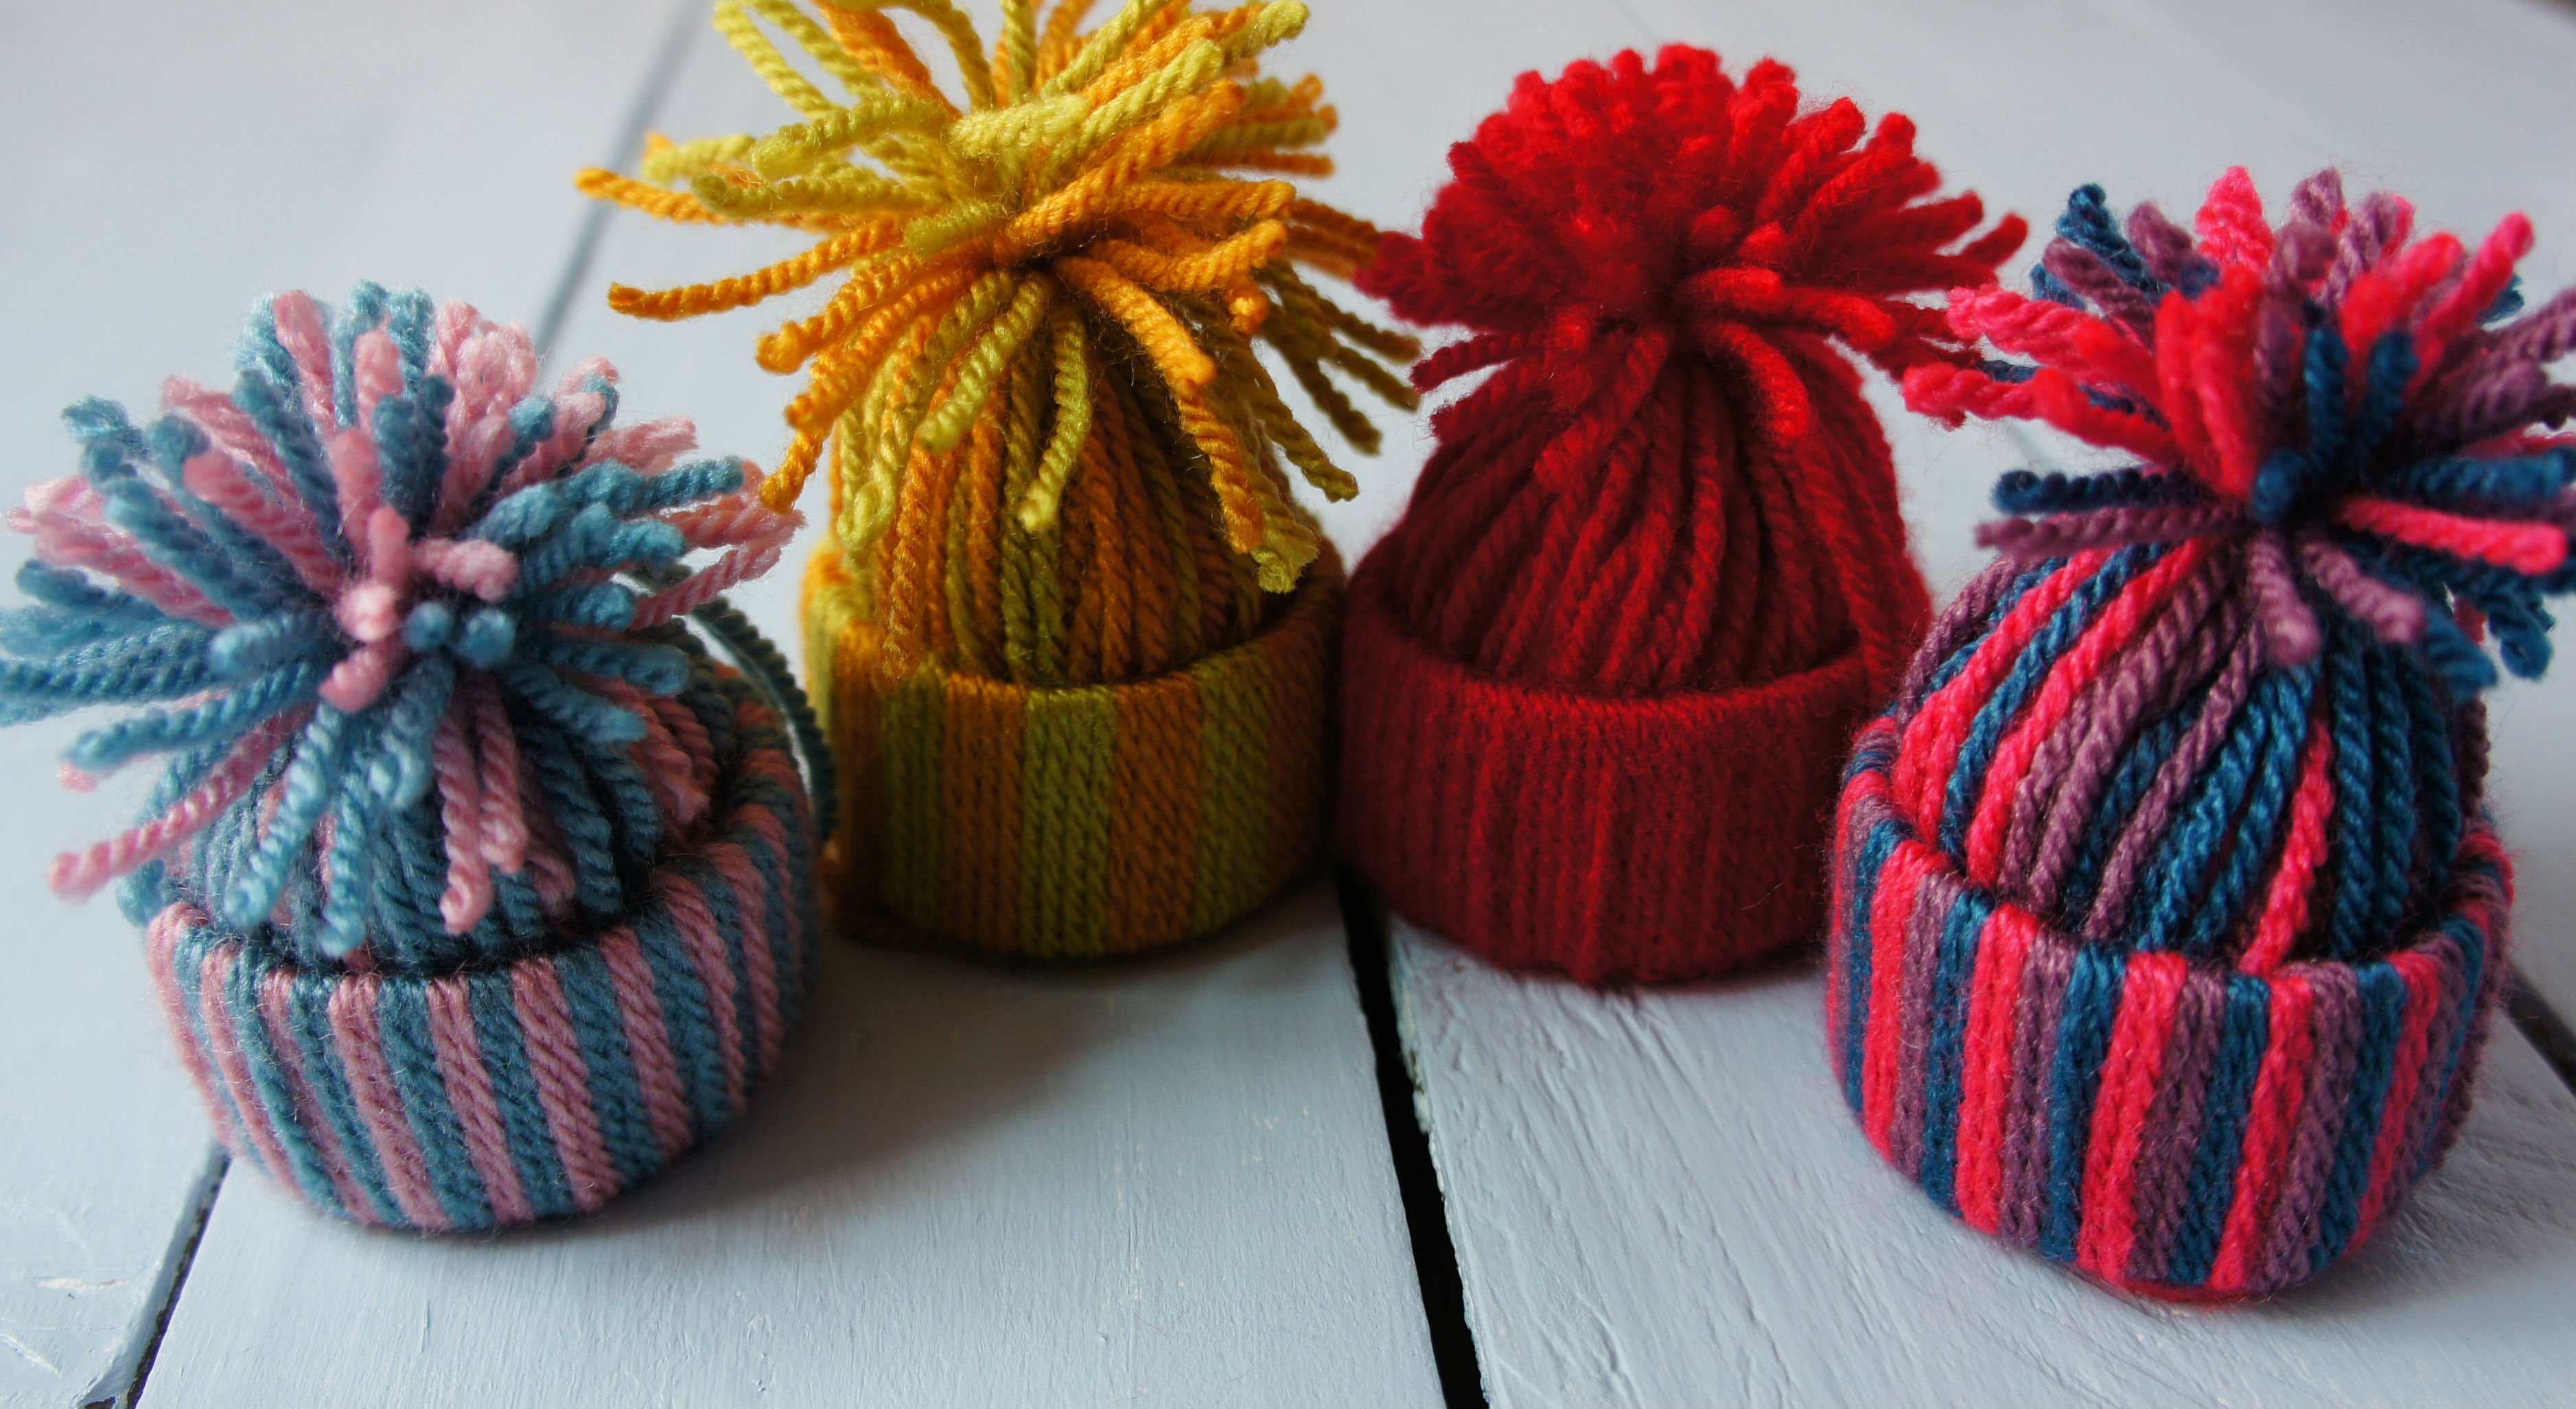
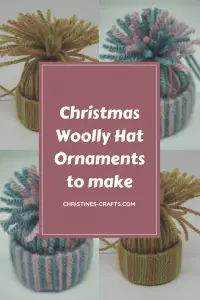
Woolly Hat Ornaments
As an Amazon Associate I earn from qualifying purchases
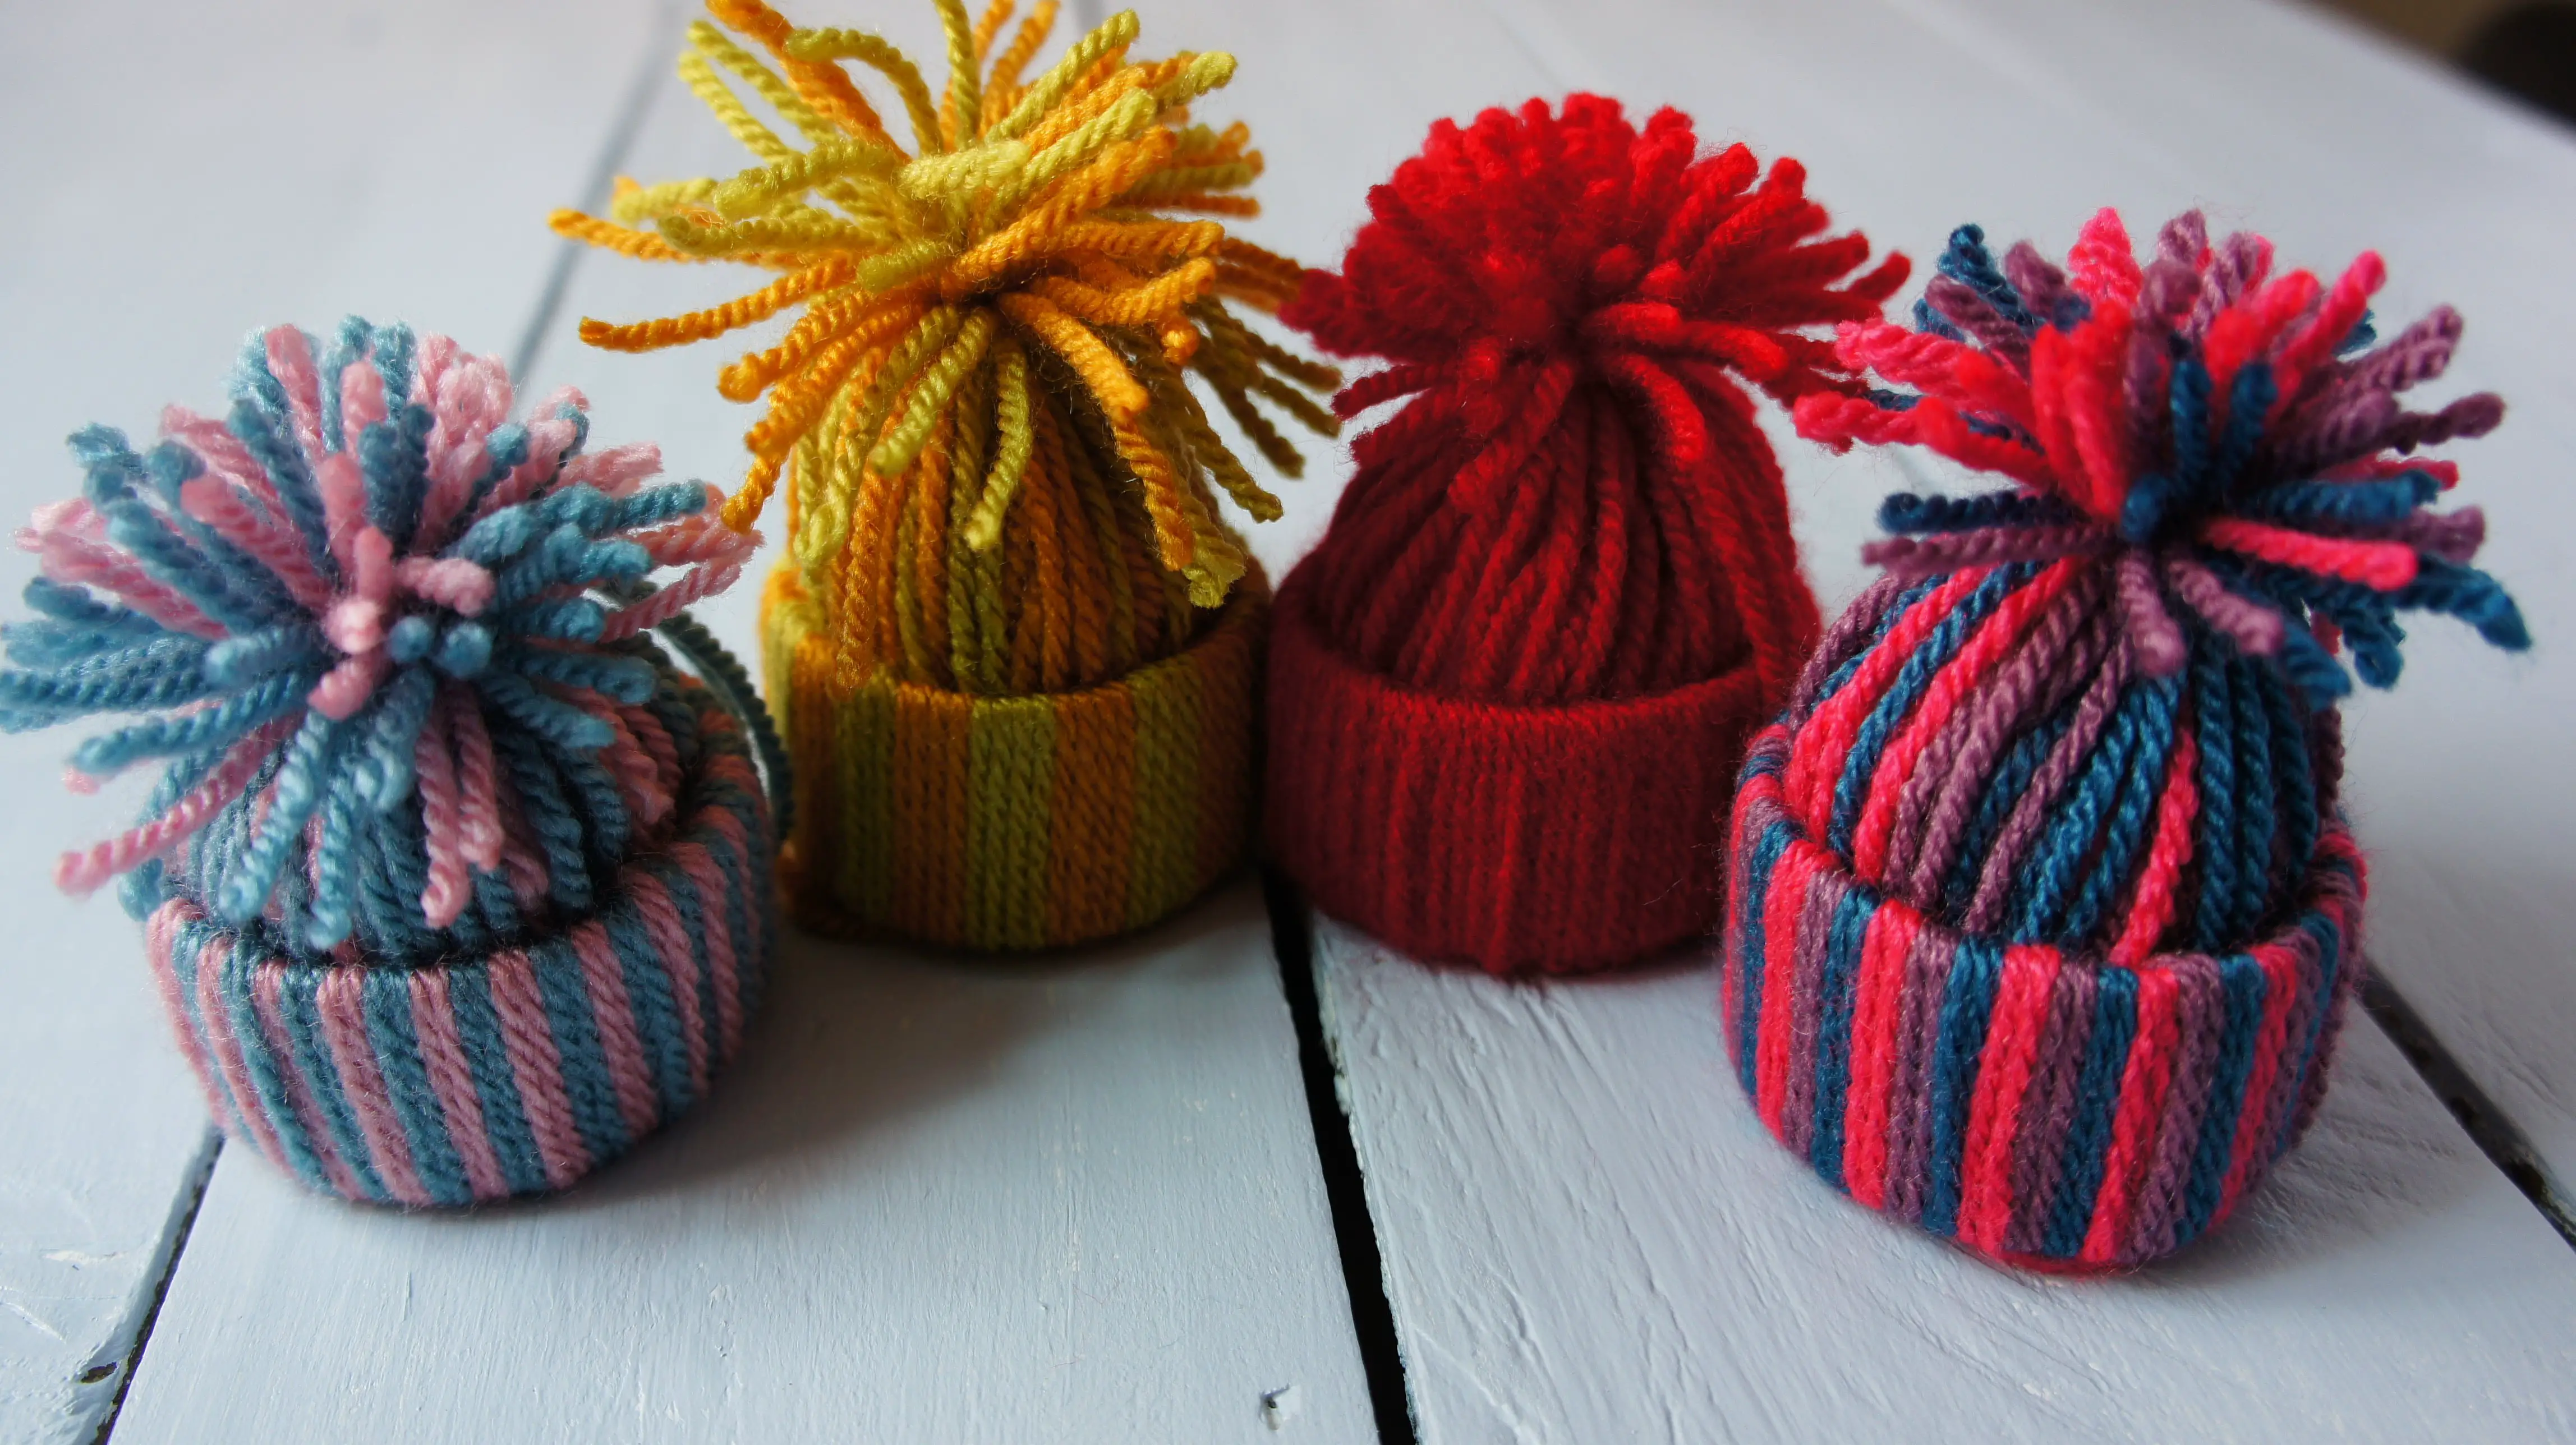
These woolly hat ornaments are so easy to make and look fantastic hanging from a Christmas tree. You can use up all your old yarn scraps or buy yarn to match your decor. They are great for kids to make and cost so little. I will show you exactly how to make them.
You Will Need:
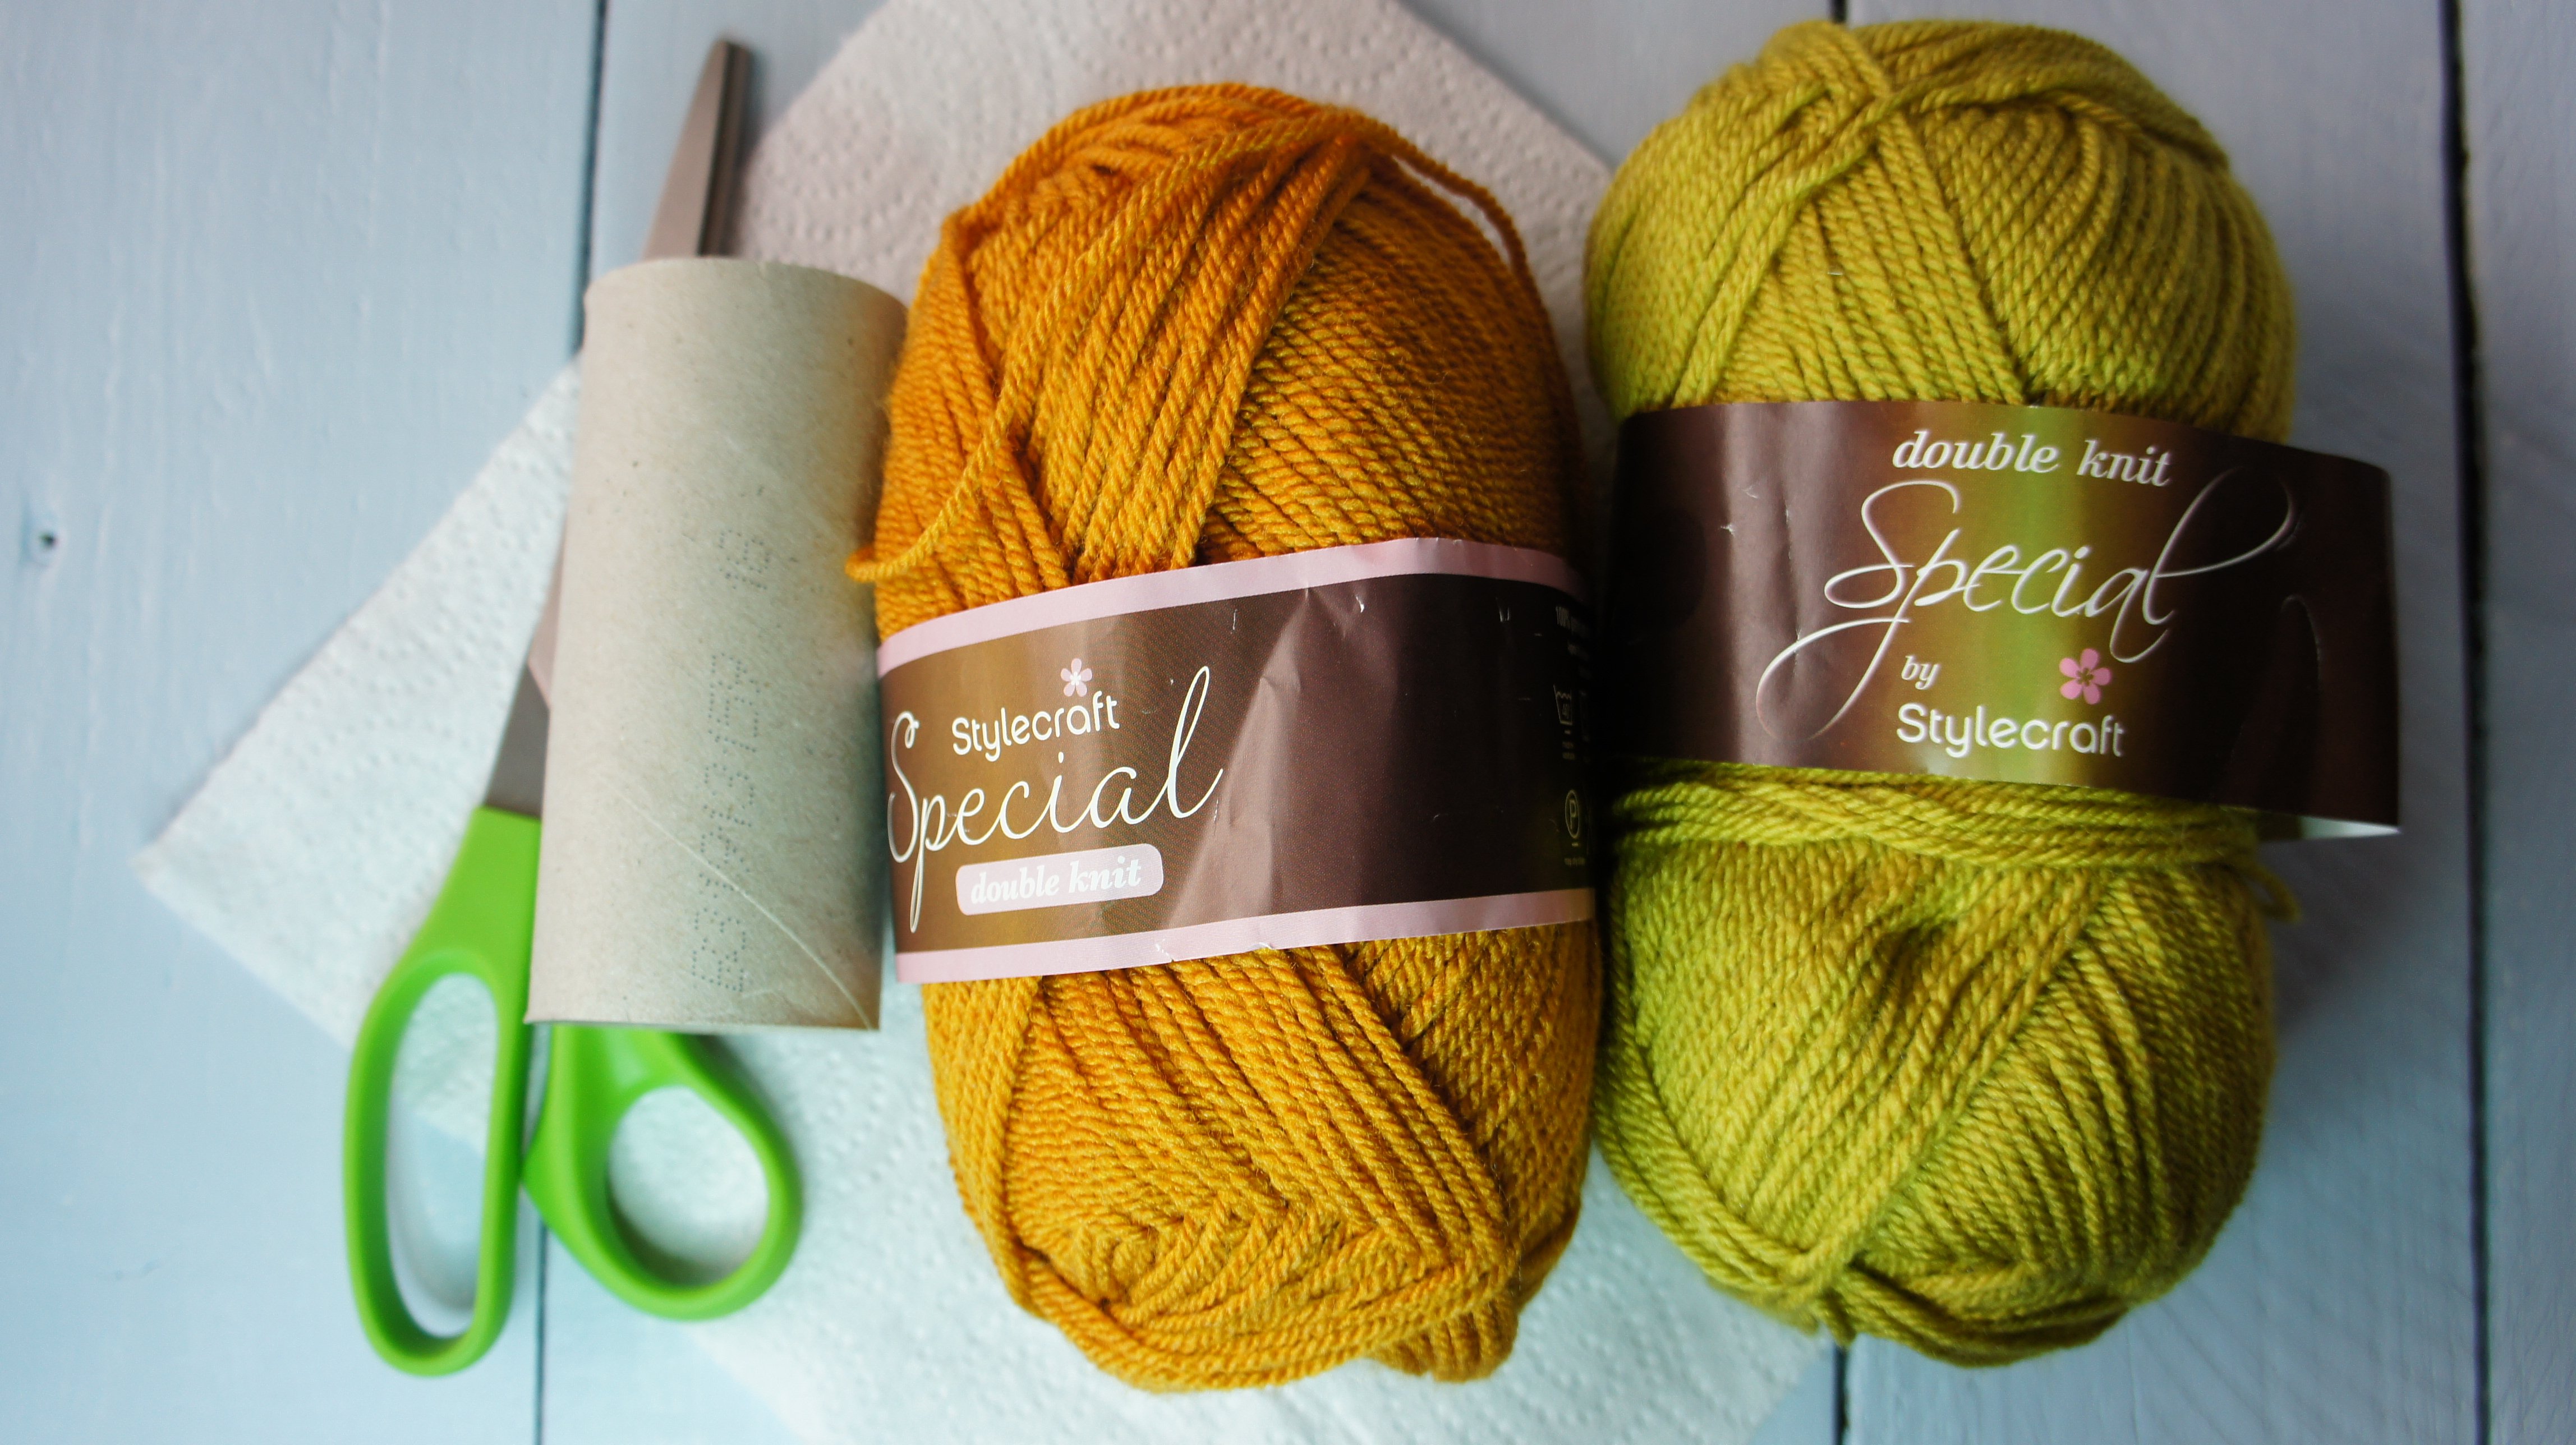
Yarn of your choice
Toilet roll or kitchen roll tube
Tissue paper
Scissors
If you like watching how something is done then watch this YouTube video tutorial or continue scrolling for written instructions and photos.
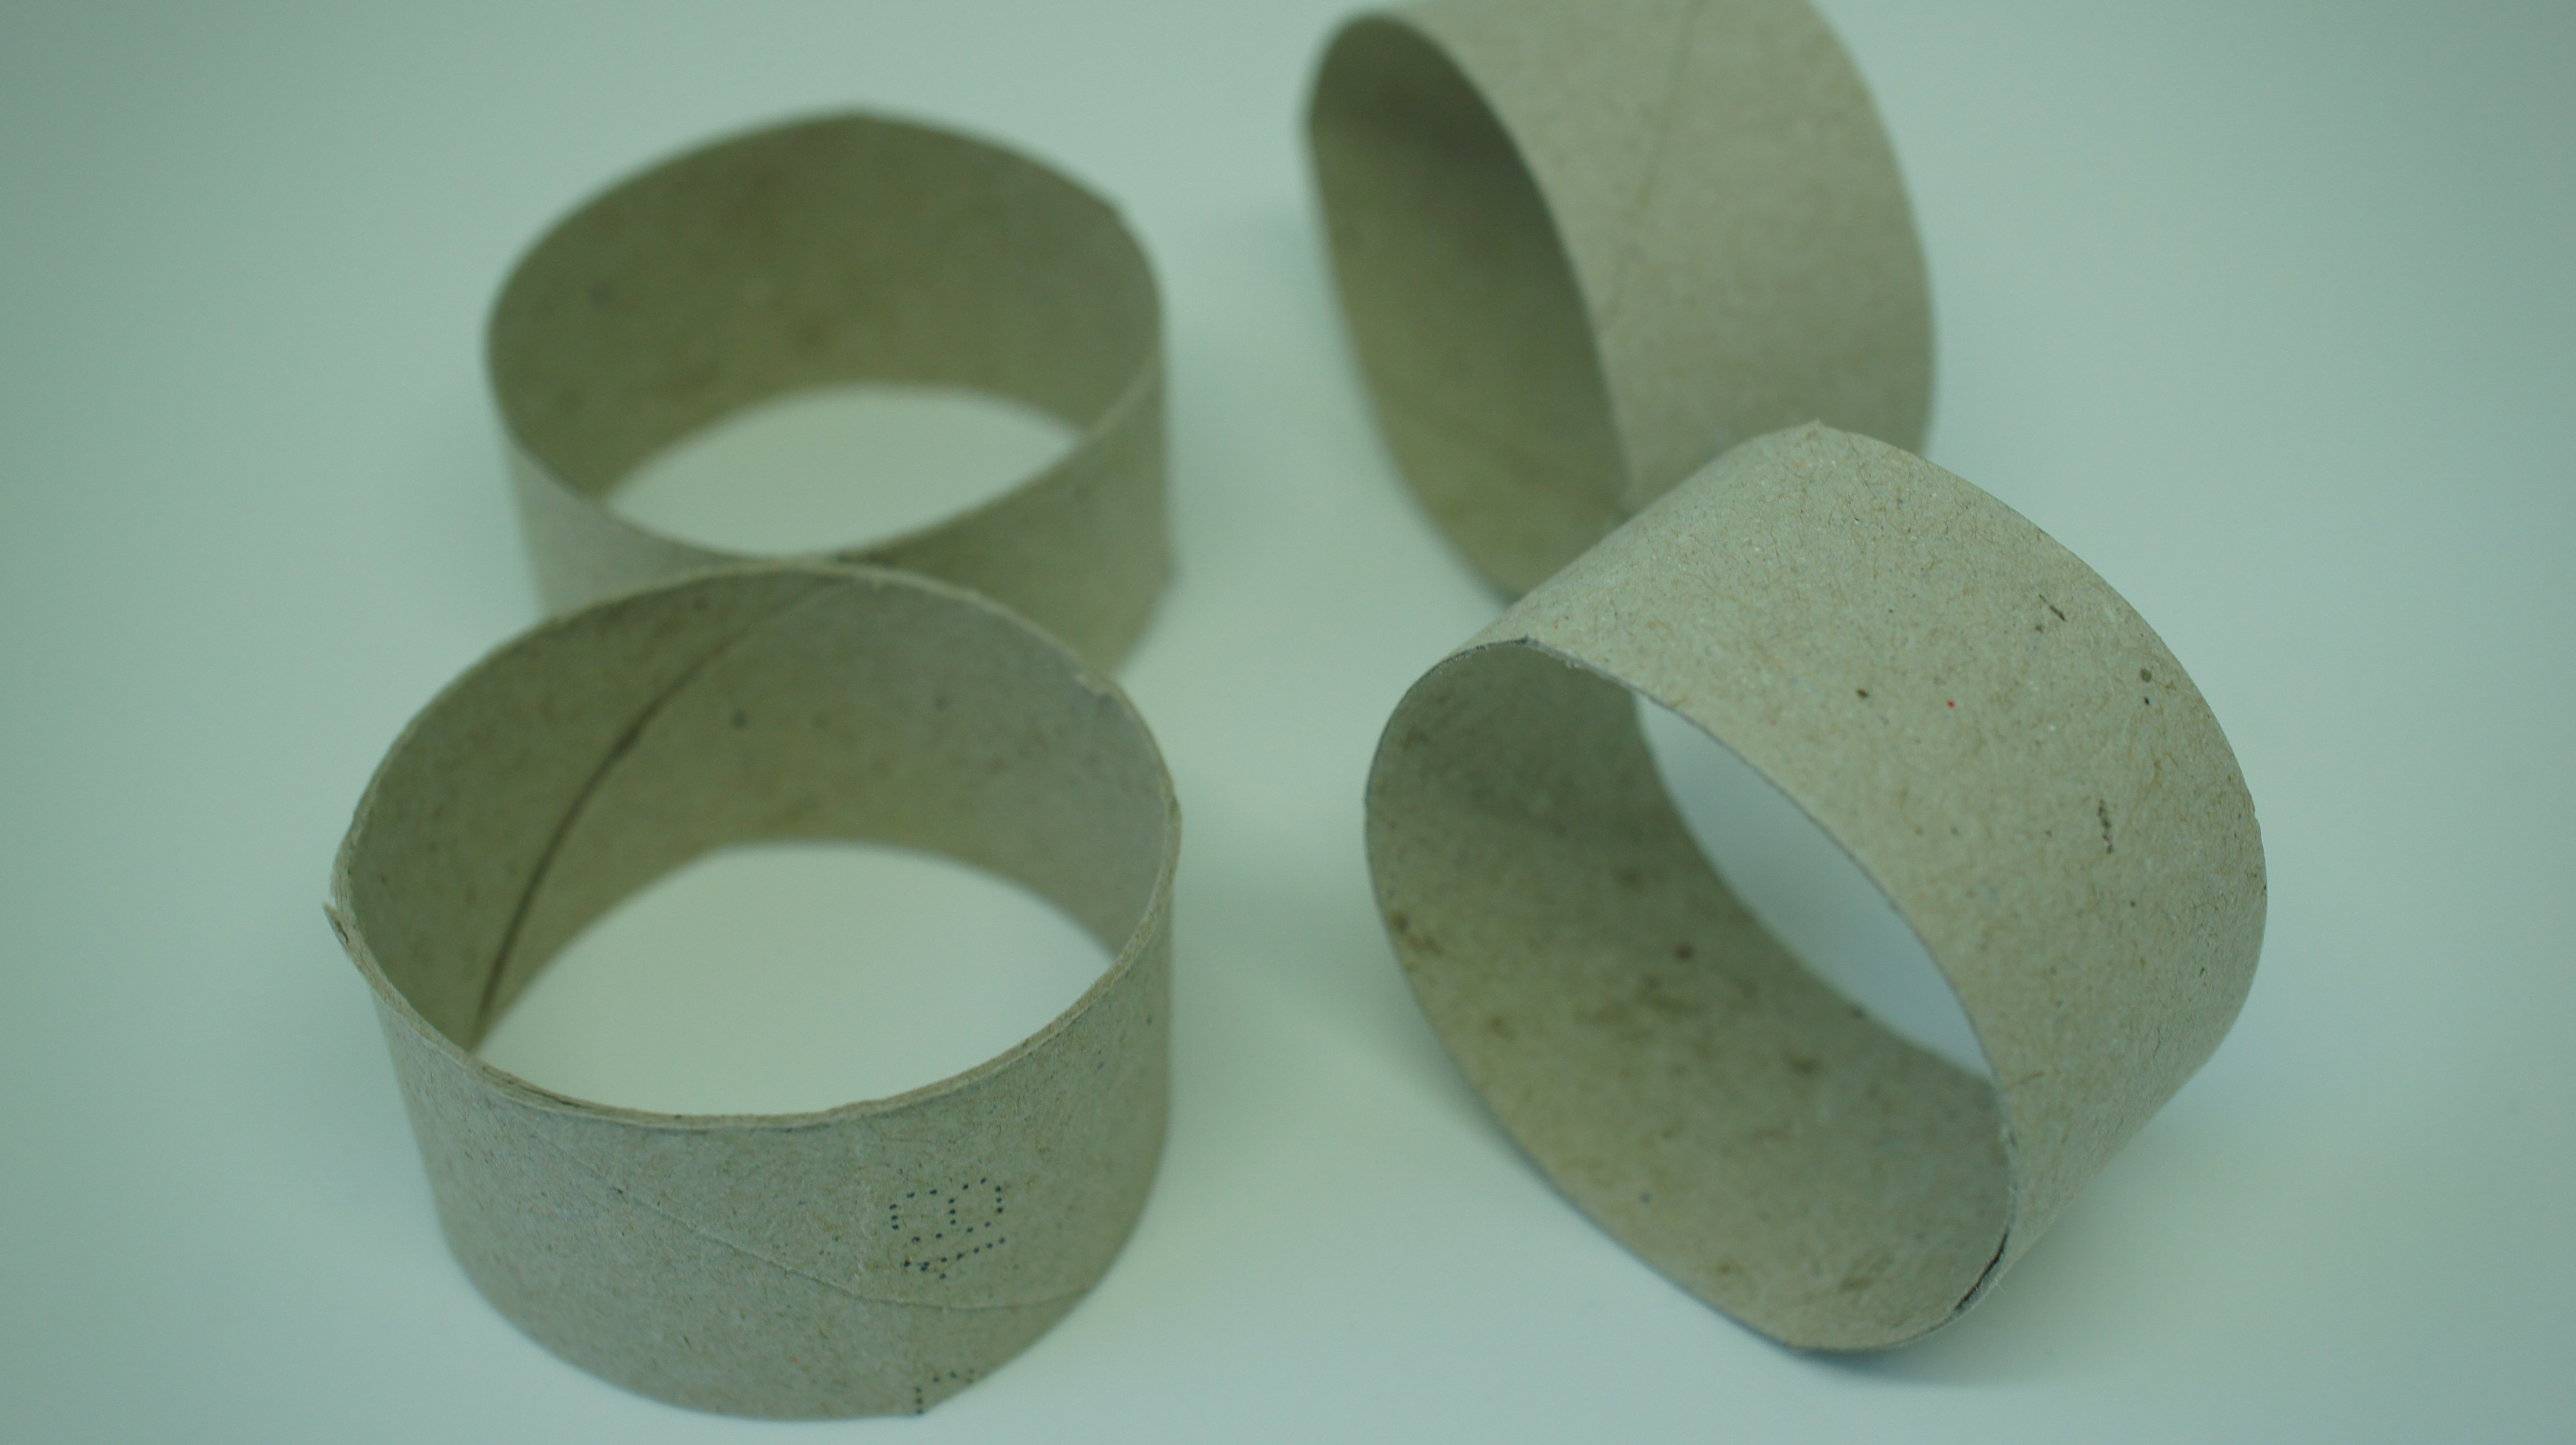
Step 1: Cut tube and yarn to size
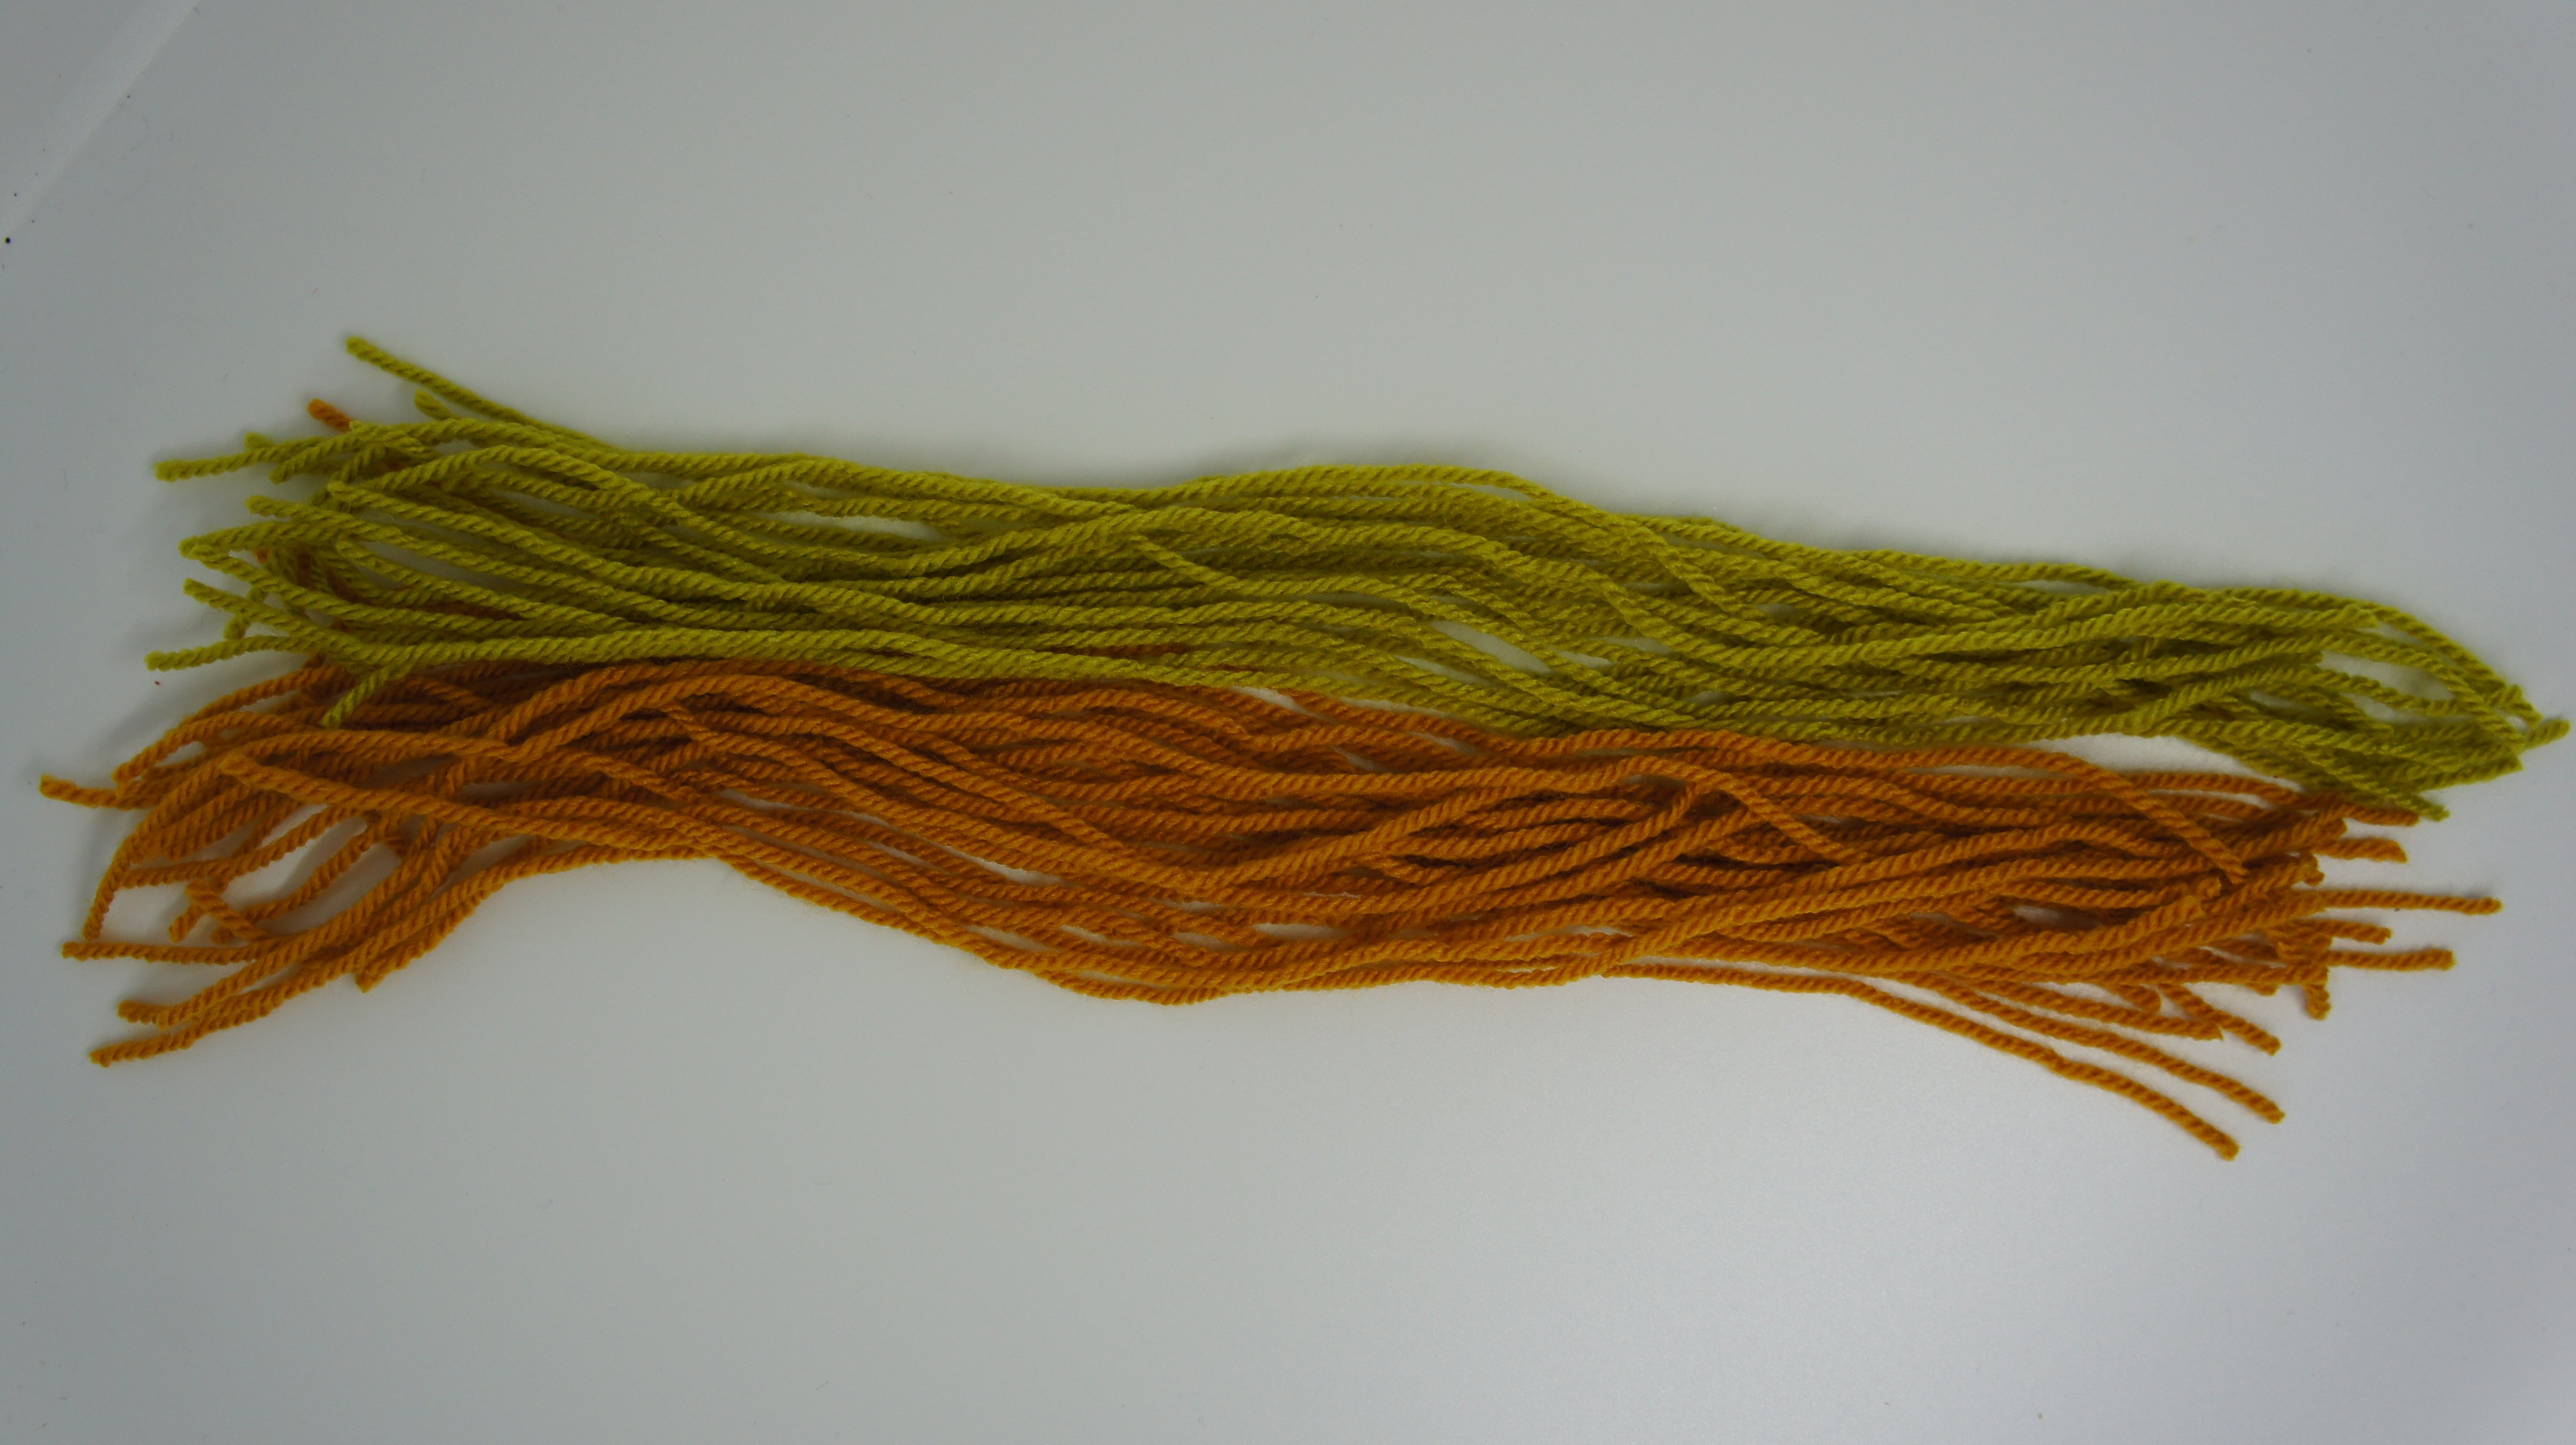
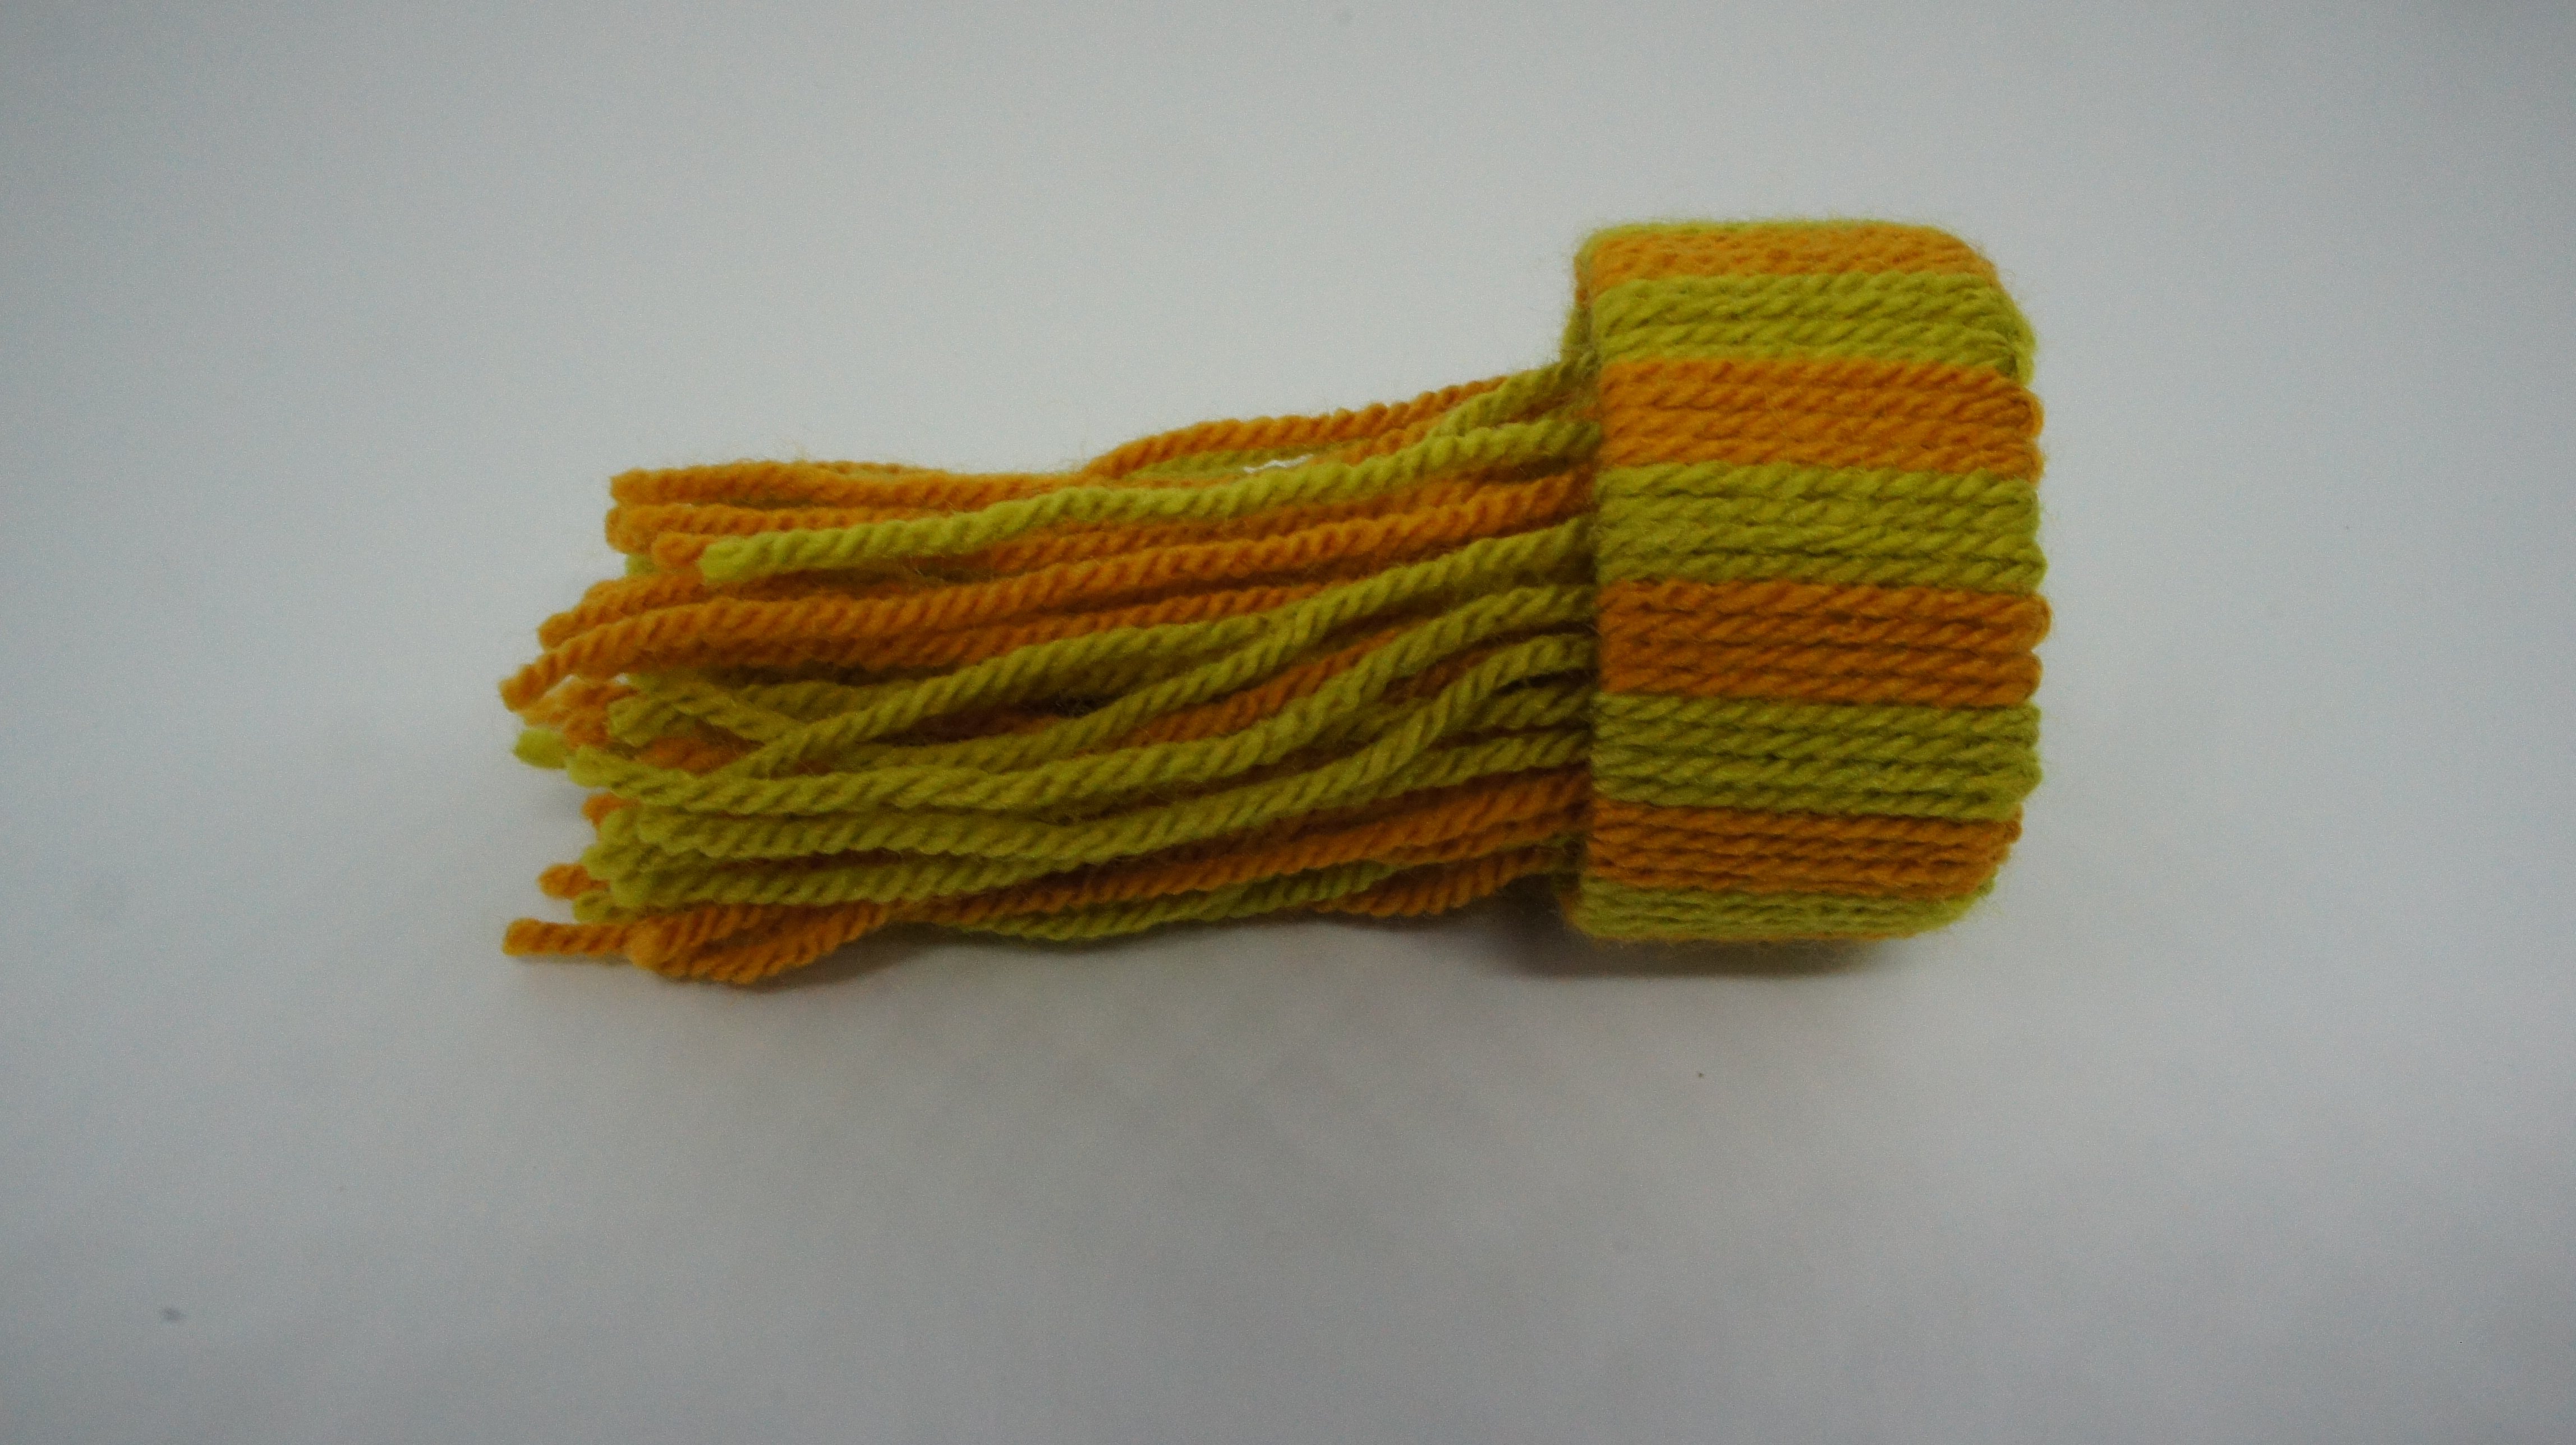
Cut your toilet or kitchen roll tube down to approximately 2.5cm (1″). I got 4 out of one toilet roll tube.
Cut approximately 40 lengths of yarn 30cm (12″) long. If you are doing a pattern then consider how many of each colour you may need. For this hat I did stripes so I cut 20 of each colour.
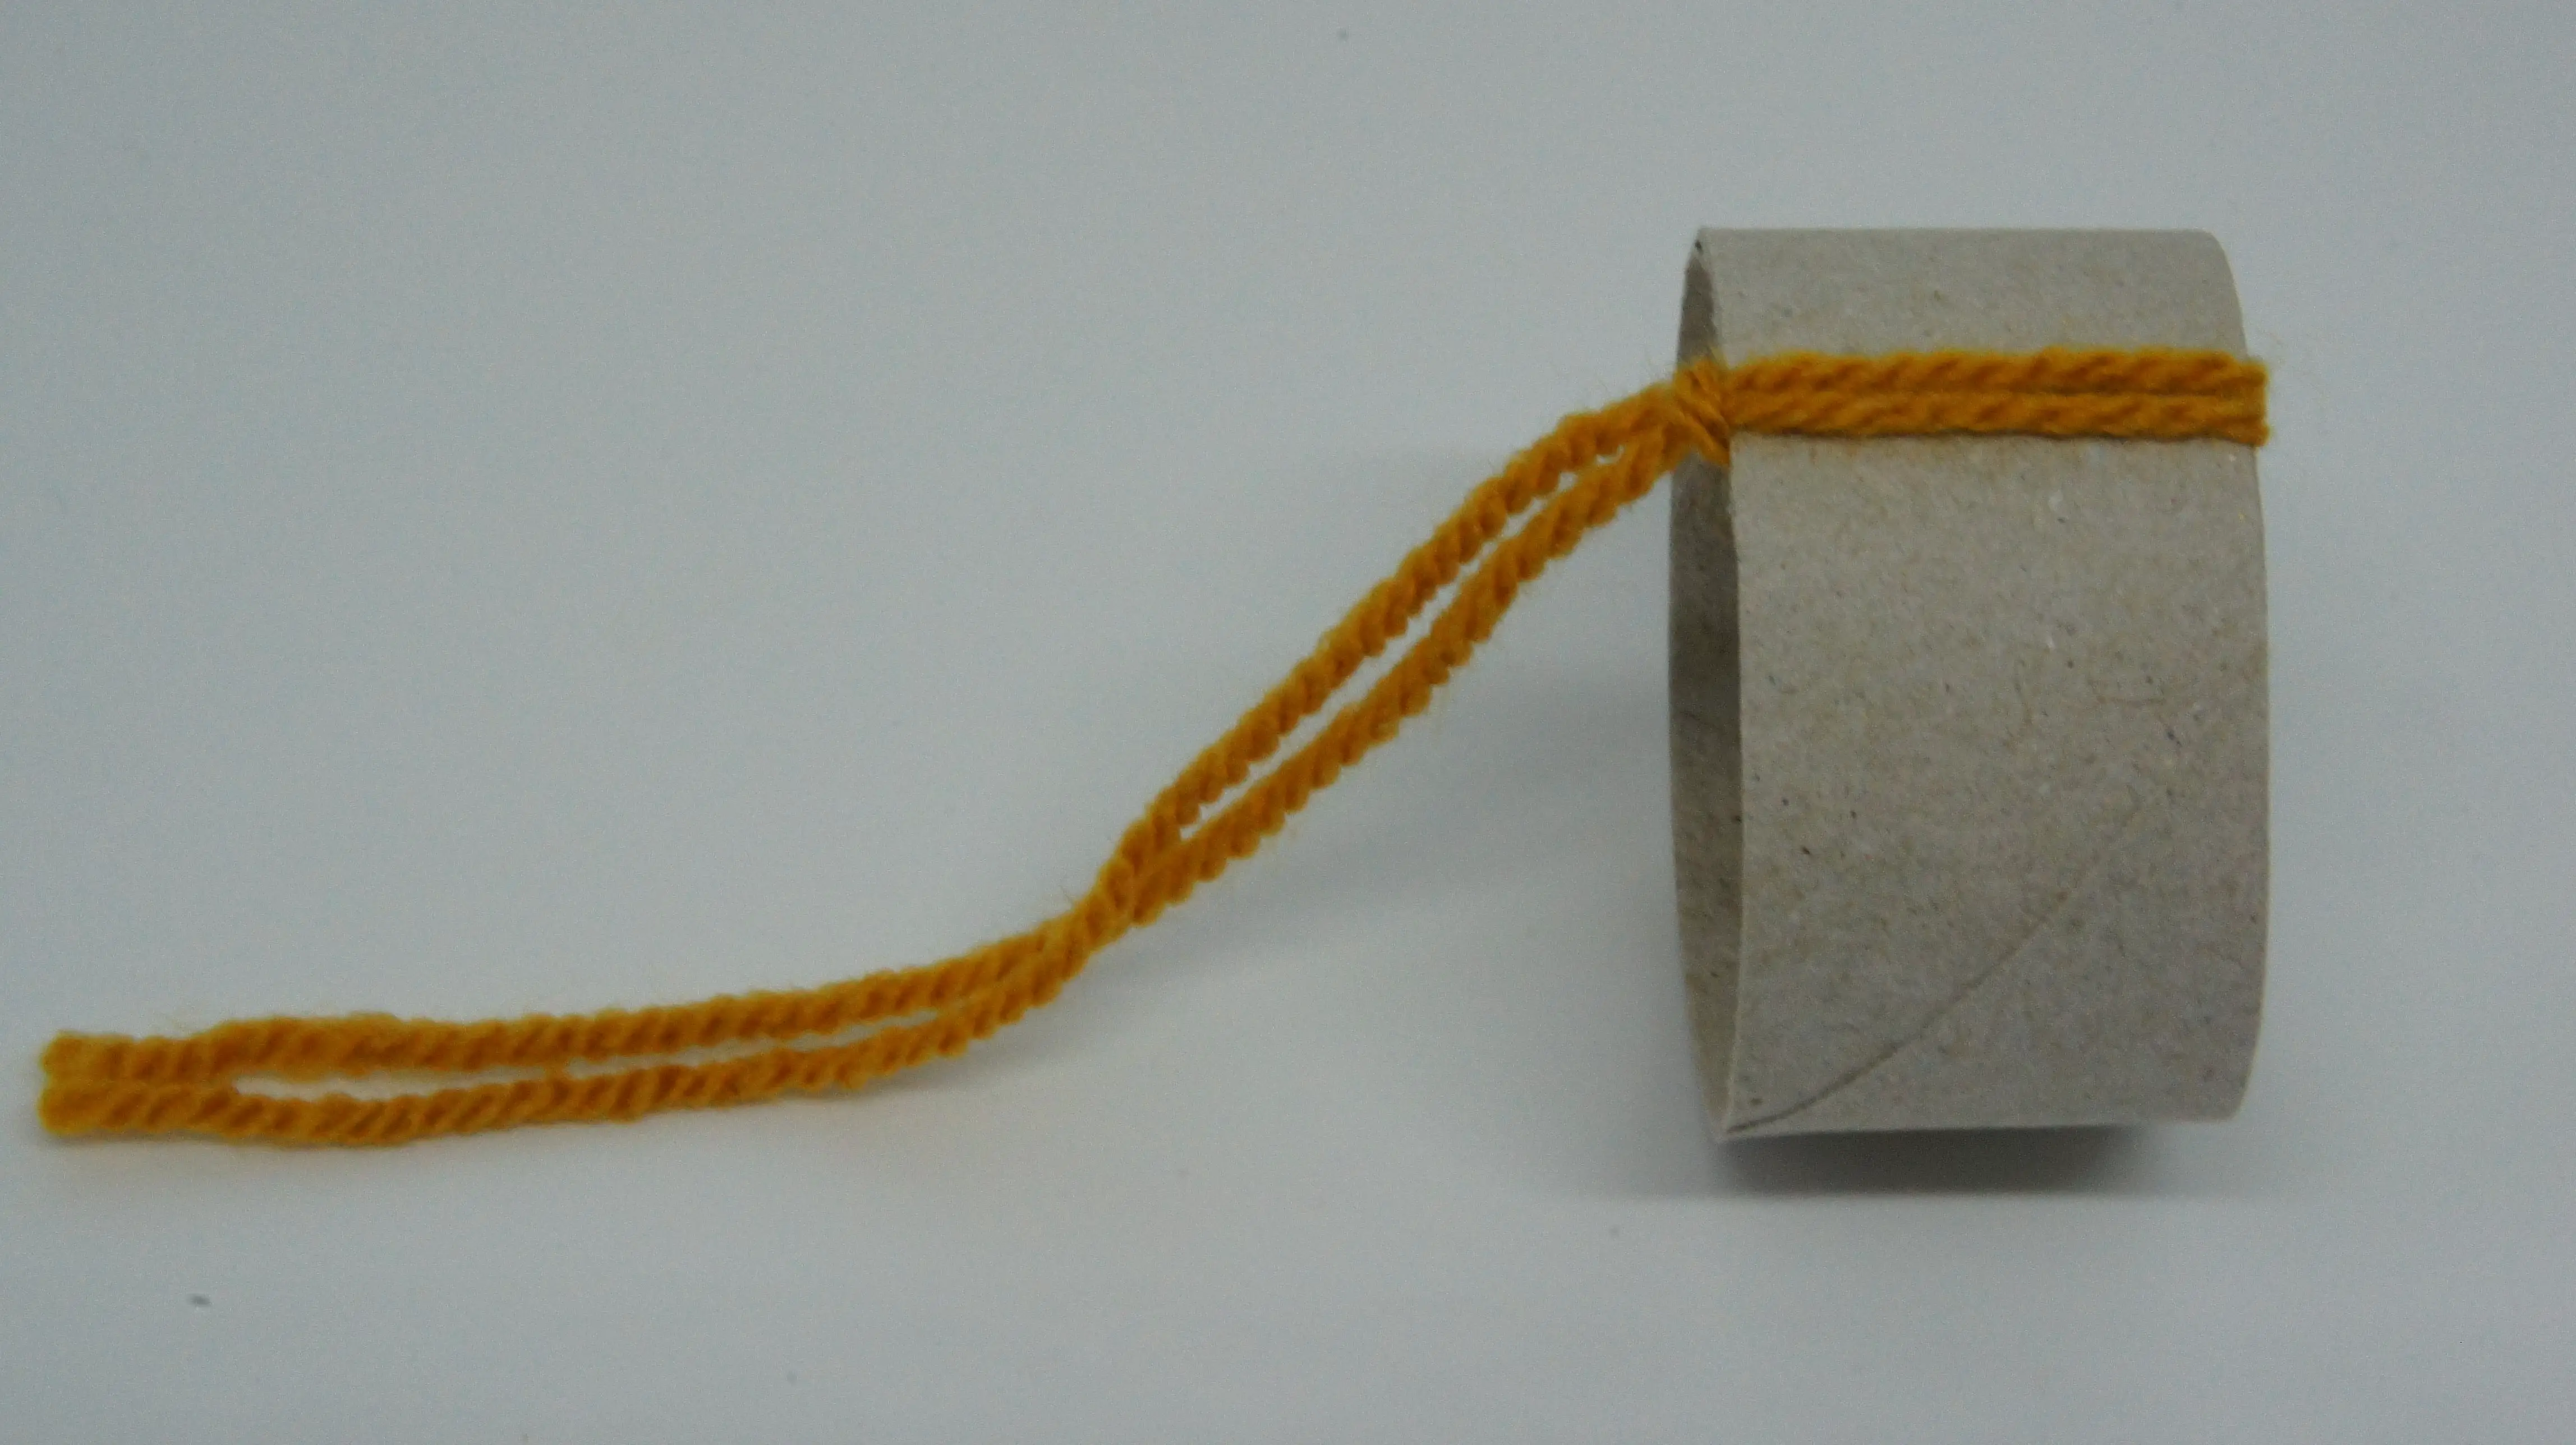
Step 2: Knot yarn onto tube
You need to form the knots that make the hat. Firstly take one of the cut pieces of tube and one piece of cut yarn. Fold the yarn in half.
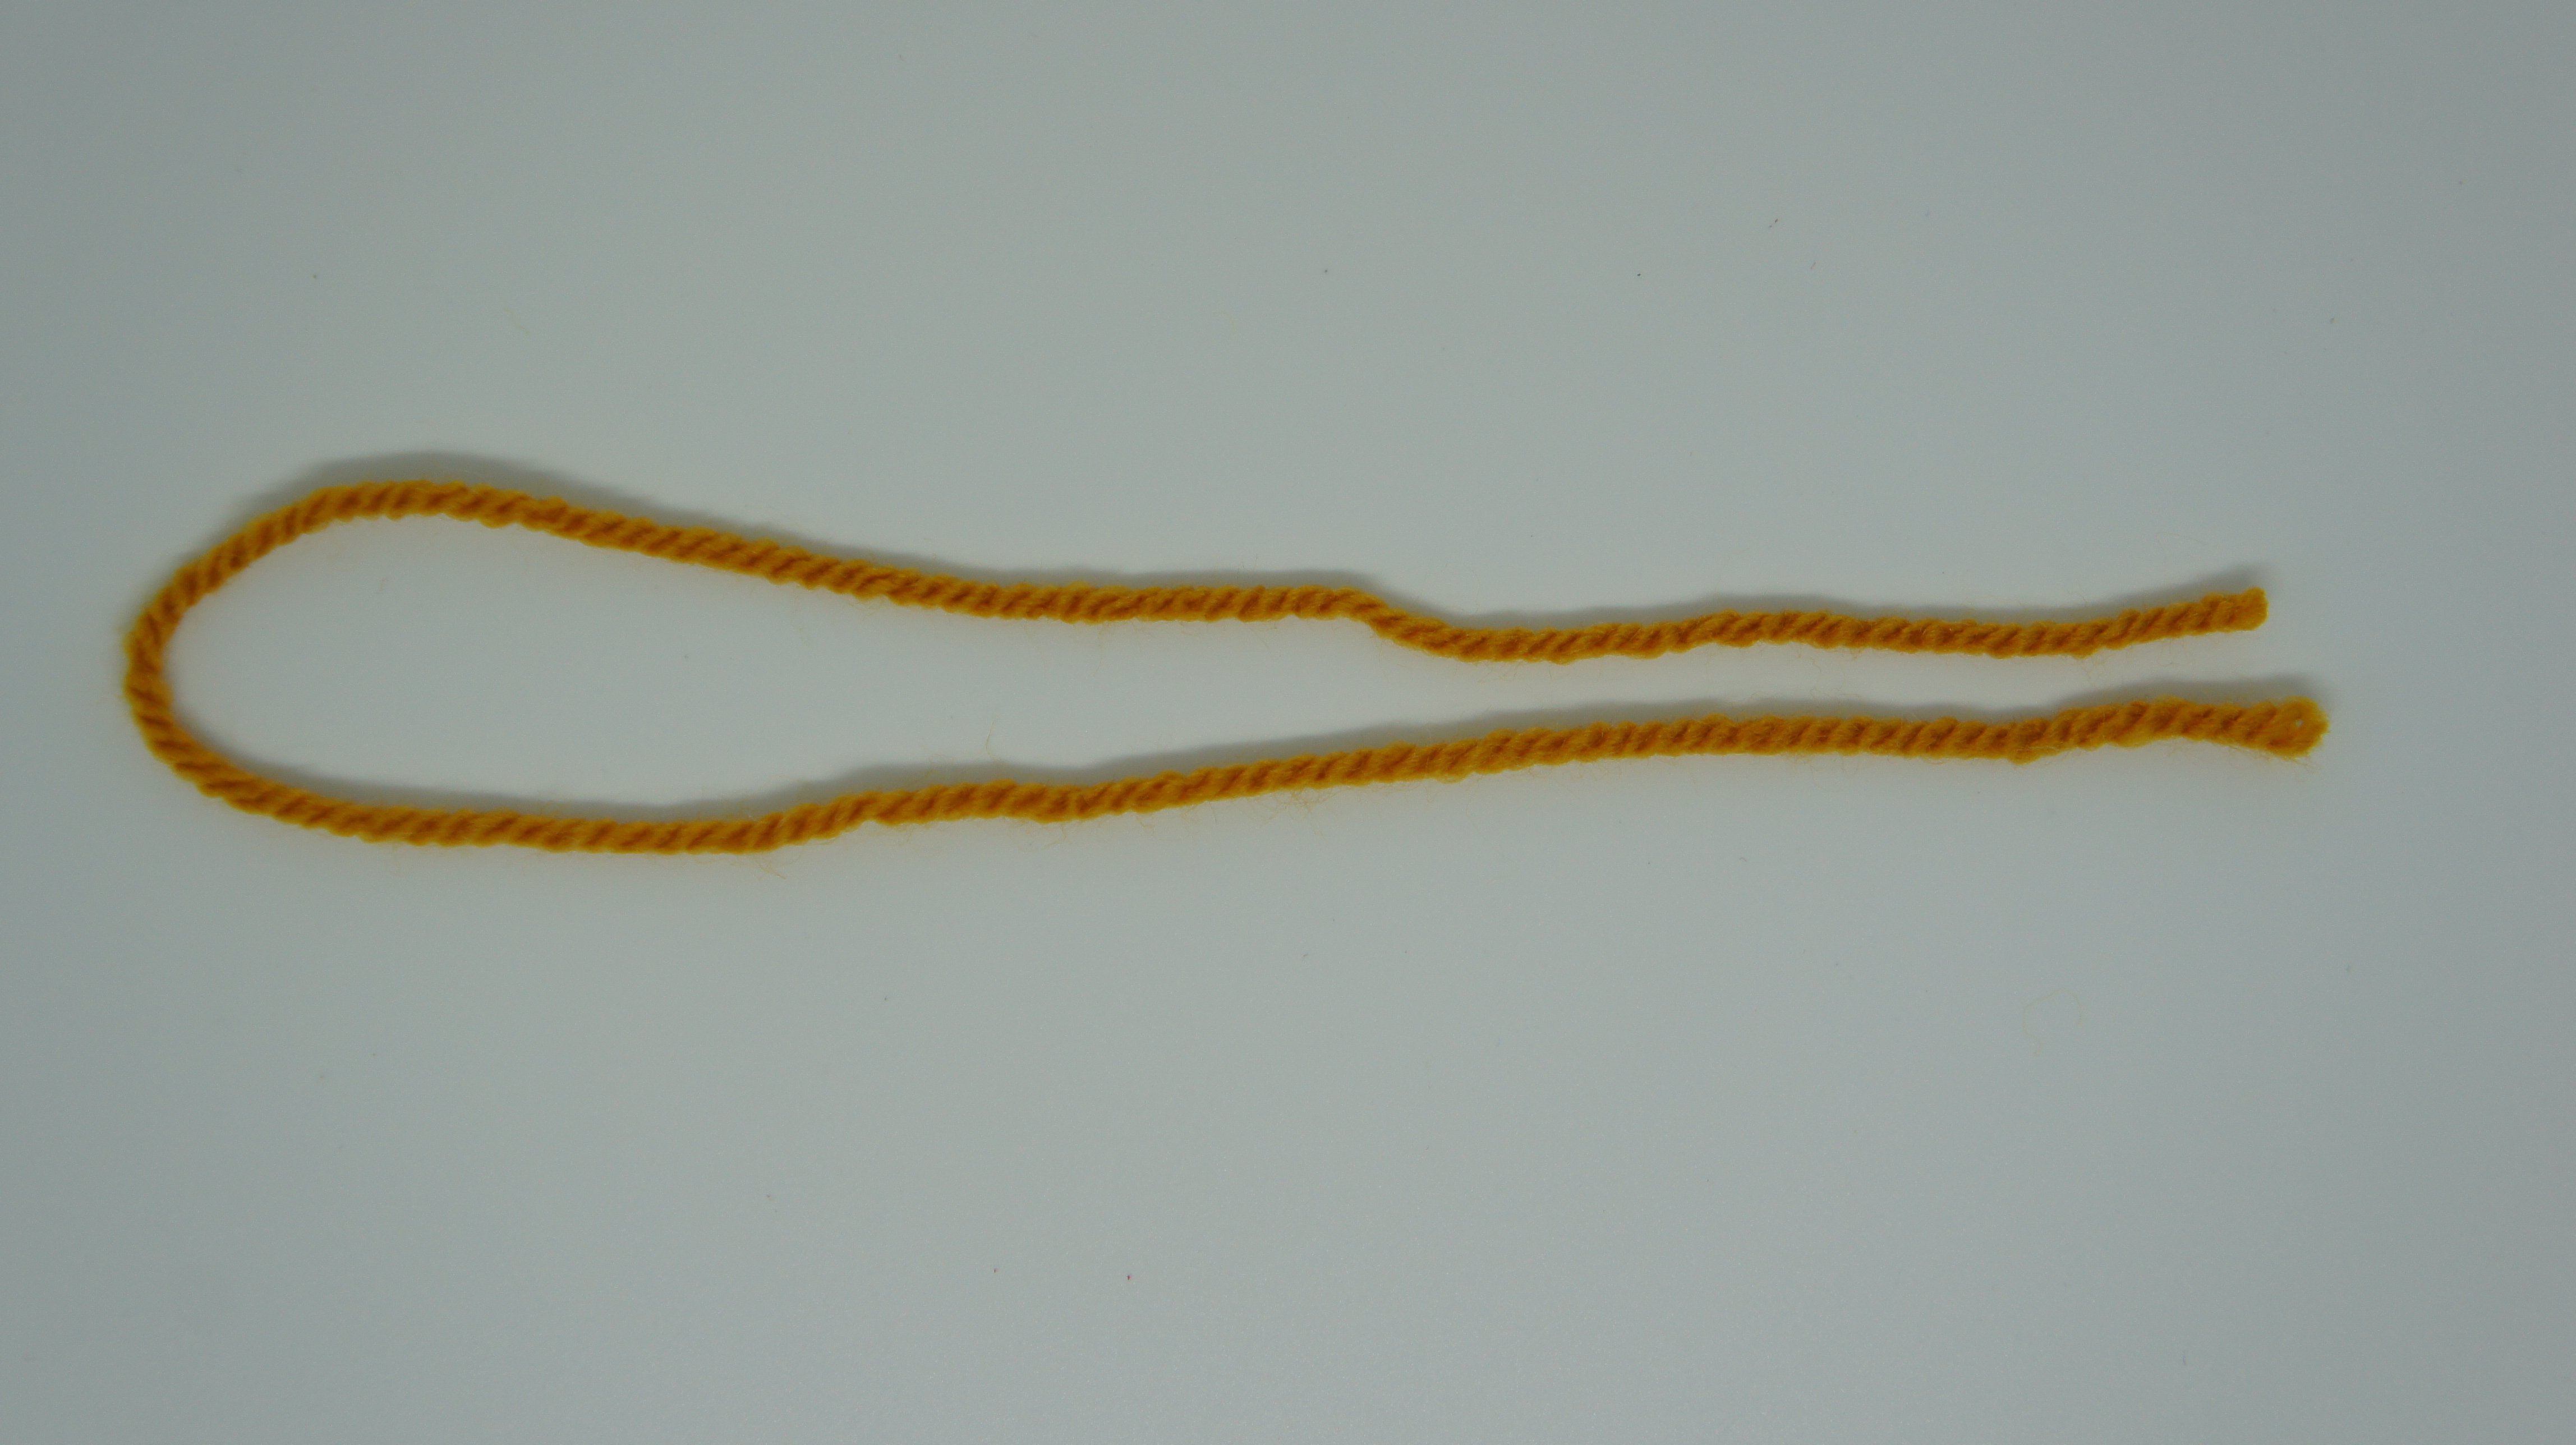
Place the folded yarn through the tube.
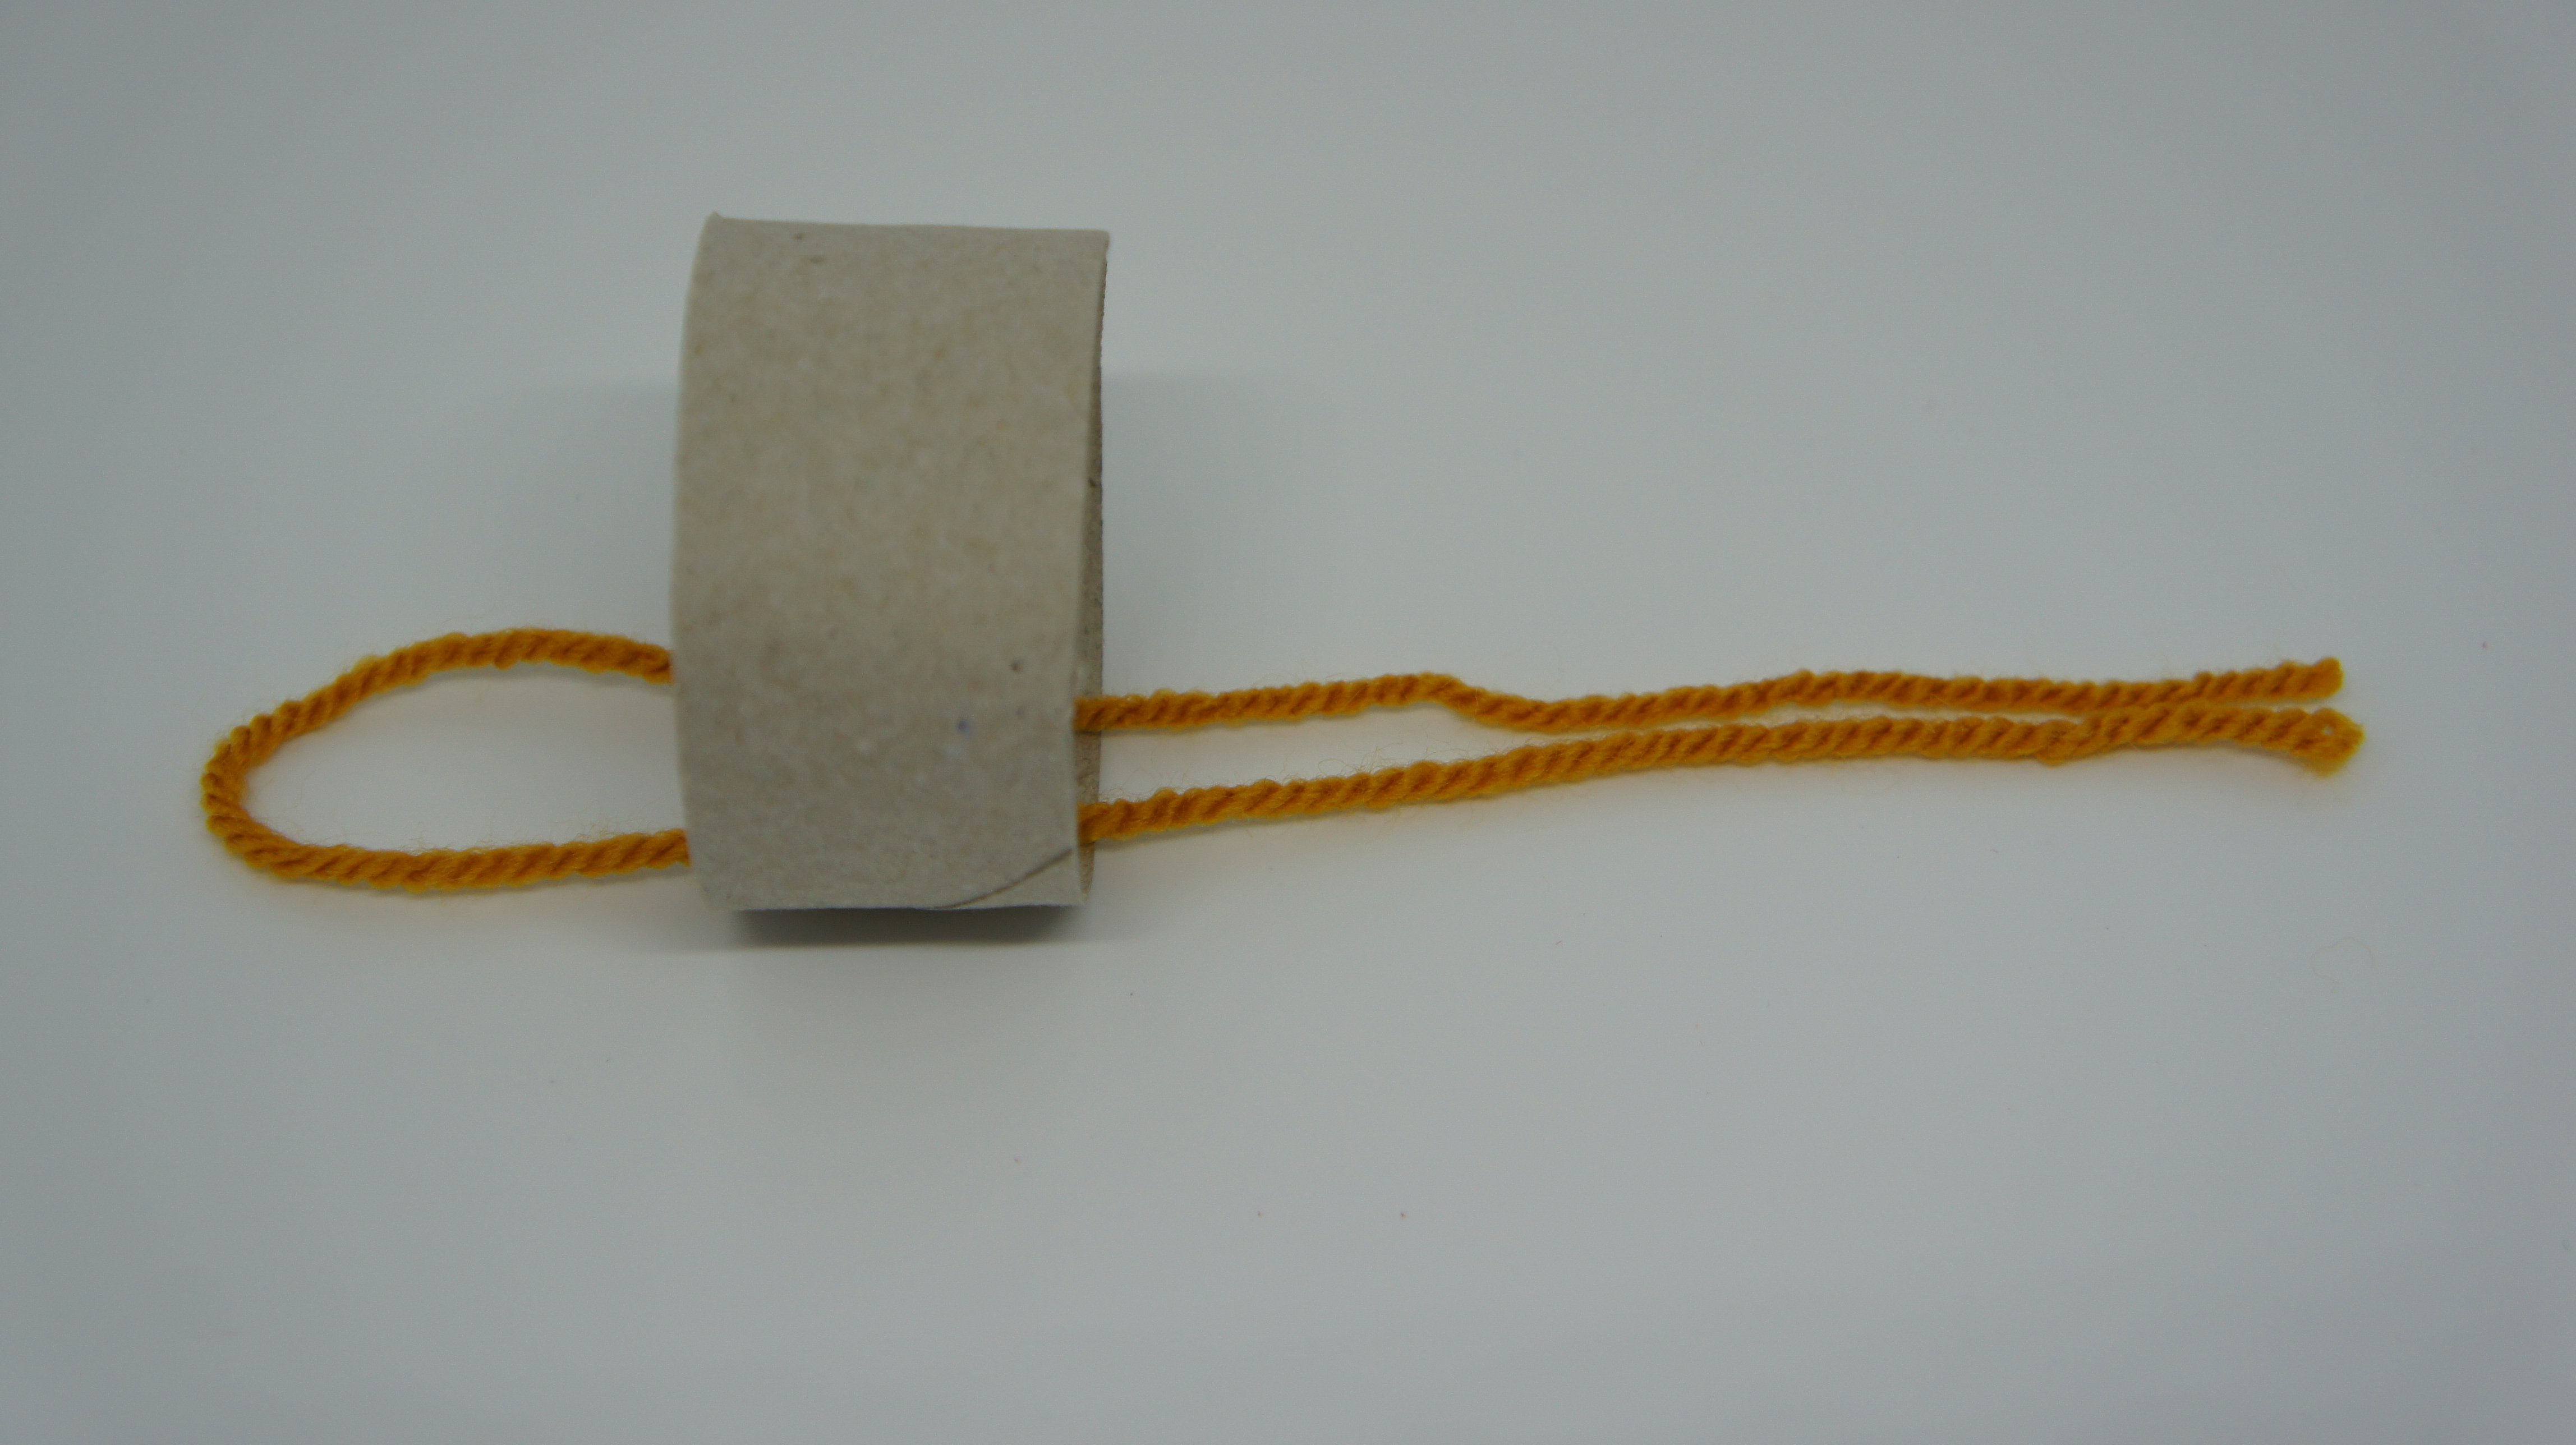
Now wrap the ends of the yarn around the tube and pull them through the loop to form a knot.
Pull it tight. The knot should be at the edge of the tube.
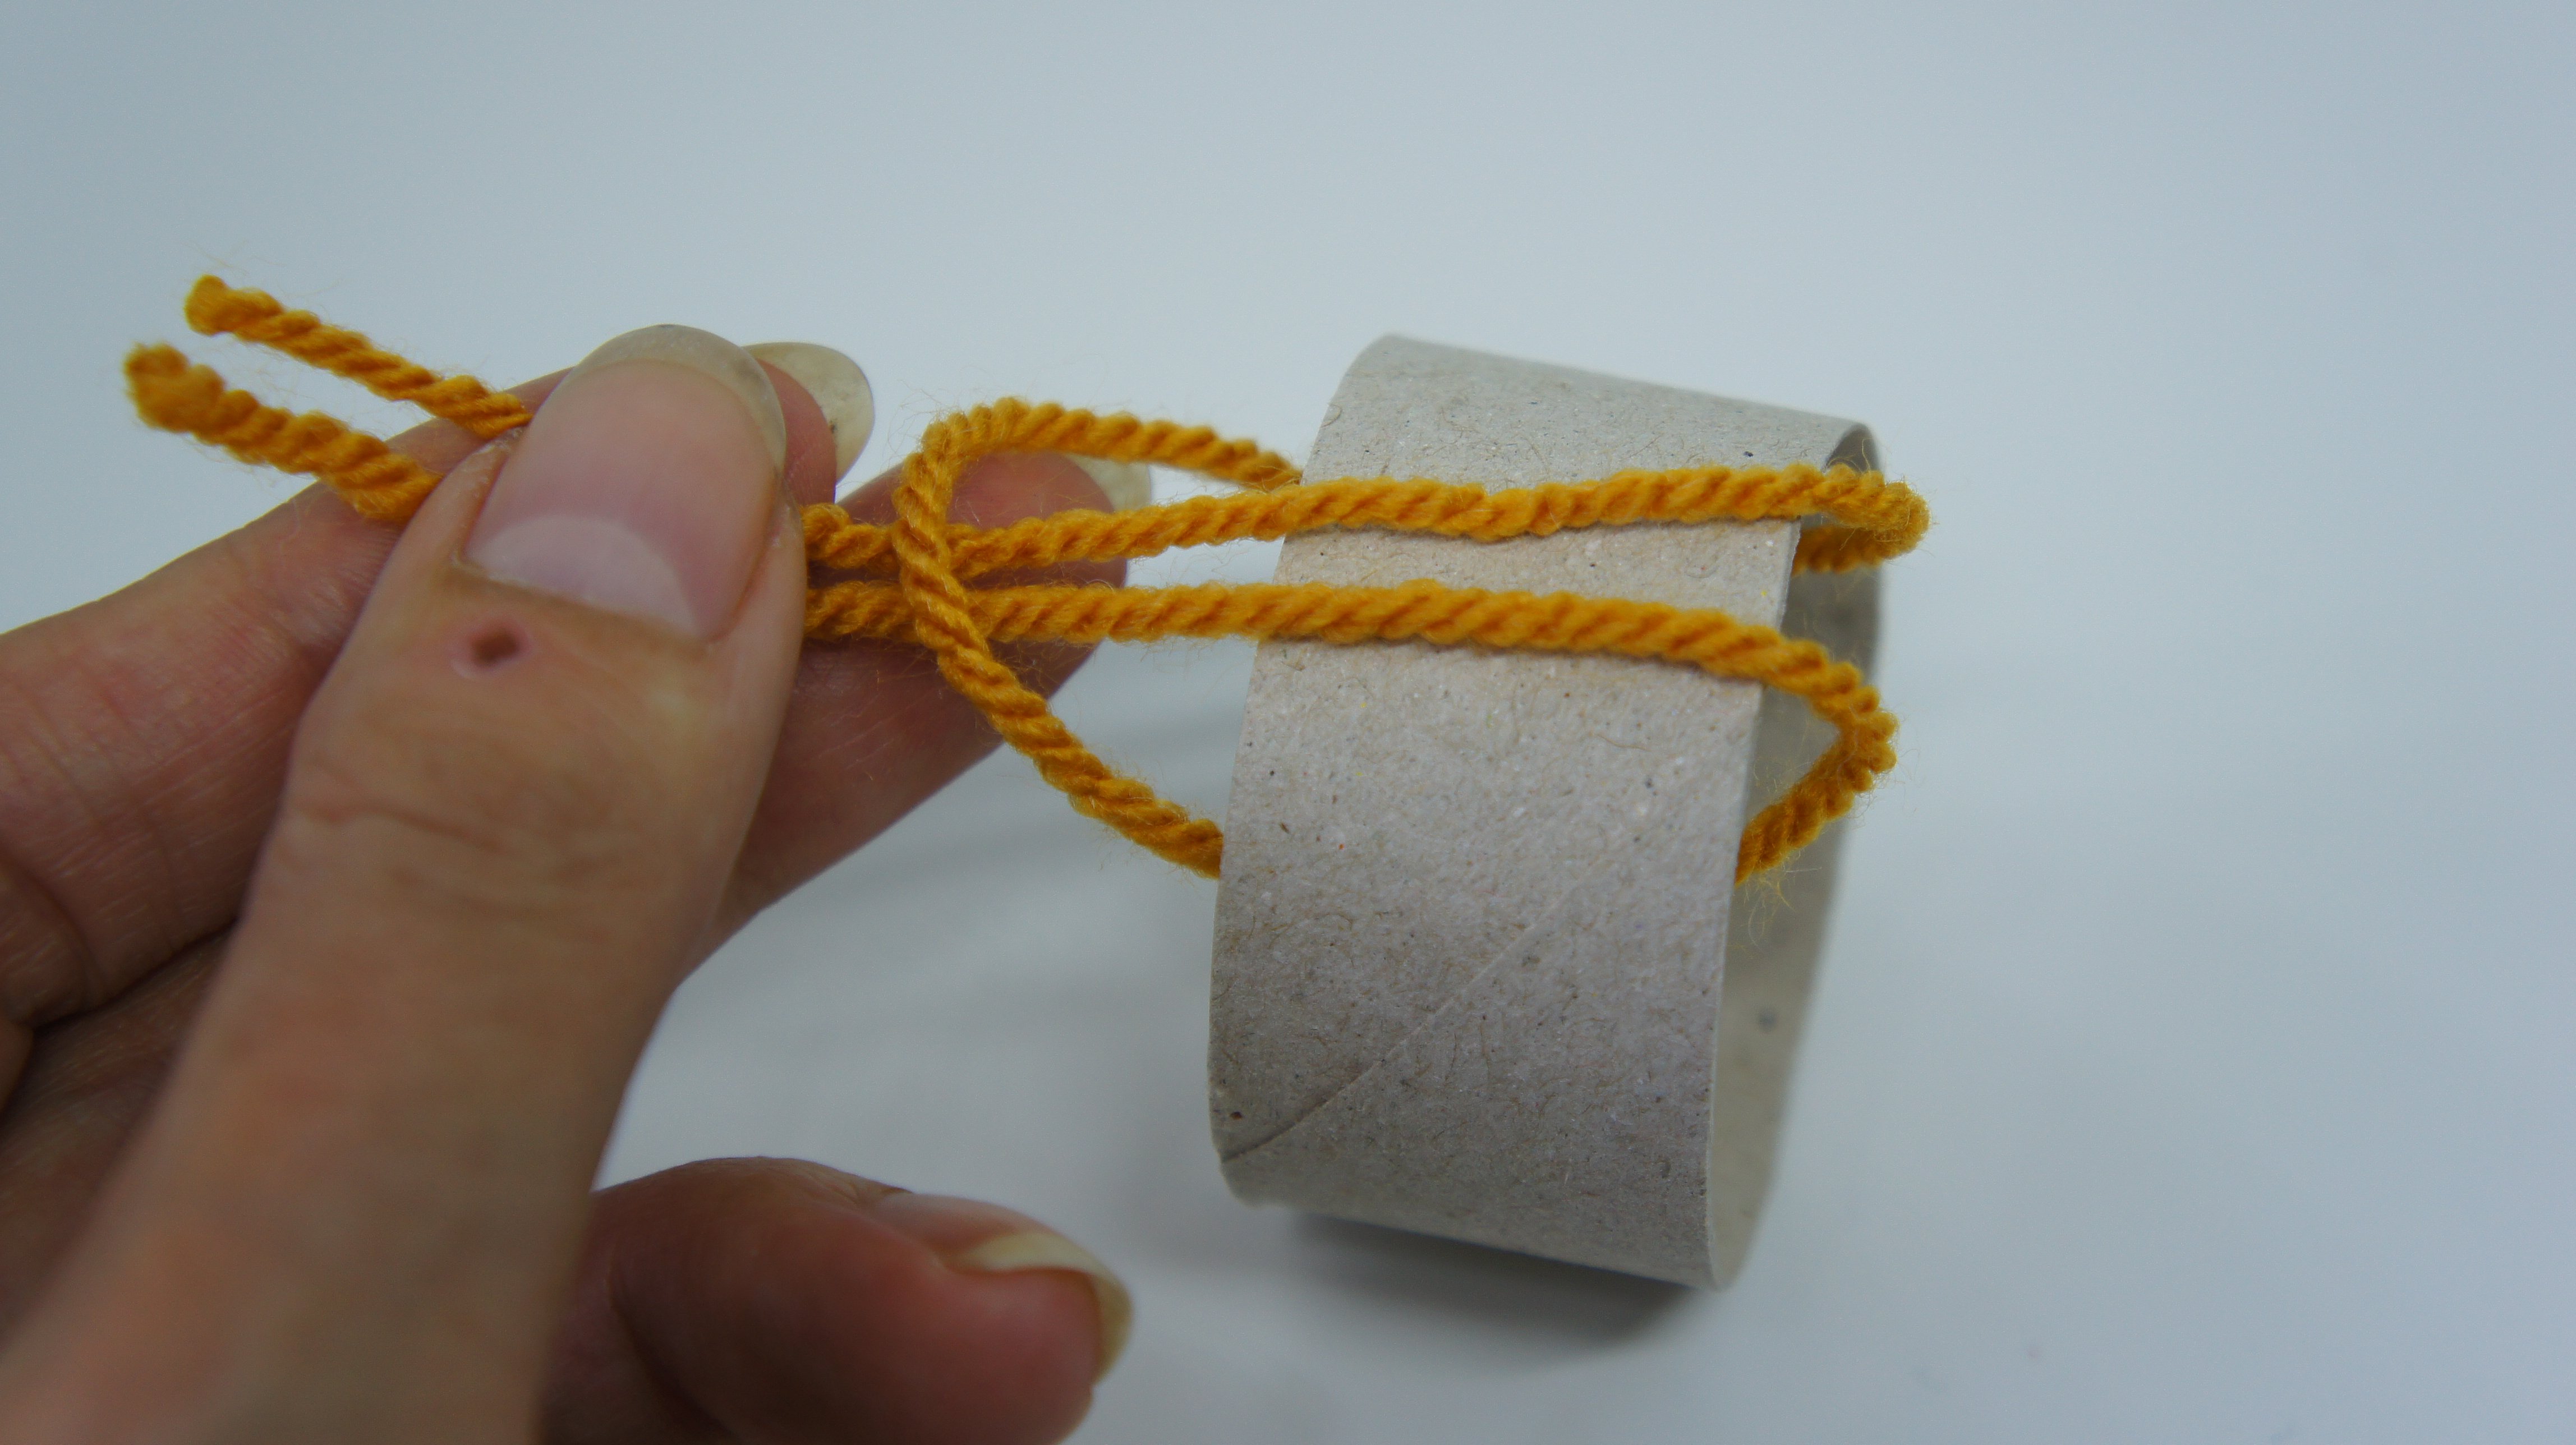
Now you just have to repeat this until you are all the way around the tube. If you are doing a pattern make sure you stick to your pattern. In this case I did 2 of each colour to form the stripes.
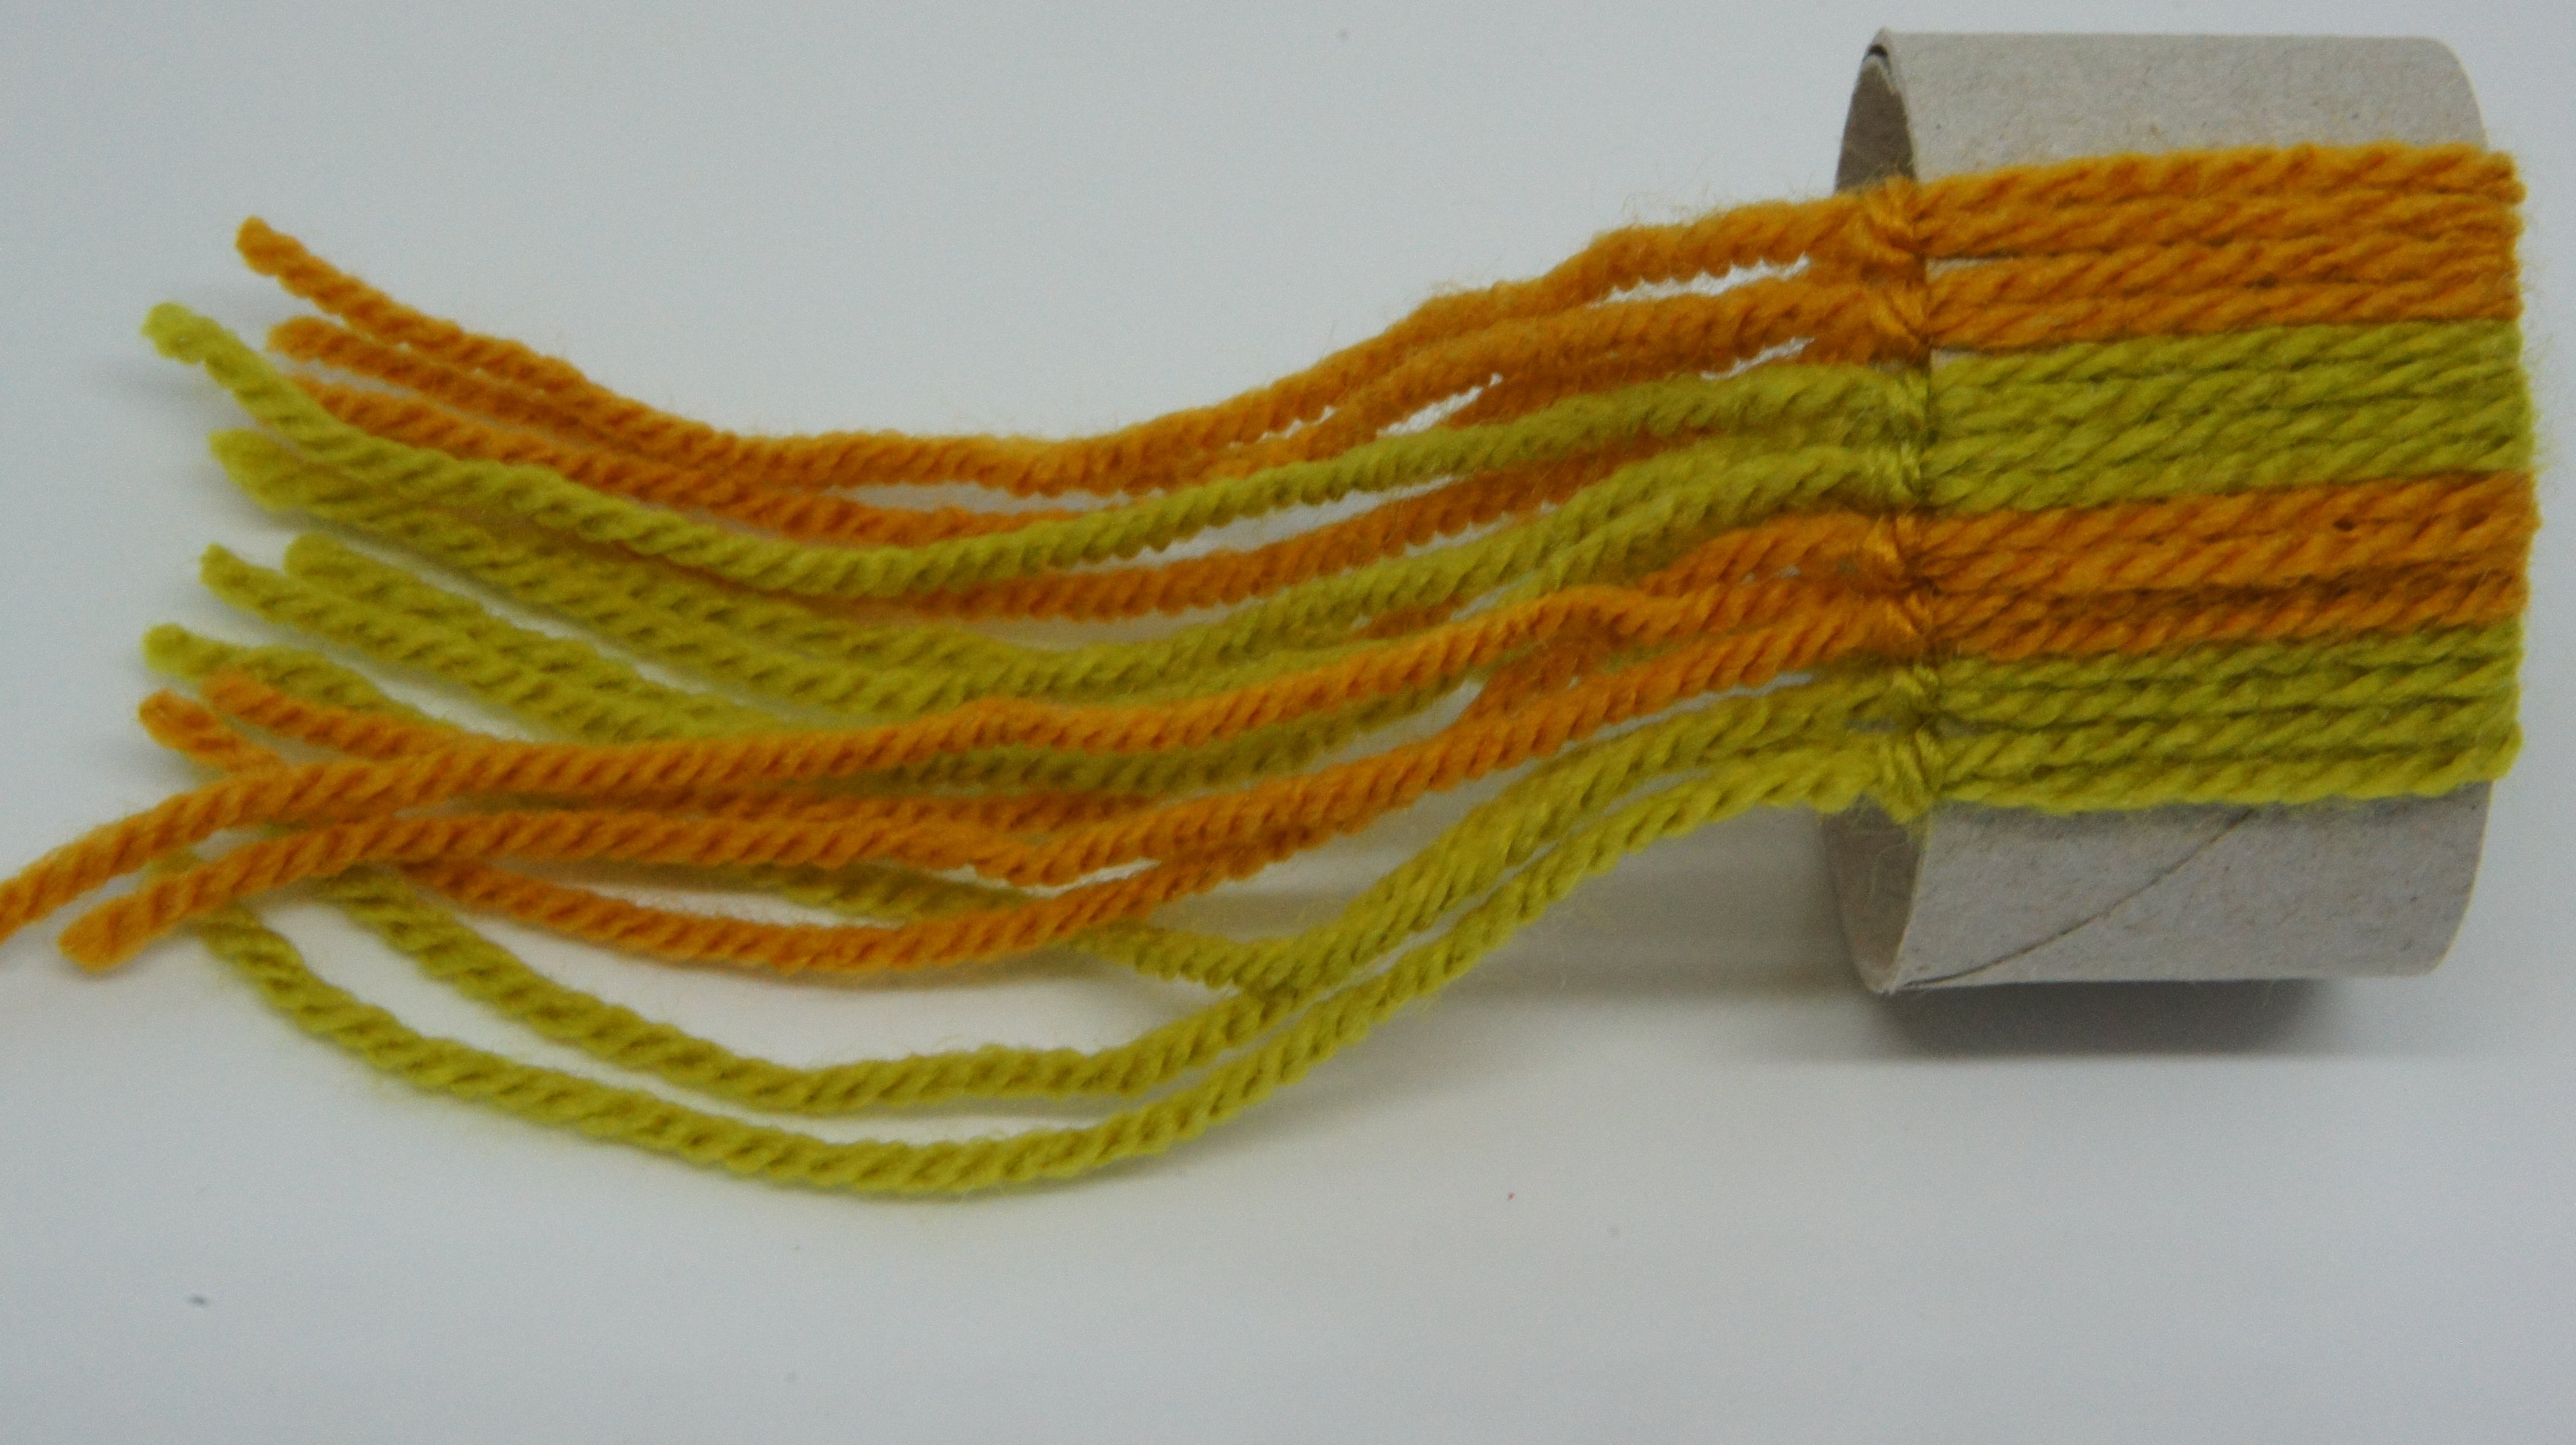
Ensure that you do enough yarn lengths to completely cover the tube. You do not want to be able to see the cardboard tube at all.
Step 3: Push yarn through tube
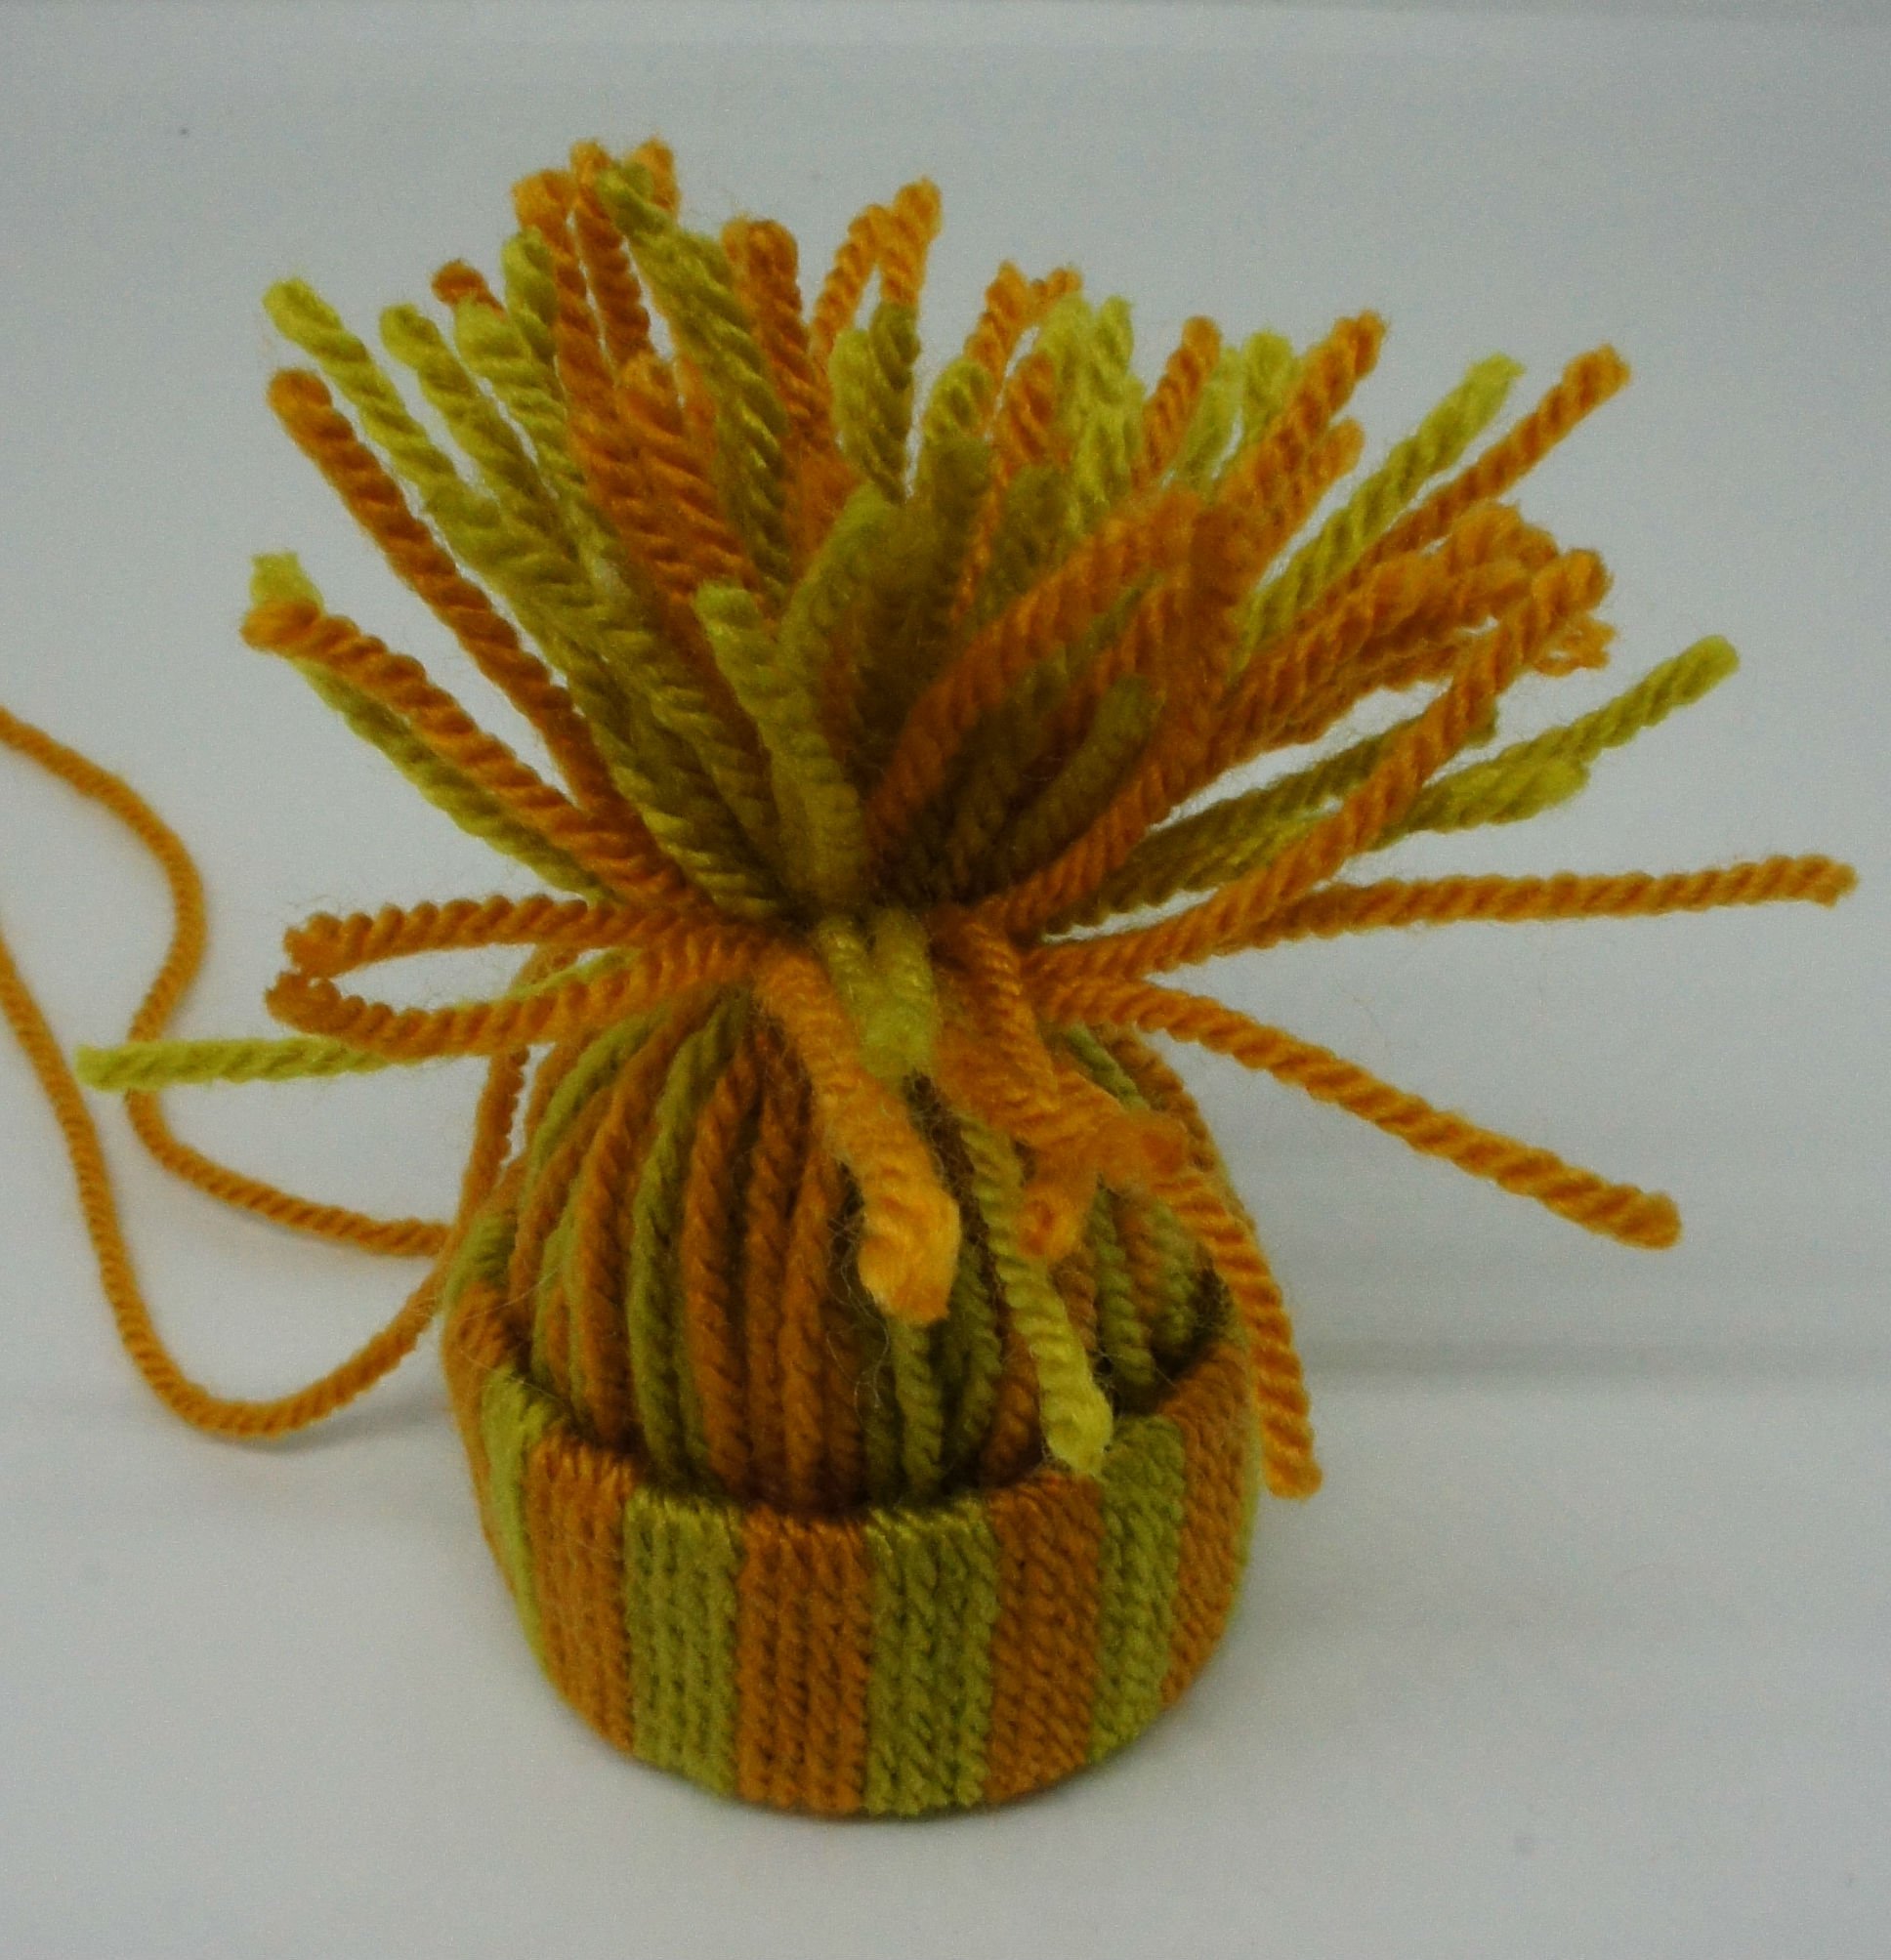
Twist the yarns together.
Push the twisted yarns through the tube to the other side. The knots are now at the ‘bottom’ of the hat.
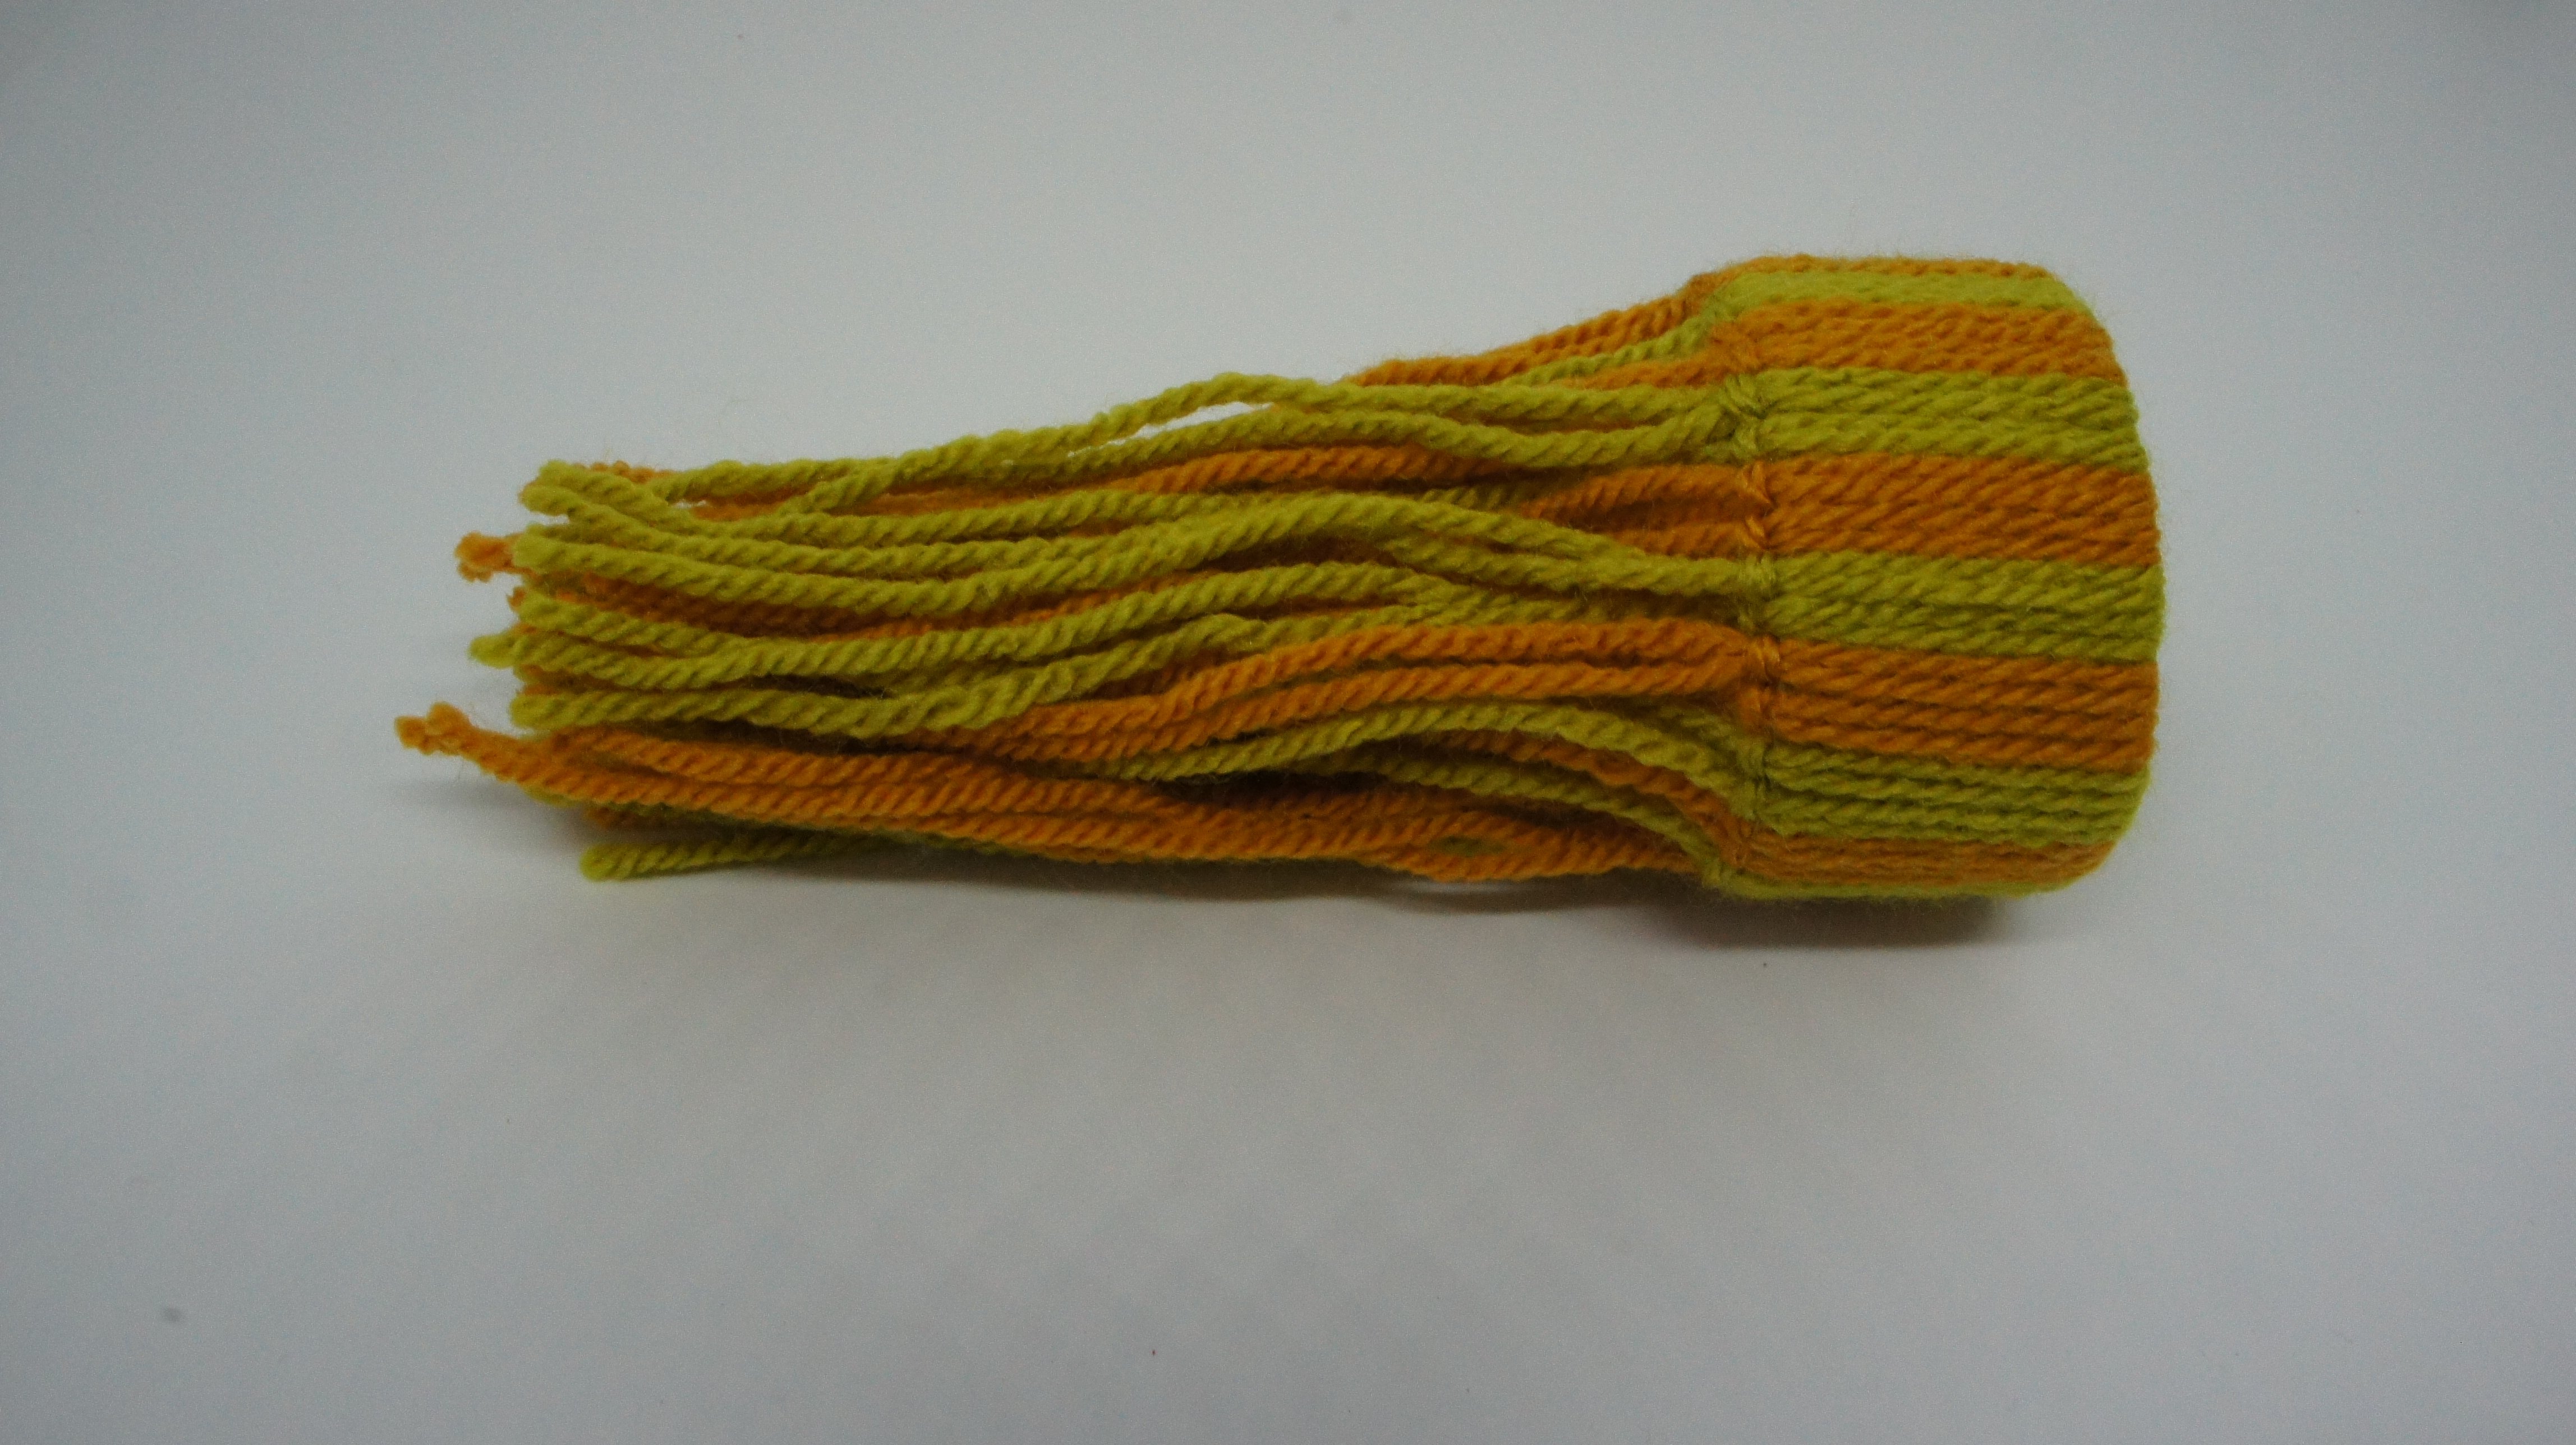
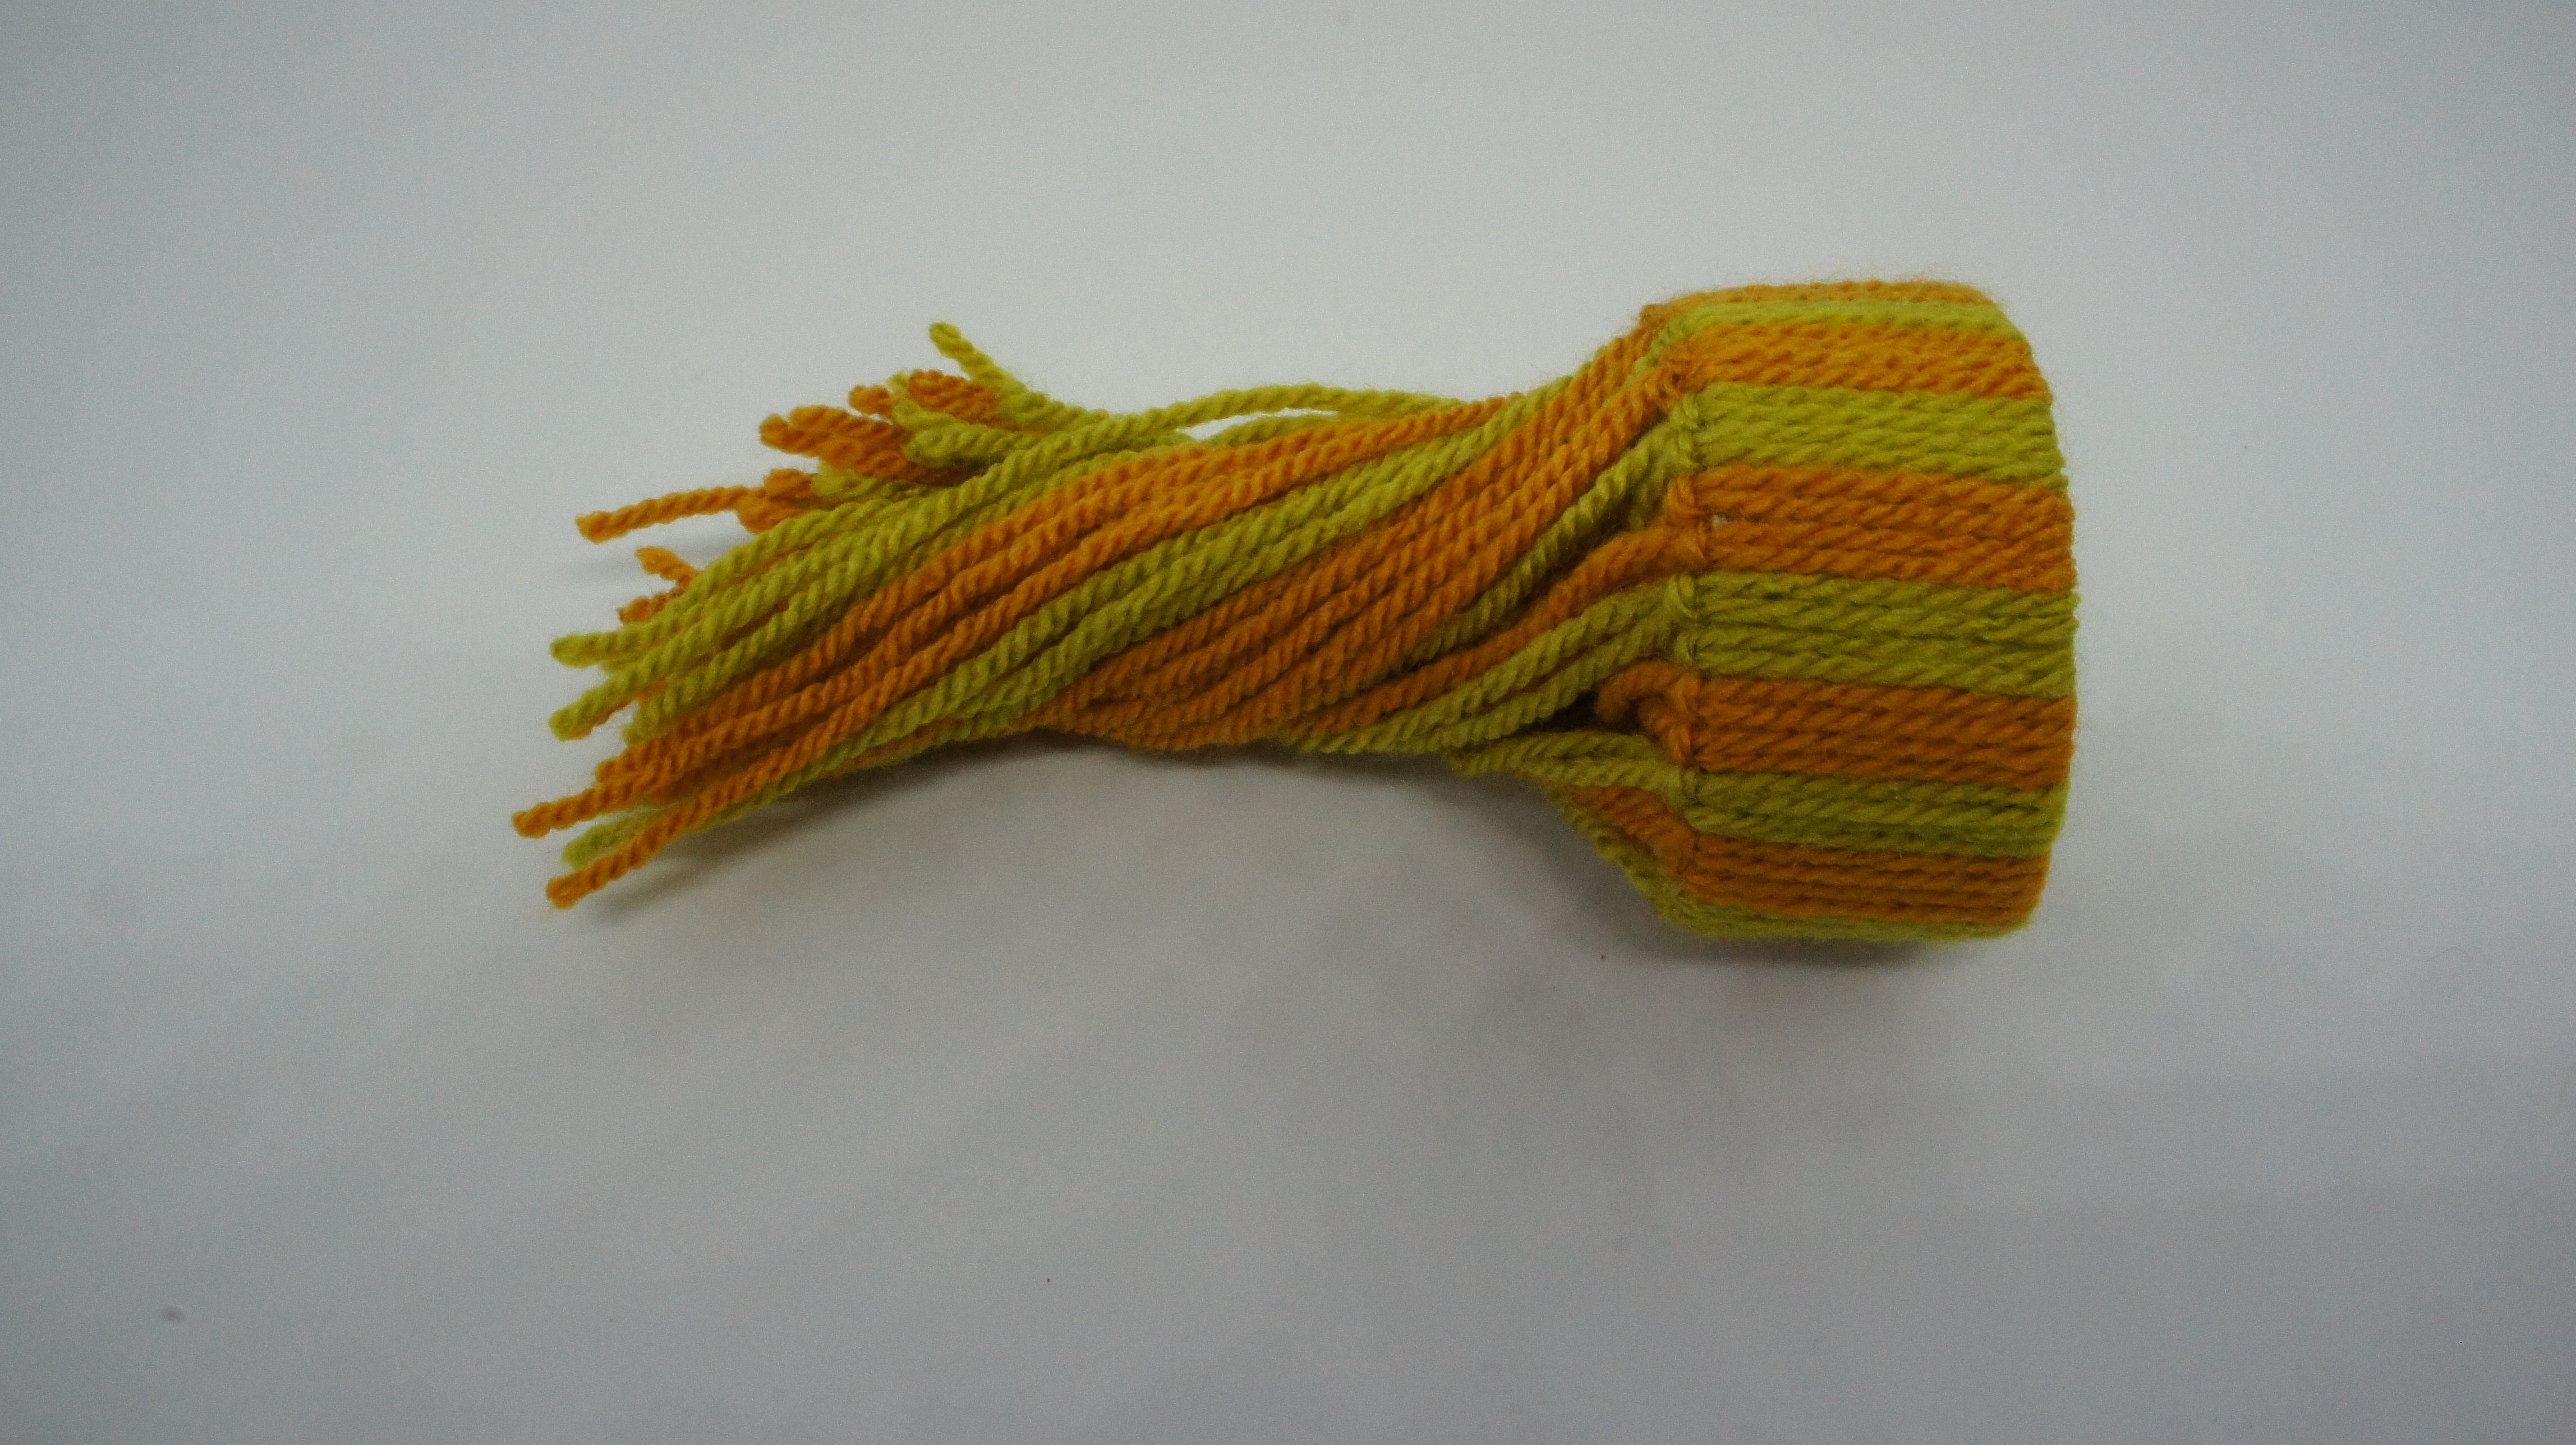
Step 4: Tie yarns together
Now straighten the yarns and tie them together approximately 3cm (1″ to 1.25″) from the tube. I used a long length of one of the yarns. This will also form the hanging thread.
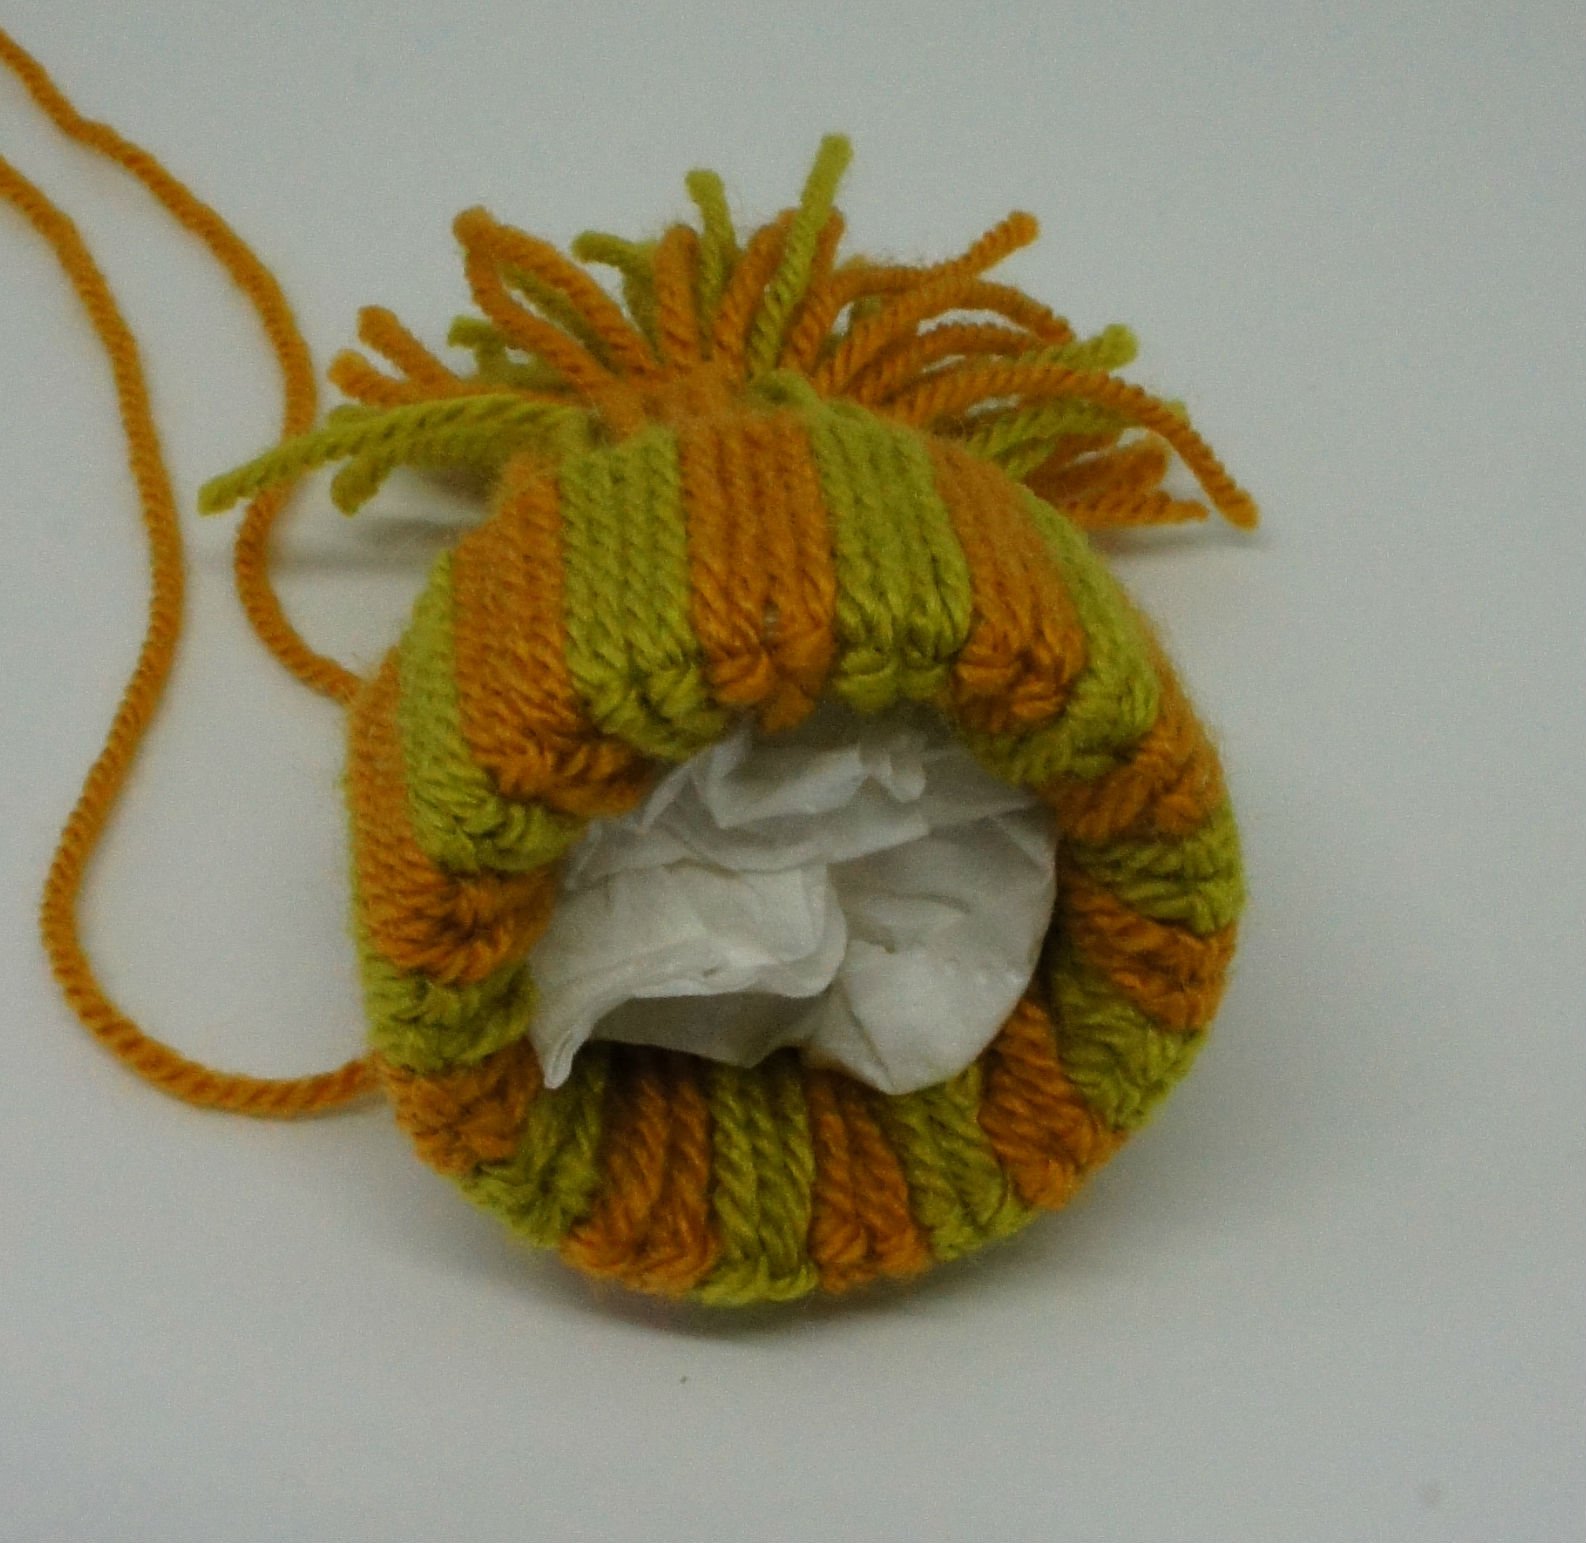
Step 5: Stuff hat
To make sure your hat keeps a nice shape push a little tissue paper into the hat. Be careful to support the hat shape without pushing the tissue paper between the yarns. You do not want to be able to see it through the hat.
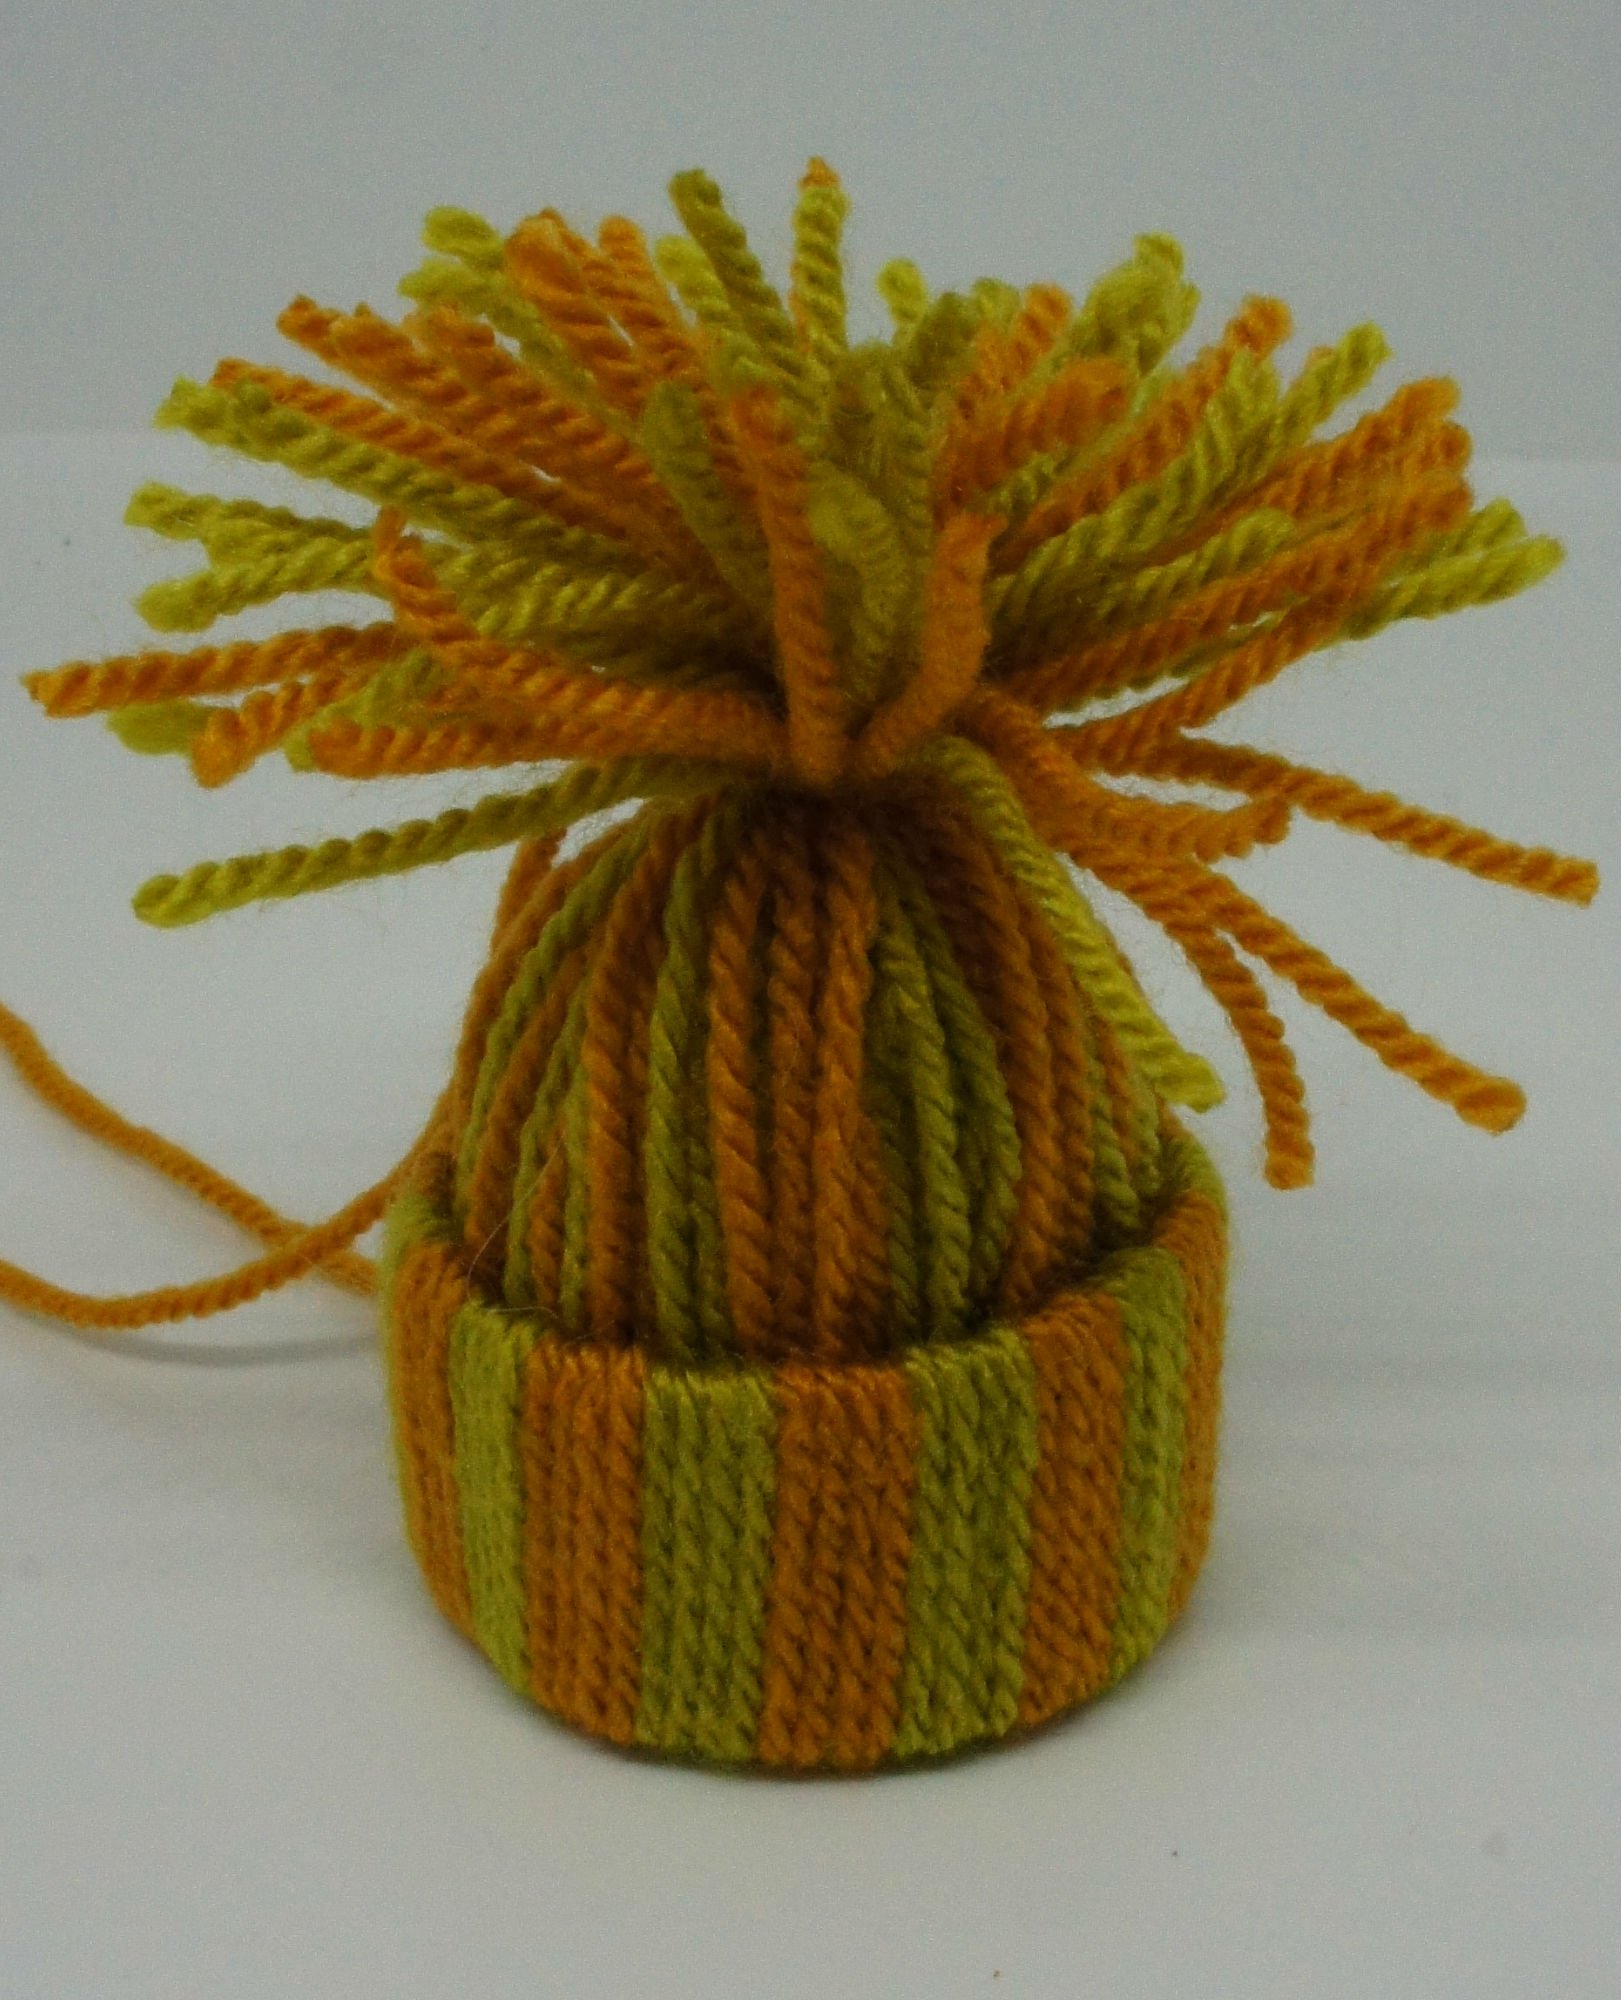
Step 6: Trim yarn ends
Finally trim off the yarn at the top of the hat to form your pom pom. It is your choice how long you want them. I have made four hats and tried different lengths for each. I prefer the shorter pom pom on the pink and blue hat! Be careful not to trim off your hanging yarn.
Summary:
These woolly hat ornaments are really easy to make and are great for kids to make. They get a very professional looking result really quickly. They make lovely gifts as well as complimenting your own Christmas decor.
So have a go and remember to pin this article so that you can find the instructions again. I would love to hear about your great hats!
If you have enjoyed these decorations you might like these other Christmas tutorials:
Christmas Tree Hanging Diamonds
Remember to pin these instructions on Pinterest for later!

These are adorable and look so simple to do!! This is my kind of crafting because I am not creative at all. Thanks so much for sharing, can’t wait to do this with my kids.
These are so cute. They are easy enough for kids, but cute enough that I would enjoy having them out as decorations! Thanks!
This is so cute, Christine!! I love it! Thank you for sharing with us!