Step-by-Step Guide to Crafting an Elegant Origami Gift Bag
As an Amazon Associate I earn from qualifying purchases
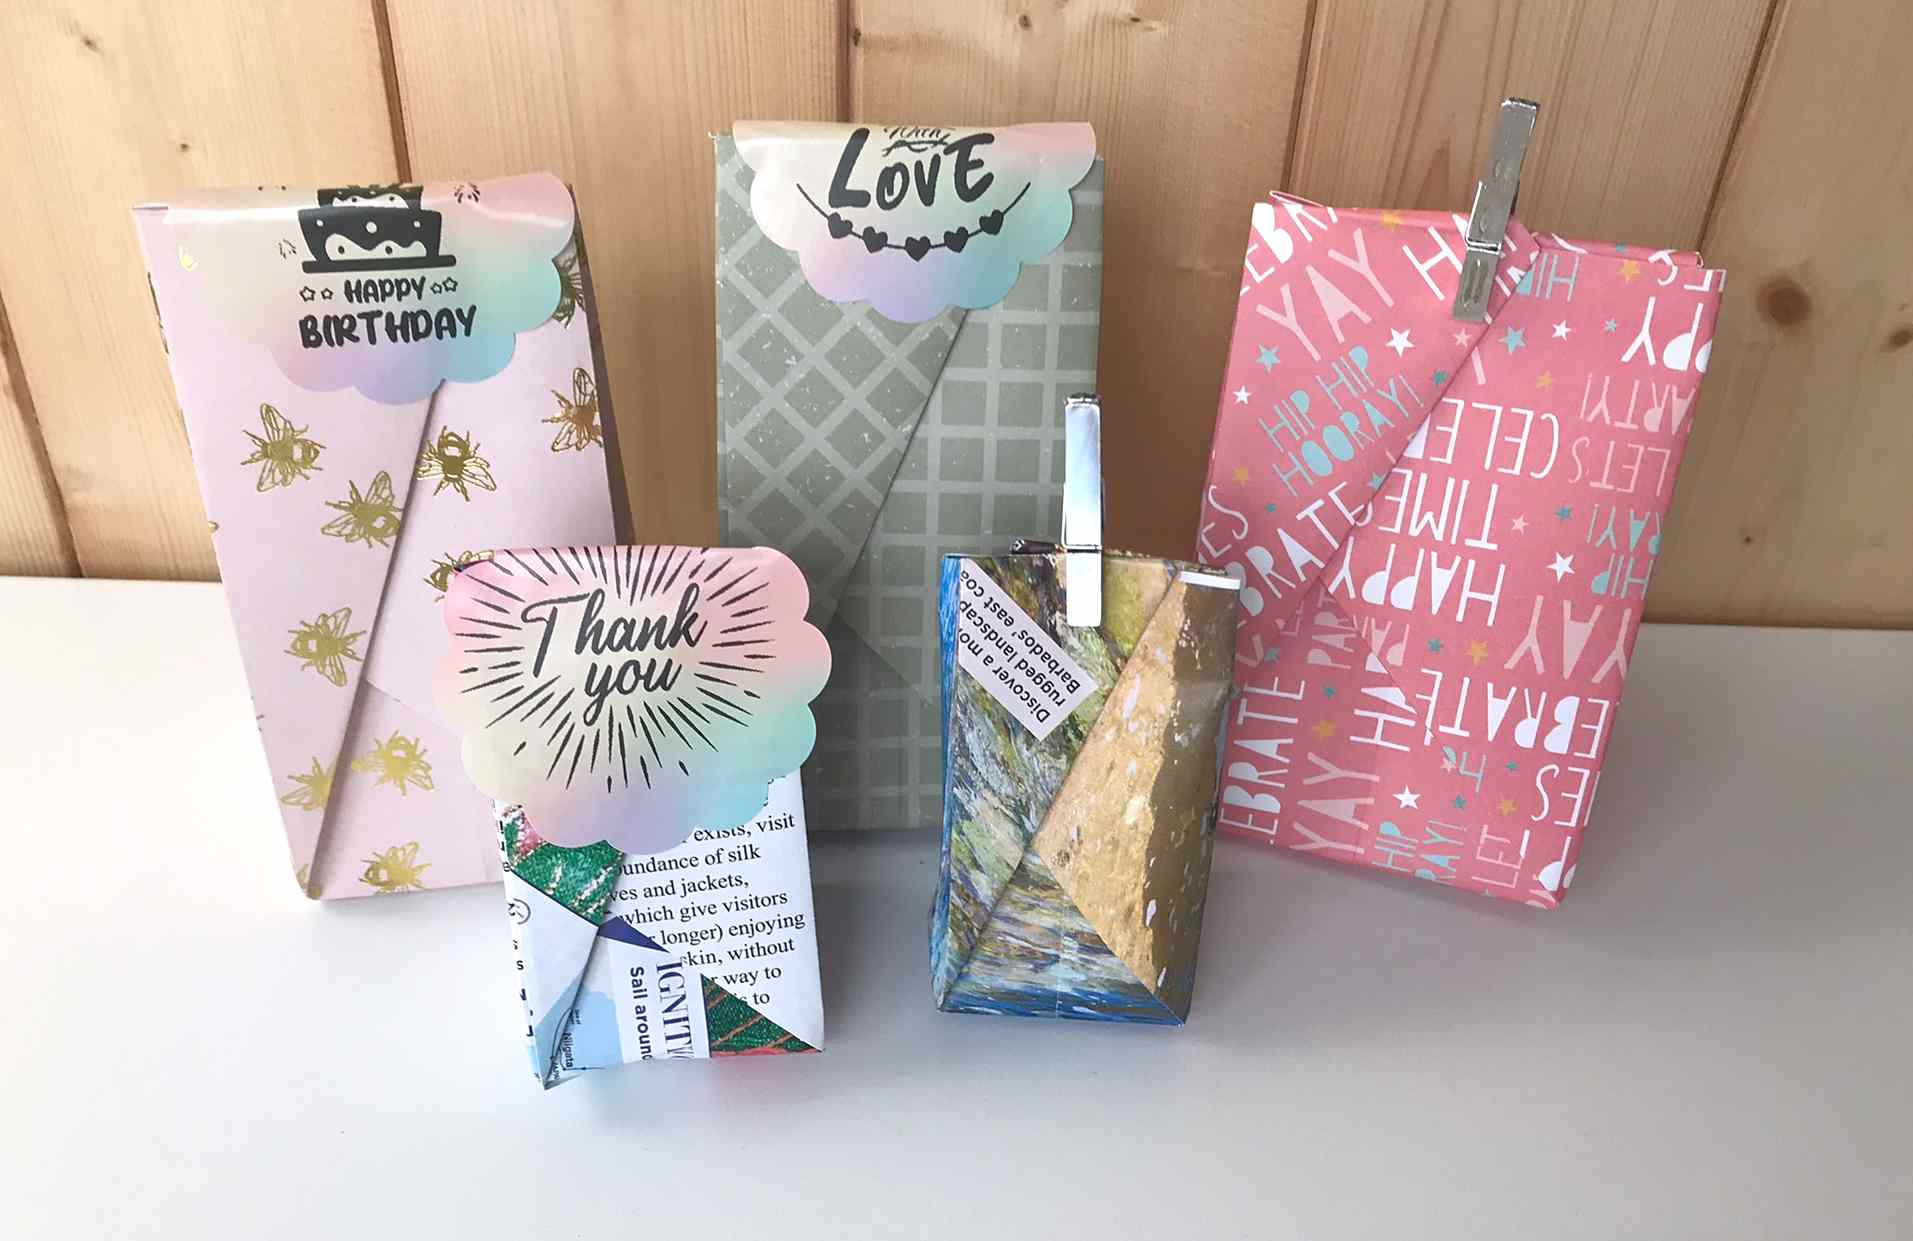
Would you like to make your own Origami gift bag but don’t know where to start? Well, don’t worry, this tutorial will show you exactly how to make some with step by step instructions and clear photos.
These paper gift bags are super quick and easy to make and you can make them out of any paper including wrapping paper. I must say that I prefer the ones I made out of thick paper / thin card eg scrapbook paper. However the ones made from ordinary paper are great if you don’t go too big!
Simply follow along and you will have your Origami gift bag in no time.
This page contains affiliate links meaning I earn a little commission if you use those links at no cost to you. I only recommend brands I use and trust.
General Origami Tips
- Ensure all folds are accurate
- Press all folds firmly
- Running your fingernail along a crease makes it a sharp crease
- Ensure your paper is the same way round as mine at every step
- If you want to learn some basic origami folds take a look at The Beginner’s Guide to Origami
You will need:
- Square of paper (I talk about sizes further down)
- Something to close your gift bag eg, sticker, peg, large clip
Video Tutorial for Origami Gift Bags
Initial Gift Bag Folds
Sizing of Origami Gift Bags
I have included a few bag sizes based on the size of paper you use. These are approximate but should help you to make an Origami gift bag for your particular gift!Paper size Bag Size 12″ x 12″ 4.5″ tall by 2″ across 8″ by 8″ 3″ tall by 1.5″ across 6″ by 6″ 2″ tall by 1″ across
Some ideas for paper include scrapbook paper, Origami paper, old book pages, old magazine pages and good old fashioned coloured paper.
Preparatory Folds
You will start with a few basic folds to get the basic shape that we will work from. If your paper is only coloured or patterned on one side make sure to start with the paper coloured or patterned side down.
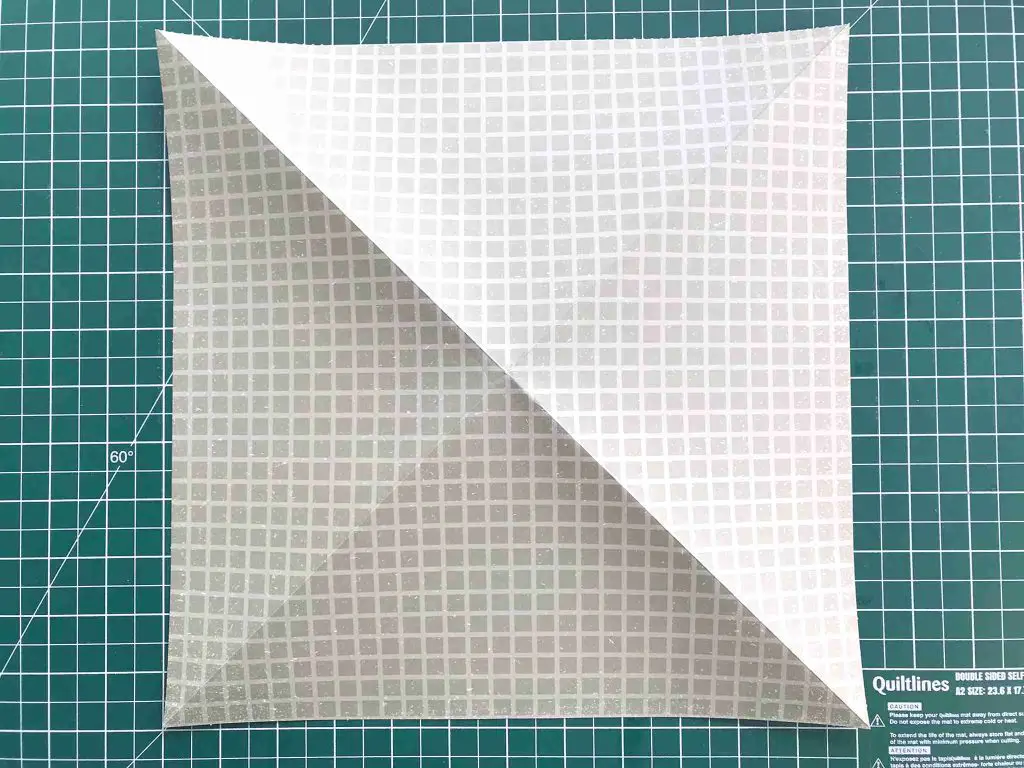
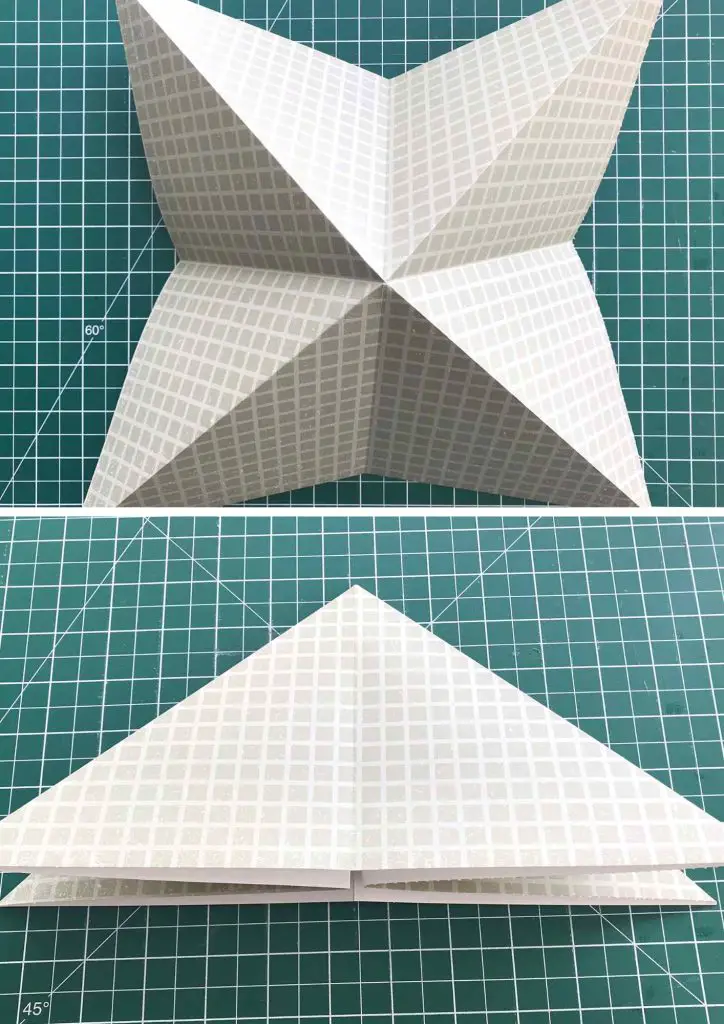
Fold the square in half, corner to corner, to form a triangle. Open the paper back out and repeat with the other two corners. Open the paper back out.
Turn it over and it should look like this.
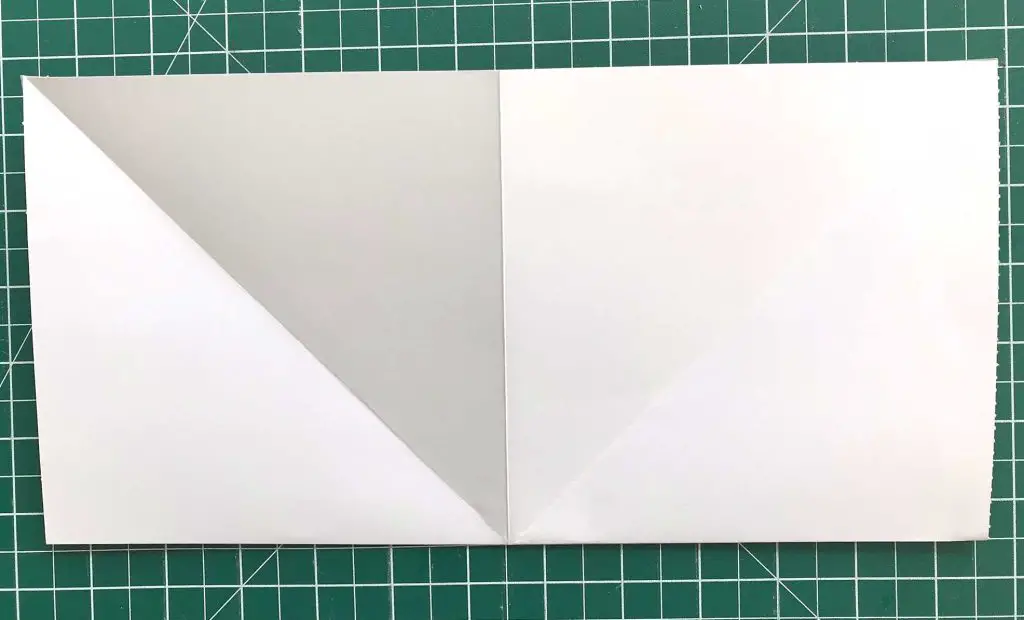
Now fold the paper in half so that 2 sides meet and you form a rectangle. Open the paper back up and repeat for the other 2 sides. Open the paper back out.
Now use the folds that you have made to fold up the square to form a triangle as shown below. The square should naturally fold up to form this shape because of your folding. If it does not check that you turned your square over between folds as described above. Check your paper looks like mine (below) and if necessary re-do your folds so that they are crisp and strong creases.
Fold your Origami Gift Bag
Lay your triangle so that the point is towards you. Fold the point up approximately 1″ . You can vary this depending on the size of your bag. For a paper size of 12″ by 12″ square 1″ is perfect!
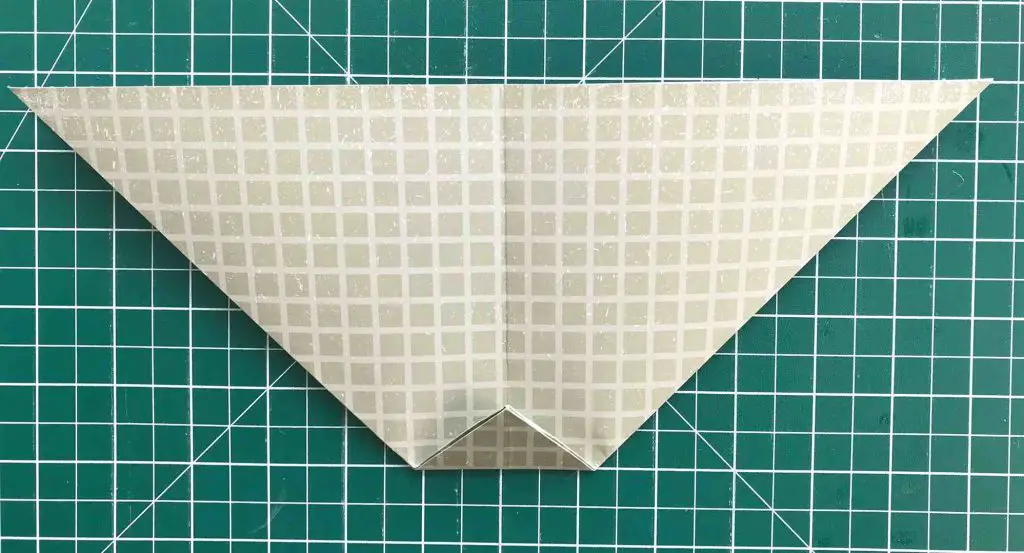
Take the right hand front point and fold it over to the left side making sure that you fold it in line with the triangle that you formed at the bottom for the base.
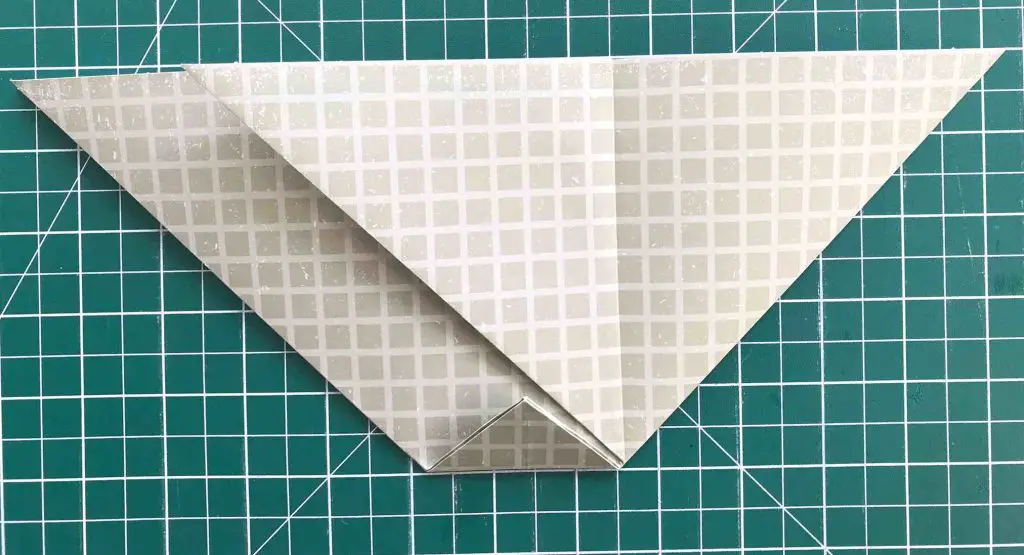
Open it back up and repeat for the left hand front point. Open that one back out too. You now have the triangle you started with but it has a base folded up at the bottom and 2 vertical fold lines.
Now take the right hand point and fold it back into position. Then fold it back on itself in line with the other vertical fold.
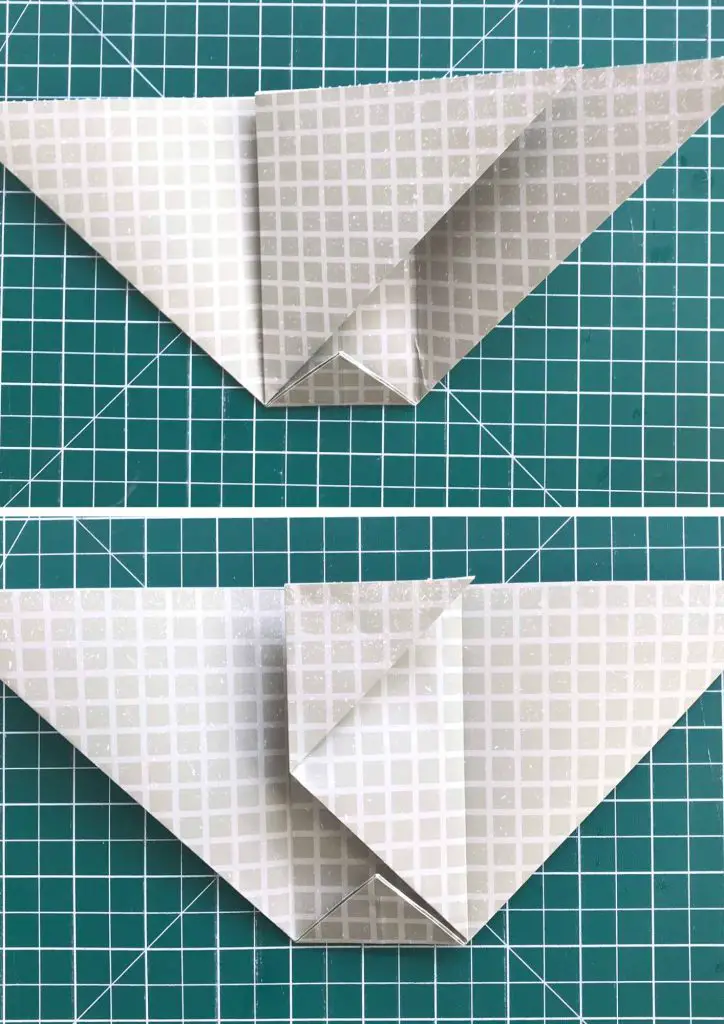
Bring the left hand pint over to the right using the fold you made earlier. Then fold it back on itself so that the long side lines up with the vertical fold. The point should stick out over the top of the rest of the ‘bag’.
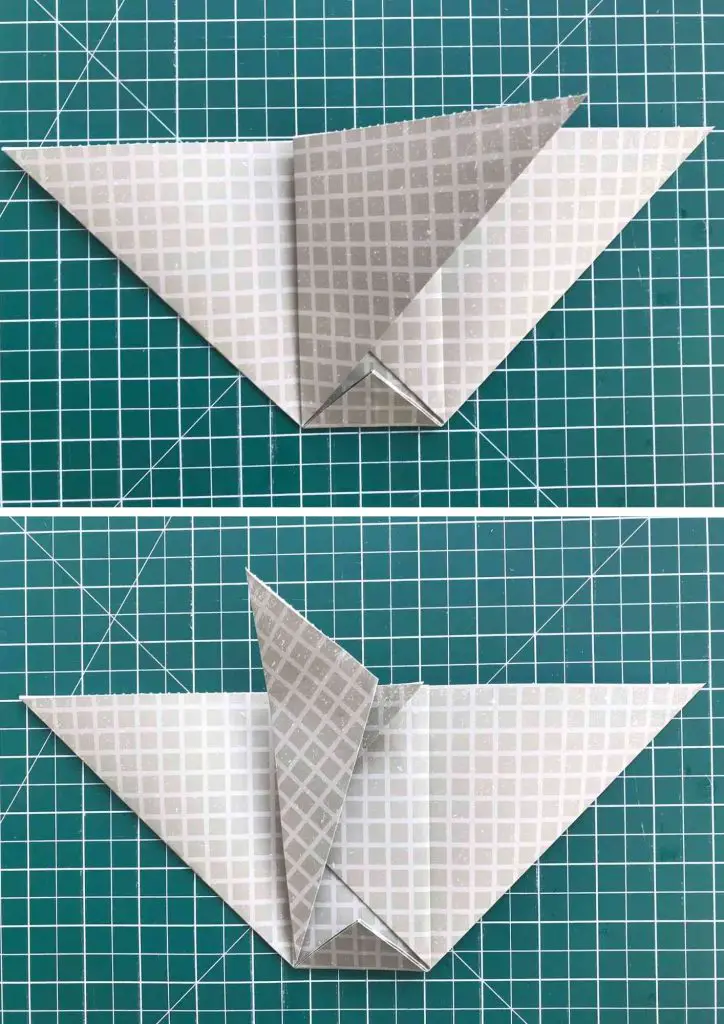
Turn the whole thing over and repeat all these steps. Your bag should now look like this.
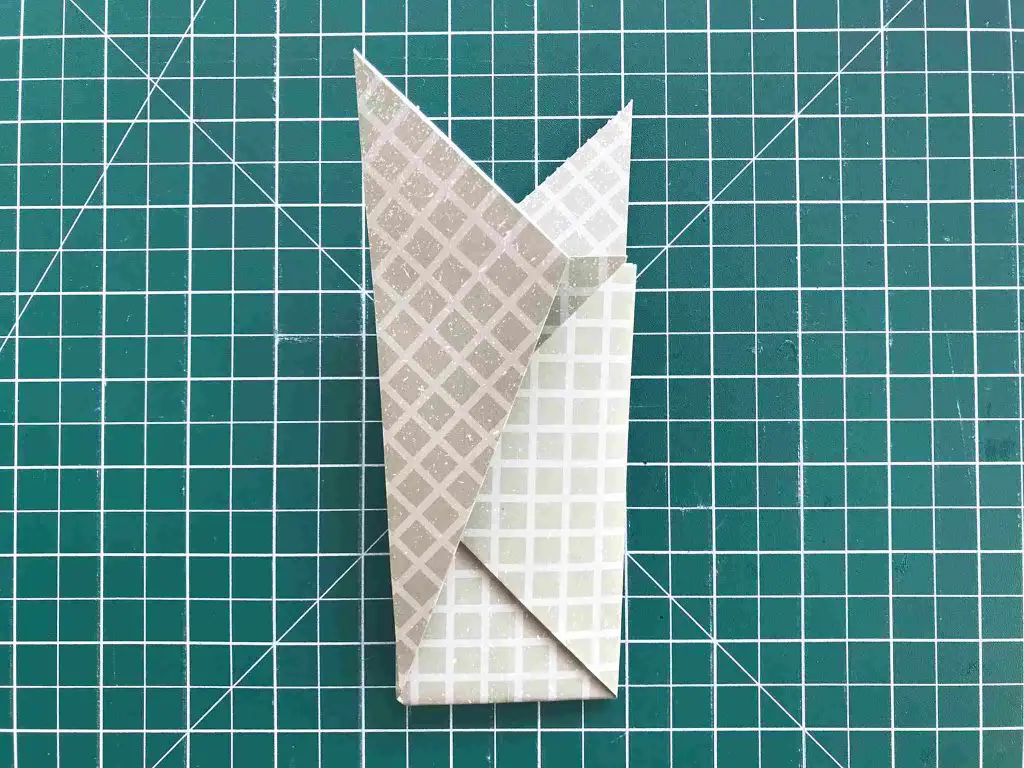
Fold those 2 top points over in line with the top of the gift bag. It is easier to fold them out than in.
Then fold the bottom triangle back out again.
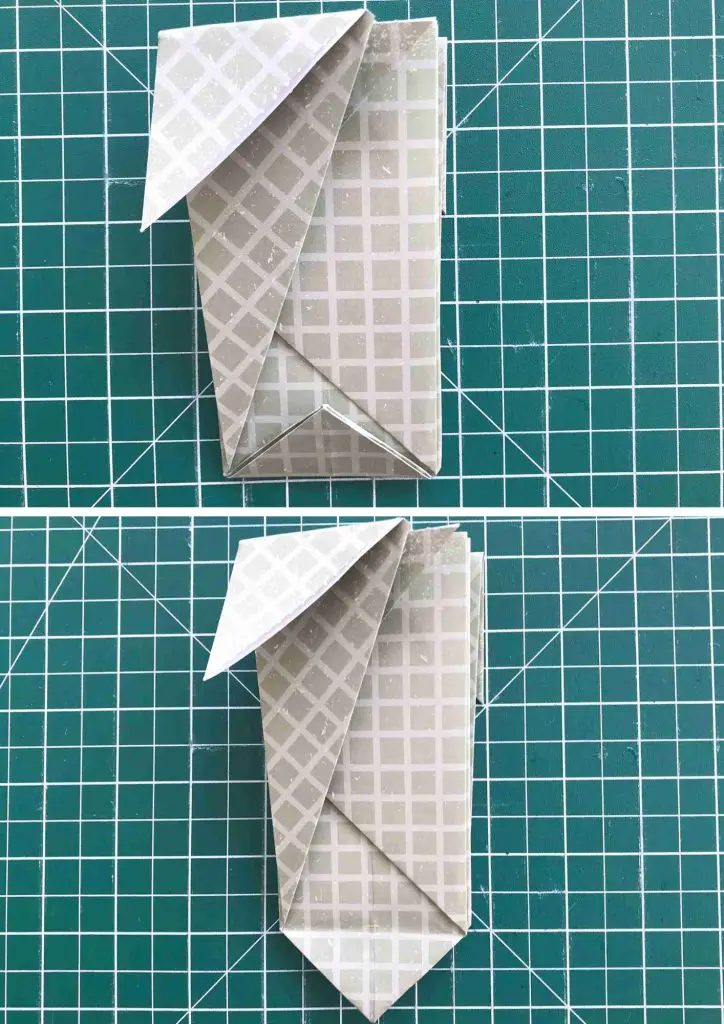
Then, fold each one of the top points in turn so that the fit inside the bag and hold each side secure. The fact that you just folded them the other way first makes this much easier!
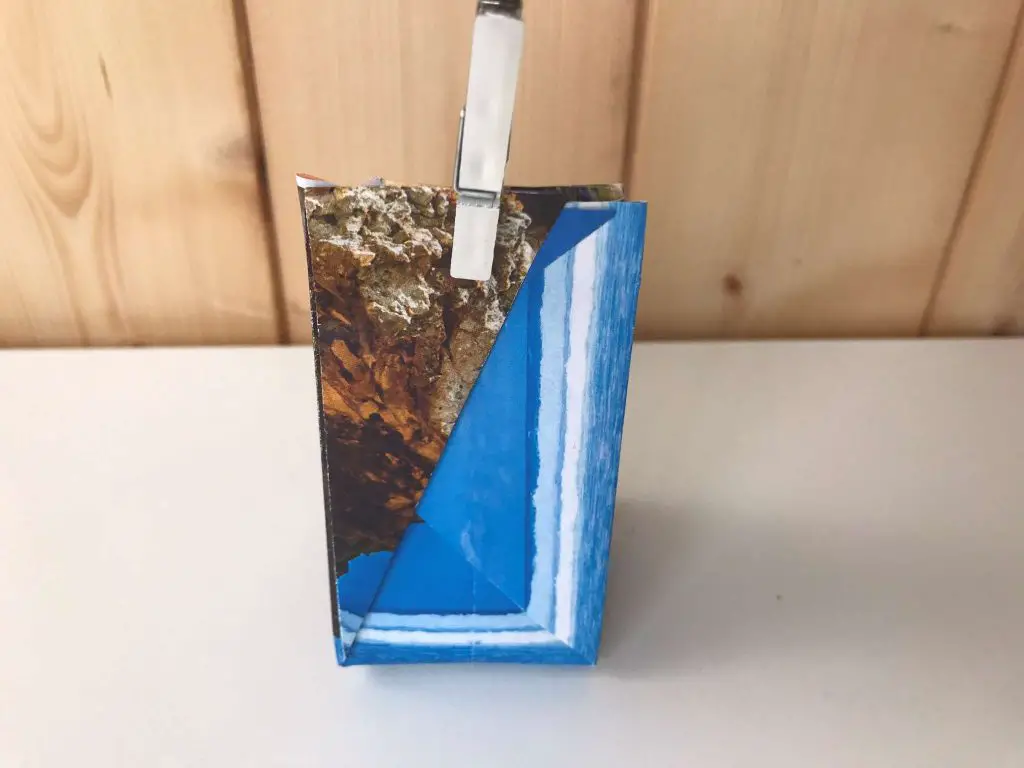
Then all that is left to do is to open up your bag at the top and gently push the bottom out to form a square bottom.
Finishing Touches
It is entirely up to you how you decide to close your gift bag but I find that cute little pegs or stickers work the best. Obviously if you use pegs then the gift bags are reusable.
If you are interested in creating your own personalised stickers without the expense of ink then how about a thermal labelling machine. You can check one out here and see what you think. You will also see a different DIY gift bag.
If you used plain paper then you could also add decoration to your bags. I recommend doing this before you push the base out to make your bag 3d.
And next …
So what else might you need with your gift bag?
Well, how about some gorgeous book page gift tags? They are super quick and easy to make and you could make them to match your gift bag.
Every gift benefits from a bow so why not make your own in minutes? This tutorial uses magazine pages but you could use whatever paper you use for your gift bag.
Whatever you choose to make your gift bag out of I am sure the lucky recipient will love it.

