Folded Book Angel – How to Make
As an Amazon Associate I earn from qualifying purchases
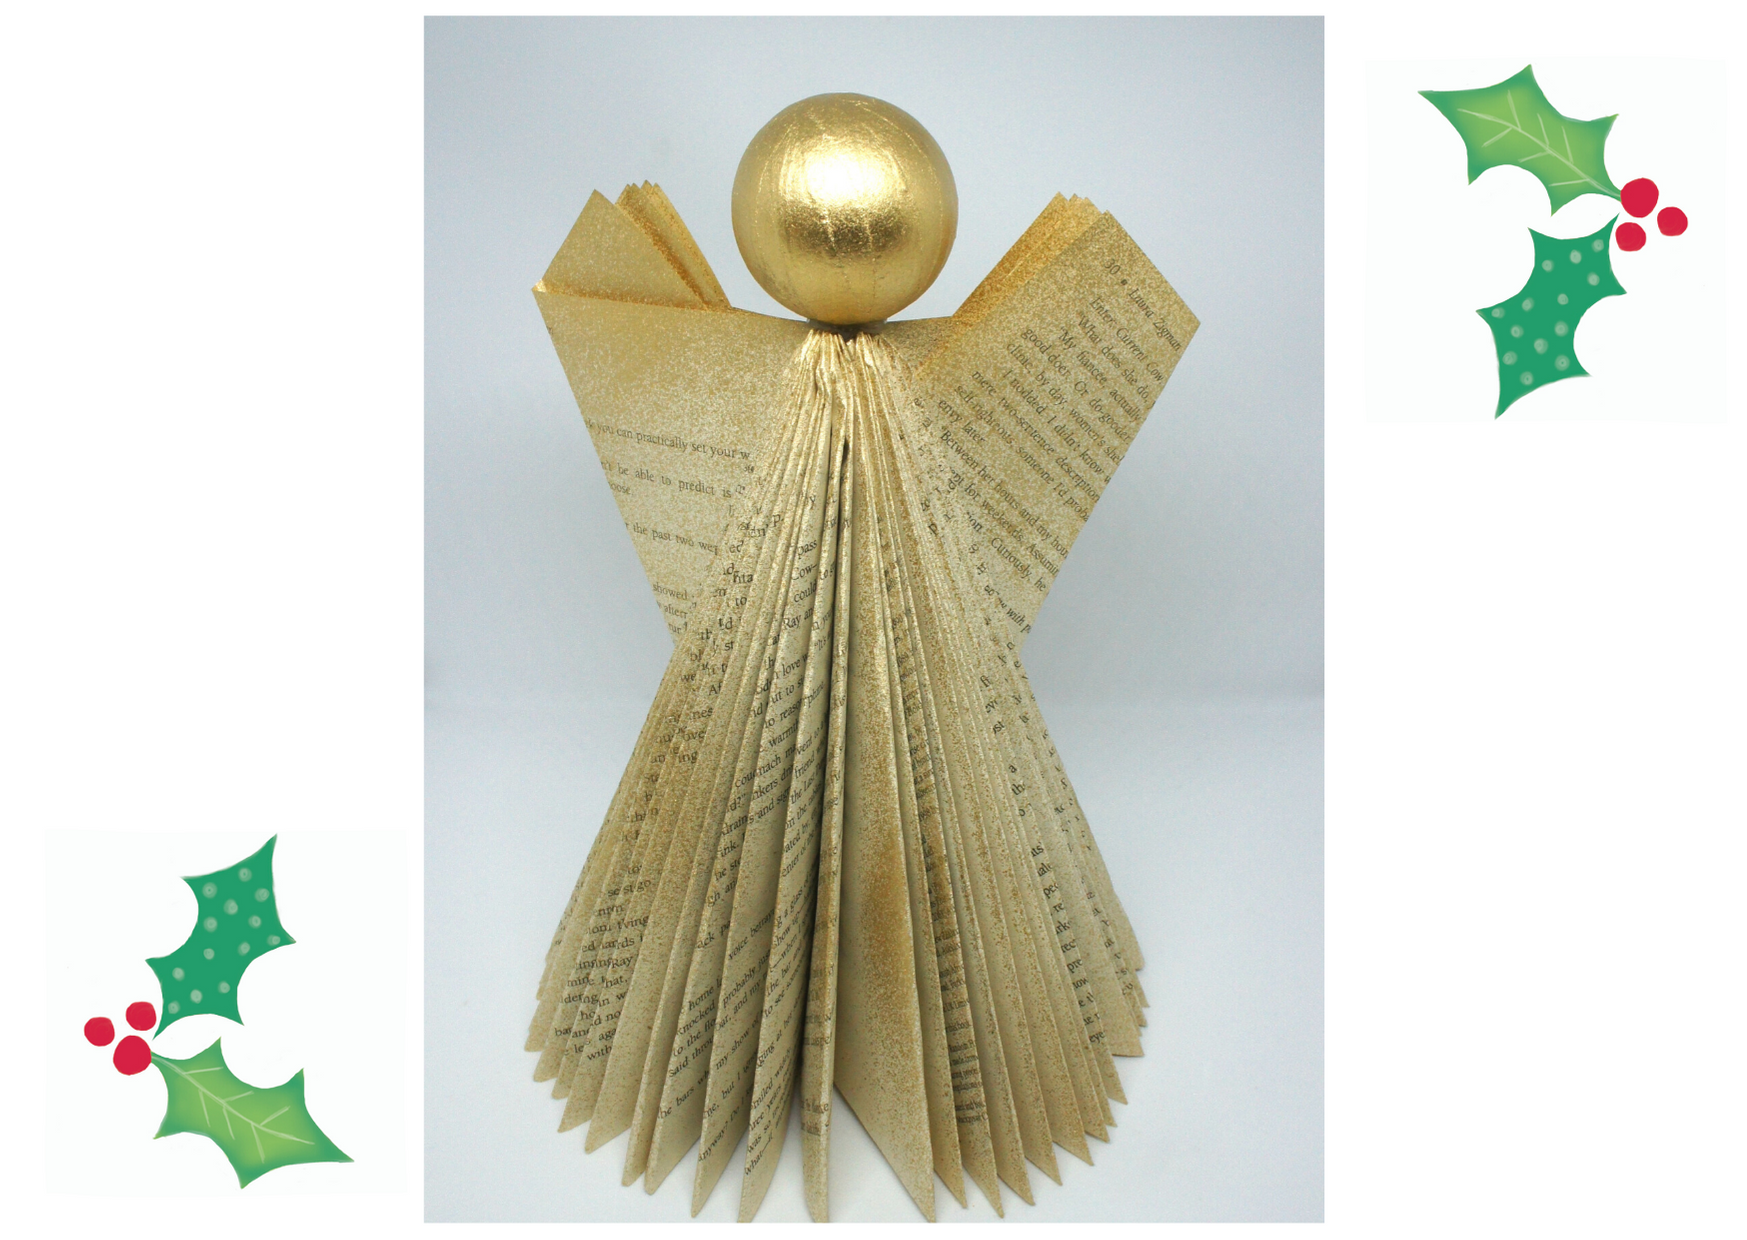
Hand made Christmas decorations are so beautiful. What could be nicer than an angel made from an old book? A folded book angel is virtually free to make and as a result you can make loads of them if you want to. I have made 2 to sit on my mantelpiece over the festive season. You can leave them simply as books or add a touch of glamour with some spray paint. You could also add bows, buttons, tinsel, etc to make your unique angels. So, take an old paperback book and make your folded book angel in under 30 minutes!
If you like watching how things are made then scroll to the bottom of this article and watch my video showing you how to make an angel.
You will need:
An old paperback (you need about 150 pages but you can just rip a book apart like I did and make 2!)
Just make sure that the spine of your book is glued.
Angel head – papermache, polystyrene or wooden ball
Any decorations you like
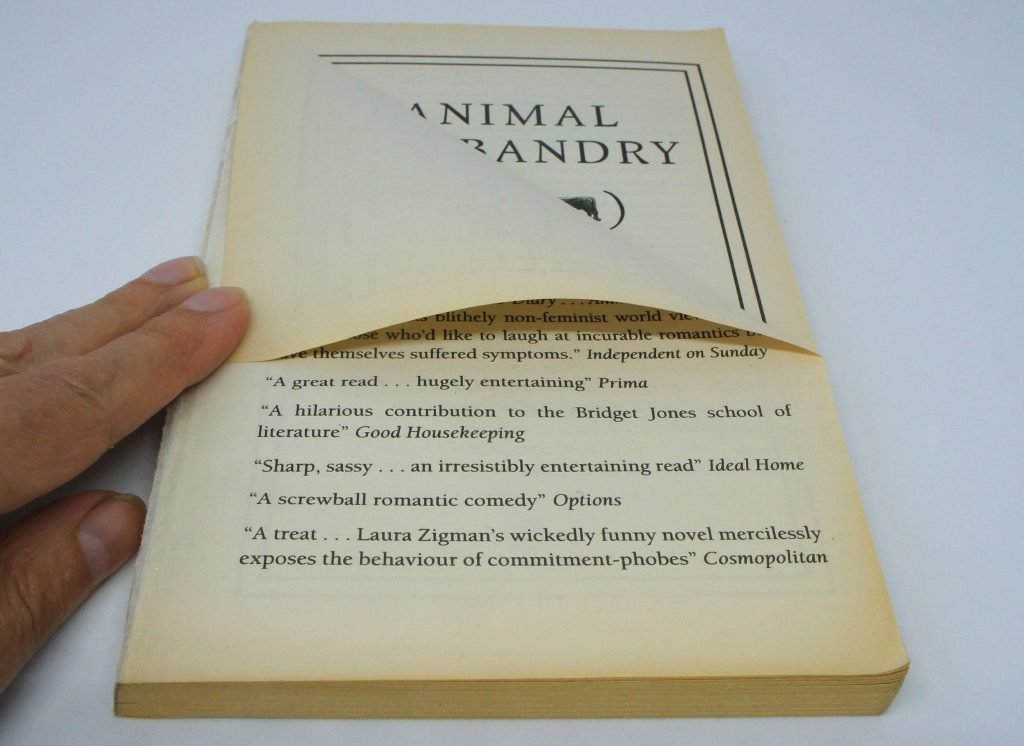
Step 1: Remove the outer cover
Remove the cover from the book and, if necessary, enough pages to leave approximately 150 pages for the angel.
Step 2: Start folding
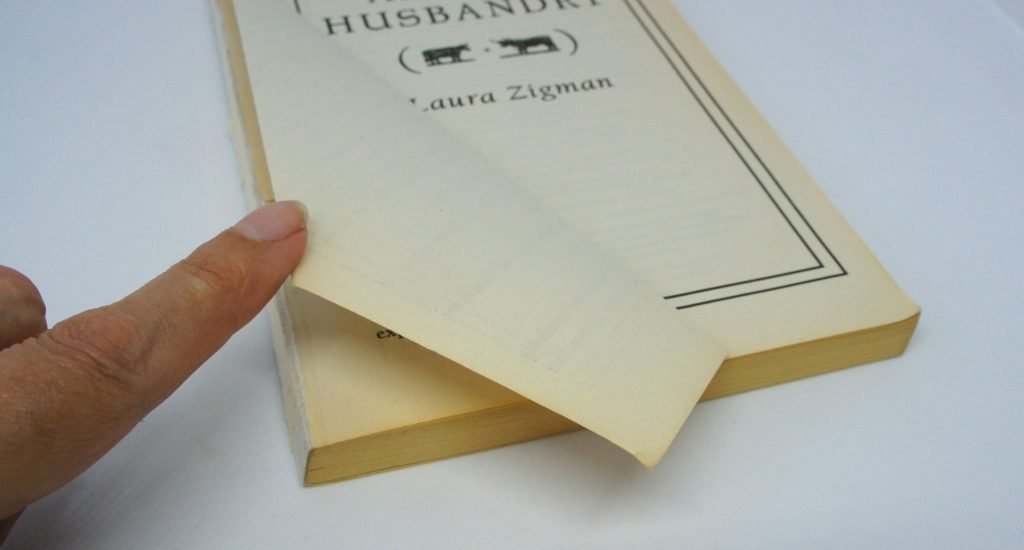
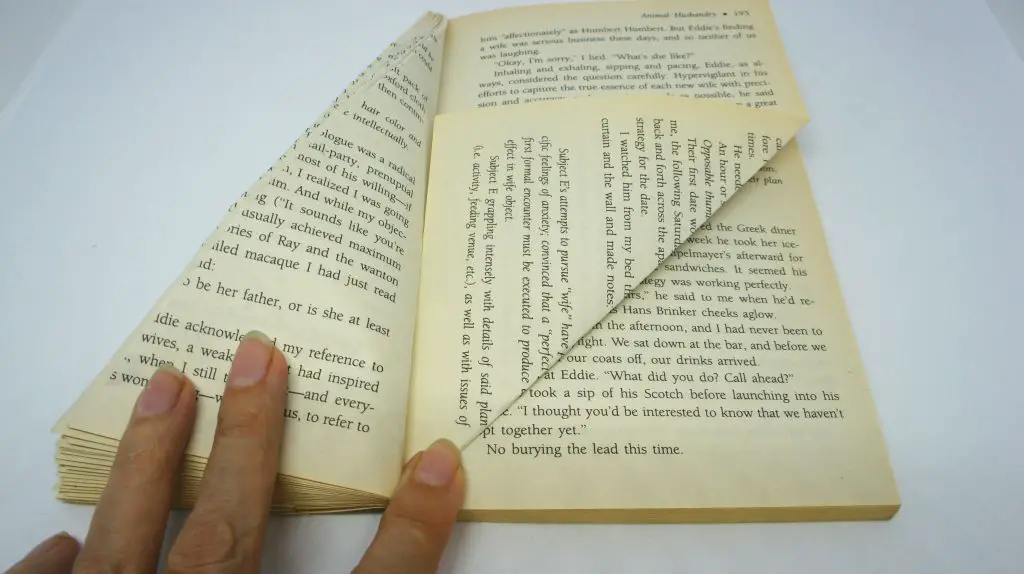
Take just the first page and fold the top right corner down onto the spine of the book as shown below.
Now fold the same sheet again in the same direction so that the outer edge of the sheet lines up with the spine of the book as shown below.
Turn the bottom of the page (that sticks out below the book) up inside the folds of the page. I have taken two photographs to show this.
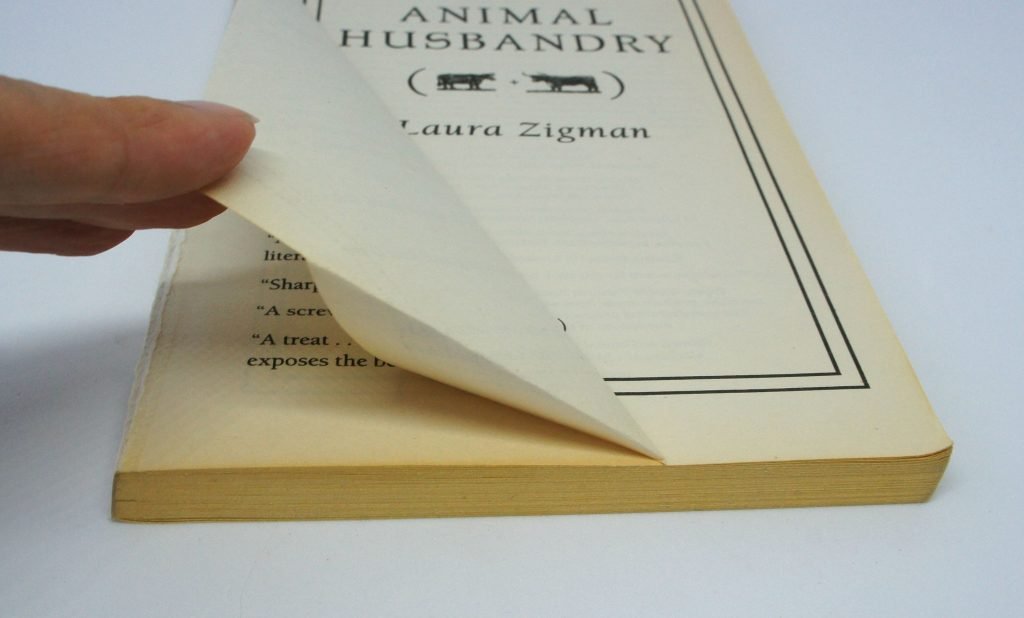
Now the bottom of the folded page should line up perfectly with the bottom of the book.
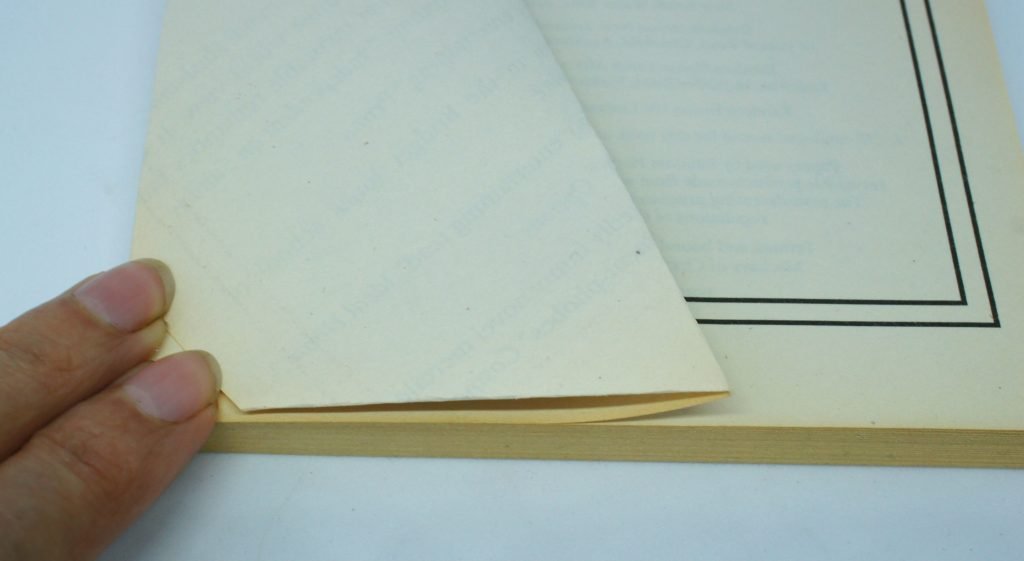
Now simply repeat for 20 pages.
Step 3: Form the wings
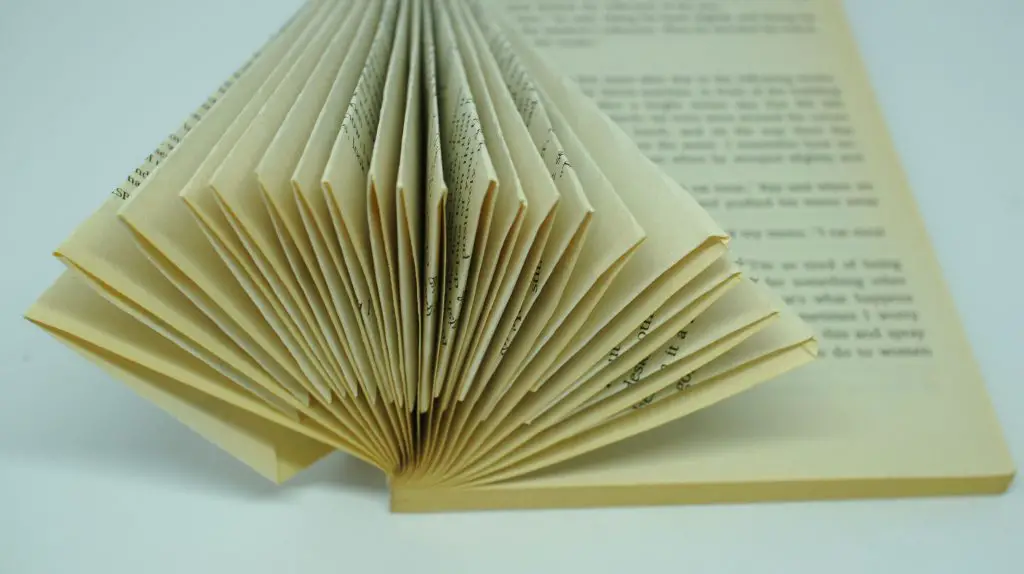
For the next page fold the bottom right corner up to the centre of the book as shown.
Fold the same sheet again so that it lines up with the spine of the book (as you did for the first 20 folds). Do not tuck the top in, this forms the top of your wings.
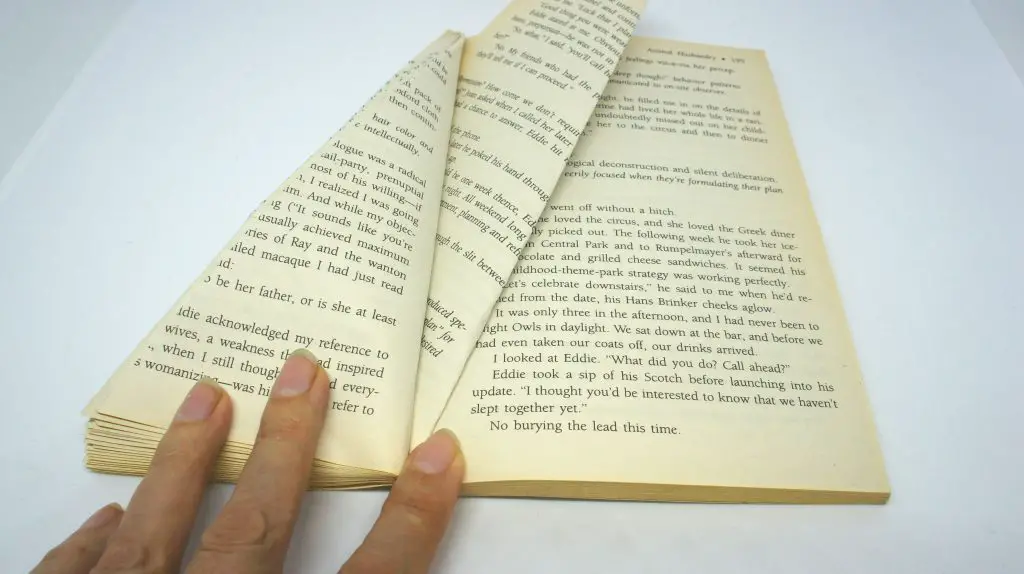
Repeat until you have folded 5 pages like this. You have now formed one angel wing.
Step 4: Complete the folding
Go back to the folds that you were doing at the start of the book and continue doing those until there are only 25 pages remaining.
Now fold 5 pages as angel wings as you did in step 4. Complete the angel by folding the last 20 pages like the first ones.
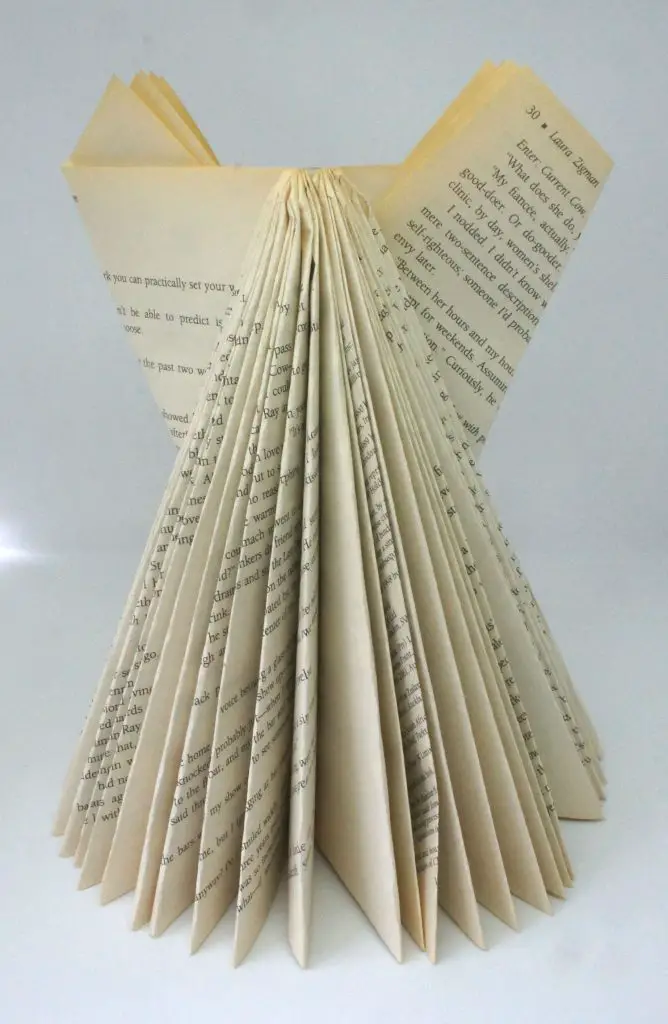
You have now completed the angel body and it should stand up perfectly. You can leave it like this or spray paint the edges like I did.
Step 5: Create the head
Your angel needs a head. Be as creative as you like here. I used a papermache Christmas bauble and spray painted it gold. If you use a polystyrene ball make sure you prime it with a water based primer as the solvent in spray paint can damage the surface of the ball.
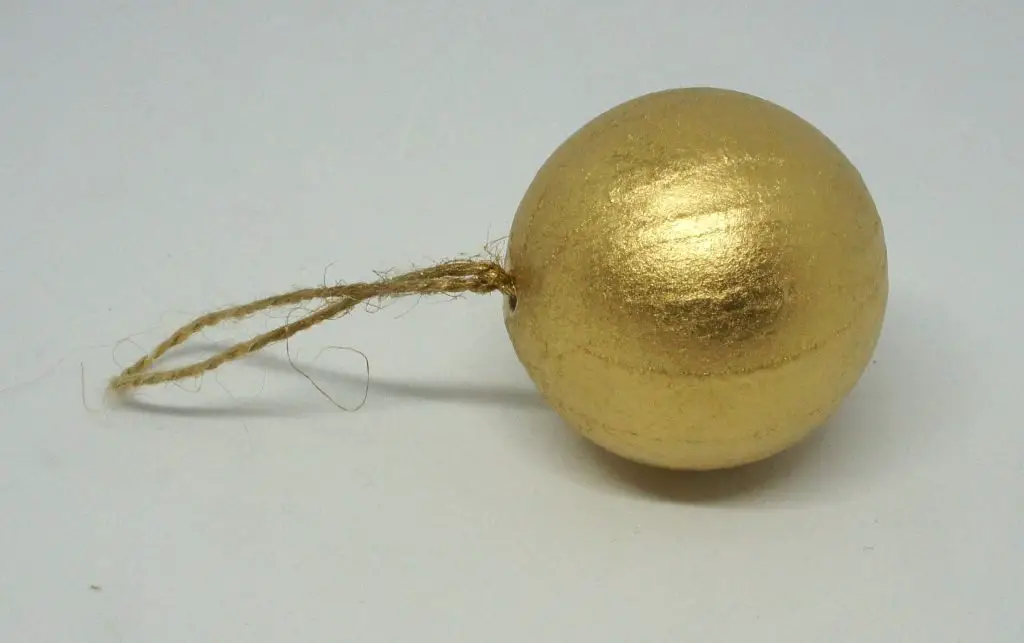
Once you have a head that you are happy with it glue it to the top of your angel body. I cut the twine hanger off before I did this. I used hot melt glue as it is very strong.

You now have a completed folded book angel unless you want to decorate it further. Let your creativity run wild! They are great for table centrepieces, shelf decorations and mantel pieces. You can put them wherever you like. Please let me know in the comments section below where you place yours!
There are some other great Christmas craft tutorials on the blog so take a look:
Remember to pin this article on Pinterest so you can find it later. You can follow me on there too for lots more great craft ideas and tutorials at Christine’s Crafts.

If you want to see how I made this angel then watch the video below.

Super Anleitung, einfach nur schön
Thank you. So glad you liked them and found them helpful!